As a homeowner, there is nothing quite as exciting as giving your floors a fresh new look. Whether you’re renovating your home or looking to spruce up a particular room, vinyl tile provides an affordable, practical, and stylish option. Installing vinyl tile is a project that you can take on yourself with a little know-how and the right tools. In this guide, we’ll walk you through the step-by-step process of how to glue down vinyl tile, so you can achieve a professional-looking floor that will stand the test of time.
Materials Needed
When it comes to gluing down vinyl tiles, having the right materials is crucial for achieving a successful installation. Here are the essential materials you will need to ensure proper adhesion of your vinyl tiles to the floor. From the vinyl tiles themselves to the tools required for installation, this list covers everything you need to create a long-lasting, professional-looking floor. Whether you’re a DIY enthusiast or a professional contractor, having the right materials will make your work much easier. And if you’re curious about other types of flooring or repair techniques, check out our guide on installing glue-down engineered wood flooring on concrete for tips and tricks on glue-down flooring.
Vinyl Tiles
Vinyl tiles are one of the most popular flooring options for many homeowners because they are durable, affordable, and easy to install. They come in various sizes, shapes, colors, and textures, so you can match them to any decor. Before you start gluing down vinyl tiles, make sure you have the right type of tile for your project. Take a look at the table below to learn more about the types of vinyl tiles available:
| Tile Type | Description | Link |
|---|---|---|
| Luxury Vinyl Tiles (LVT) | LVT is a high-quality, upscale vinyl flooring that looks like real stone or hardwood. It’s usually thicker and more durable than regular vinyl tiles, and comes with different installation methods. | How to Glue LVT Flooring |
| Peel and Stick Vinyl Tiles | Peel and stick vinyl tiles are designed for DIY installation. They have a self-adhesive backing that you can remove to stick them to a clean, smooth surface. | N/A |
| Self-Adhesive Vinyl Tiles | Self-adhesive vinyl tiles have a stripped-down backing that you expose to stick them to the floor. They come in various designs, colors, and styles. | N/A |
| Cushioned Vinyl Tiles | Cushioned vinyl tiles have an extra layer of padding that makes the floor feel more comfortable underfoot. They’re ideal for kitchens, bathrooms, and other areas where you stand for a long time. | N/A |
| Commercial Vinyl Tiles | Commercial vinyl tiles are designed for heavy foot traffic and commercial settings. They come in larger sizes and thicker constructions compared to residential tiles. | N/A |
As you can see, the type of vinyl tile you choose will depend on your budget, style preference, and installation skill. Some vinyl tiles require adhesive, while others don’t need any glue at all. If you’re not sure what type of tile is best for your project, consult a flooring specialist or a home improvement store.
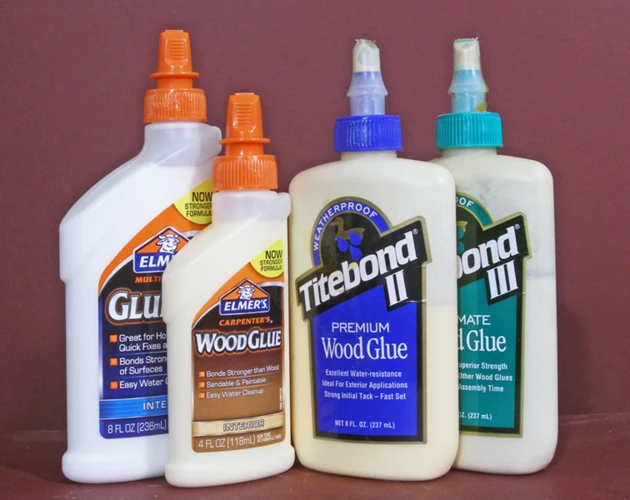
Vinyl Tile Adhesive
Vinyl tile adhesive is a crucial element in the glue-down process. It’s important to choose a high-quality adhesive that’s appropriate for the type of vinyl tile being used and the surface it will be adhered to. The wrong type of adhesive could cause the vinyl tiles to lift or not adhere properly.
There are different types of vinyl tile adhesive available on the market, including pressure-sensitive and hard-set adhesives. Pressure-sensitive adhesive is a good choice for smaller vinyl tiles since it allows for repositioning if needed. Hard-set adhesive is ideal for larger tiles since it dries and holds tiles firmly in place.
Here’s a table summarizing the types of vinyl tile adhesive:
| Type of Adhesive | Features |
|---|---|
| Pressure-sensitive adhesive | Easy to apply; allows for repositioning; good for small tiles |
| Hard-set adhesive | Dries and holds tiles firmly in place; ideal for larger tiles |
Before applying the vinyl tile adhesive, ensure the surface is clean, dry, and free from any contaminants. This will help the adhesive bond properly with the surface and the vinyl tiles.
It’s important to note: Always follow the manufacturer’s instructions when applying adhesive. The amount of adhesive needed may vary depending on the size and type of vinyl tiles as well as the surface being used.
If you need further guidance with adhesive selection or application, there are useful resources available online. For instance, if you have a problem with glue-down vinyl plank flooring, you can read our article on how to repair glue-down vinyl plank flooring. Alternatively, this guide on how to glue mosaic tiles to wood could be helpful if you work with tile installation.
Cleaner
Cleaner is an important part of preparing the surface before gluing down vinyl tiles. Before applying the cleaner, remove any dust, debris or particles from the surface to ensure proper adhesion. A clean surface is essential for the longevity and durability of the vinyl tiles.
There are many types of cleaners available in the market for different types of surfaces. Choose the one that is recommended for your surface. If you are unsure, perform a patch test on a small area of the surface before using it on the entire floor.
Here is a list of materials and tools you might need for cleaning before laying down glue-down vinyl tiles:
- Soft-bristle broom or vacuum cleaner
- Bucket
- Detergent or soap recommended for your surface
- Clean rag or mop
When cleaning the surface, make sure to follow the manufacturer’s instructions and use the recommended concentration if using cleaning solutions. After cleaning, rinse the surface thoroughly with clean water and allow it to dry completely before laying down the tiles.
In case you encounter tough stains or stubborn residue, use a stronger cleaner or a specialized cleaner recommended for that specific surface. If you need to repair any imperfections or patches, use suitable repair methods before cleaning.
Cleaning is an essential step in the preparation process before gluing down vinyl tiles. It might be a time-consuming task, but it is necessary for the longevity of the tiles and the overall aesthetic appearance of the floor.
Notched Trowel
A notched trowel is a key tool needed to successfully glue down vinyl tiles. This tool looks just like a regular trowel, but with notches on one end. The notches allow for even distribution of the vinyl tile adhesive, ensuring that the tiles will adhere properly.
When selecting a notched trowel, it is important to consider the size of the notches. The size of the notches determines the amount of adhesive applied to the floor. For most vinyl tiles, a 1/8-inch V-notch trowel will do the job. However, if the vinyl tiles are larger, a 1/4-inch notch may be needed.
Using the notched trowel properly is also important. To avoid excess adhesive, hold the trowel at a 45-degree angle and spread the adhesive in a back-and-forth motion. Apply enough pressure to ensure that the adhesive is applied evenly and fills the notches, but not so much pressure that the excess adhesive squishes out around the edges of the trowel.
A notched trowel is an essential tool when it comes to gluing down vinyl tiles. Without it, the adhesive may not be distributed evenly, causing tiles to lift or not adhere properly. For more information on gluing surfaces, see our article on how to install glue-down engineered wood flooring on concrete.
Utility Knife
The utility knife is an essential tool when gluing down vinyl tiles. It is used to cut the vinyl tiles to fit around the edges of the room or around obstacles such as pipes. When choosing a utility knife, make sure to select one that has a comfortable grip and a sharp blade. A dull blade can cause the vinyl to tear or become misshapen, making for a messy installation.
It’s important to use the utility knife carefully and precisely when cutting vinyl tiles to avoid any mistakes. When using the knife, make sure to cut along the straightedge to create a smooth and even line. It’s also important to make sure that the blade is sharp enough to cut through the vinyl cleanly and easily.
If you want to learn more about how to use a utility knife for DIY projects, check out our article on how to glue carpet to stairs. You can also find helpful tips on using a utility knife for other projects like gluing boat carpet, gluing mosaic tiles to wood, and gluing boards together. Additionally, you can find information on how much adhesive to use for vinyl flooring in our article on how much glue for vinyl flooring.
Straightedge
A straightedge is an essential tool for any DIY flooring project, especially when installing vinyl tiles. This tool ensures that the tiles are aligned and evenly spaced, resulting in a professional-looking finish. With a simple and affordable straightedge, you can quickly and easily achieve a perfect installation.
When choosing a straightedge, you want to make sure that it is sturdy and straight. A metal or aluminum straightedge is a good choice. You can find a variety of lengths, depending on the size of your project.
| Tool | Features |
|---|---|
| Straightedge | Sturdy and straight, made of metal or aluminum, available in various lengths |
It is also essential to use the straightedge properly. Place it against the tiles to ensure they are aligned and level. You can use the straightedge to check both the length and width of the tiles. By using a straightedge, you can identify any gaps or inconsistencies and make adjustments before applying the adhesive.
A straightedge is a necessary tool for any DIY flooring project, and investing in one will make a big difference in the quality of your installation.
If you want to learn more about gluing down vinyl flooring,check out our article about the best glue down vinyl plank flooring. Alternatively, if you are interested in learning how to glue paver steps, head over to our article on how to glue paver steps.
Measuring Tape
To ensure your vinyl tile flooring is installed correctly, you must be precise during the measuring and cutting stage. A measuring tape is an essential tool for determining the correct size and layout for each tile.
Using a measuring tape is simple, but first, you need to know the size of your room. Measure the length and width of the room and multiply the two to get the total square footage. Once you have this number, add 10 percent to account for any waste during cutting and installation.
Tip: Measure twice to ensure accuracy and avoid costly errors during installation.
Next, use the measuring tape to determine the size of each tile needed. Measure the length and width of each area where a tile is needed, including any angles or corners. Transfer these measurements to the vinyl tiles and use a utility knife to make the cuts.
Pro tip: To avoid mistakes, create a cutting guide. Use a straightedge to draw the cut line on the tile and ensure the blade is sharp.
Double-check your measurements and layout before gluing down the tiles to avoid any costly errors. Taking the time to use a measuring tape correctly can save you time and money in the long run.
Roller
The roller is an important tool in gluing down vinyl tiles. It helps to ensure that the tiles are secured properly to the floor and to create an even surface. A roller that is too heavy can cause the adhesive to spread too thinly, while a roller that is too light can cause uneven spaces between tiles. It is important to choose the right roller for the job.
Below is a table of recommended rollers based on the size of the vinyl tiles being used:
| Vinyl Tile Size | Roller Type |
|---|---|
| 12″ x 12″ or smaller | 75-100 lb roller |
| 12″ x 24″ or smaller, up to 18″ x 18″ | 100-150 lb roller |
| Larger than 18″ x 18″ | 150-300 lb roller |
Using an appropriate roller allows for maximum adhesion and helps to avoid any potential issues with the tiles down the line. Additionally, using a roller to press down each tile after it is glued in place will help to ensure that it is secure and that the adhesive has bonded properly.
The roller is a vital tool in gluing down vinyl tiles. Choosing the correct type based on tile size can greatly improve the outcome of the project and create a durable and long-lasting floor.
Preparation
Before you start gluing down vinyl tiles, it’s essential to prepare the surface properly. Poor preparation can lead to a subpar finished product and a waste of time and money. Taking the time to carry out the necessary preparations will save you problems down the line. It’s important to approach preparation with care, as the wrong cleaning agent or inadequate layout planning can adversely affect the durability and longevity of the tiles. This section will provide you with a step-by-step guide to preparing your surface for a successful vinyl tile installation, highlighting the materials you will need and the steps required to achieve a professional finish.
Clean Surface
Before starting to glue down the vinyl tiles, it is essential to properly clean the surface. This ensures that the adhesive will bond well with the surface and there won’t be any debris or dust that can cause problems later. Here are the steps you should follow to deep clean and prepare the surface for vinyl tile installation:
- Remove any existing flooring: Before you can clean the surface, you need to remove any existing flooring that may be present. Use a scraper or a putty knife to remove any residual adhesive or debris from the old flooring. If there are any bumps or rough spots on the surface, use a grinding tool to even them out.
- Vacuum the Surface: Once the surface is clear of any debris or bumps, vacuum it thoroughly. Use a vacuum cleaner with a powerful suction and ensure that you reach all corners and edges of the surface. This will eliminate any dust, dirt or pet hair that may have been left behind.
- Wash with Soap and Water: After vacuuming the surface, use a mop or a soft cloth to wash the surface with soap and water. Make sure you use a non-residue floor cleaner and that you rinse the surface well. If there are any stains on the surface, use a degreasing cleaner to remove them.
- Allow the Surface to Dry: After washing the surface, allow it to dry completely before you start gluing the vinyl tiles. Do not rush this step as any remaining moisture can cause the adhesive not to bond properly.
By cleaning the surface before gluing down the vinyl tiles, you ensure proper adhesion and a longer-lasting installation.
Measure and Plan Layout
Before gluing down vinyl tiles, it’s important to measure and plan out the layout of the tiles. This will ensure that the tiles fit properly and look visually pleasing in your space. Here are the steps to follow for measuring and planning your vinyl tile layout:
1. Measure the Room: Measure the length and width of the room in feet. Multiply the two measurements together to get the square footage of the room.
2. Divide the Room: Divide the room into sections that are easy to work with. This can be done by drawing a rough sketch of the room and then dividing it into squares or rectangles.
3. Create a Layout: Determine the placement of the tiles in each section. This can be done using a chalk or pencil to mark out the layout on the floor.
4. Adjust the Layout: Make necessary adjustments to the layout to ensure that the edges of the room and the sections meet evenly.
5. Measure the Tiles: Measure the tiles and adjust the layout again if necessary to ensure that the tiles fit properly.
6. Start Tiling: Once you have a final layout, start tiling from the center of the room and work your way outwards. This will help ensure that the tiles are evenly spaced and that there are no uneven edges at the walls.
Planning out the layout of your vinyl tiles may take some time, but it will save you time and frustration in the long run. Taking the time to plan out your layout will result in a beautiful and professional-looking finished floor.
Cut Tiles
When it comes to laying down vinyl tile, cutting the tiles to fit the edges and corners correctly is crucial for a professional-looking finish. Here are some tips on how to cut vinyl tiles:
| Tools Needed: | Steps: |
|---|---|
|
|
Be sure to measure twice and cut once to avoid any mistakes. It’s also important to use a sharp utility knife to ensure a clean cut. If the blade on your utility knife is dull, it may cause the tile to tear or chip. Additionally, make sure the straightedge is held down tightly to avoid the knife from slipping and creating an uneven cut.
Cutting vinyl tiles may seem like a tedious task, but taking the time to accurately measure and cut will pay off in the long run with a professional-looking finished product.
Dry Lay Tiles
Before gluing down the vinyl tiles, it’s important to first dry lay them on the floor to ensure the layout is correct and make any necessary cuts. Here’s how to do it:
1. Create a plan: Before placing any tiles, make a plan of the layout you want to achieve. Think about the direction of the pattern and how you want the tiles to align with the walls.
2. Measure: Use a measuring tape to measure the length and width of the room. Then, divide the room into sections and measure each section separately. This will help you estimate the number of tiles you need to purchase.
3. Mark the center: Find the center of the room by measuring the length and width and making a mark at the half point.
4. Lay the tiles: Starting from the center of the room, lay the tiles out in the pattern of your choice. Make sure to use spacers between the tiles to mimic the final look.
5. Check the layout: After laying out a few rows, step back and check the layout from different angles. Make any necessary adjustments before continuing.
6. Mark the cuts: Use a straightedge and a pencil to mark the tiles that need to be cut to fit the edges of the room. Double check your measurements before making any cuts.
7. Cut the tiles: Use a utility knife or vinyl tile cutter to cut the tiles along the marked lines.
8. Re-lay the tiles: After cutting the necessary tiles, re-lay them in the room to ensure they fit properly. Make any necessary adjustments before moving on to gluing down the tiles.
By dry laying the tiles, you can avoid any mistakes and ensure the final result is exactly what you want. Take the time to measure and plan, and you’ll be rewarded with a beautiful vinyl tile floor.
| Steps | Instructions |
|---|---|
| 1 | Create a plan |
| 2 | Measure the room and divide into sections |
| 3 | Mark the center of the room |
| 4 | Lay the tiles starting from the center |
| 5 | Check the layout |
| 6 | Mark the cuts on the tiles that need adjusting |
| 7 | Cut the tiles with a utility knife or vinyl tile cutter |
| 8 | Re-lay the tiles to ensure they fit properly |
Glue Down Vinyl Tiles
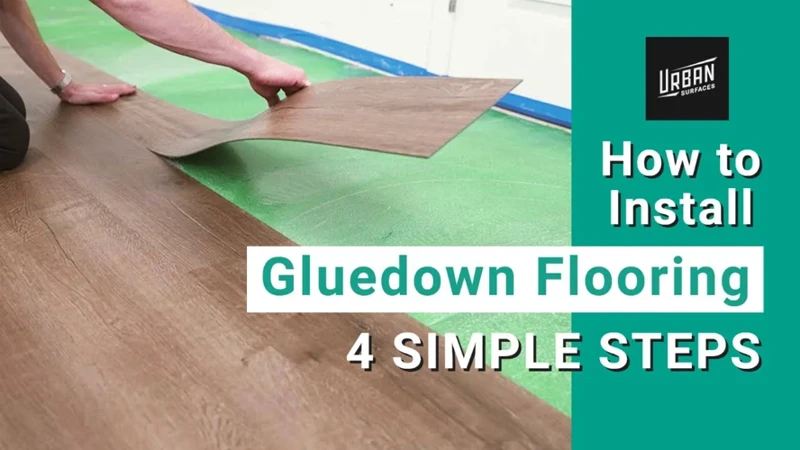
With all the necessary preparations done, it’s time to start glueing down your vinyl tiles onto the surface. This step requires precision and care as it sets the foundation for your beautiful and durable floors. To help you ensure that your tiles are applied correctly, follow these steps.
Prepare Adhesive
Before you begin gluing down the vinyl tiles, it’s important to prepare the adhesive properly. Here’s a step-by-step guide to mixing and preparing the vinyl tile adhesive:
| Step | Description |
|---|---|
| Step 1: | Read the manufacturer’s instructions carefully to ensure you mix the adhesive according to their specific requirements. Some adhesives may require more or less water, so it’s important to follow the instructions to the letter. |
| Step 2: | Pour the adhesive powder into a clean bucket. Use a bucket that’s large enough to hold your entire batch of adhesive. |
| Step 3: | Add water slowly, stirring the mixture constantly with a notched trowel. Pour water in small amounts, as you only need a little bit at a time. If you add too much water, it will make the adhesive runny and difficult to work with. |
| Step 4: | Continue mixing the adhesive until it reaches the consistency of peanut butter, with no lumps or dry patches. Make sure the adhesive is well-mixed, as any dry spots can prevent the tiles from adhering properly. |
| Step 5: | Let the adhesive sit for around 10 minutes before using it. This is called the slake time, and it allows the mixture to thicken and reach optimal consistency for use. |
By following these steps, you can ensure that your vinyl tile adhesive is mixed and prepared correctly, which will help you achieve the best results when gluing down your tiles. Remember, always follow the manufacturer’s instructions, and if you’re unsure about any part of the process, don’t hesitate to ask for guidance.
Start Gluing from the Center
When it comes to gluing down vinyl tiles, starting from the center is crucial to ensure the symmetry and balance of the floor. Here’s a step-by-step guide on how to start gluing from the center:
| Step 1: | Find the center point of the room by measuring the length and width and marking the midpoints of each wall. Then, snap a chalk line from the center of one wall to the center of the opposite wall, and another chalk line from the center of the other two walls. |
| Step 2: | Apply adhesive to the center of the intersecting lines you just made using a notched trowel. Apply the adhesive in a thin layer, making sure not to cover the lines. |
| Step 3: | Place the first tile at the intersection of the two chalk lines. Apply pressure to the tile, pressing it down firmly to ensure it adheres to the adhesive. |
| Step 4: | Place the next tiles next to the first tile, using plastic spacers to create evenly spaced joints. Work your way towards each wall, making sure to keep tiles aligned with the chalk lines. |
| Step 5: | When you get close to a wall, measure the distance between the last tile laid and the wall. Use a straightedge and a utility knife to cut the tile to fit the remaining space. |
Starting from the center of the room ensures a symmetrical and balanced appearance of the floor. It also allows you to make any necessary adjustments as you work towards the walls. Remember to use plastic spacers to create evenly spaced joints and a straightedge and a utility knife to cut the tiles to fit the remaining spaces. By following these steps, you can confidently glue down vinyl tiles and achieve a beautiful and professional-looking floor.
Press and Roll Tiles
Once you have placed the vinyl tiles onto the adhesive, it is time for the crucial step of pressing and rolling them down to ensure secure bonding.
Press and Roll the tiles using a floor roller and apply firm pressure. This process helps to ensure that the tile adheres to the adhesive and any air pockets are eliminated. To avoid the formation of bubbles and irregularities during the pressing process, use a flat wooden board or a piece of plywood with a dense and smooth surface.
It is essential to work from the center outwards, gradually press and roll each tile into place, making sure to keep them aligned correctly. Use a straightedge or a chalk line to verify that the tiles are even and spaced correctly.
To facilitate cutting the tiles, it is best to make some relief cuts in each tile. Relief cuts are small cuts made in a tile to help it bend along curves or to make it fit precisely into corners and irregular spaces. Use a utility knife to make relief cuts as needed; remember not to cut too deeply.
Once all the tiles have been pressed and rolled, let the adhesive dry according to manufacturer’s instructions, which can take up to 24 hours. Clean the floor and remove any excess adhesive that may have seeped through the gaps between the tiles.
The pressing and rolling process is essential to ensure a proper and long-lasting installation of your vinyl tile floor.
Cut Tiles to Fit Edges
When it comes to cutting vinyl tiles to fit edges, precision is key. You don’t want to end up with awkward gaps or uneven edges. Follow these steps to ensure your tiles fit perfectly:
| Materials | Steps |
|---|---|
| Utility Knife | – Measure the space where the tile needs to fit using a measuring tape. – Mark the tile where it needs to be cut using a straightedge and a pencil. – Score the tile along the marked line using a utility knife. – Press down firmly on the tile to snap it along the scored line. – Smooth out any rough edges with the utility knife or sandpaper. |
Remember to take extra care when cutting tiles that will fit in corners or around irregularly shaped objects. Measure and double-check your markings before making any cuts. With a little patience and attention to detail, you can ensure that your vinyl tile floor looks polished and professional.
Wait for Adhesive to Dry
After you have finished gluing down all the vinyl tiles, it may be tempting to walk on the newly installed floor right away. However, it is crucial to wait for the adhesive to dry completely before putting any weight or pressure on the tiles. The drying time can vary depending on the temperature and humidity of the room, as well as the type of adhesive used, so make sure to read the manufacturer’s instructions for specific details.
During the drying time, it is important to keep the room ventilated and avoid any unnecessary foot traffic or movement on the floor. This will prevent the tiles from shifting and ruining the alignment, and also ensure that the adhesive dries evenly.
To check if the adhesive is dry, press down on the edge of a tile. If it feels firm and does not move or shift, then it is likely dry. Do not rush the drying process or cut any corners as this can result in a faulty floor installation and potential damage to the tiles.
Once the adhesive is fully dry, you can move onto the final steps of finishing the floor, such as cleaning and installing molding.
Finishing the Floor
Once the vinyl tiles are glued down, the next step is to add the finishing touches for a polished look. This involves a few final steps, including cleaning the floor and installing molding. By taking care of these steps, not only will your floors look great, but they will also be protected from any damage in the future. Let’s dive into the details.
Clean the Floor
After the vinyl tile adhesive has dried, it’s important to clean the floor to remove any excess residue or debris. Here are some steps to follow to ensure a thorough cleaning:
- Sweep the floor: Use a broom or vacuum cleaner to remove any loose debris or dirt from the floor surface.
- Wipe down the floor: Use a damp mop or cloth to wipe down the surface of the floor. Be sure to use a mild cleaning solution that’s safe for vinyl material.
- Inspect the floor: Take a close look at the floor to make sure there are no spots or stains left behind. If there are, use a vinyl floor cleaner and a scrub brush to remove them.
- Dry the floor: Once the floor is clean, use a dry mop or towel to dry the surface. It’s important to make sure the floor is completely dry before moving on to the next step.
By following these steps, you’ll ensure that your newly installed vinyl floor is clean and free of any debris or residue, leaving it looking great and ready for use.
Install Molding
When you’re finished gluing down your vinyl tiles, it’s time to give your floor a complete and professional look by adding molding. Molding is a strip of material that covers the gap between the edge of the floor and the wall. It not only hides any imperfections but also protects the edges of your Vinyl Tile flooring.
Before you start installing the molding, you should gather the following materials:
| Materials Required | |
|---|---|
| Miter Saw | A saw for creating accurate angled cuts in the molding |
| Coping Saw | A saw for cutting intricate shapes and curves in the molding |
| Finishing Nails | Nails that are small and have a small head to avoid damaging the molding |
| Hammer | A hammer is used to nail the molding into the wall |
| Paintable Caulk | This is used to fill gaps and spaces between the wall and the molding |
| Paint Brush | Used to paint the molding after installation |
Once you have all the necessary materials, you can begin installing the molding. First, measure the distance between two walls that need molding. Use this measurement to determine the length of the molding that you’ll need. Cut the molding using a miter saw to create precise angles at each corner.
Next, use a coping saw to cut intricate shapes into the molding so that it fits snugly against the wall. This helps to cover any uneven edges and to create a cleaner look.
After cutting the molding, use finishing nails to nail it into place. Put a small dab of paintable caulk on the ends of each molding to fill any gaps and holes between the wall and the molding. Wait until the caulk is completely dry, then use a paintbrush to paint the molding to match the color of your vinyl tile flooring, or you can paint it a different color to create a stylish look.
Installing molding is the final step in giving your vinyl tile flooring a complete and polished look. By following these simple steps, you can install molding that will not only protect your floorings from chipping and cracking but also create an appealing and professional-looking finish.
Conclusion
In conclusion, gluing down vinyl tiles can be a simple and effective way to improve the look and functionality of any room. With the right materials and preparation, anyone can successfully tackle this project. Remember to use vinyl tile adhesive specifically designed for this purpose, and to thoroughly clean the surface before starting. Take the time to measure and plan the layout, and to dry lay the tiles beforehand to ensure the best possible outcome.
When it comes to gluing down the tiles, start from the center of the room and work your way outwards. Use a notched trowel to spread the adhesive evenly, and firmly press and roll each tile into place. Cut tiles to fit around edges and obstacles, and wait for the adhesive to dry before walking on the floor.
Once the tiles are in place, finish the floor by cleaning any excess adhesive and installing molding around the edges. This will provide a professional and polished look to the project.
Overall, gluing down vinyl tiles is a cost-effective and simple home improvement project that can make a big difference in the look and feel of any room. Whether you’re updating a bathroom, kitchen, or living space, the results of this project will be well worth the effort. Just remember to take your time and follow the steps outlined in this guide for the best possible outcome.
Frequently Asked Questions
1. Can I glue down vinyl tiles over a wood floor?
Yes, you can glue down vinyl tiles over a wood floor as long as it is clean and level.
2. Do I need to remove the old vinyl tiles before gluing down new ones?
Yes, it is recommended to remove old vinyl tiles before installing new ones as it provides a better surface for the new adhesive to bond to.
3. How long does it take for the adhesive to dry?
The drying time for the adhesive may vary depending on the manufacturer’s instructions, but typically it takes 24-48 hours for the adhesive to dry completely.
4. Can I walk on the floor immediately after installing the vinyl tiles?
No, it is recommended to wait at least 24 hours before walking on the newly installed vinyl tiles to ensure that the adhesive has dried completely.
5. Do I need to apply pressure to the tiles while gluing them down?
Yes, it is important to apply pressure to the tiles while gluing them down to ensure a strong bond between the tile and the adhesive.
6. What type of cleaner should I use to clean the surface before installing the tiles?
You should use a mild, non-abrasive cleaner to clean the surface before installing the tiles such as vinegar and water solution or a pH-neutral floor cleaner.
7. Can I install vinyl tiles in a bathroom or kitchen?
Yes, vinyl tiles are a popular flooring option for bathrooms and kitchens as they are resistant to moisture and easy to clean.
8. Do I need to seal the vinyl tiles after installation?
No, vinyl tiles do not require a sealer after installation. However, some people choose to apply a sealer for added durability.
9. Can I install vinyl tiles on top of a concrete floor?
Yes, you can install vinyl tiles on top of a concrete floor as long as it is clean and level. You may need to use a leveling compound if the concrete is uneven.
10. What should I do if a tile is not sticking to the floor?
If a tile is not sticking to the floor, you can try adding more adhesive to the back of the tile. If that does not work, you may need to remove the tile and clean the surface again before trying to re-install the tile.