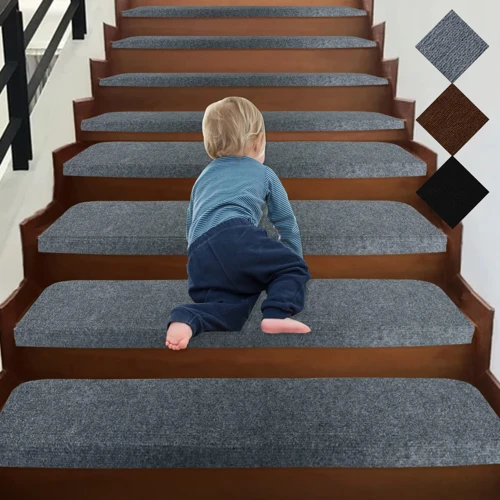
Undoubtedly, stairs are one of the essential parts of our homes, and it is crucial to keep them maintained and attractive. One way to enhance the appearance of stairs is to add a carpet, giving them a cozy and pleasant feel. However, gluing the carpet to stairs is not as easy as it sounds and can be a daunting task for many. That’s why we’ve put together a step-by-step guide to help you glue the carpet to stairs effortlessly. In this guide, we’ll cover everything from preparing the stairs to making a glue mixture and applying glue. So, let’s dive deep into the guide and transform your plain stairs into a beautiful sight to behold!
Materials Needed
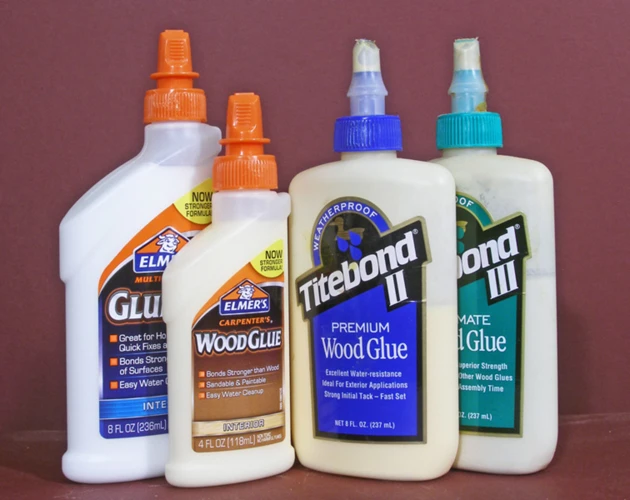
Materials Needed: Before you start gluing carpet to your stairs, you will need to gather all the necessary materials. Make sure you have the right tools to remove old carpeting and prepare your stairs for carpet installation. Additionally, you’ll need to create a glue mixture and have enough carpet to cover your stairs. Here are the materials you’ll need: [insert internal link to /how-to-glue-down-laminate-flooring/ for glue types if desired]
For Gluing Carpet to Stairs
When it comes to gluing carpet to stairs, it is important to have the right materials on hand to ensure a successful project. Here are the materials you will need:
| Materials | Description |
|---|---|
| Carpet glue adhesive | A specialized glue adhesive designed for bonding carpet to stairs |
| Notched trowel | A special trowel with notched edges used for applying adhesive to the stairs in an even pattern |
| Carpet utility knife | A sharp carpet knife used to cut the carpet precisely |
| Measuring tape | A tape measure used to measure the stairs and the carpet precisely to ensure a perfect fit |
| Safety gear | Safety goggles, gloves and mask to protect your eyes, hands and lungs while working with adhesives and carpet materials |
Having these materials will make the project go smoothly and ensure that the carpet is securely glued to the stairs for a long-lasting finish. It’s also important to note that different types of carpets may require different adhesives, and it’s always a good idea to follow the manufacturer’s instructions for best results.
For Preparing Stairs for Carpet
Preparing stairs for carpet is an essential part of ensuring a successful carpet installation. Here are the materials you will need to prepare your stairs for carpeting:
Materials:
- Knee pads
- Hammer
- Crowbar
- Utility knife
- Sandpaper (60-grit and 100-grit)
- Vacuum cleaner
- Staple gun
- Chalk line
Steps:
- Clean the stairs: Start by removing any debris or loose particles from the stairs using a vacuum cleaner. This will ensure that the adhesive sticks properly to the stairs.
- Remove old carpeting: If your stairs have an old carpet installed, it needs to be removed. Use a utility knife to cut the carpet into small sections and remove using a crowbar or pliers. Be careful not to damage the stairs during the removal process.
- Remove the tack strips: After removing the carpet, you will need to remove the old tack strips from the stairs. Use a crowbar and hammer to pry them off the staircase.
- Clean and sand the stairs: Use sandpaper to smooth out any rough spots or splinters on the stairs. Start with 60-grit sandpaper and follow up with 100-grit sandpaper. This will create a smooth surface for the carpet glue to adhere to.
- Measure the stairs: Measure the stairs using a tape measure and mark the center of each stair tread using a chalk line. This will help you to align the carpet properly during installation.
By following these steps, you can prepare your stairs for carpeting and ensure a successful and long-lasting installation. For other DIY projects involving glue, check out this guide on how to glue mosaic tiles to wood, or this guide on what to use to glue down vinyl flooring.
Preparing Stairs for Carpet
Preparing your stairs for carpet may seem like a daunting task, but with the right materials and steps, it can be done efficiently. Proper preparation is crucial to ensuring that your carpet is laid smoothly and securely. Before you start gluing carpet to stairs, you need to make sure the surface is free of debris and old materials. In this section, we will guide you through the necessary steps to prepare your stairs for new carpet.
Step 1: Measure Your Stairs
Before beginning the process, it is important to measure the length and width of each stair to determine how much carpeting will be needed. Accurate measurements are crucial to ensure a professional-looking finish. To measure the stairs, use a tape measure to measure the length and width of each stair, starting from the back of the tread to the front of the nosing. Make sure to add a few extra inches of carpeting to the measurements to ensure full coverage.
It is important to note that if the stairs have open or curved sides, additional calculations and cutting will be required. For open sides, measure the length and width of the staircase and any exposed landing areas. For curved stairs, it may be helpful to make a template using newspaper or cardboard to ensure proper measurements.
Once all measurements have been taken, create a chart or diagram to keep track of the sizes and ensure accuracy. This will also be helpful when it comes time to cut the carpeting.
Proper measurement is the first step to success when gluing carpet to stairs.
Step 2: Remove Old Carpeting
Removing old carpeting is a necessary step in preparing stairs for new carpet installation. This step is important to ensure that the new carpet is installed smoothly and without any bumps or lumps. Before removing old carpeting, make sure to wear safety gear such as gloves and a mask to protect yourself from dust and debris.
To remove old carpeting, follow these steps:
| Step 1: | Start from the top of the stairs and remove any metal nosing or trim using a pry bar or pliers. |
| Step 2: | Remove the old carpeting by lifting a corner of the carpet and pulling it back. Use a utility knife to cut the carpet into manageable pieces as you go along. |
| Step 3: | Remove any adhesive or staples left on the stairs using a scraper or pliers. For stubborn adhesive, consider using a glue solvent. |
| Step 4: | Dispose of the old carpeting and adhesive properly. |
Make sure to thoroughly sweep and vacuum the stairs after removing the old carpeting to ensure a clean surface for installing the new carpet. Taking the time to properly prepare the stairs will make the rest of the installation process much smoother.
Step 3: Clean and Sand Stairs
To ensure that the carpet adheres properly to your stairs, it is essential to properly clean and sand them beforehand. The cleanliness of the stairs and the smoothness of the surface will determine how well the carpet sticks to the stairs. Follow these steps to clean and sand your stairs for gluing carpet:
| Step 1: | Remove debris and vacuum the stairs |
| Step 2: | Scrub and wash the stairs with a mixture of water and soap. Allow the stairs to dry. |
| Step 3: | Sand the stairs to ensure they are smooth and free of any bumps. The goal is to create a surface the carpet can easily adhere to. Use a coarse-grit sandpaper to do this, then follow up with a finer-grit sandpaper for a smooth finish. |
It is important to note that you should not skip sanding the stairs, as it can cause the carpet to slide or bunch up. Make sure to properly sand the stairs for a quality finish. This step is similar to preparing a surface before any other flooring installation, such as installing tongue and groove flooring with glue. By sanding, you’ll also prevent moisture from infiltrating the carpet, just like you would when you glue vinyl siding.
After completing this step, you are now ready to move on to the next step in the process – creating the glue mixture.
Gluing Carpet to Stairs
Now that you have prepared your stairs, it’s time to start gluing the carpet. This may seem like a daunting task, but with the right materials and method, it can be done quickly and efficiently. In this section, we will guide you through the step-by-step process of gluing carpet to stairs, from creating your glue mixture to trimming the edges. If you are familiar with our guide on how to install tongue and groove flooring with glue, some steps may sound familiar. Let’s get started!
Step 1: Create Your Glue Mixture
When it comes to creating a glue mixture for gluing carpet to stairs, you want to make sure that you’re using a high-quality adhesive. The type of glue you use will depend on the type of carpet you’re using, as well as the material of your stairs. Here’s a breakdown of the materials you’ll need to make your glue mixture:
| Material | Description |
|---|---|
| Carpet Adhesive | This is the glue that will hold the carpet to the stairs. Look for a high-quality, moisture-resistant adhesive. |
| Water | Most carpet adhesives need to be mixed with water. Follow the manufacturer’s instructions for the correct water-to-adhesive ratio. |
| Paint Roller | You’ll use a paint roller to apply the glue mixture to the stairs. Make sure the roller is clean and free of debris. |
| Bucket | You’ll need a bucket to mix the adhesive and water together. Make sure the bucket is clean and large enough to hold the entire mixture. |
There are many different types of carpet adhesives available, so it’s important to do your research and find one that is appropriate for your project. Some adhesives are better suited for certain types of carpet, such as outdoor carpet or indoor-outdoor carpet. If you’re unsure which adhesive to use, do some research online or consult with a professional.
It’s also important to follow the manufacturer’s instructions for mixing the adhesive and water. The correct ratio will ensure that the glue is strong enough to hold the carpet in place without being too thick or difficult to apply.
Anchor text: If you’re also looking for information on how to glue down vinyl tile, check out our guide on the topic.
Step 2: Cut Your Carpet
When it comes to cutting your carpet for your stairs, it is important to be precise in order to ensure a perfect fit. Here are the steps to follow:
- Start by measuring the stairs once more to ensure accuracy. Make sure to note any oddly-shaped stairs or angles that may require extra attention.
- Taking your measurements, lay out your carpet in a separate area, preferably a large work surface, and use a sharp utility knife to cut the carpet to size. Try to avoid crooked cuts, as these will be noticeable once the carpet is secured.
- Make sure to cut each piece of carpet to the exact size and shape of each stair tread or riser. It may be helpful to number the back of each cut piece in order to keep track of which one goes where.
- If you are dealing with a patterned carpet, take extra care to ensure that each piece is cut in the same direction to maintain consistency.
- Remember to cut the carpet a bit longer than necessary, as you will trim the edges later in the process.
Pro tip: In order to avoid fraying at the edges of your cut carpet, use a carpet seam sealant on all of the cut edges before installation.
By following these steps, you can create precise, custom-cut pieces of carpet for each stair tread and riser. This will help ensure a secure fit and a professional-looking end result.
Step 3: Apply Glue to Stairs
Step 3: Apply Glue to Stairs
After preparing your stairs for carpet, you’re ready to start gluing the carpet onto the stairs. Using the right kind of glue is crucial for a long-lasting finish. It is recommended to use a glue that is specifically designed for carpet installation on stairs. One such product is “Stair Tread Adhesive” by Roberts, which is available at most hardware stores. This adhesive is formulated for use on stairs and can withstand the heavy foot traffic. Do not use construction adhesives, as they can damage the carpet and cause it to release from the stairs.
Before applying any adhesive, make sure the stairs are clean and completely dry. Any debris or moisture can prevent the adhesive from bonding properly. Once you have confirmed that the stairs are clean, start applying the adhesive with a notched trowel. Use a trowel with a size suggested by the adhesive manufacturer to ensure uniform application.
Here are the steps for applying the glue:
| Step 1 | Start by applying the adhesive to the back of the carpet. Use the notched trowel to spread the adhesive evenly on the carpet. Be sure to cover the edges and corners of the carpet, as they tend to curl up if left unglued. |
| Step 2 | Working quickly, apply the glue to the first step of the staircase, starting from the top. Be sure to apply enough glue for a strong and lasting bond. |
| Step 3 | Repeat the process for every step, making sure that the carpet is tight against the surface while gluing down. If bubbles or wrinkles form, press them out towards the edges of the step. |
| Step 4 | Place weights or heavy objects on the edges of the carpet to ensure that it adheres tightly and dries smoothly. Allow the glue to dry completely overnight or at least for the time recommended by the adhesive manufacturer. |
Applying the right amount of glue to the carpet and the stairs is crucial for both good adhesion and the longevity of your carpet installation. When the adhesive is dry, test the carpet’s grip by gently tugging on the corners. If it’s secure, take your scissors and trim any excess carpet away. If there are some stubborn areas that won’t lay flat, use a carpet roller or the side of a smoothing tool to press down. Finally, vacuum the carpet to get rid of any loose fibers and dust.
Step 4: Lay Carpet on Stairs
Laying the Carpet on the Stairs
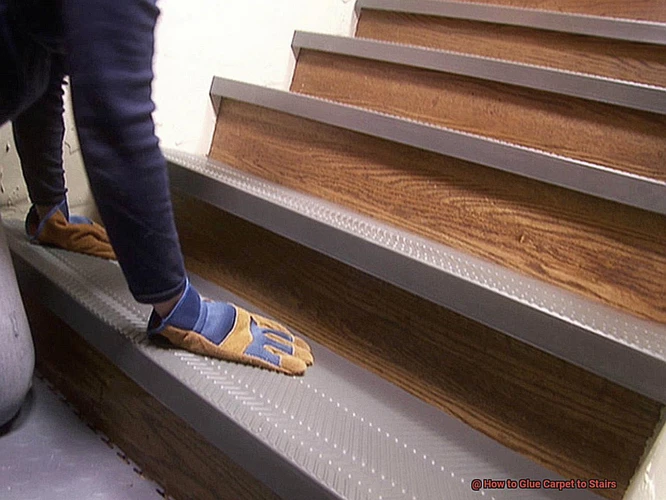
Once you have applied the glue to the stairs, it’s time to lay the carpet. Start at the bottom of the stairs and work your way up. Begin by pressing the edge of the carpet into the corner of the stair and use a carpet roller to press it firmly into place. Then, fold the carpet over the stair nose and press it down into the front of the stair with your hands.
Continue laying the carpet up the stairs, using the same technique. Be sure to press the carpet firmly into the glue to ensure a good bond. You may need to use a knee kicker to stretch the carpet tightly across the stair.
Keep in mind that you want to avoid wrinkles or bubbles in the carpet. Smooth out any imperfections as you work your way up the stairs. You may need to use a carpet cutter to cut the carpet at each stair to fit it properly.
Tips:
- Wear knee pads to protect your knees while working on the carpeted stairs
- Have a helper to hold the carpet in place to help you while you tack it down
Conclusion:
Laying the carpet on the stairs is the final step in gluing your carpet to the stairs. By following these simple steps and tips, you’ll be able to glue the carpet to the stairs efficiently and effectively. With a little bit of patience and hard work, you can easily create a beautiful carpeted staircase that will last for years to come.
Internal link: What is the Best Glue for Outdoor Carpet?
Step 5: Trim Edges and Finish
After laying down the carpet on the stairs, it’s time to trim the edges and finish the project. This step is essential to achieve a neat and professional look. Before starting, make sure the glue is completely dry.
Step 5: Trim Edges and Finish
- Use a utility knife to trim any excess carpet at the top and bottom of the stairs.
- Trim the carpet to fit tightly around the edges of the stairs.
- Use a carpet stair tool, which can be found at most hardware stores, to smooth out the carpet and ensure it is properly tucked into the corners.
- Finish the edges with stair edging. This is a decorative strip that covers the raw edges of the carpet and creates a smooth transition from the stairs to the floor.
- Secure the stair edging in place with adhesive or nails.
Tips:
- Take your time with trimming the edges. Don’t rush as it may result in uneven cuts or damage to the carpet.
- If you have never worked with stair edging before, consider practicing with a scrap piece of carpet first. This will help you understand the technique of applying stair edging.
- For additional tips on gluing vinyl flooring, check out our guide on how to glue down vinyl tile and how to install glue-down vinyl plank flooring over linoleum.
- If you plan on using engineered wood for your stairs, make sure to choose the right type of glue. Read our article on what glue for engineered flooring to learn more.
By following these steps and tips, you can successfully glue carpet to your stairs with a professional finish. Remember to take your time, work in small sections, and wear safety gear to protect yourself during this project.
Tips for Success
Ensuring success when gluing carpet to stairs takes more than just following the steps listed above. It requires attention to detail, patience, and safety precautions. To help you achieve the best results and avoid any mishaps, we’ve compiled a few tips to keep in mind throughout the process. These tips will make your project go smoothly and keep you on track towards a flawless finish. So, let’s dive in and look at some key ways to ensure a successful carpet-stair gluing project.
Tip 1: Wear Safety Gear
When gluing carpet to stairs, it is important to prioritize safety. This is where wearing proper safety gear comes in. Here are some safety equipment that you should have on hand before beginning:
| Equipment | Purpose |
|---|---|
| Safety Glasses/Goggles | Protect your eyes from any debris that may be present on the stairs. When sanding the stairs, for instance, there might be debris that can accidentally fly up and potentially cause eye injury. |
| Respirator Mask | This prevents you from inhaling any debris, dust, and glue fumes during the carpet installation. The glue, for instance, may contain strong chemicals that cause breathing difficulties and other respiratory issues. |
| Gloves | Protect your hands when handling the tools and glues. The glue can be harmful to your skin if frequently exposed for a certain period of time. Wearing gloves will give you comfort and protection from any chemical reactions. |
| Knee Pads | As you will be kneeling throughout the installation process, knee pads will help prevent sore and bruised knees. They are also essential when it comes to moving around the stairs. |
Keep in mind that the safety gears listed above are just some of the essentials. Review your project and assess what safety gears are needed for it before proceeding. Remember, safety should always come first.
Tip 2: Don’t Rush
When it comes to gluing carpet to stairs, one of the most important tips to keep in mind is to not rush the process. Rushing can lead to mistakes that will not only have a negative impact on the appearance of the finished product but can also compromise its quality and lifespan.
To better understand why rushing is not advisable, here are some potential risks involved:
| Risks of Rushing |
|---|
| Misalignment: Rushing can lead to misaligned carpet installation. This can make walking up and down the stairs difficult, and lead to premature wear and tear of the carpet. |
| Bubbles: If the glue is not properly smoothed out, air bubbles can get trapped underneath the carpet. Over time, these bubbles can grow and shift, leading to an uneven surface and even compromised safety. |
| Uneven Spread: Applying glue unevenly can also lead to installation problems. Some areas may stick well, while others can loosen and detach. This can lead to dangerous tripping hazards. |
| Incomplete Drying: Rushing can also lead to incomplete drying of the glue, which can compromise the bond formed between the carpet and the stairs. This can lead to carpet lifting and curling at corners and edges. |
Rushing the process of gluing carpet to stairs can lead to numerous problems, which is why it’s important to take the time to properly follow the steps involved in preparing and installing the carpet. By not rushing and taking the time to complete each step methodically, you can achieve a beautiful finish that will not only enhance the look of your stairs but will also last for many years.
Tip 3: Work in Small Sections
One important tip to keep in mind when gluing carpet to stairs is to work in small sections. This approach ensures that your glue does not dry out before you lay down your carpet. Working in small sections also allows you to adjust your carpet as needed to ensure a seamless installation.
To implement this tip effectively, divide your stairs into small sections that you can complete in about 15-20 minutes. For example, you can work on a single stair or one section of a stair at a time. This way, you can apply glue to that area, lay down carpet, and trim the edges before moving on to the next section.
Working in small sections also helps you maintain control over the installation process. It gives you time to adjust the carpet’s positioning, ensuring that each section aligns perfectly with the one before it. It also allows you to avoid making costly mistakes that would require you to start the entire installation process over again.
To summarize, working in small sections helps you:
| 1. | Prevent glue from drying out. |
| 2. | Adjust the carpet as needed for a seamless installation. |
| 3. | Maintain control over the installation process. |
By following this tip, you can save time and avoid frustration during the carpet installation process. Remember to take breaks as needed and work steadily to achieve the best results.
Conclusion
In conclusion, gluing carpet to stairs can be a daunting task, but with the right materials and steps, you can achieve a professional-looking finish. Remember to always wear safety gear, take your time, and work in small sections to ensure the best results. Preparing your stairs for carpet is just as important as the gluing process itself, so make sure to measure your stairs, remove old carpeting, and sand and clean the surface. Creating your glue mixture is crucial to the success of the project, and cutting your carpet to the appropriate size will make the installation process much smoother. Applying the glue to the stairs and laying the carpet requires a steady hand, as does trimming the edges and finishing the project. By following these steps, you can have a beautiful, comfortable, and safe staircase that will last for years to come. So, gather your materials, take a deep breath, and get ready to transform your stairs into a work of art!
Frequently Asked Questions
Is gluing carpet to stairs a difficult task?
It can be a bit challenging, but with the right materials and following the steps carefully, it is manageable for a DIY project.
What materials do I need to glue carpet to stairs?
You will need carpet, glue, a trowel, masking tape, a razor knife, a measuring tape, a hand stapler, a staple remover, and sandpaper.
Do I need to remove the old carpet from my stairs before gluing new carpet on?
Yes, it is recommended that you remove the old carpet to ensure that the new carpet sticks properly to the surface underneath.
What is the best type of glue to use for gluing carpet to stairs?
A solvent-based glue is recommended for gluing carpet to stairs, as it dries faster and provides better adherence.
What is the ideal time to start gluing carpet to stairs?
It is best to start in the morning or early afternoon to allow the glue and carpet to dry properly before stepping on the stairs again.
How long does it take for the glue to dry?
The drying time for the glue will vary depending on the type of glue and humidity levels, but it typically takes around 24 hours for the glue to fully dry.
Do I need to wear any safety gear while gluing carpet to stairs?
Yes, it is recommended that you wear gloves and a mask to protect your skin and lungs from the glue and carpet fibers.
How long will the glued carpet last on my stairs?
If installed properly with the right materials, the carpet should last for several years before needing to be replaced.
Can I glue carpet to painted stairs?
Yes, you can glue carpet to painted stairs, but you will need to sand the paint to create a rough surface for the glue to adhere to.
Can I glue carpet onto outdoor stairs?
No, it is not recommended to glue carpet to outdoor stairs, as moisture and weather conditions can quickly deteriorate the carpet and glue.