When it comes to modern flooring options, luxury vinyl tile (LVT) has become a popular choice for both residential and commercial spaces. Known for its versatility and range of designs, LVT mimics the appearance of natural materials like stone and wood while offering the resilience and ease of maintenance that comes with vinyl. Before diving into the process of installation, it’s essential to understand why LVT stands out in the flooring industry.
Benefits of Glue Down LVT Flooring
Durability and Aesthetics
Among various installation methods, glue down LVT is renowned for its durability and stability. This method secures the LVT directly to the subfloor, creating a strong bond that withstands heavy foot traffic and reduces the likelihood of edge lift or tile movement. Additionally, the extensive design options available make it a go-to for anyone looking to tailor their space’s aesthetics without compromising on longevity.
Moisture Resistance
Another significant advantage of glue down LVT is its resistance to moisture. When properly installed, the tight seams between tiles prevent water penetration, making it an ideal flooring solution for areas like kitchens, bathrooms, and basements where moisture is a common concern.
Installation Versatility
The versatility of LVT installation is unmatched. It can be laid over existing floors, provided they are smooth and even, making it a cost-effective and less labor-intensive option compared to other flooring types. This versatility ensures that LVT can be a suitable choice for a variety of projects.
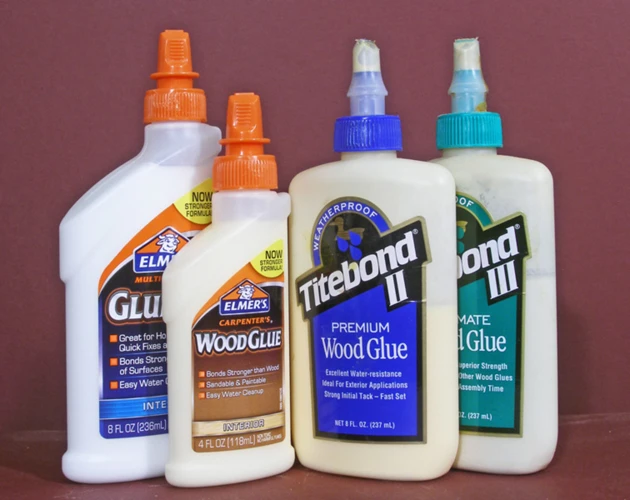
LVT Flooring Adhesive Selection

Choosing the Best Glue for LVT
Selecting the right LVT flooring adhesive is critical for a successful installation. The best glue for LVT is one that is specifically formulated to match the material’s properties, ensuring a secure and lasting bond as well as compatibility with the subfloor material.
Understanding LVT Flooring Adhesive Types
There are several LVT flooring adhesive types, including pressure-sensitive, hard set, and acrylic-based adhesives. Each type has its specific application method and setting time, making it important to understand the product’s specifications before proceeding with installation.
Preparation for Installing Luxury Vinyl Tile
Step 1: Subfloor Preparation
The key to a successful LVT installation starts with a properly prepared subfloor. The surface must be clean, dry, and level. Any imperfections can affect the final result, so it’s crucial to fill in gaps and sand down high spots before moving forward.
Step 2: Acclimating Your LVT
Acclimating the LVT to the environment where it will be installed is an often overlooked but essential step. This process involves leaving the material in the room for a specific period, usually 24 to 48 hours, to allow it to adjust to the room’s temperature and humidity, reducing the risk of expansion or contraction post-installation.
Step 3: Layout Planning
Proper layout planning ensures a visually pleasing arrangement and efficient use of materials. Start by determining the focal point of the room and consider the placement of LVT planks or tiles to maximize aesthetic appeal and minimize waste.
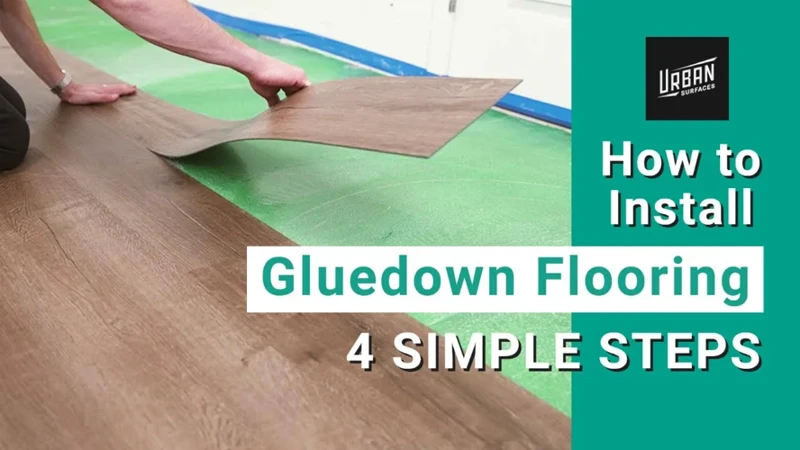
Vinyl Flooring Glue Technique
Applying LVT Flooring Adhesive
The vinyl flooring glue technique begins with applying the adhesive to the subfloor. Spread the glue using a notched trowel at a consistent angle and ensure coverage is even. Avoid applying too much adhesive, as this can lead to seepage between tiles.
Adhering the Tiles
Once the adhesive is tacked, carefully place the LVT onto the subfloor, pressing firmly to ensure proper adhesion. Work in small sections to prevent the glue from drying out before the tile is laid down. Pay close attention to aligning each piece accurately to avoid gaps or misalignment.
DIY LVT Installation Guide
Step-by-Step Process on How to Lay LVT
- Ensure the subfloor is clean and level.
- Acclimate the LVT to the room’s conditions.
- Plan the layout according to the room’s dimensions and design.
- Apply the LVT flooring adhesive as per the manufacturer’s instructions.
- Begin laying the tiles from the center or a focal point, moving outward.
- Use a rolling pin or roller to press the tiles into the adhesive.
- Allow the adhesive to cure before walking on the floor or adding furniture.
Troubleshooting Common Issues
During DIY LVT installation, it’s common to encounter issues such as bubbling or peaking. This can be due to improper adhesive application or environmental factors. Should such problems arise, consult the luxury vinyl tile adhesive guide or reach out to a professional for advice on rectification.
Finishing Touches and Maintenance
Cleaning and Care for Glue Down LVT
After the LVT is firmly in place, the final step is to clean any excess adhesive from the surface before it hardens. Regular maintenance should include sweeping and mopping with a non-abrasive cleaner to keep the floor looking its best.
Long-Term Maintenance Tips
For long-term care, avoid using harsh chemicals or abrasive tools that can damage the LVT. Additionally, using furniture pads can help prevent scratches, and periodic checks for seam integrity can ensure your LVT flooring remains pristine for years to come.
Frequently Asked Questions About LVT Installation
Many homeowners have questions when it comes to installing luxury vinyl tile. From inquiries about the best underlayment to use, to how to handle transitions between different flooring types, a comprehensive FAQ section can be an invaluable resource for anyone undertaking a DIY LVT installation project.
When it comes to installing luxury vinyl tile (LVT) flooring, understanding the proper techniques can ensure a smooth and lasting finish. If you’re considering a DIY project, you might want to explore our detailed guides. For those working with laminate, we have articles on how to glue laminate flooring and an updated version with additional tips at how to glue laminate flooring 2. If you’re dealing with parquet flooring, our guide on how to glue parquet flooring could prove to be an invaluable resource. Each piece offers step-by-step instructions to help you achieve professional-looking results with your LVT flooring project.
Conclusion and Additional LVT Flooring Tips
In conclusion, installing LVT can be a rewarding DIY project that enhances the beauty and functionality of your space. By carefully selecting the appropriate LVT flooring adhesive, preparing the subfloor, and following the vinyl flooring glue technique, you can achieve professional-looking results. Remember to consult a luxury vinyl tile adhesive guide for specific product instructions and to heed the LVT flooring tips provided for a successful installation. With the right approach and attention to detail, your new floors will stand the test of time, providing a durable and attractive surface for years to come.