Wooden floors have been a popular choice for home decoration for centuries. However, sometimes the perfect wood design is not possible with complete wooden flooring. In such cases, wooden panels are used to bring a natural and aesthetic charm to floors, walls, or even furniture. Gluing wooden panels to tiling can be a tricky task, but with the right preparation, adhesive and technique, it is not impossible. In this guide, we will provide a step-by-step guide on how to glue wood to tile in just five easy steps and give you some tips to ensure a successful outcome. So, roll up your sleeves, and let’s get started!
Step 1: Prepare the Surfaces

Before gluing wood to tile, it’s important to make sure both surfaces are prepared correctly. This will ensure a strong and long-lasting bond between the two materials. In this step, we’ll explore the necessary measures to take in order to properly prepare the surfaces before gluing. We’ll cover everything from measuring and cutting the wood to cleaning and sanding the tile. By the time you’re finished with this step, you’ll be ready to move on to choosing the right adhesive for your project. If you’re interested in learning how to glue tile to a wall or install glue-down vinyl sheet flooring, check out our guides on those topics.
Measure and Cut the Wood
Measuring and cutting the wood is a crucial step when it comes to gluing wood to tile. The measurements need to be accurate for the wood to fit perfectly on the tile. Firstly, measure the dimensions of the tile and mark the size on the wood. Use a saw to cut the wood according to the measurements. It is important to wear protective gloves while handling the saw.
| Materials needed for measuring and cutting wood | |
|---|---|
| Tape measure | |
| Pencil | |
| Saw (circular, jigsaw or handsaw) | |
| Protective gloves |
It is important to measure the wood accurately to avoid any gaps between the wood and tile. Otherwise, it can affect the structural strength and damage the adhesive. A good fit will also prevent any moisture from seeping underneath the wood, causing it to rot over time.
In case you need help with gluing tile to the wall, check out our guide on how to do it effectively.
Clean and Sand the Tile
When gluing wood to tile, it is crucial to prepare the tile surface properly to ensure a strong and long-lasting bond. This involves cleaning and sanding the tile surface to create a good adhesive surface.
To clean the tile surface, first, remove any dirt or debris. Then, use a tile & grout cleaner to remove any soap scum or residue from the tiles. After cleaning, rinse the surface thoroughly with water and let it dry completely.
Once the surface is clean, it’s time to sand it. Sanding helps to roughen up the surface and provide a better surface area for the adhesive to grip onto. Use a fine-grit sandpaper or sanding block to gently sand the tile surface in a circular motion. Be sure to sand any glossy surfaces until they are no longer shiny.
After sanding, wipe the surface down with a damp cloth to remove any dust or debris. Then, wait for it to dry completely before moving on to the next step. This will ensure that the adhesive can bond successfully to the tile and wood surfaces.
It’s essential to note that the type of adhesive you choose will also determine the preparation method. Each adhesive has its unique set of instructions on how to prepare and apply it. For instance, you will need to specially prepare the surfaces when gluing transition strips.
Cleaning and sanding the tile surface is a crucial step in gluing wood to tile. Proper preparation will ensure that the adhesive forms a strong bond that will last for years to come.
Step 2: Choose the Right Adhesive
Choosing the right adhesive is essential to ensure a successful bonding of wood to tile. With so many options available in the market, one can easily get perplexed about which glue to choose. This step is crucial in achieving a durable and long-lasting bond. In the following sections, we will discuss different types of adhesives that work best for wood and tile bonding. So, let’s dive in and explore which adhesive is the right choice for your project. For more information on gluing different materials, check out this guide on what glue to use for laminate edging.
Epoxy Adhesive
Epoxy adhesive is a two-part adhesive that creates a strong, durable bond between wood and tile surfaces. It’s a popular choice for bonding applications that require high strength, resistance to water and chemicals. Epoxy adhesive is available in a range of formulas, each designed for specific applications. When working with epoxy adhesive to glue wood to tile, it’s crucial to select an appropriate formula that matches your project’s requirements.
Advantages of Epoxy Adhesive:
- Creates a very strong bond.
- Resistant to water, chemicals, and high temperatures.
- Dries clear, ensuring no unsightly residue is left behind.
- Designed for a wide range of applications, including vertical and overhead surfaces, and dissimilar substrates.
Disadvantages of Epoxy Adhesive:
- Has a longer cure time than other adhesives.
- Is more expensive than some other types of adhesive.
- Requires mixing before application.
- Can be difficult to remove once cured.
When working with epoxy adhesive to glue wood to tile, it’s crucial to follow the manufacturer’s instructions carefully. The application process typically involves mixing two compounds together, applying the adhesive to both surfaces, and then pressing the wood onto the tile. Always ensure that the surfaces to be bonded are clean, dry, and free of dust and debris before applying the adhesive.
If you have never worked with epoxy adhesive before, it’s a good idea to do a small test application before beginning your project. That way, you can ensure you are comfortable with the process and the adhesive performs as expected.
Epoxy adhesive is an excellent choice for those looking to glue wood to tile surfaces in high-stress areas. If you need guidance on other gluing projects, such as /how-to-install-bamboo-flooring-with-glue/, /how-to-glue-tongue-and-groove-boards/, or /how-to-glue-parquet-flooring/, our site has many helpful guides.
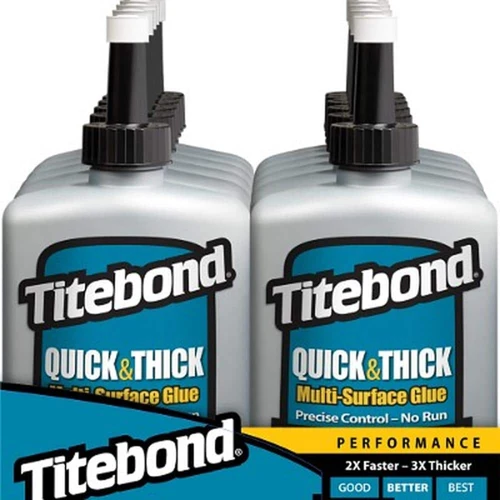
Construction Adhesive
Construction adhesive is a popular adhesive for many DIY projects. It is a powerful adhesive that can bond numerous materials, including wood, tile, metal, and concrete. Construction adhesive is a good choice when attaching wood to tile because it is strong enough to hold the weight of the wood, and it dries clear leaving no visible residue.
When choosing a construction adhesive, consider the adhesive’s strength, drying time, and how easy it is to use. It is always best to read the instructions on the adhesive before use. Some popular construction adhesives for wood to tile projects include Liquid Nails, PL Premium, and Gorilla Glue.
To apply construction adhesive to your wood and tile surfaces, squeeze a small amount of adhesive onto the wood surface. Use a notched trowel to spread the adhesive evenly. Then, press the wood firmly onto the tile surface, ensuring that it is level. Secure the wood in place with clamps while the adhesive dries.
It’s important to note that using too much adhesive can cause the wood to warp as the adhesive dries. Additionally, be sure to choose a construction adhesive that is safe to use on tile surfaces. Some adhesives may damage or discolor the tile.
In conclusion, construction adhesive is a strong, reliable adhesive that can be used to attach wood to tile. When choosing a construction adhesive, consider the adhesive’s properties and read the instructions carefully before use. Remember to apply the adhesive evenly and use clamps to hold the wood in place while it dries.
Silicone Adhesive
When it comes to gluing wood to tile, silicone adhesive is another option you can consider. Silicone adhesive is made from a type of silicon that can be found in sand, rocks, and quartz. It has a rubber-like texture and is known for its flexibility and water-resistance. Here are some things to keep in mind when using silicone adhesive:
- Surface preparation: As with other adhesives, make sure to start with a clean, dry surface. Sanding the tile and the wood can also improve the surface’s adhesion.
- Application: Unlike some other adhesives, silicone adhesive doesn’t dry as quickly. This can give you more time to adjust the wood if needed. Apply the adhesive in a zigzag pattern on the wood and then use a caulk gun to apply the adhesive onto the tile.
- Positioning: Positioning the wood onto the tile can be a bit tricky since silicone adhesive doesn’t create an instant bond. Press down firmly on the wood to ensure it sticks to the tile.
- Clean up: Once the adhesive dries, use a razor blade to carefully remove any excess silicone.
While silicone adhesive can be a good option for wood to tile projects, it may not be the best fit for every situation. Consider the needs of your specific project and surfaces before deciding on the best adhesive to use.
If you’re interested in learning more about gluing vinyl siding, check out our article on how to glue vinyl siding.
Step 3: Apply the Adhesive
Before you start applying adhesive, it’s important to choose the right type of adhesive for the job. There are a few different options to choose from, and each one has its own benefits and drawbacks. Once you’ve settled on an adhesive, you’ll need to apply it carefully and precisely to ensure that the wood and tile bond properly. This step is crucial to the success of your project, so take your time and follow these instructions closely. Ready to learn how to apply adhesive to your wood and tile surfaces? Let’s get started!
Apply Adhesive to Wood
Before applying the adhesive to the wood, make sure that the surface of the wood is clean and dry. Any dirt, dust, or grease on the surface will prevent the adhesive from forming a strong bond.
Step 1: Take the adhesive and apply it evenly to the wood using a paintbrush, trowel, or a putty knife. Make sure that you apply the adhesive to the back of the wood where it will make contact with the tile.
Step 2: Apply the adhesive in thin, even coats. Applying too much adhesive can result in excessive squeeze-out and uneven bonding.
Step 3: Spread the adhesive evenly over the surface, leaving no gaps or voids. This will ensure that the wood is bonded firmly to the tile, without any weak areas.
Step 4: Allow the adhesive to dry according to the manufacturer’s instructions. This will usually take a few minutes to a few hours, depending on the type of adhesive used.
Note: Different types of wood require different types of adhesive. It is important to choose the right adhesive for your wood type. If you are unsure which adhesive to use, seek advice from a professional or the manufacturer’s guidelines.
If you’re interested in learning about gluing composite decking, we have an article on how to glue composite decking that you might find helpful.
Apply Adhesive to Tile
Before applying adhesive to the tile, it is important to ensure that the surface is clean and free from any dust or debris. Failure to do so can result in a weak bond between the tile and the wood. Follow the steps below to apply adhesive to the tile:
- Choose the Right Adhesive: Depending on the type of tile and wood being used, different adhesives may be more suitable for the job. Once you have chosen the right adhesive for your project, read the manufacturer’s instructions carefully before applying it to the tile.
- Apply the Adhesive: Using a putty knife or trowel, apply a thin layer of adhesive to the tile in the area where the wood will be placed. Be sure to spread the adhesive evenly and leave no spots untouched.
- Allow for Drying Time: Once the adhesive has been applied, it is important to allow it to dry for a few minutes before placing the wood on top. This will help ensure that the adhesive is tacky enough to create a strong bond between the tile and the wood.
Remember to work in small sections and only apply adhesive where you will immediately place the wood. This will prevent the adhesive from drying out before the wood is in place. If you need more detailed information on how much adhesive to use, check out our article how much glue for vinyl flooring.
It is essential to follow the manufacturer’s instructions, as some adhesives may require a different application process. For instance, epoxy adhesive might require you to mix two components together before application. If you are installing glue-down vinyl sheet flooring and require information on how to apply adhesive for that project, check out our article how to install glue-down vinyl sheet flooring.
Step 4: Position and Secure the Wood
Now that the surfaces are prepared and the adhesive is applied, it’s time to position and secure the wood to the tile. This step may require some precision and patience, so it’s important to take your time and ensure that everything is properly aligned. Let’s dive into the details of how to position and secure the wood using simple and effective techniques.
Place the Wood on the Tile
Once you have applied the adhesive on both the wood and tile surfaces, it’s finally time to place the wood onto the tile. Here are the steps to follow while positioning the wood:
- Align the Wood: Begin by aligning the wood on top of the tile surface based on the measurements you had taken earlier. Make sure to position the wood accurately to achieve a perfect finish.
- Gently Place the Wood: After aligning the wood, gently place it on the tile surface. Be mindful not to tilt or move it around so as not to disturb the adhesive that you applied earlier on the tile surface.
- Use Leveling Tools: Once the wood is in place, you can use leveling tools like a spirit level to make sure that the wood is horizontal and as level as possible. Making use of a tool like this will ensure the wood stays firmly in place and prevent any bumps or tilts that might compromise the adhesion.
- Lightly Tap the Wood: To make sure that the wood is fully secured onto the tile and there are no air pockets, lightly tap the surface of the wood with a rubber mallet or hammer. This will guarantee the adhesive is distributed evenly and that the bond between the wood and tile is as strong as possible.
After following these steps, the wood should be firmly and properly placed on the tile, and you can proceed to the final step of the process.
Secure with Clamps
Once the wood is securely positioned on the tile, it’s time to use clamps to ensure it stays in place while the adhesive dries. Clamps are an essential tool for securing wood to tile as they apply pressure evenly across the entire surface, ensuring a strong bond.
Here are steps to follow when securing with clamps:
| Step 1: | Choose the appropriate clamp size for the job. |
| Step 2: | Place the clamp on the wood and tighten it slightly, ensuring that the clamp is perpendicular to the surface of the wood and the tile. |
| Step 3: | Repeat step 2 on the opposite end of the wood, effectively securing the wood in place between two clamps. |
| Step 4: | Space additional clamps out evenly down the length of the wood to further secure it to the tile. |
| Step 5: | Be careful not to tighten the clamps too tightly, as this may cause the wood to warp or crack. The goal is to apply even pressure to the entire surface of the wood and tile. |
| Step 6: | Allow the adhesive to dry fully before removing the clamps, as this will ensure a strong and secure bond between the wood and tile. |
Properly securing the wood with clamps is an important part of the process for ensuring a successful wood to tile adhesion. Take time to make sure the clamps are positioned correctly and apply even pressure across the surface of the wood and tile.
Step 5: Finish and Seal
After positioning and securing the wood onto the tile, there are just a few more steps to take to complete the process of gluing wood to tile. One crucial aspect of this process is ensuring that the bond between the materials is strong and long-lasting. This involves finishing the surface and sealing the edges to prevent moisture from seeping in. Read on to discover the final steps in this five-step guide on how to glue wood to tile.
Clean Up Excess Adhesive
Once you have secured the wood to the tile, it’s important to clean up any excess adhesive. Failure to do so can result in a messy and unprofessional-looking project. Here are some steps to follow:
- Act Fast: Adhesive can dry quickly, so it’s important to act fast before it sets.
- Scrape Away: Use a putty knife or scraper to gently remove any excess adhesive. Be careful not to damage the wood or tile surfaces.
- Clean with Solvent: Use a solvent such as acetone or rubbing alcohol to clean up any remaining adhesive. Apply the solvent to a clean cloth and gently wipe the surfaces until the adhesive is gone.
- Rinse: Rinse the surfaces with water to remove any remaining solvent or adhesive residue. Dry with a clean cloth.
By following these steps, you can ensure that your wood-to-tile project looks clean and professional. Don’t rush the cleaning process, as it can make a big difference in the final outcome of your project.
Apply Sealant
After you have finished gluing the wood to the tile, it is important to apply a sealant to protect the bond and ensure the longevity of the project. Here are the steps to apply the sealant:
- Clean the surface: Before applying the sealant, clean the surface thoroughly to remove any debris or adhesive residue. Use a damp cloth and allow the surface to dry completely.
- Choose a sealant: Select a sealant that is compatible with both the wood and the tile materials. There are various types of sealants available in the market such as silicone, polyurethane or epoxy and you can choose based on your preference.
- Apply the sealant: Squeeze a small amount of sealant onto the surface and spread it evenly using a brush or roller. Make sure to apply a thin layer of sealant and smooth out any bumps or bubbles.
- Let it dry: Allow the sealant to dry completely as per the manufacturer’s instructions. The drying time can vary based on the type of sealant, humidity and temperature levels. Avoid touching or disturbing the surface while it dries.
- Apply a second coat: If necessary, apply a second coat of sealant once the first layer has dried completely. This will provide extra protection and ensure the bond is secure for a long time.
- Final check: Once the sealant is dry, inspect the surface to ensure that it is smooth and uniform. If you notice any missing areas or rough spots, you can touch them up using a small brush or roller.
Applying a sealant is an important step to complete the process of gluing wood to tile. It protects the bond from moisture, temperature changes, and wear and tear. Select the appropriate sealant and follow the above-mentioned steps to ensure a successful and long-lasting project.
Conclusion
After following the five easy steps outlined in this article, you should now have successfully glued wood to tile. It’s important to remember that the process of gluing wood to tile requires patience and attention to detail in order to ensure a strong and long-lasting bond between the two surfaces.
When choosing the right adhesive, consider the specific needs of your project and the materials you are working with. Epoxy adhesive is a popular and strong option, but may require mixing and can be more difficult to work with. Construction adhesive is another strong option and is often easier to apply. Silicone adhesive is a good choice for areas that may be exposed to moisture.
Make sure to properly prepare the surfaces by measuring and cutting the wood to the correct size and cleaning and sanding the tile to create a clean and rough surface for the adhesive to adhere to. Applying the adhesive evenly and in the appropriate amount is crucial for a strong bond. Once the wood is positioned on the tile, use clamps to secure it and allow the adhesive to dry completely.
After the wood is securely glued to the tile, it’s important to clean up any excess adhesive and apply a sealant to protect the wood from moisture or other potential damage.
By following these steps and selecting the right adhesive for your project, you can ensure a successful outcome and a strong bond between wood and tile. Remember, take your time, pay attention to detail, and be patient to achieve the best results possible.
Frequently Asked Questions
1. Can I glue wood to any type of tile?
It depends on the type of tile you have. Natural stone tiles may require a different adhesive than ceramic or porcelain tiles. Always consult with your adhesive manufacturer for specific recommendations.
2. How long should I wait for the adhesive to dry before removing clamps?
It is best to wait for the adhesive to dry completely before removing clamps. This can take anywhere from a few hours to overnight, depending on the adhesive used. Always follow the manufacturer’s instructions for drying time.
3. Can I use regular wood glue to attach wood to tile?
No, regular wood glue is not recommended for gluing wood to tile. It is not designed to bond with non-porous surfaces such as tile. It is best to use an adhesive formulated for this purpose.
4. What is the best adhesive for gluing wood to tile?
There are several adhesives that work well for this application, including epoxy adhesive, construction adhesive, and silicone adhesive. Choose the one that best suits your project and consult with the manufacturer for specific recommendations.
5. Do I need to apply sealant after gluing wood to tile?
Yes, applying sealant after gluing wood to tile is a good idea to protect the wood and tile from moisture damage. Choose a sealant that is compatible with both the wood and tile materials and follow the manufacturer’s instructions for application.
6. Can I use a hair dryer to speed up drying time for adhesive?
No, using a hair dryer or other heat source to speed up drying time for adhesive is not recommended. It can cause the adhesive to dry too quickly and compromise the strength of the bond.
7. Should I use a trowel to apply adhesive to the tile?
It depends on the type of adhesive you are using. Some adhesives may require a trowel for even application, while others can be applied directly from the tube. Always consult with the adhesive manufacturer for specific recommendations.
8. What should I do if excess adhesive seeps out from the sides of the wood?
Clean up excess adhesive with a damp cloth or sponge before it dries. If it has already dried, gently scrape it away with a putty knife. Be careful not to damage the wood or tile surface.
9. Can I use this method to glue other materials to tile?
Yes, this method can be used to attach other materials to tile, such as metal or plastic. However, always consult with the adhesive manufacturer for specific recommendations and make sure the materials are compatible.
10. Is it necessary to use clamps to secure the wood in place?
Yes, using clamps is necessary to ensure that the wood is held securely in place while the adhesive dries. This helps to achieve a strong and lasting bond between the wood and tile surfaces.