Picture yourself enjoying your newly built composite decking, sipping on a cold drink while taking in the stunning view. Now, imagine your serene moment being interrupted by a loose decking board that suddenly shifted or popped out of place. To prevent this from happening, gluing composite decking is the way to go. Not only will it keep your decking boards secured in place, but it will also enhance the overall structural integrity and longevity of your deck. In this guide, we’ll take you through the step-by-step process of how to glue composite decking with ease. But before we dive into that, let’s take a look at the essential materials you’ll need.
Materials Needed
Materials Needed: In order to glue composite decking properly, you will need to gather a few materials beforehand. These items include quality adhesive, a tape measure, a level, a chalk line, a brush, a putty knife, and a saw. It’s important to have all these materials on hand for a smooth and efficient gluing process. If you need help with other types of gluing projects, take a look at our article on the best glue down vinyl plank flooring for more tips and tricks.
List of materials
To properly glue composite decking, you’ll need to ensure that you have all the necessary materials on hand. Here’s a list of materials you’ll need for the gluing process:
- Composite Decking: Make sure you have the appropriate composite decking boards for your project.
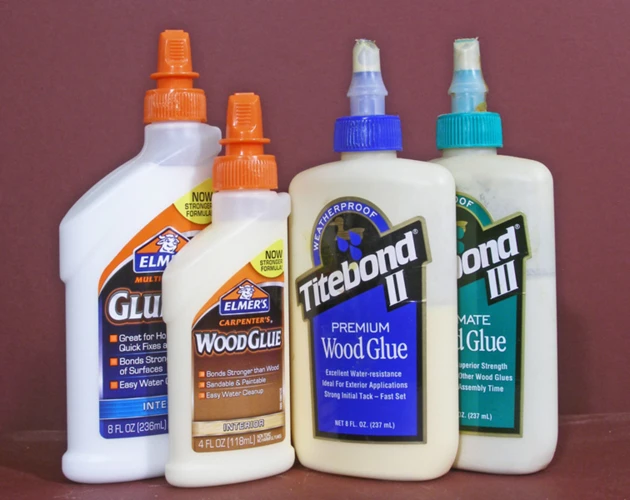
- Composite Decking Glue: Choose a composite decking glue that is compatible with your decking boards. We recommend the Gorilla Heavy Duty Construction Adhesive or the 3M Marine Adhesive Sealant.
- Caulking Gun: You’ll need a caulking gun to apply the glue onto the decking boards.
- Tape Measure: To ensure accurate cuts and spacing, have a measuring tool on hand.
- Chalk Line: You’ll create straight lines and mark reference points for cuts using this tool.
- Pencil: You’ll need a pencil to mark cut lines on the decking boards.
- Circular Saw: To make any necessary cuts to the composite decking boards, you’ll need a circular saw. If you don’t have a circular saw, consider renting one at your local hardware store.
- Sanding Block: To smooth out any rough edges or spots on the decking boards, have a sanding block handy.
Knowing which materials are required before starting the project can save you time and frustration during the decking installation process. Once you’ve ensured that you have all the necessary materials, it’s time to move on to preparing the decking surface.
If you want to know how to lay vinyl flooring without glue, check out our guide on how to lay vinyl flooring without glue.
Preparing the Decking Surface
Before starting the gluing process, it’s essential to prepare the composite decking surface properly. The success of your deck installation relies heavily on how well you prepare the surface beforehand. Taking the time to do so will ensure that you have a solid and sturdy foundation for your deck that will last for years to come. In this section, we’ll go over the key steps you need to take to properly prepare your decking surface, including surface cleaning and tape application. By following these steps, you’ll be able to ensure that your composite decking is properly glued down and firmly in place.
Surface cleaning
Before you start gluing your composite decking, it is essential to start with a clean surface. This will ensure that the adhesive bonds effectively to the deck, providing a strong, durable hold. Here’s how to properly clean your decking surface before gluing:
| Step | Materials Needed | Method |
|---|---|---|
| 1 | Deck Brush | Remove all dirt, debris, and leaves from the decking surface using a stiff deck brush. Pay particular attention to the gaps between the boards and the edges. |
| 2 | Cleaner | Mix a composite deck cleaner solution as per instructions stated on the bottle. Apply the cleaner with a stiff broom, ensuring to reach every surface. Scrub the deck thoroughly and leave for the manufacturer-recommended time. Rinse away the cleaner using a hose, and take note never to use a power washer to rinse. |
| 3 | Soft-bristle Brush | Rinse the decking surface with cold water only to remove excess cleaner and loosen remaining debris. Then repeat the scrubbing process once more with the soft-bristle brush. Rinse away foam and debris with a hose. |
| 4 | Dry cloth | A dry cloth should be used to mop up standing water to allow the surface to dry completely. |
Note that every manufacturer may have their recommended cleaning solutions; That’s why it’s wise to follow the seller’s instructions. By doing this, you ensure you clean your surface up appropriately and guarantee helpful binding.
Once you’ve finished cleaning the surface of the composite decking, it’s time to proceed to tape application.
Tape Application
To ensure that the boards are properly aligned and spaced, it’s essential to use tape before applying the glue. Using strong tape like duct tape or masking tape will help keep the boards in place. The tape should be applied perpendicular to the decking boards to ensure a proper gap between each board, which will allow for proper drainage.
| Tape Type | Advantages | Disadvantages |
|---|---|---|
| Duct Tape | Durable and weather-resistant. The strong adhesive can hold heavy boards in place. | Difficult to remove and may leave residue on the surface of the composite decking. |
| Masking Tape | Gentle adhesive that is easy to remove and won’t damage the surface of the composite decking. | Not as strong as duct tape, which may not be suitable for heavier boards or in windy weather conditions. |
It’s important to note that the tape should not be left on for an extended period. Leaving the tape on for too long can cause it to bond with the surface of the decking, making it difficult to remove. It’s best to remove the tape immediately after the glue has dried.
If you encounter any difficulty removing the tape or residue, there are several guides available on how to remove glue residue that may be applicable to this situation.
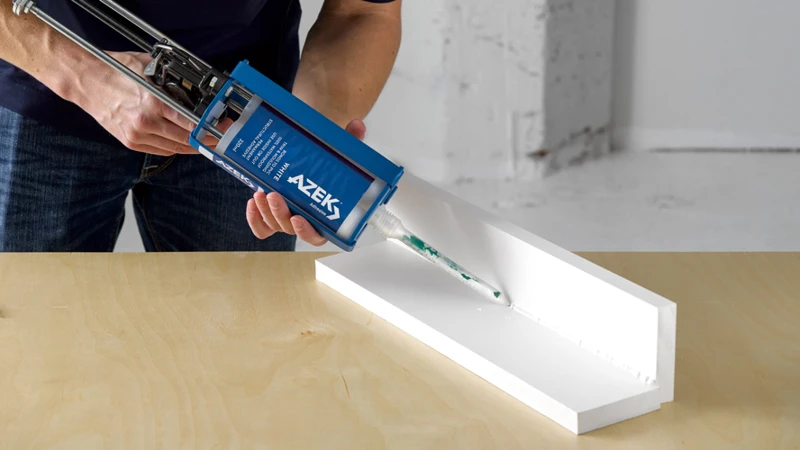
Applying the Glue
Applying the Glue: Once you have prepared the decking surface, the next step is to apply the adhesive. Proper adhesive application is a crucial step in ensuring that your composite decking stays in place and retains its durability. The process of applying glue to composite decking can be likened to other adhesive applications like gluing parquet flooring, installing ceiling tiles, or even gluing drywall. In this section, we’ll cover the right techniques to use while applying the glue.
Glue Application Techniques
When it comes to gluing composite decking, there are a few techniques to keep in mind that can make a significant difference in the outcome of your project. The correct technique ensures the decking planks will stay in place without moving or slipping, and the finished surface will be smooth and durable.
Here are some glue application techniques to follow:
| Technique | Description |
| Back Buttering | This technique involves applying the glue on both the deck joists and the underside of the composite decking planks. Back buttering provides complete coverage for proper adhesion and helps level any inconsistencies in the joist surfaces. |
| Spot Gluing | In this method, the glue is applied to a few strategic points on the deck joists. This technique works best if the recommended adhesive coverage is sporadic and not complete. |
| Full Coverage | This technique involves applying adhesive on the entire surface of the deck joists. Full coverage leaves no room for any shifting or movement of the decking planks. However, this technique requires careful handling to prevent the glue from getting on other surfaces. |
| Smoothing Out | After applying the glue on the joists and the composite decking planks, spread the adhesive out evenly using a trowel or flat surface. This step ensures an even distribution of glue for proper adhesion and helps in leveling any high spots between the deck joists. |
Using the correct application technique is crucial when gluing composite decking. If you’re unsure about which technique is best for your project, it’s always best to consult with a professional. Similarly, every type of glue has its drying period, and you should refer to the manufacturer’s guidelines. If you’re interested in learning more about glue drying and how long it takes, check out this article on how long for tile glue to dry? or this one on what is glue-down vinyl plank flooring?
Amount of Glue to be Applied
When it comes to applying glue for composite decking, it’s important to get the right amount to ensure that the boards stick together properly. Applying too little glue can result in weak bonding, while applying too much glue can leave excess residue or even cause the boards to warp. There are a few guidelines to follow when determining the amount of glue to use for composite decking:
| Board Width | Recommended Glue Amount |
|---|---|
| Less than 2 inches | Thin line along the center |
| 2-5 inches | Thin line along center as well as on each edge |
| More than 5 inches | Knife-grade adhesive applied in a zigzag pattern on each joist |
It’s important to note that the width of the board is the most important factor in determining the amount of glue required. Thinner boards require less adhesive as the surface area is smaller. Wider boards require more glue to hold them securely in place.
Remember to always follow the manufacturer’s instructions for the specific adhesive being used. It’s also a good idea to do a test run on a scrap piece of decking to determine the appropriate amount of glue necessary for the project.
If you’re interested in learning more about gluing different materials together, check out our article on how to glue plywood together or our article on how to glue tile to a wall.
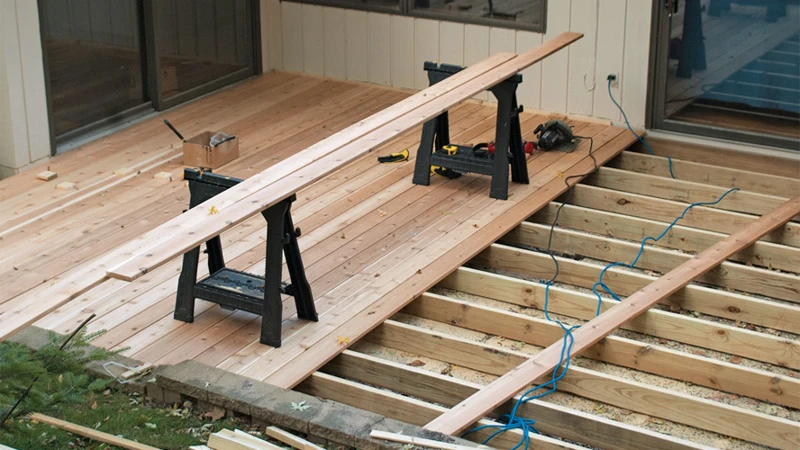
Gluing the Decking Boards
As you prepare to glue your composite decking boards, it’s important to understand the proper techniques to ensure a strong and long-lasting bond. Once you’re ready to begin this step, grab your materials and let’s get started with the board placement process.
Board Placement
Proper board placement is crucial when gluing composite decking. Follow these steps for the best results:
- Layout the Boards: Plan the layout of the decking boards prior to application. This will ensure that the boards are arranged in a way that is both visually appealing and structurally sound.
- Correct Spacing: Before gluing, make sure that there is a small gap between each deck board. This gap will allow for any expansion or contraction of the boards that may occur due to temperature or weather changes.
- Working in Sections: Work in sections when gluing the boards. Apply glue to a limited area until you have had enough time to place all the boards in the section. Then, move onto the next section, repeating this pattern until all boards are completed.
- Board Alignment: Proper board alignment is necessary for a seamless deck surface. Use spacers to ensure that boards are perfectly aligned and evenly spaced.
- Board Orientation: Check the orientation of your decking boards before gluing them in place. Make sure they are all facing the same direction and flipped the same way to create a uniform and cohesive look for your deck.
By following these simple steps for board placement, you can ensure that your composite decking is properly glued and installed for a beautiful and long-lasting deck.
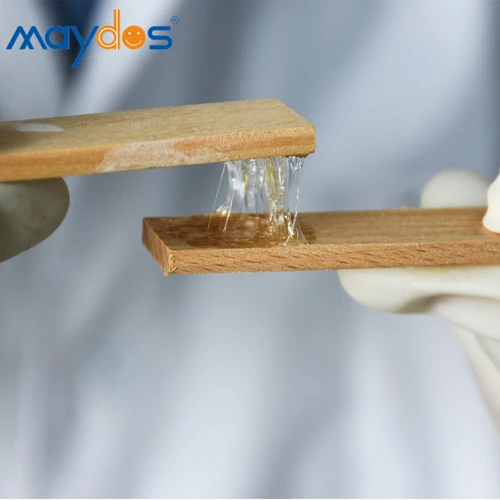
Board Pressure and Time
When gluing the decking boards, the pressure and time applied are crucial factors in ensuring a strong bond. It is important to apply even pressure on the boards to ensure that the glue is evenly distributed throughout the surface area. Additionally, the time the boards are pressed together allows the glue to set and create a strong bond.
Pressure
To apply even pressure on the boards, consider using clamps or heavy objects such as sandbags. Place them on the boards and adjust their positions to ensure they are applying equal pressure on the entire surface area. This will prevent any voids from forming, which weakens the bond between the boards.
Time
Once the boards are firmly pressed together, leave them in place for the recommended time listed on the glue manufacturer’s instructions. Different brands of glue may have different recommended set times, so it is important to follow the manufacturer’s instructions for the best results. In general, most composite decking glue requires around 24-48 hours to fully set. It is important to not disturb the boards during this time to ensure a strong bond is formed.
| Pressure and Time Guidelines | |
|---|---|
| Recommended Pressure | Even pressure applied on the entire surface area |
| Recommended Time | 24-48 hours |
| Exceptions |
|
In some cases, the recommended time may be affected by factors such as location and weather conditions. It is important to take these into consideration when gluing composite decking boards. For instance, if the temperature is too high or low, it may affect the glue’s ability to bond effectively. However, by following the manufacturer’s instruction and considering external factors such as temperature and weather conditions, you can ensure a successful bonding process.
Cleaning up Glue Residue
Removing any leftover glue residue is vital in ensuring a clean and professional-looking composite deck. Failure to clean up the glue can result in unsightly patches that can detract from the overall appeal of your project. In this section, we will discuss how to clean up glue residue effectively. By following these steps, you can ensure that your composite decking looks stunning and lasts for years to come.
Immediate Clean Up
To ensure a smooth gluing process for your composite decking, it’s important to clean up any excess glue right away. Immediate clean-up prevents the glue from drying and sticking to the surface of the decking, causing unsightly marks or stains.
Here are some steps to follow for immediate clean-up:
- Scrape off the excess glue: Use a putty knife or scraper to remove any excess glue immediately after it’s applied.
- Use a damp cloth: Wet a cloth with warm water and gently wipe the area where the excess glue was removed.
- Repeat as necessary: If there is still glue residue left, repeat the process until it’s completely removed.
- Do not use harsh chemicals: Avoid using harsh chemicals or solvents, as they can damage the surface of the composite decking.
Following these steps will help ensure that there is no visible residue left on the surface of your composite decking. It’s important to note that even with immediate clean-up, some glue residue may still remain. If this is the case, it can be removed with a scraper or sander after it dries.
Properly cleaning up excess glue is an essential step in the gluing process and will help ensure a seamless finish for your composite decking.
Removing Dried Glue
After gluing the composite decking boards together, there may be some dried glue residue remaining on the surface. It is important to remove any excess glue before it hardens, as it will be difficult to remove once it dries.
To remove dried glue from composite decking, follow these steps:
- Step 1: Scrape off Excess Glue – Use a scraper or putty knife to remove as much of the dried glue as possible from the surface of the decking. Be careful not to damage the surface of the decking while doing this.
- Step 2: Apply Acetone – Apply a small amount of acetone to a clean cloth and rub it onto the dried glue. Acetone is a solvent that can dissolve dried adhesive, making it easier to remove.
- Step 3: Scrub with a Soft-Bristled Brush – Use a soft-bristled brush to scrub the dried glue, working in a circular motion. Be sure to apply gentle pressure, as you don’t want to damage the decking surface.
- Step 4: Wipe Clean – Use a clean, damp cloth to wipe away any remaining glue residue. Repeat the process until all of the dried glue is removed from the decking surface.
It is important to note that acetone is a harsh chemical and should be used with caution. Always wear gloves and goggles to protect yourself while using acetone. Test a small, inconspicuous area of your decking before using acetone to ensure that it does not cause any damage. If you are unsure about using acetone, consult with a professional before attempting to remove dried glue from your composite decking.
Preventing Common Gluing Mistakes
When it comes to gluing composite decking, even the smallest misstep can lead to unsatisfactory results. One of the best ways to ensure a successful project is to avoid common gluing mistakes altogether. By taking a few precautions and following some basic guidelines, you can increase your chances of achieving a professional-looking finish that withstands the test of time. Here are a few preventative measures to keep in mind as you embark on your decking project.
Weather Conditions
When it comes to gluing composite decking, one of the most important things to consider is the weather conditions. The temperature and humidity levels can have a significant impact on the success of the glue application, so it’s important to choose the right time and conditions to get the best results.
Factors to consider:
- Temperature
- Humidity
- Sun exposure
Temperature: The temperature should be above 55°F/12°C for the glue to set properly. Gluing in colder temperature than this will result in weak bonds. If the temperature is too high, the glue may set too quickly and not bond properly. To achieve the best results, it’s recommended to glue composite decking when the temperature is between 60°F/15°C and 80°F/27°C.
Humidity: High humidity can also have a negative impact on the glue application. When the humidity is high, the glue may take longer to dry, resulting in a weaker bond. It’s best to avoid gluing composite decking on rainy or extremely humid days.
Sun exposure: Direct sunlight can also impact the success of the glue application. If the decking is in direct sunlight, the surface may become too hot for the glue to stick properly, resulting in weak bonds. It’s best to avoid gluing composite decking during the hottest part of the day when the sun is at its peak.
Tip: Before gluing composite decking, it’s a good idea to check the weather forecast to make sure the conditions are optimal. If the temperature is too low or the humidity is too high, it’s best to wait until conditions improve for a stronger bond.
Proper Glue Application
When it comes to properly applying glue for your composite decking, it’s important to take some steps to ensure the best possible outcome. Here are some tips to take your glue application to the next level:
| TIP | DESCRIPTION |
|---|---|
| Use the Right Glue | Make sure to use a high-quality adhesive that is compatible with composite decking. Not all adhesives will work, so be sure to check the label or ask a professional for recommendations. |
| Apply Glue to Dry Surface | Ensure that the surface is completely dry before applying the glue. This means that there should be no dew, moisture, or standing water on the surface of the decking. |
| Use Enough Glue | Using too much or too little glue can affect the strength and durability of the bond. Follow the manufacturer’s instructions for the appropriate amount of glue to apply for the best results. |
| Spread the Glue Evenly | Spread the glue evenly onto the surface of the decking board, using a notched trowel or a roller. This will ensure that the glue coverage is consistent and the board will bond properly with the joist. |
| Work in Small Sections | It’s best to work in small sections when applying the glue, to prevent it from drying out or becoming too tacky. Apply a manageable amount of glue to one section at a time, and then place the board onto the joist before moving on to the next section. |
By following these tips, you can ensure that your composite decking is glued properly and securely. Taking the time to apply the glue correctly can prevent common issues such as warping and separation of the boards. Additionally, it can increase the overall lifespan of your deck, saving you time and money in the long run.
Benefits of Gluing Composite Decking
Gluing composite decking boards offers numerous benefits that make it a popular choice among homeowners and builders. Firstly, it helps prevent the decking boards from warping, twisting, or shifting, which can occur with mechanical fasteners like nails and screws. This is because glue creates a stronger bond between the decking board and the joist.
Gluing composite decking also creates a seamless and polished look as there are no unsightly screw or nail holes on the surface of the deck. This enhances the aesthetic appeal of the deck and creates a safer environment by eliminating any tripping hazards.
Another advantage of gluing composite decking is that it creates a more stable and rigid deck surface, which reduces the amount of noise and bounce that can occur when walking on the deck. This makes it a great choice for high-traffic areas, such as outdoor living spaces where families often gather.
Glued decking boards are less likely to develop mold, mildew, and other weather-related problems, as there are no gaps that can trap water and moisture.
Besides, using glue for composite decking eliminates the need for additional hardware, which can save time and money on installation. It also prevents the need for periodic tightening of screws and nails, ensuring less maintenance is required over the lifespan of the deck.
Gluing composite decking is a superior option that provides a sleek and durable deck surface, free from defects and hazards, while also adding value and beauty to a property.
Conclusion
In conclusion, gluing composite decking offers several advantages over traditional fastening methods. By using sturdy and reliable adhesives, your composite decking will have a seamless and aesthetically pleasing appearance with no visible screws or nails. Additionally, gluing ensures a longer lifespan for your decking boards as there will be no water penetration from the drilled holes, reducing the risk of rot or decay.
However, it is important to note that proper preparation and installation techniques are crucial to achieving successful results when gluing composite boards. The surface must be thoroughly cleaned and dried before any glue is applied, and the correct amount of glue must be used to ensure a secure bond.
It is also essential to be mindful of weather conditions during the gluing process, as humidity and temperature can affect the bonding strength of the adhesive. And, if any mistakes are made during the gluing process, immediate clean-up or removal of dried glue will prevent damage to the decking boards.
Overall, gluing composite decking can be a rewarding and effective method for installation, but it requires careful attention to detail and adherence to recommended guidelines. By following the steps outlined in this guide, you can achieve a beautiful and long-lasting composite decking installation that is sure to impress.
Frequently Asked Questions
How long does it take for composite decking glue to dry?
The drying time for composite decking glue varies depending on factors such as temperature and humidity. However, it typically takes around 24 hours for the glue to fully dry.
What type of glue should I use for composite decking?
We recommend using a waterproof, polyurethane-based adhesive or a high-quality construction adhesive suitable for outdoor use. Always check the manufacturer’s instructions and recommendations.
Do I need to prepare the surface before applying glue to composite decking?
Yes, it is important to thoroughly clean the surface and remove any debris, dirt, grease, or mold that may be present. The surface should also be dry and free of any moisture.
Can I glue composite decking in cold weather?
No, it is not recommended to glue composite decking in very cold weather. The glue may not set properly in extreme cold temperatures, so it is best to wait for warmer weather.
Do I need special tools to glue composite decking?
No, you don’t need any special tools to apply glue to composite decking. You may use a standard caulking gun and a utility knife to cut the tip off the adhesive tube.
Can I use glue to fix scratches or dents on my composite decking?
No, glue is not recommended to fix scratches or dents on composite decking. A composite decking repair kit or a professional deck repair service may provide better results.
How much glue should I apply to each decking board?
You should apply a thin, even layer of glue on the surface of each decking board that will come in contact with the joist or frame. Too much glue may result in excess oozing and visible residue.
Can I walk on the composite decking after gluing it?
We recommend waiting for the glue to fully dry and cure before walking on the composite decking. This may take up to 24 hours, depending on the specific glue and environmental conditions.
How do I clean up excess glue during the installation process?
You should use a clean, damp cloth or sponge to wipe off excess glue immediately after it appears. Once the glue dries, it may be more difficult to remove.
What are the benefits of gluing composite decking?
Gluing composite decking boards can help increase their stability, reduce movement and squeaking noise, and prevent water damage. It can also create a seamless and more uniform appearance for your deck.