Creating an inviting and durable outdoor space often involves the construction of a staircase that can withstand the elements. Gluing paver steps is a critical task in ensuring the longevity and safety of your outdoor paver staircase. This DIY project can enhance the aesthetic appeal of your garden or patio while providing a stable footing for all who traverse it. In this blog post, we’ll navigate the process of installing paver steps, emphasizing the importance of using the right adhesives and techniques to achieve professional results.
Benefits of Using Paver Step Adhesive for Outdoor Paver Staircase

The decision to use paver step adhesive when constructing your outdoor staircase comes with a myriad of benefits. This specialized adhesive provides a strong bond that can resist the shifting and settling often caused by weather and heavy foot traffic. It also helps in preventing weed growth between pavers and deters ants and other pests. Moreover, an outdoor paver staircase that’s well-constructed with quality adhesive will maintain its form and function for years, reducing the need for frequent repairs.
Materials and Tools Needed for DIY Paver Stairs
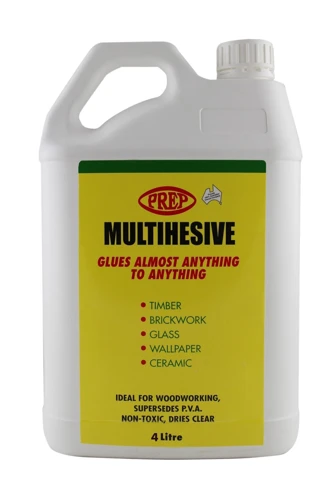
Choosing the Right Stone Step Adhesive
Selecting the ideal stone step adhesive is pivotal for the success of your gluing paver steps project. The market offers various types of adhesives designed to bond with stone, concrete, and brick. Look for adhesives that are specifically formulated for outdoor use, offering waterproof and freeze-thaw resistant properties to ensure the bond remains intact through varying weather conditions.
Essential Tools for Installing Paver Steps
When endeavoring to secure pavers steps properly, having the right tools at hand is as important as choosing the right adhesive. Your toolkit should include:
- A notched trowel for even adhesive application
- A rubber mallet for setting pavers in place
- A level to ensure each step is even and well-aligned
- Spacers to maintain consistent gaps between pavers
Preparation for Installing Landscape Paver Steps

Assessing the Area for Paver Step Construction
Before diving into the installation process, take the time to evaluate the area where your landscape paver steps will be located. Consider the slope, soil type, and drainage patterns. Ensure the chosen site doesn’t collect water and is firm enough to support the weight of the steps without shifting.
Cleaning and Preparing the Base
The base is the foundation of your staircase, and its preparation is crucial for a successful paver step construction. Start by removing any debris, vegetation, or loose soil. Compact the ground and add a layer of paver base material, compacting it as well to provide a stable and level surface for the pavers to rest upon.
Step-by-Step Guide to Installing Paver Steps
Laying the Base for Paver Steps
Laying a solid base sets the stage for durable DIY paver stairs. After compacting the base material, add a layer of sand and level it off. This layer acts as a bed for the pavers and allows for minor adjustments to be made during the installation process.
Applying Exterior Step Glue
With the base ready, it’s time to apply the exterior step glue. Start at the bottom of the staircase, spreading the adhesive on the base where the first paver will be placed. Use the notched trowel to create grooves in the adhesive, which will help to secure the paver more effectively.
Securing Pavers Steps
Place the first paver onto the adhesive, using the level to ensure it is even and the spacers to maintain consistent spacing. Gently tap it with the rubber mallet to set it in place. Continue this process, applying adhesive and setting pavers, ensuring each step is secure and level before proceeding to the next.
Finishing Touches for a Professional Look
Ensuring Proper Adhesion and Settling
After all pavers are in place, go back and check each step to ensure they are firmly adhered and there are no uneven areas. If necessary, apply additional adhesive to any pavers that may need extra support to achieve a professional finish.
Curing Time and Post-Installation Tips
Allow ample time for the adhesive to cure, following the manufacturer’s recommendations. During this period, avoid walking on the steps to ensure the adhesive sets properly. Once cured, fill the gaps between pavers with polymeric sand to deter weeds and lock the pavers in place.
Troubleshooting Common Issues with Gluing Paver Steps
Even with careful planning and execution, you may encounter issues such as pavers shifting or adhesive not setting correctly. If this happens, re-assess the base and adhesive application. Make sure that the base is compact and the adhesive is applied consistently. In some cases, it may be necessary to remove a paver, reapply adhesive, and set the paver again.
Maintenance Tips for Glued Paver Steps
To keep your glued paver steps looking their best, regular maintenance is essential. Sweep them clean of debris, rinse with water, and check periodically for loose or damaged pavers. If you find any, reapply adhesive and set the paver back in place. This preventative care will extend the life of your staircase and keep it safe for use.
Are you looking to enhance your home with some DIY projects? If you’re specifically interested in gluing paver steps, you may also find value in our comprehensive guides for similar tasks. We’ve got step-by-step articles on how to glue parquet flooring, which can give your home an elegant touch. If you’re into aquariums, our guide on how to glue frags could be just what you need for your coral fragging projects. And for those looking to secure their indoor steps, don’t miss our tips on how to glue stair treads. Each guide is designed to make your DIY ventures as smooth as possible.
Conclusion: Enjoy Your New DIY Paver Staircase
With patience and attention to detail, you can successfully complete the project of gluing paver steps. The process, from preparation to finishing touches, requires a bit of effort but results in a stable and attractive addition to your outdoor space. Enjoy the satisfaction of a job well done and the beauty and functionality that your new DIY paver staircase adds to your home.