For both seasoned woodworkers and hobbyists, mastering DIY wood gluing is a foundational skill that transforms simple pieces of lumber into stunning, functional projects. Whether you’re constructing furniture or crafting a custom decoration, the art of joining wood is essential. In this guide, we’ll explore the methods and materials that ensure your woodwork not only looks professional but also stands the test of time.
Choosing the Best Wood Glue
Understanding Wood Glue Types
Not all wood adhesives are created equal. The best wood glue for your project depends on the specific requirements, such as open time, strength, and water resistance. Polyvinyl acetate (PVA), epoxy, and polyurethane glues are among the most popular, each with its own set of properties tailored to different applications.
Woodworking Glue Tips for Selection
The key to selecting the right adhesive for wood boards lies in understanding the project’s demands. PVA is great for indoor projects, while polyurethane offers more water resistance for outdoor use. Epoxy excels in gap-filling and bonding dissimilar materials. Always consider the working time and clamping time to ensure a stress-free application.
Preparation for Board Bonding

Surface Preparation Techniques
Proper surface preparation is crucial. Begin by ensuring your wood surfaces are clean, dry, and free from dust or oil. Planing or sanding the edges to create a smooth surface will improve adhesion. A well-prepared surface is the cornerstone of robust board bonding techniques.
Adhesive for Wood Boards: Application Tips
When it comes to applying the adhesive, less is often more. Spread a thin, even layer of glue on one surface. Avoid over-application to prevent excessive squeeze-out, which can weaken the bond and create more cleanup work.
The Glue-Up Process
Applying the Glue
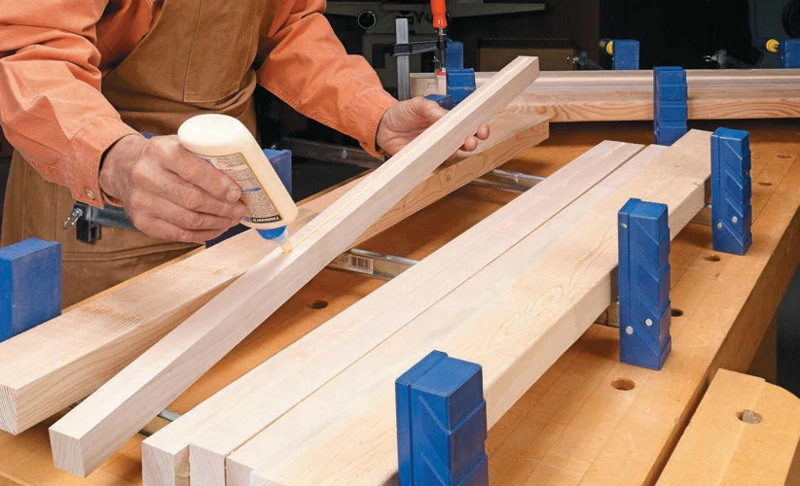
Start the glue-up process by carefully applying an even layer of glue across the board’s surface. Use a brush or roller to ensure complete coverage without pooling. The goal is to achieve a bond that is both reliable and aesthetically pleasing.
Aligning Boards for Gluing
Before joining, align the boards to ensure a seamless edge. Any misalignment now can cause issues later, so take the time to get it right. A dry fit is recommended before introducing the adhesive to anticipate any potential problems.
Edge-to-Edge Joinery Tips
For edge-to-edge joinery, maintaining a flat surface across the joint is essential. Be vigilant about arranging the boards so that the glue line is invisible, and use cauls if necessary to keep the panel surfaces aligned during the clamping process.
How to Clamp Wood for Strong Joints
Clamping Strategies
Knowing how to clamp wood effectively is critical for forming strong wood joints. Ensure your clamps are in good condition and distribute them evenly along the joint. For best results, alternate the clamp placement on both sides of the panel.
Pressure Distribution and Timing
Adequate pressure distribution is paramount. Use clamping cauls to prevent indentations and apply even pressure across the joint. The timing of clamp removal should adhere to the glue manufacturer’s recommendations — usually after the adhesive has fully set but before it’s cured.
Curing Time and Process
Factors Affecting Cure Time
Cure time can be influenced by temperature, humidity, and the type of glue used. Warmer conditions tend to speed up the process, while higher humidity can prolong it. Always check the glue’s specifications for optimal curing conditions.
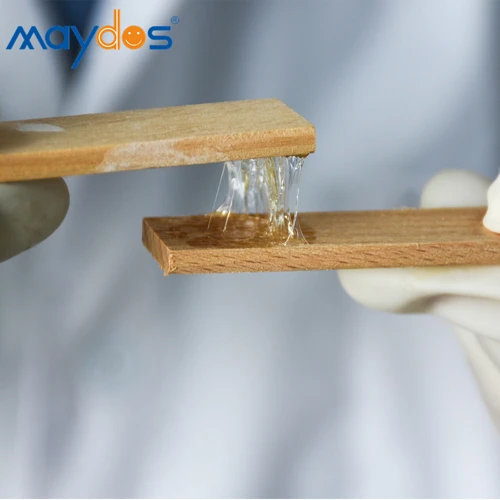
How to Test for Proper Adhesion
After the recommended curing time, test the joint by applying light pressure. It should feel solid and show no signs of separation. If the joint flexes or gaps are visible, it may require more time to cure or additional clamping.
Finishing the Wood Panel Gluing
Cleanup and Sanding
Once the glue has cured, remove any excess with a chisel or scraper. Sanding the joint smooth is the next step in achieving a professional finish. Start with a coarse grit and work your way up to a finer grit for a smooth, flawless surface.
Final Inspection and Touch-ups
Conduct a final inspection of the wood panel gluing to ensure no glue residue remains and the surface is ready for finishing. Touch up any areas that require further attention to ensure your project presents its best face to the world.
Advanced Board Bonding Techniques
Creating Complex Shapes and Panels
For more intricate projects, advanced board bonding techniques may be necessary. These can include curved laminations or joining veneers. Such applications often require specialized clamps and forms to maintain the desired shapes as the glue sets.
Strategies for Large-Scale Gluing Projects
Large-scale projects may demand a different approach. Consider using a vacuum press for veneers or larger clamping systems to accommodate the size. Planning and organization are key to managing the complexity of these projects successfully.
Maintenance of Glued Wood Projects
Protecting the Joints
Proper maintenance is crucial for ensuring the longevity of your work. Protecting the joints from excessive moisture and temperature fluctuations will help maintain their strength over time. Regular inspections can catch any potential issues early.
Repair Tips for Separated Joints
Should a joint begin to separate, quick action can save the project. Clean the area thoroughly, reapply glue, and reclamp. If the separation is due to wood movement, consider adding mechanical fasteners for additional strength.
Conclusion: Achieving Strong Wood Joints
To conclude, achieving strong wood joints is a combination of selecting the right materials, meticulous preparation, and precision during the glue-up process. With patience and practice, anyone can master the art of DIY wood gluing and create projects that are both beautiful and durable.
Troubleshooting Common Gluing Issues
- If joints are weak, check for proper glue application and clamp pressure.
- For gaps in the joint, ensure the wood is flat and square before gluing.
- If the glue isn’t curing, verify the temperature and humidity conditions.
Are you taking on a woodworking project and looking to understand the best methods for gluing boards together? Our comprehensive guide on how to glue up boards is a great place to start. For those working with specific materials like cedar, we also have a specialized article on how to glue cedar boards together to ensure your projects last. And if you’re feeling creative or working on a craft, our instructions on how to glue pencils together might just spark some unique ideas. Dive into these resources to ensure your gluing technique is solid!
Additional Resources and References
For further reading and to deepen your understanding of wood gluing techniques, consult woodworking forums, instructional videos, and manufacturer guidelines. These resources can provide valuable insights and help troubleshoot any specific issues you might encounter.