Have you ever tried to join two wooden boards together, only to find out that the joint didn’t hold up over time? A weak joint can cause furniture to wobble, shelves to sag, and even lead to the splitting of wooden objects. But fear not – with the right tools and techniques, it’s easy to glue up boards to create a strong and durable joint that will stand the test of time. In this article, we’ll take you through the step-by-step process of preparing, gluing, and clamping boards, so you can create a perfectly aligned and stable joint for all your woodworking projects. So, let’s dive in and get started!
Materials Needed
When it comes to woodworking, having the right materials is essential. To create a strong and durable joint, you’ll need a few key tools and supplies. There are a variety of options available, so it’s important to choose the right ones for your project. In order to achieve optimal results, you’ll need the following items: wood boards, clamps, wood glue, and a glue brush. Each item serves a specific purpose in the process and will help ensure that your joint is sturdy and long-lasting. If you are unsure about what type of glue to use, check out this article on different types of glue to help you make the right choice.
Wood boards
When it comes to gluing up boards, the type of wood used can make a significant difference in the overall strength and durability of the joint. Wood boards are the most common material used for gluing up boards. It is essential to choose boards that are straight and flat. The boards should also be of the same thickness and width to ensure the joint is strong. A warped or twisted board can break under pressure, causing the entire project to fail.
Additionally, the moisture content of the boards is crucial. The ideal percentage of moisture content is between 6% to 8%. Boards with too much moisture content will shrink after glue-up, causing cracks and warps in the joint. On the other hand, boards with too little moisture content will expand, causing the joint to break.
Here is a table summarizing the important considerations when choosing wood boards for a glue-up project:
| Consideration | Details |
| Straightness | Boards should be straight and flat, with no warps or twists. |
| Consistency | Boards should be the same thickness and width. |
| Moisture content | Ideal moisture content is between 6% to 8%. Too much or too little moisture can cause the joint to fail. |
Remember to choose the right wood boards for your project, and ensure that they are properly prepared before glue-up. This will result in a strong and durable joint that will last for years to come.
Clamps
Clamps are an essential tool for gluing boards together. They are used to apply pressure to the glued boards, ensuring a tightly joined bond. There are different types of clamps available, but the most commonly used for woodworking projects are C-clamps, bar clamps, and pipe clamps.
C-clamps are commonly used for small projects or when a small amount of pressure is required. They have a fixed jaw and a screw mechanism that tightens the clamp onto the workpiece.
Bar clamps are longer and have a sliding jaw that can be positioned anywhere along the bar. They are most commonly used in pairs, with one clamp on each end of the workpiece, and can apply a high amount of pressure.
Pipe clamps consist of a sliding jaw that moves along a long pipe, which can be extended to clamp large workpieces. These clamps are ideal for gluing up larger projects such as tabletops or panels.
It is important to have enough clamps to hold the boards securely together during the drying process. A general rule is to have one clamp per foot of board length, with one extra clamp for good measure. So, if you are gluing together a 6-foot board, you will need at least 7 clamps.
It’s always a good idea to have a few extra clamps on hand in case some break or malfunction during the gluing process. Also, make sure the clamps are clean and in good working condition before use.
Thinning PVA glue can help make the glue easier to spread and can also help with clean up. It’s important to use a thin layer of glue on the boards to prevent an excess amount of glue from squeezing out during the clamping process. Excess glue can be removed with a damp cloth before it dries.
Using the right type and number of clamps is crucial for a strong and durable joint.
Wood glue
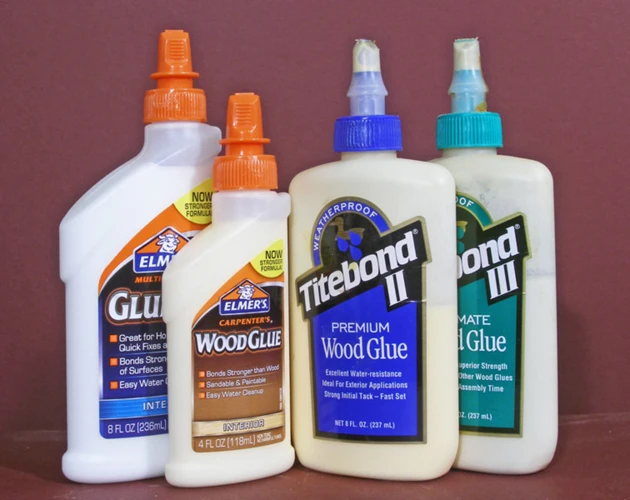
Wood glue is an essential material for gluing wood boards together. It’s a strong adhesive that creates a durable bond between two surfaces. There are different types of wood glue, but the most commonly used is PVA (Polyvinyl Acetate) glue. PVA glue is easy to use, dries clear and has a strong bond.
Before buying wood glue, you have to consider the type of wood you’re using and the conditions where it will be placed. For example, if you’re gluing wood that will be exposed to moisture, you’ll need a waterproof wood glue. Titebond III is a popular waterproof wood glue on the market.
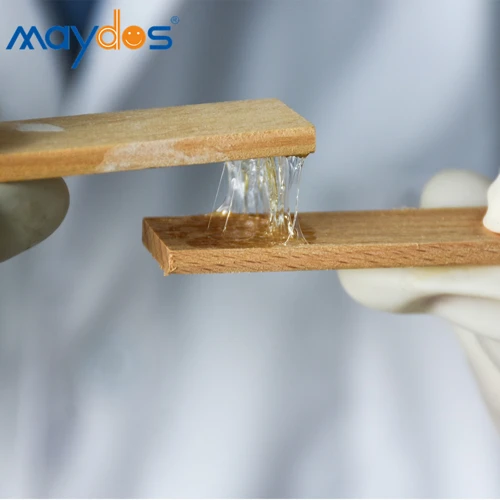
It’s important to note that the glue needs to be spread evenly on both surfaces before clamping the boards together. This allows the glue to penetrate the wood fibers for a strong bond. A glue brush or a roller can be used to apply the glue evenly. To avoid any mess, make sure to cover your work surface with some form of protective covering.
| Type of Wood Glue | Features | Where to Use | Link |
|---|---|---|---|
| PVA (Polyvinyl Acetate) Glue | Easy to use, dries clear, strong bond | Indoor use, non-load bearing applications | Not applicable |
| Waterproof Glue (Titebond III) | Can be used in high-moisture areas, strong bond | Outdoor use, load-bearing applications, high-moisture areas | /what-is-glue-dots/ |
| Hide Glue | High strength, reversible, natural adhesion | Antique restoration, instrument making | /what-does-curing-glue-mean/ |
It’s also important to use the right amount of glue. Too much glue can create a mess, and can weaken the bond. On the other hand, too little won’t create a strong bond. A good rule of thumb is to apply an even layer of glue to both surfaces, spreading it out with a brush, and then using your finger to gently spread it out evenly until the entire surface is covered.
In general, wood glue creates a stronger bond when the glue is allowed to dry for at least 24 hours. However, the recommended drying time may vary depending on the type of glue used and the humidity of the environment. After the glue is completely dry, it can be sanded to achieve a smooth, even surface.
If you’re interested in learning how to make plaster of paris with glue, or how to glue arrow inserts, you can follow the links provided.
Glue Brush
Using a glue brush is an essential part of the process when it comes to gluing up boards. It is used to apply a uniform layer of glue to both surfaces of the boards before clamping them together. This helps to ensure a strong and even bond. A good glue brush should have stiff bristles that will not shed, and a comfortable handle to make it easy to use.
When choosing a glue brush, it is important to consider the type of glue being used. Some glues, like epoxy, can be quite thick and require a stiffer brush to apply, while others, like PVA glue, are more liquid and can be spread easily with a softer brush.
It is also important to keep your glue brush clean to prevent any glue residue from interfering with future glue-ups. One simple method is to wipe the brush with a rag or paper towel immediately after use, and then wash it with warm soapy water.
If you do not have a glue brush, it is possible to substitute with a foam brush or even a roller brush for larger surfaces. However, keep in mind that the uneven application of glue can negatively affect the joint’s strength. It is better to use a proper glue brush to create a lasting bond.
Plaster of Paris with glue can be useful for making sculptures, crafts, and molds. It requires a different type of glue than wood glue, but a glue brush can be useful for this project as well.
Preparing the Boards

Preparing the boards for gluing is one of the most crucial steps to ensure a sturdy and durable joint. There are three important steps to prepare the boards – planing, jointing, and sanding. These steps are essential to achieve a smooth surface and perfect alignment of the boards. If any of these steps are overlooked, the joint may not be strong enough or may not align properly. Let’s take a closer look at each of these steps.
First, we will start with planing the boards to ensure they are of equal thickness and smoothness. This is important to get a tight joint and reduce any gaps between the boards. Once the boards are planed, you can move on to jointing.
Step 1: Planing the Boards
When gluing boards together, it’s important to ensure that they are flat and square. The first step in preparing the boards is planing them. Planing the boards will ensure that they are smooth and that they will fit together perfectly.
Step 1: Choose the Rough Side
When working with rough sawn lumber, you’ll need to choose which side you want to be the reference face. The reference face is the side that will be planed and joined with the other board. Use a pencil to mark the rough side of the board.
Step 2: Adjust the Planer
Before planing the board, you must first adjust the planer. Make sure the planer blades are sharp, and are set to the correct height. You can adjust the height of the blades using the knobs on the side of the planer.
Step 3: Begin Planing
Position the board on the planer with the rough side up. Turn on the planer and gently push the board through it. Be sure to apply even pressure to the board to avoid gouging. Use a push stick to keep your hands away from the blades.
Step 4: Check for Flatness
After you’ve planed one side of the board, flip it over and plane the other side. Once both sides are planed, check the board for flatness. Lay a straight edge along the length of the board to check for high spots. If there are any high spots, plane them down until the board is flat.
Step 5: Rip the Board
If necessary, you can rip the board to the desired width on a table saw or with a circular saw. Be sure to wear hearing and eye protection when using power tools.
By following these steps, you’ll have perfectly planed boards that are ready to be joined together for a strong and durable joint.
Step 2: Jointing the Boards
One crucial step in gluing up boards for a strong and durable joint is jointing the boards. Jointing helps create a smooth, flat surface that is essential for producing a strong joint.
To begin jointing, first mark the face of each board that will be the ‘reference face’. The reference face is the surface that will be facing upwards during the glue-up, so mark each board so that this face is easily recognizable.
Next, adjust the jointer’s infeed table. The infeed table is the portion that raises and lowers while feeding the board into the cutting knives. Adjust the infeed table height, so that it is lower at the point where the board enters the jointer and higher at the point where the board exits the jointer. This slight difference in height will remove a thin layer of wood from the board’s face, producing a flat surface.
After adjusting the infeed table, turn on the jointer and feed the board across the cutting knives, keeping the reference face firmly against the jointer’s fence. Repeat the process until the board has been entirely jointed.
It is essential to continue jointing until the reference face is flat and free of twists or bows. A lack of jointing may result in an uneven joint and weak bond. Remember always to joint with safety equipment, including safety glasses and ear protection.
Now that the boards have been jointed, the next step is to move on to sanding them. We will cover this in detail in the next section of the article.
If you are interested in gluing arrow inserts to your arrows, it is crucial to know how to glue arrow inserts correctly. You can checkout /how-to-glue-arrow-inserts/ for detailed information.
Step 3: Sanding the Boards
Sanding is an important step in preparing the boards for gluing, as it ensures a smooth and even surface for the glue joint. Before sanding, ensure that the boards are clean and free from any debris. Begin sanding with a coarse grit sandpaper such as 80 or 100 grit, then progress to a finer grit sandpaper like 150 or 220 grit. Sand with the grain of the wood, applying even pressure across the entire surface of the board.
Sand until the surface is completely smooth and free from any noticeable imperfections. It’s important to note that over-sanding the wood can result in a weakened joint, so be sure to sand only as much as necessary.
To ensure the best results, use sandpaper that is specifically designed for use with wood. Also, consider using a sanding block or an orbital sander if you are working with a larger surface area.
After sanding, be sure to wipe down the boards with a clean, dry cloth to remove any dust created during the sanding process. This will ensure that the glue has a clean surface to adhere to and prevent any excess glue from being trapped by the sanding dust.
If you’re using a colored or stained wood, be sure to test your stain on a small area before sanding to ensure that it is the desired color. Additionally, if you plan to apply a finish after gluing, be sure to sand the boards to the appropriate level of smoothness for the type of finish you plan to use.
Sanding the boards is an important step in ensuring a strong and durable glue joint. By taking the time to properly prepare your boards, you can ensure that your project will last for years to come.
Applying the Glue
Assembling two boards with glue requires precise technique to achieve a robust joint. The glue application is one of the most critical steps in creating a durable joint. It’s important to use the right type and amount of glue for the best results. Applying a consistent coat of glue ensures that the boards adhere evenly across their entire length. In this section, we will go over the two crucial steps in applying glue before joining the boards together.
Step 1: Setting Up the Clamps
Setting up the clamps is a crucial step in gluing up boards for a strong and durable joint. Before applying glue, it is important to prepare the clamps, so they are ready for use when needed. The materials needed for this step include clamps and scrap pieces of wood.
To start, gather the necessary number of clamps based on the length and width of the boards to be glued. It is recommended to use at least one clamp for every 12 inches of board length. Next, set aside a few scrap pieces of wood to use as clamping blocks. These blocks will be placed on either side of the joint to distribute the clamping pressure and prevent damage to the boards.
Once you have the clamps and clamping blocks ready, check that the clamps are functioning properly, and all moving parts are working well. You don’t want to discover a faulty clamp when you are in the middle of applying glue. Position the scrap pieces of wood at both ends of the joint to serve as clamping blocks.
It is crucial to determine the proper positioning of clamps to ensure that the boards stay in place firmly and perfectly aligned, during the gluing process. The placement of clamps should be such that it applies even pressure to the entire width of the board. To do this, position the clamps about one-third of the way in from either end, leaving the center unclamped.
It is recommended to practice this step once before you begin gluing. This will help you work out the positioning of the clamps and ensure that you have everything you need nearby.
Pro tip: If you are new to woodworking, you can use small spring clamps in place of traditional clamps. These are sufficient for small surfaces or if you don’t have many clamps available.
Internal HTML link: What glue to use for gold leaf
Step 2: Applying the Glue
When it comes to applying glue to your boards, there are a few things to keep in mind to ensure a strong and durable joint. Start by placing your boards on a flat surface with their mating edges facing up. Use a glue brush to apply an even layer of glue to both edges, making sure to cover the full surface area. Be careful not to over-apply the glue, as excess glue can cause issues with the joint.
To keep things organized, you may want to use a small table to hold your glue and brush. Also, make sure to work quickly to avoid the glue drying before you can clamp the boards together.
If you’re using a wood glue, like Titebond III, it’s important to note that you should apply the glue to both edges and then let it sit for around 5-10 minutes before joining the boards. This allows the glue to partially dry and create a stronger bond.
Remember: Always follow the manufacturer’s instructions on the glue bottle, as different types of glue may have different application guidelines.
Once you’ve applied the glue, it’s time to move onto the next step: clamping the boards together.
Clamping the Boards
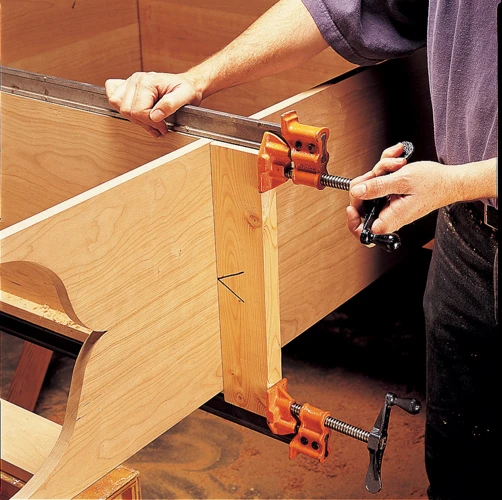
After preparing the boards and applying the glue, the next step is a crucial one in creating a strong and durable joint – clamping the boards. During this process, the boards are aligned and securely held together while the glue dries, ensuring a tight bond between the two pieces. In this step-by-step guide on how to glue up boards for a strong and durable joint, we’ll walk you through the clamping process to ensure your final product is sturdy and built to last.
Step 1: Alignment
Before clamping the boards together, it’s important to ensure that they are properly aligned. Misaligned boards can result in a weak and unstable joint. To align the boards, follow these steps:
| Step | Instructions |
|---|---|
| Step 1 | Place the boards next to each other with their mating edges facing up. Check for any gaps or unevenness along the edges. |
| Step 2 | If the edges are uneven, use a plane or sander to make them flat and level. |
| Step 3 | Once the edges are flat and level, place the boards together again and check for any gaps. If there are gaps, use a hammer and block to gently tap them together until they fit tightly together. |
| Step 4 | Use a square to check that the boards are at a perfect 90-degree angle to each other. Adjust as needed until they are square. |
Proper alignment is crucial for a strong and durable joint. Take the time to ensure that your boards are properly aligned before moving on to the clamping step. With properly aligned boards, your joint will be more secure and less likely to fail over time.
If you’re looking for other woodworking tips and tricks, check out our articles on how to seal MDF with PVA glue or how to attach glass to wood without glue.
Step 2: Clamping the Boards
Once you have aligned the boards, it’s time to clamp them together. Clamping the boards will keep them in place while the glue dries, ensuring a strong and durable joint. Here are the steps to clamp your boards:
| Step 1: | Start by applying even pressure across the entire glue joint. This will help ensure that the joint is strong and evenly clamped. You can use a clamp or two to achieve this. |
| Step 2: | Place your clamps on the boards, making sure that the pressure points are directly over the glue joint. You want the pressure to be applied directly to the joint to ensure a strong hold. Start by placing one clamp near each end of the boards. |
| Step 3: | Next, add additional clamps in the center of the boards, spaced evenly apart. The number of clamps you need will depend on the length of your boards, but a good rule of thumb is to place a clamp every 12 inches or so. |
| Step 4: | Begin tightening the clamps until you feel resistance. Make sure all the clamps are tightened evenly to ensure a uniform clamping pressure. You can use a clamp spreader to open the jaws of the clamp to make it easier to position them initially. |
| Step 5: | Dampen a cloth with warm water and use it to wipe away any excess glue that may have squeezed out of the joint. This will prevent the glue from drying on the surface of the wood and impacting the finish. |
Remember to leave the clamps in place for the recommended drying time, and don’t disturb the boards until they have completely dried. Once the glue has fully dried, you can remove the clamps and continue with any further sanding or finishing that is needed.
Step 3: Checking for Squareness
Once you’ve finished clamping the boards, it’s important to make sure the joint is square. A square joint means that the boards are perfectly perpendicular to each other, creating a strong and durable joint. To check for squareness, you’ll need a measuring tool such as a framing square or a carpenter’s square.
Step 1: Place the measuring tool against the joint at one end of the board.
Step 2: Slide the measuring tool down the joint to the other end of the board, making sure it stays flat against the joint.
Step 3: Check the measurements at both ends of the joint. If the measurements are the same, the joint is square. If the measurements are different, the joint is not square and adjustments need to be made.
To make adjustments, gently tap the boards with a mallet until they are square. Be careful not to tap too hard, as this can damage the joint or cause the boards to slide out of alignment. Once the joint is square, recheck the measurements to ensure that it is still square.
Using an html table can be helpful for keeping track of the measurements and keeping them organized. For example:
| End of Board | Measurement |
|---|---|
| 1 | 13 inches |
| 2 | 13.25 inches |
In the example above, the measurements are not the same, indicating that the joint is not square. Adjustments can then be made until the measurements match and the joint is square. Checking for squareness may seem like a small step, but it can make a big difference in the overall strength and durability of the joint.
Drying and Cleaning Up
After completing the process of gluing and clamping, the next step is crucial for achieving a strong and durable joint: drying and cleaning up. This step requires patience, as rushing it could compromise the strength of the joint. Proper cleaning ensures that no excess glue remains, and sanding creates a smooth, even surface. Let’s explore each step in detail to ensure that your glued joint is as strong as possible.
Step 1: Removing Excess Glue
Once the glue-up is complete, you’ll need to remove any excess glue. This is an important step because it can affect the look of your final product, as well as making it difficult to apply finish later on. To remove the excess glue, follow the steps below:
- Wait before removing excess glue: Allow the glue to dry for at least a few hours before removing it. This will make it easier to remove and prevent it from spreading around the joint.
- Use a scraper: Once the glue has dried, use a scraper to gently remove any excess glue from the surface of the boards. Be careful not to remove any wood or damage the joint.
- Sand the joint: After removing the excess glue, lightly sand the joint to remove any remaining glue residue. Use a fine-grit sandpaper and sand lightly to avoid damaging the joint.
By following these simple steps, you can ensure that your final product looks clean and professional. It’s also important to note that removing excess glue is not just for aesthetic reasons – it can also affect the strength of the joint. Any glue left on the surface of the wood can prevent the two boards from bonding properly, resulting in a weaker joint. So take your time with this step and ensure that all excess glue is removed before moving on to the next step.
Step 2: Drying Time
After the glued boards have been clamped together, the next step is to allow sufficient drying time for the wood glue to fully cure. Depending on the type of wood glue used, the drying time may vary. Check the manufacturer’s instructions for specific drying time recommendations.
Table:
| Glue Type | Drying Time |
|---|---|
| PVA Glue | 1-2 Hours |
| Polyurethane Glue | 6-8 Hours |
| Epoxy Glue | 24 Hours |
PVA Glue: This is the most common type of wood glue used for board gluing. It has a drying time of about 1-2 hours and creates a strong bond between the boards.
Polyurethane Glue: This type of glue has a longer drying time of about 6-8 hours, but it has the advantage of being waterproof once cured. It also has a higher bonding strength than PVA glue.
Epoxy Glue: Epoxy glue has the longest drying time of the three, taking approximately 24 hours to fully cure. This type of glue is often used for high-stress applications as it has an excellent bond strength.
During the drying process, it is important to keep the boards in a dry and well-ventilated area, away from any moisture or drafts. It is also important to avoid disturbing the boards while they are drying, as any movement can affect the bond between the boards.
After the recommended drying time, check to make sure that the glue has fully cured by testing the joint for strength. If the bond is still weak, allow more time for the glue to dry.
Once the glue has fully cured, remove the clamps and sand the glued joint to smooth out any imperfections. Clean up any remaining glue using a scraper or sandpaper before applying any finishes to the project.
Step 3: Sanding the Glued Joint
After the glue has dried completely, it’s time to sand the glued joint. Sanding the joint helps to create a smoother surface and blend the joint seamlessly. Follow these steps to sand the glued joint:
- Start by using a coarse sandpaper with grit 100 to 120, fold it into a narrow strip and run it across the glued joint firmly. This will help remove any excess glue and level the joint.
- Next, take a finer grit sandpaper, around 180 to 220, and sand the joint to achieve a smooth finish. Be careful not to sand too hard as it can create an uneven surface.
- Remember to sand the boards with the grain to prevent any scratches, and always sand evenly and gently for the best results.
- When you’re satisfied with the smoothness of the joint, wipe it down with a cloth to remove any dust or residue from sanding.
- Repeat the process for any other joints in your project, and continue sanding the entire project for a smooth, professional finish.
Note: It’s important to ensure that the joint is sanded evenly and smoothly to avoid any bumps or ridges that can affect the appearance and stability of your project. Take your time and sand carefully to achieve a strong, durable joint that is also aesthetically pleasing.
Step 4: Clean Up
Once the boards have dried and the clamps have been removed, it’s time to clean up the excess glue. A clean and well-executed glue up job will make for a smooth and attractive looking joint.
Here are some steps for cleaning up:
- First, use a glue scraper or putty knife to remove any excess glue on the surface of the board. Be sure to wear gloves to avoid getting glue on your skin.
- Next, use a damp cloth to wipe down the surface of the board. A damp cloth will help soften any remaining glue and make it easier to remove.
- Once the surface glue has been removed, gently sand the joint using a fine grit sandpaper, starting with a grit of 220 and then moving to a grit of 320. Sanding will help remove any leftover glue and smooth out the surface of the joint.
- Finally, take a close look at the joint. Check for any gaps or imperfections that need to be filled with additional wood filler or glue. If necessary, repeat the glue-up process.
A few tips for cleaning up:
- If the glue has dried for too long and is difficult to remove, a heat gun can be used to soften and loosen the glue.
- When sanding, be careful not to remove too much material and compromise the strength of the joint.
- Leaving excess glue on the surface of the board can lead to problems when staining or finishing, as the glue won’t absorb the stain or finish in the same way as the wood.
By following these steps and taking your time to clean up the excess glue, you’ll be left with a beautifully executed joint that’s sure to last for years to come.
Conclusion
In conclusion, gluing up boards is a simple process that can provide a strong and durable joint for various woodworking projects. By following the steps outlined in this guide, you can ensure that your boards are properly prepared, glued, clamped, and cleaned up for the best results.
Remember to use the right materials: You will need good-quality wood boards, clamps, wood glue, and a glue brush. Choosing low-quality or substandard materials could result in a weak joint that compromises your finished project.
Take proper care in preparing your boards: Planing, jointing, and sanding your boards will ensure that they are flat, straight, and smooth. This will help you achieve a strong and seamless joint.
Apply the glue with care: Applying the proper amount of glue, spreading it evenly, and making sure that the surfaces are fully covered will ensure a strong bond between the boards.
Clamp the boards carefully: Proper alignment and even clamping pressure will prevent any gaps from forming between the boards, ensuring a tight and strong joint.
Allow for proper drying time: Leaving the clamped boards undisturbed for at least 6-8 hours will give the glue enough time to fully cure, resulting in a strong joint. Remember to remove any excess glue before it dries.
Finish with cleanup and sanding: Removing any excess glue and sanding the joint flush with the rest of the boards will provide a seamless finish.
Overall, gluing up boards correctly requires some patience and attention to detail, but the end result will be a strong and durable joint that will last for years to come.
Frequently Asked Questions
1. Can any type of wood be used for gluing up boards?
While most types of wood can be used, it’s important to choose boards that have similar grain patterns and moisture content. This will ensure a strong and durable joint.
2. Is it necessary to plane the boards before gluing?
Yes, planing the boards will ensure that they are flat and have a smooth surface for the glue to bond to.
3. What type of wood glue should I use?
For gluing boards, it’s recommended to use a waterproof glue, such as Titebond III. This will help prevent the joint from coming apart if it gets wet.
4. Can I use too much glue?
Yes, using too much glue can actually weaken the joint. Apply a thin, even layer of glue to both surfaces being joined.
5. How many clamps do I need?
The number of clamps needed will depend on the length and width of the boards being glued. As a general rule, use one clamp per foot of board length.
6. Should I clean up excess glue before it dries?
Yes, it’s important to remove excess glue before it dries. Once it dries, it will be difficult to remove and can interfere with the finishing process.
7. Can I remove glue squeeze out with water?
No, using water to remove glue squeeze out can actually damage the wood and weaken the joint. Use a sharp chisel or scraper to remove the excess glue.
8. How long do I need to let the glue dry?
The drying time will depend on the type of glue being used. Follow the manufacturer’s instructions for drying time, but generally, it’s recommended to let the glue dry for at least 24 hours.
9. Should I sand the glued joint?
Yes, sanding the glued joint will help smooth out any uneven areas and ensure a flat surface for finishing.
10. Can I use screws instead of clamps?
While screws can be used, clamps are preferred as they provide even pressure along the entire length of the joint. Using screws can also leave unsightly holes in the wood.