Embarking on a creative journey often leads us to explore various crafting techniques, one of which is the creation of DIY Plaster of Paris. This versatile medium has been used for centuries in art, construction, and decoration. Making your own can not only be cost-effective but also allows for customization to suit specific project needs. Whether you’re a seasoned artist or a budding DIY enthusiast, mastering the art of plaster making can add a new dimension to your craft repertoire.
Understanding Plaster of Paris Alternatives
Traditional Plaster of Paris is known for its quick-setting properties and fine detail capture, making it a favorite in the crafting world. However, sometimes, finding an alternative becomes necessary due to accessibility, safety, or cost. Plaster of Paris alternatives can range from commercial products to homemade solutions, offering different benefits and challenges. Exploring these options can open up new possibilities for your projects while keeping them affordable and environmentally conscious.
Homemade Plaster with Glue-Based Recipe

Creating a homemade plaster using a glue-based plaster recipe is a fantastic way to achieve similar results to traditional Plaster of Paris while using readily available materials. The following steps will guide you through the process of making plaster with white glue, a common household item.
Gathering Your Materials
- White PVA glue
- Water
- Measuring cups or scales
- Mixing bowl and spoon
- Plaster powder (optional for added strength)
Step 1: Preparing the Mixing Area
Begin by preparing your space. Cover the work area with newspapers or a plastic sheet to protect surfaces. Have all your materials within arm’s reach and ensure the room is well-ventilated to avoid inhaling any fine particles.
Step 2: Mixing White Glue and Water
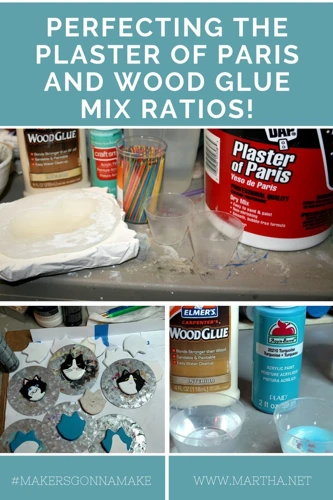
In a mixing bowl, start by combining equal parts of white PVA glue and water. Stir the mixture thoroughly until it’s smooth and homogeneous. This mixture forms the base of your glue-based plaster recipe, serving as a binder for the plaster powder.
Step 3: Combining Homemade Mixture with Plaster
If you’re adding plaster powder for extra solidity, slowly sift it into the liquid mixture. Gradually incorporate the powder while continuously stirring to prevent any lumps from forming. This step requires patience and a steady hand to achieve a uniform consistency.
Step 4: Achieving Desired Consistency
Adjust the consistency by adding more plaster powder or water as needed. The ideal texture should be similar to pancake batter; it should pour easily but still hold its shape. Once you’re satisfied with the consistency, your easy plaster mixture is ready for use.
Craft Projects with Plaster

Now that you’ve prepared your homemade plaster, it’s time to unleash your creativity. There are countless craft projects with plaster that you can undertake, from intricate sculptures to decorative casts.
Plaster Casting at Home
One of the most popular uses for your DIY mixture is plaster casting at home. This process involves pouring your plaster into molds of various shapes and sizes to create detailed replicas and artworks. The quick-drying nature of plaster makes it ideal for this application.
Non-Toxic Plaster Making for Safe Crafting
Using white glue as the base for your plaster recipe ensures that your crafting material is non-toxic. This is especially important if you’re working with children or seeking to maintain a safe crafting environment. Non-toxic plaster making allows everyone to get involved without worrying about harmful chemicals.
Finishing Your Plaster of Paris Crafts

After you’ve completed your plaster of Paris crafts, the next steps are crucial for ensuring longevity and aesthetic appeal.
Drying and Curing Your Easy Plaster Mixture
Allow your crafts to dry thoroughly. Depending on the thickness, this could take several hours to days. Curing is complete when the piece feels cool to the touch and no longer damp. Proper drying ensures that your craft projects with plaster are durable and ready for the final touches.
Painting and Decorating Plaster Crafts
Once dry, your plaster creations can be sanded for smoothness and painted or decorated as desired. Acrylic paints work well on plaster, and a sealant can be applied afterward to protect the surface. Decorating your crafts is where you can truly express your individuality and bring your vision to life.
Tips for Perfect Plaster of Paris Results

Achieving perfect results with your homemade plaster requires some insider knowledge. Here are a few tips: always measure your ingredients accurately, mix thoroughly to avoid lumps, and tap your molds gently to release any air bubbles. Additionally, working quickly is essential as the plaster sets fast. With these practices in mind, your DIY plaster will turn out just right.
Troubleshooting Common Plaster Making Issues
Occasionally, you might encounter issues such as cracking, uneven setting, or brittleness. These problems can often be solved by adjusting the water-to-glue ratio, mixing more carefully, or controlling the drying environment to avoid rapid moisture loss. Understanding these common challenges helps you refine your technique and produce high-quality crafts.
If you’re interested in creative DIY projects, you’ll be excited to explore the various ways you can use glue in your crafts. For those looking to work with plaster, our guide on how to glue Plaster of Paris can be incredibly helpful. If you’re into fabric projects, don’t miss our tips on how to make fabric paint with glue. And for the beach artists, our article on how to make sand sculptures with glue will show you how to keep your sandy creations intact. Discover the versatility of glue in your artistic endeavors and start crafting today!
Conclusion: Your Next Steps in Plaster Crafting
With the knowledge of how to make plaster of Paris with glue, you are now equipped to embark on a variety of plaster crafting projects. Whether you’re interested in creating intricate decorative pieces, engaging in non-toxic plaster making with your family, or exploring the many applications of plaster casting at home, the possibilities are endless. Embrace the journey and enjoy the satisfaction of crafting with your very own homemade plaster.