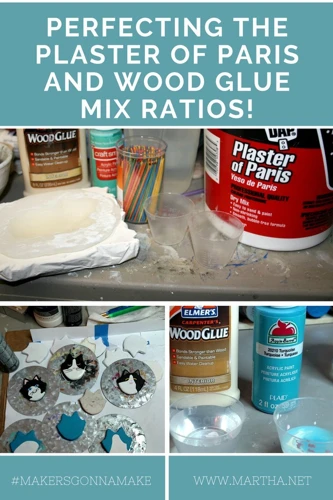
So, you’ve got a project involving Plaster of Paris and you need to know how to glue it together. It may seem like a daunting task, but fear not, with a little bit of knowledge and the right tools, you’ll be able to successfully glue your Plaster of Paris creation in no time. In this guide, we’ll walk you through the step-by-step process of how to glue Plaster of Paris, from gathering the necessary supplies to finishing touches. By the end, you’ll have a perfectly glued project to show off. Are you ready to get started? Let’s go!
Supplies
If you’re planning to work with plaster of Paris, gathering the right supplies is essential. Without the proper tools, applying plaster of Paris can be quite challenging. Before you begin, make sure you have everything you need to successfully complete the task. Some of the essential supplies you’ll need include a putty knife, fine-grit sandpaper, a dust mask, a mixing bowl, a stirring stick, plaster of Paris, and the appropriate glue for your project. If you’re unsure about which type of adhesive to use, refer to our guide on super glue that dries clear.
Gather the Tools You Need
When it comes to gluing plaster of Paris, you’ll need a few tools to make sure the job is done well. Here are the supplies to gather before getting started:
| Tools | Description |
| Measuring cups and spoons | For precise measuring of adhesive and water |
| Bowl or bucket | For mixing the adhesive and water |
| Stirring stick or spoon | To thoroughly mix the adhesive and water |
| Plaster of Paris | The material you will be gluing |
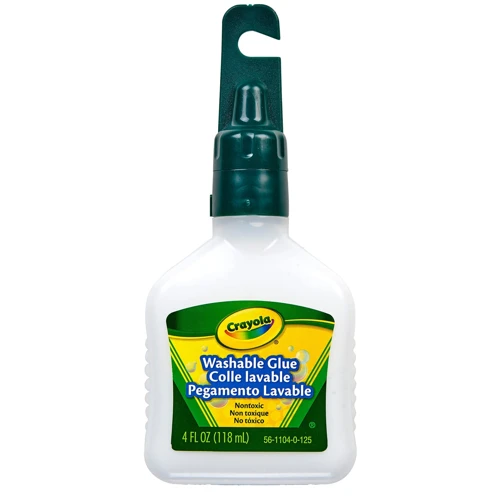
| Adhesive | Glue Dot, white glue or a glue gun with glue sticks can be used depending on the project and the surface you are working with. |
| Water | To mix with the adhesive and create the glue mixture |
| Sandpaper | To smooth out any rough edges after the glue has dried |
Make sure you have all of these supplies before starting your project. If you’re unsure about the type of adhesive to use, do some research or contact a hardware store for advice. Once you have everything you need, you can move on to preparing the surface for gluing.
Choose the Right Adhesive
Choosing the right adhesive is crucial when it comes to gluing Plaster of Paris. Not all adhesives can handle the weight and texture of this material. There are different types of adhesives that can work for Plaster of Paris, so it’s important to choose the right one for your specific project.
Below is a table of the different types of adhesives that can work for Plaster of Paris:
| Type of Adhesive | Best Use |
|---|---|
| PVA Glue | Best for indoor projects where water exposure is minimal |
| Epoxy | Best for heavy-duty projects that require a strong hold |
| Super Glue | Best for small projects that require a quick hold |
| Construction Adhesive | Best for outdoor projects or heavy-duty indoor projects |
Having the right adhesive for your project is important because it affects the strength and longevity of the bond. Using the wrong adhesive can lead to weak bonds or even the plaster coming apart.
If you’re not sure which adhesive to use for your project, consider doing a small test. Apply a small amount of each adhesive to a piece of Plaster of Paris and let it dry for several hours. Then, test the strength of the bond by pulling the two pieces apart. This will give you an idea of which adhesive will work best for your project.
It’s important to note that some adhesives may require more preparation before applying, such as roughing up the surface or adding a primer. Be sure to read the instructions for the adhesive you choose and follow them carefully for the best results.
Internal link: If you’re interested in making your own glue, check out our article on How to Make Goop Without Borax or Glue.
Preparing the Surface
Preparing the surface is a crucial step before applying the plaster of Paris. Whether you are working on a new project or repairing a broken piece, you need to ensure that the surface is smooth, clean, and dry. If you are working on a surface that is already painted or has a layer of old plaster, you need to remove it completely. Use a scraper or sandpaper to remove the old layer, and wipe the surface with a damp cloth to remove any dust or debris. If you are gluing the plaster to glass, metal, or any non-porous surface, it is essential to use a primer before applying the adhesive. You can read our article on what glue works on car glass to learn more about how to prepare non-porous surfaces for gluing.
Get the Surface Ready
Before gluing Plaster of Paris, it is essential to prepare the surface. This step is crucial as it will help the glue adhere better. One way to get the surface ready is to clean it thoroughly using soap and water. Make sure that there is no dust or debris on the surface as it can prevent the glue from adhering well. For extra cleanliness, wipe the surface with a clean cloth dipped in rubbing alcohol.
Another way to prepare the surface is to roughen it up. Using sandpaper or a wire brush, lightly sand or scratch the area where the Plaster is going to be applied. This process will create small crevices and make the surface more porous. As a result, the glue will have a better grip on the surface when applied.
If you are working with a surface that is not porous, such as glass or plastic, you can still prepare it for gluing. Use sandpaper or a wire brush to roughen up the surface lightly. Alternatively, you can use an adhesive promoter. An adhesive promoter is a liquid that prepares the surface and promotes the adhesion of the glue. Apply the adhesive promoter with a soft-bristled brush, let it dry, and then move on to applying the glue.
Note: If you are gluing Plaster of Paris to a wine bottle, check out our detailed guide on how to glue glass beads to a wine bottle.
Here’s a summary of how to get the surface ready:
| Step | Instructions |
|---|---|
| Step 1 | Remove any dust or debris from the surface using soap and water. |
| Step 2 | Wipe the surface with a clean cloth dipped in rubbing alcohol for extra cleanliness. |
| Step 3 | Roughen up the surface using sandpaper or a wire brush. This is especially important if the surface is not porous. |
| Step 4 | Apply an adhesive promoter if the surface is not porous. Let dry before applying glue. |
Pro Tip: If you’re looking for a fun craft that doesn’t require glue, try making a paper crown! Check out our guide on how to make a paper crown without glue.
Apply a Base Coat (Optional)
If you’re working with a surface that has imperfections or a lot of texture, applying a base coat before gluing on your plaster of Paris can help ensure a smooth and even finish. This step is optional, but it can make a big difference in the final result.
To apply a base coat, you’ll need a filler compound, such as spackling or joint compound, and a putty knife. Begin by filling in any gaps or holes in the surface with the filler, using the putty knife to smooth it out and create an even surface. Allow the filler to dry completely, following the manufacturer’s instructions.
Note: If you’re unsure about which filler compound to use, check with the manufacturer of your plaster of Paris or consult with a professional.
Once the base coat is dry, use sandpaper to smooth out any rough patches or bumps. You can also use a sanding block or sanding sponge to make the process easier. Be sure to wipe away any dust or debris before moving on to the next step.
If you didn’t use a base coat and your surface has significant texture or imperfections, your finished project may not look as smooth as you’d like. However, applying too much pressure while sanding can cause damage to the surface. That’s why it’s essential to start with a thin layer and build up as needed.
Internal link: To learn how to make glue for rolling paper, check out our guide on How to Make Rolling Paper Glue.
Now that your surface is prepped and ready to go, it’s time to move on to applying the glue.
Applying the Glue
Now that you have gathered the necessary supplies and chosen the right adhesive, it’s time to move on to applying the glue. This step is crucial to ensure that the plaster properly adheres to the surface and stays in place. Before you begin, make sure that the surface is clean and prepared as mentioned in the previous section. Also, keep in mind that the amount of glue you apply will depend on the size of the surface and the amount of plaster you are using. Now, let’s dive into the process of applying the glue with step-by-step instructions. If you’re wondering about the glue’s consistency or how to make it, check out our article on how to make samosa glue.
Apply Glue to the Surface
Before applying glue to the surface, it’s important to make sure that the surface is clean and free from any debris or dust. This will ensure that the glue can adhere properly and create a strong bond. Here are the steps to follow:
- Clean the surface: Use a damp cloth to wipe down the surface and remove any dust or dirt.
- Dry the surface: Once you’ve cleaned the surface, use a dry cloth or towel to dry it off completely. Any moisture can affect the bond strength of the glue.
- Select the right glue: As mentioned earlier, choosing the right adhesive is crucial for a strong bond. Some examples of adhesives that work well with plaster are PVA glue and construction adhesive. Avoid using superglue or hot glue, as they may not provide a strong enough bond.
- Apply the glue: Using a paintbrush or a roller, apply a thin layer of glue to the surface. Make sure that the layer is even and not too thick, as this can affect the drying time and bond strength of the glue.
- Wait: Give the glue some time to dry and become tacky. This usually takes a few minutes, but make sure to read the manufacturer’s instructions for the exact drying time.
By following these steps, you can ensure a strong bond between the plaster and the surface. In case you need to learn about different types of glues for different surfaces like laminates, you must check out our article on What Glue Will Stick to Laminate? or how to open Uhu glue pen you can read our article on Uhu Glue Pen: How to Open?.
Apply Glue to the Plaster
When it comes to applying glue to your plaster of Paris, there are a few key steps to follow. First, you’ll need to choose the right adhesive for your project. Once you’ve picked out the perfect glue, it’s time to get started.
Step 1: Mix the Glue to the Right Consistency
Before you can apply glue to your plaster, you’ll need to mix it to the right consistency. This will vary depending on the type of adhesive you’ve chosen. If you’re working with a powdered adhesive, you’ll need to mix it with water according to the instructions on the package.
Step 2: Apply the Glue Evenly
Once your glue is mixed, it’s time to apply it to the plaster. Use a brush or a trowel to apply the glue evenly over the surface of the plaster. Be sure to cover the entire area you plan to attach to another surface.
Step 3: Follow the Package Directions
Pay close attention to the instructions on the package of your adhesive. Some types of glue may require you to wait a certain amount of time before attaching the plaster to another surface. If you don’t follow the instructions carefully, you may end up with a weak or unreliable bond.
| Step | Action | Tool/Supply |
|---|---|---|
| 1 | Mix the Glue to the Right Consistency | Adhesive (Powdered or Liquid form) and Water |
| 2 | Apply the Glue Evenly | Brush or Trowel |
| 3 | Follow the Package Directions | Adhesive Packaging |
By following these steps and using the right tools and supplies, you can apply glue to your plaster of Paris quickly and easily, ensuring a strong and reliable bond.
Joining Two Pieces of Plaster
You’ve successfully applied plaster of Paris on your surface, but now it’s time to join two pieces of plaster together. It may seem like a daunting task, but with the right tools and technique, it can be easy to achieve a seamless bond. In this section, we’ll guide you through the step-by-step process of joining two pieces of plaster using glue. So, grab your supplies and let’s get started!
Apply Glue to Both Pieces
When joining two pieces of plaster together, it’s important to apply glue to both pieces to ensure a strong bond. Here’s a step-by-step guide on how to do it properly:
1. Place the two pieces of plaster next to each other, making sure they fit properly.
2. Use a brush or your fingers to apply the glue to the surface of both pieces. Be sure to apply a liberal amount of glue so that it covers the entire surface of both pieces.
3. Spread the glue evenly using a putty knife or your fingers. Make sure to smooth out any bumps or lumps to ensure a tight fit between the pieces.
4. Press the two pieces of plaster together, using your fingers to firmly hold them in place for a few seconds.
5. Secure the pieces of plaster using clamps or tape if necessary. This will help to hold the pieces in place while the glue dries.
6. Allow the glue to dry completely before removing the clamps or tape. This can take anywhere from a few hours to overnight, depending on the type of adhesive used.
7. Once the glue is completely dry, use a sandpaper to lightly sand any rough spots or excess glue. This will help to create a smooth, even surface.
Note: It’s important to choose the right adhesive for your project. Some adhesives are specifically designed for use with plaster, while others may not adhere properly. Be sure to read the label carefully and follow the manufacturer’s instructions for best results.
Here’s a table summarizing the key steps for applying glue to both pieces of plaster:
| Step | Action |
|---|---|
| 1 | Place the two pieces of plaster next to each other |
| 2 | Apply glue to the surface of both pieces |
| 3 | Spread the glue evenly |
| 4 | Press the two pieces together |
| 5 | Secure the pieces of plaster if necessary |
| 6 | Allow the glue to dry completely |
| 7 | Sand any rough spots or excess glue |
By following these steps and using the right adhesive, you can ensure a strong and lasting bond between two pieces of plaster.
Hold the Pieces Together
Now that you have applied glue to both pieces of plaster, it’s time to join them together. Holding the pieces together properly is critical for ensuring a strong and reliable bond.
Here are some tips for holding the pieces together:
- Use clamps: Clamps are handy tools that can hold the pieces together while the glue dries. Place them in strategic spots to ensure a strong bond.
- Apply pressure: Applying pressure is another way to hold the pieces together. Use your hands and fingers to hold the pieces in place while the glue dries.
- Use gravity: Depending on the shape of the pieces, you may be able to use gravity to your advantage. For example, if you’re gluing two flat pieces of plaster, you can place one on top of the other and let gravity hold them together while the glue dries.
Whichever method you choose, make sure that the pieces are held firmly together. If the pieces are not held together properly, the bond may not be strong enough to hold up over time.
Once you have held the pieces together long enough for the glue to dry, carefully remove any clamps or pressure. You should now have a strong and reliable bond between the two pieces of plaster.
Finishing Touches
After completing the gluing process, it’s important to take care of the finishing touches to ensure a polished and professional look. This final step involves cleaning up any excess glue and allowing the plaster to dry and settle into place. If needed, sanding can also be done to smooth out any imperfections in the surface. In this section, we’ll go over the specific steps needed to complete these finishing touches and make your project look its best. So, let’s dive in and achieve that flawless finish!
Clean Up Any Excess Glue
After the plaster has been glued to the surface or to another plaster piece, it’s essential to clean up any excess glue before it dries completely. This step ensures that the final product looks clean and professional.
Here’s how to clean up any excess glue:
- Use a damp sponge or cloth to wipe away any visible excess glue. Be gentle to avoid smudging the glue onto the surface.
- For any hard-to-reach areas, use a toothbrush or a Q-tip dipped in water to clean up the glue.
- Make sure to clean the tools and brushes you used before the glue dries on them.
Keep in mind that if glue is left to dry on the surface, it can be difficult to remove and may require sanding. Taking a few extra minutes to clean up the excess glue can save time and effort in the long run.
Pro Tip: It’s important to check the glue’s drying time before starting the project. Depending on the brand and type of glue you’re using, the drying time may vary. Waiting until the glue has completely dried before cleaning it up will make it more difficult to remove.
Let Dry and Sand (If Necessary)
Once you have glued the plaster together, it is important to let it dry completely. Depending on the adhesive you used and the size of the project, the drying time can range from a few minutes to several hours. It is crucial not to rush this step, as the plaster will not form a strong bond if it hasn’t fully dried.
Once the plaster is dry, you may notice some excess glue around the edges. You can clean this up using a damp cloth or sponge. If the glue has hardened, you may need to use a scraper or sandpaper to remove it.
If necessary, you can also sand the surface of the plaster to smooth out any rough edges or imperfections. To do this, use fine-grit sandpaper and gently rub the surface of the plaster in a circular motion. Be careful not to sand too much or too aggressively, as this can damage the surface.
Pro tip: Wear a dust mask when sanding plaster to avoid inhaling any dust particles. Additionally, avoid blowing on the plaster as this can also release dust into the air. Instead, use a vacuum or damp cloth to clean up any debris.
Once you have finished sanding, wipe the surface clean with a damp cloth or sponge, and allow it to dry completely before painting or decorating. And with that, your plaster project is complete!
Conclusion
In conclusion, mastering the art of gluing plaster of Paris is an essential skill for anyone looking to work with this versatile material. Whether you are an artist, a DIY enthusiast, or a professional builder, knowing how to glue plaster of Paris is crucial to creating high-quality, long-lasting projects.
Remember to gather the right tools and choose the correct adhesive for your intended use. Be sure to prepare the surface properly by cleaning and priming it if necessary. When applying the glue, take care to apply it evenly and thoroughly, both to the surface and the plaster itself.
If you’re joining two pieces of plaster, make sure to apply glue to both pieces and hold them together until the glue dries. And once you’ve finished your project, be sure to clean up any excess glue and sand the surface smooth, if necessary.
In short, gluing plaster of Paris is a straightforward process, but it requires attention to detail and careful execution. With the right tools, technique, and a bit of practice, you’ll soon be able to create stunning projects with confidence.
Frequently Asked Questions
What is Plaster of Paris?
Plaster of Paris is a type of plaster made from gypsum. It is a white powder that, when mixed with water, hardens to form a solid material that is commonly used for molding and casting.
What types of surfaces can Plaster of Paris be glued to?
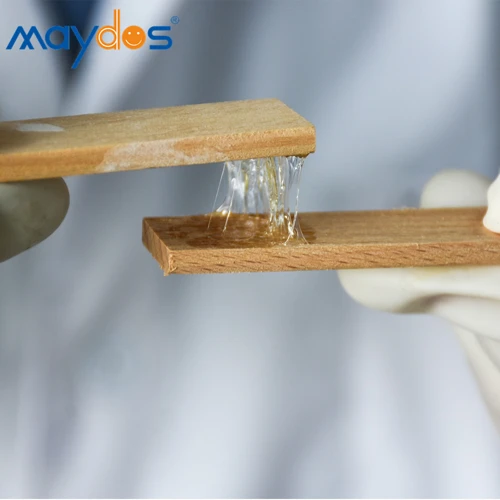
Plaster of Paris can be glued to a variety of surfaces, including wood, metal, and plasterboard. It is important to make sure that the surface is clean and free of debris before applying the adhesive.
Can Plaster of Paris be used for outdoor projects?
Plaster of Paris is not recommended for use in outdoor projects as it is not water-resistant and can deteriorate over time due to exposure to the elements.
What type of adhesive should I use for Plaster of Paris?
For most projects, a strong adhesive such as epoxy or construction adhesive is recommended. However, for smaller projects, a good quality white glue should suffice.
How long does the glue take to dry?
The drying time will depend on the type of adhesive used, the size of the project, and the environmental conditions. Generally, white glue will take several hours to dry, while epoxy and construction adhesive can take several days.
Can Plaster of Paris be sanded after it has dried?
Yes, once the adhesive and plaster have dried completely, the surface can be sanded to a smooth finish if necessary.
Can Plaster of Paris be painted after it has been glued?
Yes, once the adhesive and plaster have dried completely, it can be painted over with any type of paint. It is recommended to use a primer before painting to ensure that the paint adheres properly.
Can Plaster of Paris be used for repairs?
Yes, Plaster of Paris can be used to repair cracks or holes in plaster walls or ceilings. Make sure to use a strong adhesive to ensure a long-lasting repair.
Can I add color to the Plaster of Paris before gluing it?
Yes, you can add pigment or paint to the Plaster of Paris before gluing it. This can be a great way to add color and texture to your projects.
Is it safe to use Plaster of Paris?
When used properly, Plaster of Paris is safe to use. However, it is important to avoid inhaling the powder and to wear gloves when handling it, as it can be irritating to the skin.