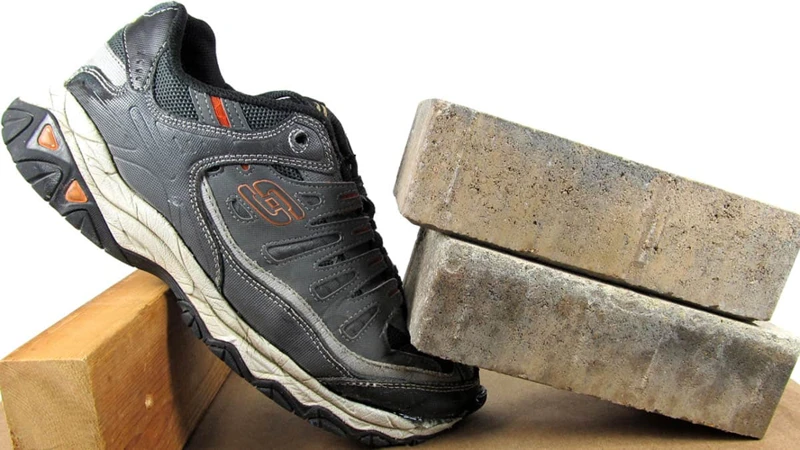
Have you ever experienced the frustration of stepping out of the house with your favorite pair of shoes only to realize that they’re falling apart? One of the major reasons why shoes tend to deteriorate quickly is due to the weakening of the glue that holds them together. While most people opt to purchase a new pair of shoes, melting shoe glue can help you extend the life of your favorite footwear. But how do you melt shoe glue, you may ask? In this comprehensive guide, we’ll take you through a step-by-step process on the best practices for melting shoe glue and restoring your shoes to their former glory.
Why Do You Need to Melt Shoe Glue?
If you’re an avid shoe lover, you may encounter situations where your favorite pair of shoes starts to come apart at the seams. Instead of spending money on a brand new pair, you can save yourself time and money by fixing them yourself. This is where melting shoe glue comes in handy. Knowing how to melt shoe glue properly can help you reattach detached soles, torn leather, or any other damage to your shoes, making them look new again. Whether you need to fix rubber soles to a pair of leather shoes or need to repair a gaping hole, melting shoe glue can do the job. So let’s dive deeper into the reasons to melt shoe glue.
Types of Shoe Glue
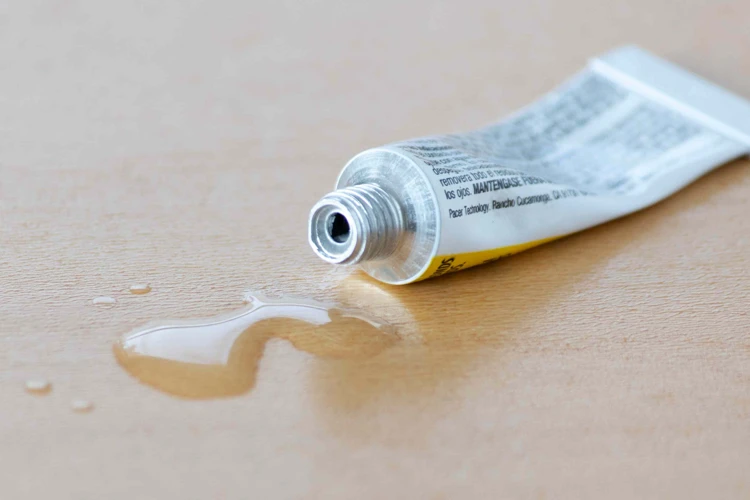
When it comes to types of shoe glue, there are a few different options to consider. Epoxy glue is a popular choice as it creates a strong bond between materials and is resistant to water and heat. Another common option is cyanoacrylate glue, also known as super glue, which bonds quickly and strongly. Polyurethane glue is another option that creates a flexible bond and can be used on a variety of materials. Rubber cement is popular for repairing rubber soles on shoes, while contact cement is often used for attaching soles to shoes. In addition, E6000 glue is a strong adhesive that is resistant to water, chemicals, and heat, often used for leather and shoe repair. The type of shoe glue you choose depends on the materials you’re working with and the type of repair you need to make. If you want to know more about how to use E6000 glue on shoes or what glue to use on leather belt, click on the relevant links to learn more.
Reasons to Melt Shoe Glue
Reasons to Melt Shoe Glue
Melted shoe glue can be removed from your shoes for a variety of reasons. Below are the most common reasons to melt shoe glue:
| Reason | Description |
| Replacing soles or heels | If you want to replace the soles or heels of your shoes, you need to remove the existing glue so that the new glue can adhere properly. |
| Fixing shoe imperfections | If your shoes have imperfections, such as bumps or wrinkles, melting the glue can soften the adhesive and allow you to reposition the material to smooth out the imperfections. |
| Repairing damage | If your shoes have holes or scratches, melting the glue can soften the adhesive, making it easier to add new material to repair the damage. |
| Removing unwanted embellishments | If your shoes have unwanted embellishments, such as rhinestones or patches, melting the glue can loosen the adhesive, making it easier to remove the embellishments. |
| Changing shoe design | If you want to change the design of your shoes, melting the glue can help you remove existing embellishments or reposition materials to create a new look. |
If you are in need of replacing soles or heels, you may find this article very helpful. If you are looking for advice on what glue to use on leather, check out this post.
What You’ll Need to Melt Shoe Glue
As you prepare to melt the shoe glue, it is important to have all the necessary tools and ingredients at hand. This will make the process smoother and less stressful. Below are some essential tools and additional ingredients you will need to get the job done right. Depending on the method you choose, you may not need all of them. However, having them on hand will ensure you are prepared for any eventuality.
Essential Tools
For melting shoe glue, you will need some essential tools. These tools will make the process easier, safer, and more efficient. Here are some essential tools that you will need:
| Tools | Description |
|---|---|
| Heat gun | A heat gun is an essential tool for melting shoe glue. It produces a high temperature that is required to melt the adhesive. It is recommended to use a heat gun with adjustable temperature settings, so you can adjust the temperature according to your needs. |
| Scraper | A scraper is required to remove the melted glue from your shoes. You can use a metal scraper or a plastic scraper depending on the type of glue and the material of your shoes. A plastic scraper is recommended for delicate materials like leather and suede. |
| Gloves | Wearing gloves will protect your skin from the heat and the chemicals that may be present in the adhesive. It is recommended to use heat-resistant gloves that can withstand high temperatures. |
| Protective eyewear | Protective eyewear is essential to protect your eyes from the heat and the chemicals that may be present in the adhesive. It is recommended to use safety glasses that are designed to protect your eyes from high temperatures. |
| Rag or towel | A rag or a towel is required to wipe off the excess glue from your shoes. You can use a microfiber towel or any other soft cloth that won’t scratch or damage your shoes. |
Using the right tools is crucial to melt shoe glue without damaging your shoes or injuring yourself. Before starting the process, make sure that you have all the necessary tools within reach. In case you need any extra tools, be sure to get them before starting the process. Remember, safety first!
Additional Ingredients
When it comes to melting shoe glue, there are additional ingredients that you can use to make the process more effective. Here are some of the most commonly used additional ingredients:
- Heat Gun: This is a great tool for melting shoe glue, as it produces a steady and controlled stream of heat. It’s important to use this tool with caution and at a safe distance from the shoes to avoid damaging them.
- Hair Dryer: If you don’t have a heat gun, a hair dryer can be used as an alternative heat source. Make sure to keep the hair dryer on the highest setting and direct the hot air towards the glue.
- Acetone: Acetone is a popular ingredient for melting glue. It works by breaking down the adhesive bond. However, it’s important to be careful when using acetone, as it can also damage some materials. You can learn more about using acetone here: how to use E6000 glue on shoes.
- Olive Oil: This is a natural alternative to acetone. Simply apply a small amount of olive oil to the glue and let it sit for a few minutes before using a scraper to remove the adhesive. You can learn more about using olive oil here: how to glue rubber to leather.
- Rubbing Alcohol: Rubbing alcohol can also be used to melt shoe glue. Simply apply a small amount to the glue and let it sit for a few minutes before using a scraper to remove the adhesive. You can learn more about using rubbing alcohol here: how to glue shoes.
- Baking Soda and Lemon Juice: This is another natural alternative to acetone. Mix equal parts of baking soda and lemon juice to create a paste. Apply the paste to the glue and let it sit for a few minutes before using a scraper to remove the adhesive. You can learn more about using baking soda and lemon juice here: how to glue Converse shoes.
Remember to use caution when using any of these additional ingredients, as they can cause damage to your shoes if used improperly. It’s also important to note that the effectiveness of these ingredients will vary depending on the type of glue and the material of your shoes. Before attempting to melt shoe glue using any of these additional ingredients, test a small, inconspicuous area of your shoes first to ensure that they won’t be damaged.
How to Melt Shoe Glue: Step-by-Step Instructions
Now that you have a good understanding of why shoe glue may need to be melted and what tools are needed to complete the task, it’s time to dive into the step-by-step instructions. Whether you’re trying to reattach a sole or remove a pesky glue stain, these instructions will guide you through the process. Keep in mind that different methods work better for different types of glue and materials, so choose the method that best suits your needs. Let’s get started! If you’re unsure about what type of glue to use on your leather belt, you may find this article helpful.
Step 1: Choose the Right Method
Choosing the right method to melt shoe glue is critical for the success of the process. Different types of glue and shoes require different methods. Here are some methods you can choose from:
| Method | Description |
|---|---|
| Heat gun | This is the most effective method for melting shoe glue. A heat gun produces hot air, which softens the glue, making it easier to remove. However, it requires a steady hand and patience. |
| Hair dryer | If you don’t have a heat gun, a hair dryer can also be used. It works the same way as a heat gun but takes longer. |
| Boiling water | This method is ideal for removing the sole of a shoe. It softens the glue, making it easier to remove. However, it is not recommended for delicate materials or shoes with water-soluble glue. |
| Freezer | If you don’t have any heat sources, you can place the shoe in a plastic bag and then into the freezer overnight. The glue will harden, making it easier to scrape off. |
Keep in mind that each method has its own advantages and disadvantages, so choose the one that is best suited for your specific shoe and glue type. It’s also important to note that some glues take longer to melt, especially if they are water-resistant or industrial strength. For more information on drying times for different types of shoe glue, check out this article.
If you’re unsure about what type of glue you’re dealing with, consider seeking advice from a cobbler. They can give you guidance and even recommend what kind of glue to use if you need to reattach parts of your shoe. Check out this article for more information on what types of glue cobblers use for different types of shoes.
Additionally, if you’re looking to glue trim back onto your car, check out this article for helpful tips. Regardless of the method you choose, take your time and be thorough to ensure the best results for your shoes.
Step 2: Prepare Your Shoes
Before you begin the process of melting shoe glue, it is important to properly prepare your shoes to ensure the best possible results.
Step 1: The first step in preparing your shoes is to clean them thoroughly. Use a soft-bristled brush to remove any dirt, debris, or loose glue from the surface of your shoes.
Step 2: Next, apply a small amount of rubbing alcohol to a cotton ball or pad and wipe down the area where the glue is located. This will help to remove any remaining dirt or oils that may be preventing the glue from melting properly.
Step 3: If your shoes have any shiny or smooth spots on them, use sandpaper to roughen up the surface. This will help the glue to better adhere to the material and will make it easier to melt.
Step 4: Using masking tape or painter’s tape, cover any areas that you want to protect from heat or potential damage during the melting process. This can include the soles of your shoes, any rubber or plastic parts, or any areas that are particularly sensitive or fragile.
Step 5: Finally, put on a pair of gloves to protect your hands from the heat and any chemicals that might be used during the melting process. This will help to prevent burns or other injuries, and will also help to keep your shoes clean and free from fingerprints or other marks.
By properly preparing your shoes before attempting to melt the glue, you can ensure that the process goes as smoothly as possible and that your shoes look their best when you’re finished.
Step 3: Apply the Heat Source
Now that you’ve prepared your shoes, it’s time to apply the heat source to melt the glue. There are several tools you can use, including a heat gun, blow dryer, or even a clothes iron. Each of these tools has their advantages and disadvantages, so choose the one that will work best for you.
| Heat Gun |
| A heat gun is a powerful tool that can deliver a precise stream of hot air to the glue. Hold the heat gun about 2-3 inches away from the glue and move it back and forth until the glue softens. Be careful not to overheat the glue or your shoes. |
| Blow Dryer |
| If you don’t have a heat gun, a blow dryer will work just as well. Set the dryer to the highest temperature and hold it close to the glue, moving it around in circular motions. Keep the dryer moving to avoid overheating the glue or your shoes. |
| Clothes Iron |
| An iron is another good option if you need a large heat source. Heat the iron to a high setting and use it to apply heat to the glue through a thin cloth or paper towel. Don’t place the iron directly on your shoes, or you risk damaging their material. |
No matter which tool you choose, it’s important to keep the heat source moving. Don’t focus on one area for too long, or you could end up overheating and damaging your shoes. As the glue melts, use a scraper or putty knife to gently pry it away from the shoe. If the glue is stubborn and doesn’t seem to be melting, you may need to reapply heat or try a different melting method.
Step 4: Scrape Off the Adhesive
Now that the adhesive has been melted, it is time to remove it. This step is crucial to achieving a clean and professional-looking finish. Here are the steps to follow:
- Wait for the glue to cool down: Before scraping off the melted adhesive, give it time to cool down and harden. This will make it easier to remove.
- Get your scraping tools ready: You will need a scraper, putty knife, or even an old credit card to remove the adhesive. If you’re working on a delicate surface, use a plastic scraper to avoid damaging it.
- Start scraping: Begin at the edges of the glue and scrape away from the center, using firm and consistent pressure. Be careful not to be too rough, as this can damage the surface of your shoes. Repeat the process until the entire surface is free of glue. If there are any stubborn spots, use the scraper to gently push the adhesive off.
- Clean the surface: Once the adhesive has been removed, use a clean cloth or rag to wipe away any debris or residue that may have been left behind. You can also use a mild soap and warm water solution to clean the surface.
Remember to be patient and take your time while scraping. Rushing through this step can cause irreparable damage to your shoes. Additionally, if you’re having trouble removing the adhesive, you can try reheating it with your heat source before scraping again.
Following these steps will ensure that your shoes are free of any excess adhesive and are ready to be used again.
Step 5: Repeat If Necessary
Once you have scraped off the adhesive, it’s time to assess whether or not the glue has been completely removed. If there is still glue residue, you may need to repeat the process. Here are some factors to consider before repeating the process:
| Factors to Consider | Action to Take |
|---|---|
| Type of Glue | If you’re dealing with a stronger glue, you may need to repeat the process several times to fully remove it. This is especially true for industrial strength adhesives. |
| Amount of Glue | If there is still a significant amount of glue residue left on your shoes, you may need to repeat the process. |
| Level of Perfectionism | If you’re a perfectionist and want your shoes to look as good as new, you may need to repeat the process until you’re satisfied with the results. |
If you do need to repeat the process, be sure to follow the same steps as before. Apply the heat source and scrape off the adhesive. However, be careful not to overheat the glue or use too much force when scraping to avoid damaging your shoes. Remember to take breaks and let your shoes cool down if necessary.
Step 6: Clean Your Shoes
Once you have successfully melted the shoe glue off of your shoes, it is important to clean them thoroughly before wearing them again. Neglecting to do so can leave behind residue or harmful chemicals that can damage your shoes or harm your feet. To clean your shoes after melting the glue off, follow these steps:
| Step | Action |
|---|---|
| 1 | Remove any remaining glue residue using a soft-bristled brush or old toothbrush. |
| 2 | Mix together a solution of mild soap and warm water. |
| 3 | Use a clean cloth or sponge to apply the soap solution over the entire surface of the shoes. |
| 4 | Take another clean cloth or sponge and rinse the shoes thoroughly with clean water. |
| 5 | Gently pat the shoes with a clean towel to remove any excess water. |
| 6 | Allow the shoes to air dry completely before wearing them again. Avoid using a hairdryer or any other heat source to dry them as this can cause damage. |
Remember to take care when cleaning your shoes as some materials can be delicate and require special treatment. It is always best to refer to the manufacturer’s instructions on the label before attempting to clean your shoes. By following these cleaning steps, you can ensure that your shoes not only look great but are safe and comfortable to wear again.
Step 7: Let Your Shoes Dry
After you have finished melting the shoe glue, it is crucial to let your shoes dry completely before wearing them again. This step ensures that the adhesive sticks to the sole and doesn’t come off easily.
Drying Time
The length of time needed for your shoes to dry depends on the melting method you used and the amount of adhesive that was present. On average, it can take anywhere from 2 to 6 hours for your shoes to dry completely. However, if you don’t want to wait that long, you can use a fan to help speed up the drying process.
Preventing Damage
Make sure that you place your shoes in a cool, dry place to prevent any damage from occurring during the drying process. Avoid exposing them to direct sunlight or high temperatures, as this can cause the glue to melt again and your shoes to warp.
Final Check
Before wearing your shoes, double-check to ensure there is no excess glue left on the surface. Use a clean cloth to remove any residue that may have remained after the glue melted.
To recap, letting your shoes dry properly is a crucial step in the shoe glue melting process. It ensures the adhesive sticks well and prevents any damage to your shoes. The amount of time needed to dry depends on various factors, and you can facilitate the process by using a fan. Lastly, always double-check your shoes before wearing them again to make sure they’re in good shape.
| Drying Time | Preventing Damage | Final Check |
|---|---|---|
| 2-6 hours | Place in a cool, dry space | Remove any excess glue residue |
Alternative Methods to Melt Shoe Glue
If you’re not comfortable using heat to melt your shoe glue, don’t worry! There are alternative methods you can use that don’t involve high temperatures. These methods may require a bit more effort, but they can still be effective. Let’s explore some of these alternative methods:
Using Acetone
Using acetone is one of the most popular and effective methods for melting shoe glue. This chemical dissolves adhesives quickly, making it an ideal option for removing stubborn residue from your shoes.
To use acetone as a melting agent, you will need the following:
| Materials: | Tools: | |
|---|---|---|
| Acetone | Cotton Balls | Plastic Wrap |
| Nitrile Gloves | Bowl | Brush or Scraper |
Step 1: Put on nitrile gloves to protect your skin from coming into contact with the acetone.
Step 2: Soak a cotton ball in acetone and hold it against the glue patch on your shoe. Make sure you apply enough acetone to saturate the adhesive, but not so much that it drips or spreads onto the surrounding area.
Step 3: Once the cotton ball is in place, cover it with plastic wrap to keep the acetone from evaporating. Leave the wrap and cotton ball in place for about 15-20 minutes.
Step 4: After the time has elapsed, remove the cotton ball and wrap. Using a brush or scraper, gently scrape away the melted adhesive. If the glue doesn’t come off easily, you may need to repeat the process.
Step 5: Once you’ve removed all the glue, clean your shoes with soap and warm water to remove any remaining residue. Dry your shoes with a clean cloth and let them air-dry completely before wearing them again.
It’s important to note that acetone can be harsh on some materials, so be careful when using it on leather or other delicate shoe materials. Additionally, always work in a well-ventilated area, and keep the acetone away from any sources of heat or flames.
Using acetone can be an effective way to melt shoe glue, but it’s essential to take the necessary precautions and follow the steps carefully to avoid damaging your shoes or exposing yourself to harmful chemicals.
Applying Olive Oil
An alternative method for melting shoe glue is by using olive oil. Olive oil is a natural oil and can safely be used on most shoe materials without causing damage.
To use olive oil to melt shoe glue, follow these steps:
| Step | Instructions |
|---|---|
| Step 1: | Clean the surface of your shoes with a damp cloth to remove any dirt or debris. |
| Step 2: | Apply a small amount of olive oil onto the affected area of the shoe glue. |
| Step 3: | Let the olive oil sit on the shoe glue for about 30 minutes. |
| Step 4: | Use a plastic scraper or spatula to gently scrape off the glue. Be careful not to scrape too hard and damage the shoe material. |
| Step 5: | Repeat the process until all of the glue has been removed from the shoe. |
| Step 6: | Clean the shoes with soapy water or a mild detergent to remove any remaining olive oil residue. |
| Step 7: | Let the shoes air dry completely before using them again. |
Note: Olive oil can make the shoe material oily, so it is recommended to use this method on shoes that are made of leather or other natural materials. Additionally, this method may not work for all types of shoe glue, so it is important to test a small, inconspicuous area first.
Using Rubbing Alcohol
Rubbing alcohol is a popular household item that can be used to melt shoe glue. Here are the step-by-step instructions on how to use rubbing alcohol to remove shoe glue:
- Prepare your materials: You will need a bottle of rubbing alcohol, a rag or cloth, and a plastic scraper.
- Apply rubbing alcohol: Pour a small amount of rubbing alcohol onto the glue stain. Use the rag or cloth to rub the rubbing alcohol onto the glue. You should start to see the glue soften and break down.
- Scrape the glue: Use the plastic scraper to remove the glue from the surface of the shoe. Be sure to scrape gently so that you don’t damage the shoe.
- Repeat if necessary: If the glue is still not coming off, apply more rubbing alcohol and repeat the process until the glue is removed.
- Clean the shoe: Once the glue is removed, clean the shoe with soap and water to remove any remaining rubbing alcohol residue.
- Dry the shoe: Let the shoe dry completely before wearing it.
Rubbing alcohol works by breaking down the chemical structure of the glue, making it easier to remove. However, it should only be used on small areas of the shoe, and you should avoid getting it on any other parts of the shoe, as it can damage the material. If you have sensitive skin, you should wear gloves when using rubbing alcohol to avoid any skin irritation.
Lemon Juice and Baking Soda
A lesser-known alternative method for melting shoe glue is to use a combination of lemon juice and baking soda. This process may take more time and effort compared to other methods, but it requires minimal heat exposure, making it a safer option for shoes that are made with delicate materials.
Here is a table outlining the steps for using lemon juice and baking soda to melt shoe glue:
| Step 1: | Mix a tablespoon of baking soda with a few drops of lemon juice in a small bowl until it forms a thick paste. |
| Step 2: | Apply the paste to the area with the shoe glue, using a cotton swab or toothbrush to spread it evenly. |
| Step 3: | Let the paste sit for 30 minutes to an hour, allowing it to penetrate the glue. |
| Step 4: | Use a plastic scraper or an old credit card to gently scrape away the softened glue. |
| Step 5: | Repeat steps 2-4 as necessary until all of the glue is removed. |
| Step 6: | Wipe away any remaining residue with a damp cloth, and allow the shoes to air dry. |
It is important to note that while this method is generally safe for most shoe materials, it is always best to test a small, inconspicuous area of the shoe first before applying the paste to the entire affected area. Additionally, like with all shoe glue removal methods, it is crucial to protect skin and clothing and work in a well-ventilated area.
Precautions When Melting Shoe Glue

When dealing with hot temperatures and chemicals, it’s important to take necessary precautions to prevent accidents or damage. The same goes for melting shoe glue. Before starting the process, it’s crucial to understand the potential risks and take the appropriate measures to protect yourself, your clothes, and your shoes. Here are some safety guidelines to follow when melting shoe glue.
Protect Your Skin and Clothes
Before melting shoe glue, it’s important to protect your skin, clothes, and surroundings. The heat source you’ll be using can be potentially harmful, so it’s essential to take proper precautions. Here are some steps you can take to protect yourself and your environment:
- Wear protective clothing: Wear clothes that fully cover your skin to reduce the risk of splattering melted glue on your skin or clothes. Long-sleeved shirts and pants are recommended. Also, consider wearing rubber gloves to protect your hands.
- Use a protective layer: Place a protective layer such as cardboard or newspaper on the surface beneath your shoes to catch any drips or splatters.
- Avoid contact with eyes and mouth: Melted glue can be dangerous if it comes into contact with your eyes or mouth. Avoid touching your face while you work, and wear safety goggles if necessary.
- Keep children and pets away: Ensure that your children and pets are out of the room while you’re working with melted glue. Accidents can happen, and you want to ensure their safety.
- Store your tools safely: When you’re finished melting the glue, store your tools safely. The heat source can remain hot for some time, so it’s important to keep it out of reach of children and pets.
By following these precautions, you can minimize the risk of accidents and work more comfortably. Safety should always be a top priority when working with heat sources such as melted glue.
Work in a Well-Ventilated Area
When melting shoe glue, it is essential to work in a well-ventilated area to avoid inhaling any harmful fumes. Strong chemical odors can cause respiratory problems and dizziness. It is best to work in an open, airy space or use a fan to help circulate the air.
Here are some guidelines that you can follow to ensure you are providing enough ventilation while you melt shoe glue:
| Choose an Open Space | Select an area that is open, airy, and free from any objects or clutter. This space should be away from any living areas or rooms that may be affected by the fumes. |
| Use a Fan | Use a fan to help circulate the air and keep the area well-ventilated. This will help prevent any toxic fumes from accumulating in the room. |
| Don’t Work in a Confined Space | Avoid working in small or enclosed spaces that do not have proper ventilation. The fumes can easily accumulate and cause serious health issues. |
| Wear Protective Gear | Wear a respirator or a mask to prevent inhaling the fumes. It is also advisable to wear gloves and safety goggles to protect your skin and eyes from the chemicals. |
Working in a well-ventilated area not only protects your health but also allows the adhesive to melt properly. Hot glue releases fumes when exposed to heat, which can be toxic if inhaled. Keep yourself safe by working in a space that is open and well-ventilated.
Avoid Damaging Your Shoes
When melting shoe glue, it is important to take precautions to avoid damaging your shoes. Here are some tips to help you protect your shoes:
- Be careful not to overheat the adhesive: Applying too much heat or leaving the heat source in one spot for too long can cause the glue to melt too much, which can damage your shoes. It’s important to monitor the heat and stop once the glue starts to soften.
- Use a heat source that won’t damage your shoes: Some heat sources, such as a lighter or torch, can be too intense and may cause your shoes to discolor or burn. It’s best to use a heat gun or hair dryer on a low setting to avoid damaging your shoes.
- Avoid using sharp tools: When scraping off the adhesive, it’s important to use a tool that won’t damage your shoes. A plastic scraper or spatula is a good choice, as it is less likely to scratch or gouge the shoe surface.
- Protect sensitive materials: Certain materials, such as suede or patent leather, may be more delicate and require extra care. Be sure to use a lower heat setting and avoid applying too much force when scraping off the adhesive. For suede shoes, use a suede brush to restore the nap after removing the glue.
- Test a small area first: Before applying heat or any adhesive-removal method, test a small, inconspicuous area of your shoe to make sure it won’t damage the material or color. If you notice any adverse effects, stop immediately and try a different method.
By taking these precautions, you can melt your shoe glue without causing any damage to your beloved shoes.
Tips for Melting Shoe Glue like a Pro
As you embark on melting shoe glue, it’s important to approach the process with caution and attention to detail to reach the desired result effectively. To help you achieve your goal like a pro, we’ve compiled a list of essential tips to keep in mind. From taking your time to using the right amount of heat, these tips will guide you through the process and ensure your success. So, let’s dive in and discover how to make melting shoe glue a cinch!
Don’t Rush the Process
It’s important to not rush the process when melting shoe glue in order to achieve the best results. One way to prevent rushing is to allocate enough time for the process and make sure you have everything you need before starting.
Another way to avoid rushing is to work on one section of the shoe at a time. This will help you to concentrate on applying the right amount of heat and pressure, and ensure that you do not accidentally damage any other parts of the shoe.
It’s also important to remember that different types of shoe glue may require different amounts of time to melt properly. For example, some stronger adhesives may take longer to melt than weaker ones. Rushing the process could result in the glue not melting properly, which can impact the outcome of the project.
Take the time to read the instructions for the method you are using and apply the heat gradually. It’s better to heat the glue incrementally than to apply too much heat at once and risk damaging your shoes. Remember, patience is key when melting shoe glue!
Here are a few more tips to help you avoid rushing the process:
| TIP | DESCRIPTION |
| 1 | Start with a small area of the shoe and work your way around gradually. This will allow you to practice using your heat source and gauge how well the glue is melting. |
| 2 | Be mindful of the amount of pressure you use when scraping off the adhesive. Too much pressure could damage the shoe. Instead, use gentle, even strokes to remove the melted glue. |
| 3 | Take regular breaks to look over your work and assess how well the glue is melting. This will help you to avoid mistakes and prevent damage to your shoes. |
By taking your time and being patient, you can successfully melt shoe glue and transform your shoes into a brand new pair.
Use the Right Amount of Heat
When it comes to melting shoe glue, using the right amount of heat is crucial. Too much heat can damage your shoes, while too little heat won’t be effective in melting the adhesive. The table below provides a guide for the appropriate amount of heat to use based on the type of shoe glue you are dealing with:
| Type of Shoe Glue | Appropriate Amount of Heat |
|---|---|
| Hot melt glue | Use a hair dryer set on low or medium heat or a heat gun set on low heat |
| Epoxy glue | Use a heat gun set on low heat |
| Contact cement | Use a heat gun set on medium heat |
| Cyanoacrylate glue | Use a hair dryer set on low heat |
It is important to note that the appropriate amount of heat may also vary based on the specific manufacturer’s instructions for the shoe glue. It’s always a good idea to check the packaging or manufacturer’s website for specific melting instructions. Additionally, it’s a good idea to test a small, inconspicuous area before applying heat to the entire shoe to make sure you don’t damage the material.
Be Patient and Consistent
When it comes to melting shoe glue, it’s important to remember that patience and consistency are key. Rushing the process or giving up too soon could lead to incomplete removal of the adhesive, which could compromise the integrity of your shoes. To avoid this, it’s important to follow the steps carefully and take your time to ensure that the glue is fully melted and scraped off.
Here are some tips for being patient and consistent during the shoe glue removal process:
| Tip | Description |
| Work in Small Areas | Instead of trying to remove all the glue at once, focus on small sections of your shoes at a time. This will help you to stay patient and consistent, as you won’t be overwhelmed by the task at hand. |
| Apply Even Heat | Whether you’re using a hair dryer or a heat gun, it’s important to apply heat evenly across the surface of your shoes. This will help to ensure that the glue melts evenly and that you’re able to remove it in a consistent manner. |
| Use the Right Tools | In addition to the heat source, you’ll need a scraper or putty knife to remove the melted glue. Make sure you have the right tools on hand and that they’re in good condition before you begin. Using dull or damaged tools could make the process more difficult and frustrating. |
| Take Breaks | Removing shoe glue can be a time-consuming and tedious process. To avoid becoming impatient or inconsistent, take breaks every so often to rest and recharge. This will help you stay focused and motivated throughout the process. |
| Be Thorough | After you’ve removed the glue, inspect your shoes carefully to make sure that all of the adhesive has been taken off. If you notice any leftover residue, apply heat again and use your scraper to remove it. Being thorough will help ensure that your shoes are fully restored to their original condition. |
By following these tips and staying patient and consistent, you can successfully melt shoe glue and restore your shoes to their former glory. Keep in mind that the process may take some time and effort, but the end result will be worth it.
Conclusion
In conclusion, melting shoe glue may seem like a daunting task, but with the right tools and techniques, it can be easily accomplished. Whether you choose to use a heat gun, acetone, olive oil, rubbing alcohol, or lemon juice and baking soda, it’s important to follow the appropriate safety precautions and take your time. Rushing the process or using too much heat can result in damage to your shoes or injury to yourself.
Remember to protect your skin and clothes, work in a well-ventilated area, and avoid damaging your shoes. With patience and consistency, you can remove old or excess shoe glue and give your shoes a new lease on life. By following this step-by-step guide and the alternative methods provided, you’ll be able to tackle any shoe repair project with confidence. So go ahead, try it out, and see how melting shoe glue can transform your worn-out shoes into stylish and functional footwear.
Frequently Asked Questions
What is shoe glue made of?
Shoe glue can be made of various materials such as rubber, polyurethane, or cyanoacrylate.
Can I melt shoe glue with a hairdryer?
Yes, using a hairdryer is one of the methods to melt shoe glue. However, it may not work for tougher glues.
Is it safe to melt shoe glue with a heat gun?
It is safe to use a heat gun to melt shoe glue as long as you take precautions and use it in a well-ventilated area.
Can I use a microwave to melt shoe glue?
No, it is not recommended to use a microwave to melt shoe glue as it can damage the shoes and the microwave.
Can I melt shoe glue off of leather shoes?
Yes, you can melt shoe glue off of leather shoes. However, you should be careful not to damage the leather with excessive heat.
Will melting shoe glue damage my shoes?
Melting shoe glue can potentially damage your shoes if you use excessive heat or don’t take proper precautions. However, this can be prevented with careful handling.
Is it necessary to clean my shoes after melting the glue?
Yes, it is important to clean your shoes after melting the glue to remove any residue and ensure your shoes look their best.
Can I melt shoe glue off of rubber soles?
Yes, you can melt shoe glue off of rubber soles. However, you should avoid using too much heat as this may damage the rubber.
How do I know if the shoe glue is completely melted?
You will know that the shoe glue is completely melted when it becomes soft and pliable and can be easily scraped off.
Can I reuse the tools and materials I used to melt shoe glue?
Yes, you can reuse the tools and materials you used to melt shoe glue as long as they are clean and in good condition.