Have you ever found yourself in a situation where your favorite pair of shoes starts to fall apart, and you’re not quite sure what to do about it? As troubling as it may be, fear not, as a cobbler’s glue can work wonders in restoring your shoes to their original state. But what glue do cobblers use to get the job done? There are a few options to choose from, each with their own unique strengths and weaknesses. In this comprehensive guide, we will explore the different types of glue cobblers use, as well as tips for choosing the right glue for your shoe repair needs and how to use shoe glue effectively. So, let’s dive in and learn more about this essential tool in the cobbler’s arsenal.
Types of Glue Cobblers Use
When it comes to repairing shoes, one of the most important factors is choosing the right type of glue. Cobblers use a variety of glues depending on the type of repair needed and the materials involved. In this section, we’ll take a closer look at some of the most commonly used types of glue by cobblers for shoe repair. From contact cement to shoe goo, each type of glue has its own unique properties and uses. Whether you’re repairing athletic shoes, dress shoes, or boots, understanding the different types of glue available can help you make the best choice for your repair needs. To learn more about each type of glue, keep reading!
1. Contact Cement
Contact cement is a popular type of glue used by cobblers for shoe repairs. It is a versatile adhesive because it can bond different materials together, such as leather, rubber, and plastic. Contact cement should be applied to both surfaces being bonded, and it is important to let it dry slightly before sticking the two surfaces together. This type of cement creates an instant and permanent bond, so it’s best to position the surfaces correctly the first time.
Here is a summary of the pros and cons of using contact cement for shoe repairs:
| Pros | Cons |
|---|---|
| Creates an instant and permanent bond | Can be messy to apply |
| Can be used on a variety of materials | Not easily reversible |
| Resistant to heat and water | Volatile and strong odor |
If you need further information about the best ways to use Shoe Goo Glue, check our article.
Contact cement is a great option for cobblers when repairing shoes. However, because it creates a permanent bond, it’s important to be careful when applying it and make sure the surfaces are in the correct position before sticking them together. It’s also important to work in a well-ventilated area and follow the manufacturer’s instructions carefully.
2. Epoxy
Epoxy is a popular adhesive for cobblers due to its ability to bond to a variety of materials and its strong, durable hold. Epoxy glue is made up of two parts — the resin and the hardener — that, when mixed together, form a strong bond that can even fill gaps.
One of the advantages of using epoxy glue is its high resistance to chemicals, water, and heat. This makes it an ideal option for shoe repairs that will be subjected to frequent wear and tear. It’s commonly used for repairing soles, heels, and other parts of the shoe that experience a great deal of stress.
To use epoxy glue for a shoe repair, begin by cleaning and roughening both surfaces that will be bonded. Mix the resin and hardener together in a small amount and apply a thin coat to one surface. Then, press the two surfaces together and clamp them tightly for the recommended drying time.
It’s important to note that while epoxy provides a strong hold, it can be brittle and may crack over time with repeated bending or flexing. Additionally, it can take quite some time to dry thoroughly, so be sure to allow ample time for the bond to cure before using the shoes again.
If you’re unsure whether epoxy glue is the right option for your specific shoe repair, consider consulting with a professional cobbler or reviewing online resources such as “What Is Shoe Goo Glue?” to determine the best adhesive for your needs.
3. Polyurethane
Polyurethane glue is another commonly used adhesive by cobblers for shoe repair. This type of glue is known for its high strength and durability, making it suitable for repairing shoes with heavy wear and tear.
Here are some key features of polyurethane glue:
- It is waterproof and weather-resistant, making it ideal for outdoor shoe repairs.
- It has a longer working time compared to super glue, giving you more time to adjust the pieces you are gluing.
- It expands as it dries, filling any gaps and providing a strong bond.
- It can be sanded and painted over once it dries, allowing you to achieve a smooth finish.
When using polyurethane glue, it’s important to keep in mind that it needs moisture to activate and cure properly. This means that you may need to lightly wet the surfaces that you are gluing, or use a damp cloth to moisten them before applying the glue.
If you are using polyurethane glue for the first time, it’s a good idea to practice on a small area first to get a feel for how the glue works. It’s also worth noting that polyurethane glue can be messy, so be sure to protect your work area with newspaper or a drop cloth before applying the glue.
While polyurethane glue is a strong and durable option for shoe repair, it may not be suitable for all types of repairs. If you are unsure about which type of glue to use for a specific repair, consult a cobbler or a professional shoe repair service for guidance.
If you want to know how long it takes for shoe glue to dry, check out our article on how long shoe glue takes to dry.
4. Hot Melt Glue
Hot melt glue is another popular choice for cobblers when it comes to repairing shoes. This type of glue is also known as “thermoplastic adhesive” and works by melting a solid adhesive and applying it to the surface that needs repairing. Here are some key points to keep in mind when considering hot melt glue for your shoe repair needs:
Benefits: Hot melt glue is perfect for quick repairs, as it can set within a matter of seconds and doesn’t require any mixing. It is also very strong and can bond a variety of materials, including leather, rubber, and even metal.
Drawbacks: One major drawback of hot melt glue is its lack of flexibility. It can become brittle over time, which means it may not be suitable for repairing areas that need to bend or flex, such as the soles of shoes. Additionally, it is not waterproof, so it may not be the best choice for repairing shoes that will be exposed to water.
Hot melt glue can be a great option for minor shoe repairs that require a strong and quick bond. However, it may not be the best choice for all types of repairs. Consider the materials involved and the intended use of the shoe before choosing hot melt glue.
5. Shoe Goo
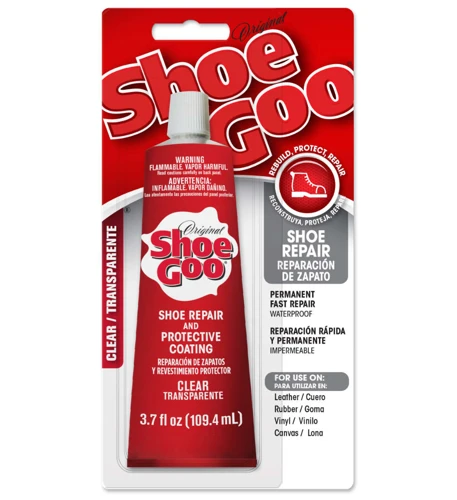
Shoe Goo is a well-known adhesive used by cobblers. It’s a versatile glue that can be used for a variety of shoe repairs. This type of glue is known for its superior bonding strength and durability. It’s perfect for repairing worn-out soles and broken heels.
Shoe Goo is made from a clear and flexible formula that is resistant to water and extreme temperatures. It’s also resistant to peeling, cracking, and yellowing. This adhesive can stick to a variety of surfaces such as leather, rubber, vinyl, and canvas.
To apply Shoe Goo, you need to prepare your shoe by cleaning and drying the area you want to repair. Squeeze a small amount of Shoe Goo onto the area and spread it with a toothpick or a small brush. Make sure to apply enough glue to cover the area evenly.
Tip: It’s important to use Shoe Goo sparingly. Using too much glue can result in a messy and uneven repair.
Once you have applied the glue, hold the repair together with clamps or tape until the glue dries completely. Shoegoo typically takes around 24 hours to dry but check the packaging for specifics.
Fun fact: Did you know that Shoe Goo can also be used to prevent damage to new shoes? Apply a small amount of Shoe Goo to the soles of new shoes to prevent slipping and add extra grip.
If you’re looking for an adhesive that is long-lasting and can withstand harsh conditions, Shoe Goo is an excellent choice. However, it’s important to note that it is not suitable for all types of shoe repairs. For example, it may not be the best choice for repairing ripped or torn leather.
Anchor link: If you want to know more about what glue to use on shoes for glitter, check out our in-depth guide.
Shoe Goo is an excellent adhesive for adding extra life to your shoes. It is easy to use, affordable, and readily available in most hardware stores. With proper application and care, your shoe repair will be as good as new!
Anchor link: If you want to know more about how long shoe glue lasts, check out our in-depth guide.
6. Cyanoacrylate (Super Glue)
Cyanoacrylate (super glue) is a fast-acting adhesive that is commonly used by cobblers for shoe repairs. Super glue dries quickly and forms a strong bond, making it ideal for repairing small tears or cracks in shoes. It works well on a variety of materials, including leather, rubber, and plastic.
However, it’s important to note that super glue may not be the best option for larger, more significant repairs. It can become brittle over time, which can cause the bond to break. This is especially true if the repair involves a high level of stress or movement.
To use super glue for shoe repairs, follow these steps:
- Clean the area to be repaired with rubbing alcohol or another adhesive remover to ensure that the surface is free from dirt, dust, and debris.
- Apply a small amount of super glue to one surface of the repair, using a toothpick or other small applicator to spread it as evenly as possible.
- Press the two surfaces together and hold them firmly for 30-60 seconds.
- Allow the glue to dry completely before wearing the shoes again.
It’s important to note that super glue can bond to skin quickly and can cause skin irritation or a burning sensation. If you accidentally get super glue on your skin, soak the affected area in warm, soapy water or use an acetone-based nail polish remover to dissolve the glue.
Super glue can be a useful tool for cobblers, but it’s best suited for small, quick repairs that don’t involve a lot of stress or movement. For larger repairs, it’s best to choose a more durable adhesive like epoxy or polyurethane. If you want to know more information about different shoe adhesives, we’ve got an article about what glue to use on leather shoes.
How to Choose the Right Glue for Your Shoe Repair Needs
Choosing the right glue is crucial when it comes to repairing your shoes. With so many options available, it can be overwhelming to figure out which one to choose. Factors such as the type of repair, materials involved, and drying time should all be taken into consideration. To make the process smoother, we’ve put together a comprehensive guide on how to choose the perfect glue for your shoe repair needs. No matter if you’re repairing a pair of Nike sneakers or gluing glitter onto your shoes, we’ve got you covered.
1. Type of Repair
When choosing the right glue for your shoe repair needs, the type of repair you need to make is an important factor to consider. Different types of repairs may require different types of glue to achieve the best results. Here are some common types of shoe repairs and the types of glue that are best suited for them:
– Sole Repair: If you need to repair the sole of your shoe, contact cement or polyurethane glue are good choices. Both types of glue create a strong hold and are flexible when dry, allowing the shoe to be comfortable to wear and walk in.
– Upper Repair: If you need to repair the upper part of your shoe, such as a tear or hole, a strong and flexible glue like Shoe Goo or Epoxy will work well. These types of glue can bond different materials together, making it an ideal option when repairing shoes made from different types of materials.
– Heel Repair: When repairing a heel, it is best to use a strong and durable glue such as cyanoacrylate or hot melt glue. These types of glue can withstand the weight and pressure placed on the heel of the shoe.
– Decorative Embellishments: If you are looking to add decorative elements to your shoes, such as glitter or jewels, it is best to use a strong adhesive like E6000 or a glue gun. These types of glue can hold heavy decorations in place and will not damage the shoe material.
Remember, the type of repair you need to make is a crucial factor when choosing the right glue. Consider the materials involved, the drying time, the flexibility needed, and the strength required. By selecting the correct glue for your specific repair needs, you can ensure that your shoes will be as good as new and last longer.
If you want to know more about what glue to use on shoes for glitter, follow the link to our comprehensive guide on this topic.
2. Materials Involved
When considering the materials involved in your shoe repair, it’s important to choose a glue that is compatible with those materials. Here are some examples of common shoe materials and the types of glue that work best with them:
- Leather: Leather shoes generally require a glue that is flexible and can bond strongly with the material. Contact cement and polyurethane are good choices for leather shoes.
- Rubber: Rubber soles can be difficult to glue, but a strong adhesive like epoxy can do the trick. Additionally, shoe goo is specifically designed for rubber repairs.
- Fabric: Fabric shoes and sneakers require a different type of glue, one that can bond strongly with the flexible material without cracking or flaking off. Contact cement and hot melt glue are good options for fabric shoes.
- Plastic: When gluing plastic shoe parts together, it’s important to choose a glue that is compatible with the specific type of plastic being used. For example, if you’re repairing Crocs, the company recommends using a cyanoacrylate (super glue) specifically designed for use with their material.
It’s always a good idea to test the glue on a small, inconspicuous area of your shoe before performing a full repair to ensure that it will bond properly and not damage the material. Also, be sure to properly clean and prepare the surface of your shoe before applying any glue to ensure a strong bond. If you need further guidance on how to glue specific types of shoes, check out our article on how to glue Crocs, what glue does Nike use, or how to glue Birkenstocks.
3. Drying Time
When it comes to choosing the right shoe glue, drying time is an important factor to consider. The drying time of a glue typically refers to the time it takes for the glue to fully cure and dry, making it strong and resistant to wear and tear. Different types of shoe glue have different drying times, so it’s important to choose a glue that is suitable for your repair needs and can dry at a pace that works for you. Here are some things to keep in mind when it comes to drying time:
1. Contact cement: This type of glue typically dries very quickly, anywhere from 5 to 30 minutes depending on the brand and specific product. However, it’s important to note that while the glue may dry quickly, it may take up to 24 hours for it to fully cure and achieve its maximum strength.
2. Epoxy: The drying time for epoxy can vary from brand to brand, but it typically takes several hours to dry and up to 24 hours to cure completely. Epoxy is a slow-drying glue, so it’s important to allow enough time for the glue to dry and cure properly.
3. Polyurethane: Polyurethane glue takes anywhere from 30 minutes to several hours to dry, depending on the brand and product. However, it can take up to 24 hours to fully cure and achieve maximum strength.
4. Hot melt glue: This type of glue dries almost instantly, making it a great option if you need a quick fix. However, hot melt glue may not be the strongest option and may not provide a long-lasting hold.
5. Shoe Goo: Shoe Goo typically takes around 24 hours to dry and cure completely, but it can take longer depending on the temperature and humidity of the environment.
6. Cyanoacrylate: Cyanoacrylate, also known as super glue, dries very quickly. It can dry within seconds, making it a great option for quick repairs. However, it’s important to note that super glue is not the strongest option and may not provide a long-lasting hold.
It’s important to keep in mind that the drying time of shoe glue can be affected by a variety of factors, including temperature, humidity, and the type of material you are bonding. It’s always a good idea to follow the manufacturer’s instructions for optimal results, and to allow your shoes to dry and cure completely before using them or putting them under stress.
If you’re unsure about which glue to use for your specific repair needs, consider consulting a cobbler or a shoe repair professional. They can provide expert advice and guidance on which glue to use, as well as tips for applying and using the glue properly.
For more information on shoe glue and related topics, check out our articles on how long shoe glue takes to dry or what glue to use on shoes for glitter.
4. Water Resistance
When choosing the right glue for your shoe repair needs, it’s important to consider the water resistance of the glue. Shoes are often exposed to different weather conditions and may get wet, so it’s crucial to choose a glue that can withstand water.
- Contact cement is a waterproof adhesive and is a great option for shoe repairs that require strong, permanent bonding.
- Epoxy is another waterproof adhesive that can bond to a variety of materials. It’s known for its durability and is great for repairing the soles of shoes.
- Polyurethane glue is a waterproof adhesive that expands as it dries, filling any gaps in the repair. It’s a great option for repairing shoes with significant damage or that need a lot of filling.
- Hot melt glue is not waterproof and should be avoided for shoe repairs that need to withstand moisture.
- Shoe Goo is a waterproof and flexible adhesive that’s specifically designed for shoe repairs. It’s great for repairing shoes with rubber soles.
- Cyanoacrylate (Super Glue) is not waterproof and should be avoided for shoe repairs that need to withstand moisture.
It’s important to remember that even waterproof glue can wear out over time with exposure to moisture and the elements. Be sure to check how long shoe glue lasts and reapply as needed. Additionally, it’s important to properly prepare the surface before applying the glue. To learn more about how to prep shoes for glue application, check out our article on how to glue Converse shoes or read our guide on how to use E6000 glue on shoes.
5. Comfort and Flexibility
When considering the type of glue to use for your shoe repair needs, it’s important to think about the comfort and flexibility of the cured glue. Some glues can become hard and stiff after drying, making it uncomfortable for you to wear the shoes. It’s important to pick a glue that will provide the necessary adhesion while also maintaining the softness and flexibility of your shoes.
Here are some factors that you should consider in terms of comfort and flexibility when choosing a glue:
- Flexibility: Look for a glue that will maintain the natural flexibility of the material. This is especially important for leather shoes, as they move and flex with your feet, and you don’t want the glue to stiffen up and inhibit that movement. Epoxy and polyurethane glues can be rigid once they’ve cured, so they may not be the best for repairs that will require this level of flexibility.
- Breathability: Shoes should allow your feet to breathe, and if the glue is too thick or doesn’t allow for air circulation, your feet may become sweaty, which can cause foot odor and discomfort. You can choose a glue that is breathable and won’t trap moisture inside the shoe, such as contact cement or Shoe Goo.
- Softness: Some glues can cure to a very hard consistency, which can make it uncomfortable to wear the shoes. Look for a glue that maintains the softness and comfort of the shoe, such as Shoe Goo or polyurethane adhesive.
- Expansion and contraction: Shoes can expand and contract as they move, especially when they’ve been worn for a while. You should choose a glue that can expand and contract with the material without cracking or breaking away. Shoe Goo is an excellent option for this because it is specially formulated to move with the shoe material.
By considering these factors, you can choose a glue that will not only provide strong adhesion for your shoe repair needs but also maintain the comfort and flexibility of the shoe.
6. Strength
Strength is another essential factor that cobblers need to consider when selecting the right glue for repairing shoes. Different types of glue have different levels of strength, and understanding what type of strength you need for your repair can make all the difference between a temporary fix and a long-lasting repair.
Key factors for strength include:
| Type of Glue | Strength |
| Contact Cement | Once fully cured, contact cement creates a strong and durable bond that can withstand heavy stress and pressure. It is ideal for bonding leather and rubber materials. |
| Epoxy | Epoxy forms a very strong bond that can withstand significant weight and pressure. It is ideal for repairing plastic or metal parts of a shoe. |
| Polyurethane | Polyurethane creates a strong and flexible bond that can withstand vibrations and shocks. It is ideal for repairing the soles of shoes. |
| Hot Melt Glue | Hot melt glue creates a strong bond that can withstand light to medium stress and pressure. It is ideal for bonding fabric and other non-rigid materials. |
| Shoe Goo | Shoe Goo forms a strong and flexible bond that can withstand moderate stress and pressure. It is ideal for repairing the soles of shoes and other leather materials. |
| Cyanoacrylate (Super Glue) | Cyanoacrylate creates a strong bond that can withstand light stress and pressure. It is ideal for bonding hard materials such as wood and ceramic, but it may not be the best choice for repairing shoes. |
It’s important to keep in mind that certain types of glue may be better suited for specific types of materials or repairs. Cobblers should choose a glue based on the materials involved in a repair, the type of repair needed, and the expected stress and pressure on the repaired area.
Ultimately, selecting a strong adhesive that is appropriate for the type of repair you are performing will not only increase the longevity of that repair, but also ensure the safety and comfort of the person wearing the shoe.
Tips and Tricks for Using Shoe Glue
When it comes to repairing shoes, using the right glue is only part of the equation. Proper application and technique are also crucial in ensuring a successful repair. Follow these helpful tips and tricks to make the most out of your shoe glue and achieve a strong and long-lasting repair.
1. Clean and Prepare the Surface
Before you can properly apply any type of glue to a shoe, you need to ensure the surface is clean and prepared. Any dirt, oil, or debris can prevent the glue from properly adhering and could compromise the strength of the repair. Here are some steps to follow in order to properly clean and prepare the surface:
| Step | Description |
|---|---|
| Step 1 | Remove any loose or damaged parts of the shoe. For example, if the sole is partially detached, you will want to remove any loose pieces before starting the repair. |
| Step 2 | Use a brush to clean any dirt or debris off the area you are repairing. A soft-bristled toothbrush can work well for this purpose. |
| Step 3 | Wipe the area with a clean, dry cloth to remove any remaining dust or dirt. |
| Step 4 | If the area is particularly dirty or has any oils or greases on it, you may need to use a deglazer or rubbing alcohol to clean it. Apply the deglazer or rubbing alcohol to a clean cloth and wipe the area thoroughly. |
| Step 5 | Allow the area to dry completely before applying any glue. |
By properly cleaning and preparing the surface, you can ensure that the glue will adhere properly and create a strong repair that will last. It may seem like a small step, but taking the time to properly prepare the surface can make a big difference in the success of your shoe repair.
2. Apply the Glue Correctly
When applying shoe glue, it is important to do it correctly to ensure a strong and lasting repair. Here are some key steps to follow:
- Apply the glue sparingly: Using too much glue can create a mess and may not allow the bond to form properly. A thin layer of glue is typically sufficient for most shoe repairs.
- Apply the glue evenly: Spread the glue evenly over the surfaces that need to be bonded. Avoid leaving any gaps or bubbles, as this could weaken the bond.
- Use the right applicator: Depending on the type of glue, you may need to use a brush, nozzle, or other specialized tool to apply the glue. Make sure you use the right applicator for the job, as this can affect the quality of the bond.
- Work quickly: Shoe glue often sets quickly, so you’ll need to work efficiently to make sure the bond forms before the glue dries. Follow the instructions on the glue package for best results.
- Apply pressure: Once you’ve applied the glue, firmly press the surfaces together. You may also need to use clamps or other tools to hold the surfaces in place while the glue dries.
By following these steps, you can ensure that your shoe glue application is done correctly and your repair will be strong and long-lasting.
3. Clamp or Press the Repair Together
When it comes to repairing shoes, using glue is just one part of the process. Another important step is to clamp or press the repair together to ensure a tight, secure bond. This helps to prevent any movement or separation of the glued areas.
Why is Clamping or Pressing Important?
Clamping or pressing the repair together is important to ensure that the glue is evenly distributed and that the repair is held in place until the glue dries. This process allows the glue to penetrate the surfaces, creating a strong and durable hold. Without pressure, the bond may not form properly, leading to a weaker, less secure hold.
What Should You Use to Clamp or Press the Repair?
The clamping or pressing tools you use will depend on the size and shape of the area being repaired. Some options include:
| Tool | Description |
| C-clamps | Used for larger repairs. These clamps are adjustable and can be tightened securely. |
| Binder clips | Good for smaller areas. These clips are easy to use and readily available. |
| Heavy books | If you’re in a pinch, heavy books can be used to provide pressure to the repair area. |
| Specialized shoe clamps | These are designed specifically for shoe repairs and provide an even pressure to the area being repaired. |
How Long Should You Clamp or Press the Repair?
The amount of time needed to apply pressure to the repair area will depend on the type of glue being used and the size and type of repair. Generally, it is recommended to apply pressure for at least 30 minutes, but it’s best to follow the manufacturer’s instructions for the specific glue being used.
Final Thoughts
Clamping or pressing when using shoe glue is an important step that shouldn’t be overlooked. It is essential for creating a strong and secure bond between the repair areas. By using the right tools and following the manufacturer’s instructions, you can ensure that your shoe repairs are done properly and will last a long time.
4. Let the Glue Dry Completely
After applying the glue and pressing the repair together, it’s important to let the glue dry completely to ensure a strong bond. Here are some tips for letting the glue dry properly:
- Be patient: Different types of glue have different drying times, so be sure to read the label for specific instructions. Generally, it’s best to let the glue dry for at least 24 hours before using the shoes again.
- Avoid touching or moving the shoes: While the glue is drying, it’s important to avoid touching or moving the shoes to ensure the repair doesn’t shift or break the bond.
- Keep the shoes in a dry, well-ventilated area: Proper air circulation will help the glue dry more quickly and effectively. Avoid exposing the shoes to heat or direct sunlight, as this can cause the glue to soften or break down.
- Check the glue before wearing the shoes again: Before wearing the shoes again, give the repaired area a gentle tug or test the bond with your fingers to ensure it’s fully dry and secure.
By following these tips, you can ensure that your repaired shoes will maintain a strong and long-lasting hold. Remember, allowing the glue to dry fully is essential for a successful repair.
Conclusion
In conclusion, choosing the right glue for your shoe repair needs is crucial for a successful and long-lasting repair. It is important to consider the type of repair needed, the materials involved, drying time, water resistance, comfort and flexibility, and strength. With the right type of glue and proper application techniques, you can avoid having to constantly replace your shoes or spend a lot of money on professional repairs.
Remember to always clean and prepare the surface before applying glue, apply the glue correctly, clamp or press the repair together, and let the glue dry completely. Following these tips and tricks for using shoe glue will ensure a strong and durable bond.
Overall, cobblers use a variety of glues depending on the specific repair and material involved. Contact cement, epoxy, polyurethane, hot melt glue, Shoe Goo, and cyanoacrylate (Super Glue) are all commonly used. When in doubt, consult with a professional cobbler or follow the manufacturer’s instructions to ensure the best results. Don’t let the fear of a complicated repair hold you back from fixing your favorite pair of shoes. With the right glue and techniques, you’ll be amazed at the results you can achieve.
Frequently Asked Questions
1. What is the best glue for leather shoe repair?
The best glue for leather shoe repair is contact cement. It’s strong, dries quickly, and creates a permanent bond.
2. Can you use regular glue for shoe repair?
No, regular glue is not recommended for shoe repair. It’s not strong enough and can break down over time.
3. What is the strongest shoe glue?
The strongest shoe glue is epoxy. It’s a two-part adhesive that creates a very strong bond and can be used on a variety of materials.
4. How long does it take for shoe glue to dry?
The drying time for shoe glue can vary depending on the type of glue and the materials being used. Some glues dry in just a few minutes, while others may take several hours or even overnight.
5. Can shoe glue be used on rubber soles?
Yes, most shoe glues can be used on rubber soles. However, it’s important to choose a glue that is specifically designed for rubber and follow the manufacturer’s instructions carefully.
6. Is Shoe Goo waterproof?
Yes, Shoe Goo is waterproof once it has fully cured. It’s a great option for repairing shoes that will be exposed to water or wet conditions.
7. Can you remove shoe glue?
It can be difficult to remove shoe glue once it has fully cured. Some solvents may be able to break down the glue, but it’s generally best to avoid getting glue on surfaces that you don’t want it to stick to.
8. Can shoe glue be used to repair other types of items?
Yes, shoe glue can be used to repair a variety of items, including bags, belts, and other leather or synthetic materials.
9. Is hot melt glue a good option for shoe repair?
Hot melt glue can be a good option for temporary shoe repairs, but it’s not recommended for permanent repairs or repairs that require a lot of strength.
10. How can you make shoe glue dry faster?
Some shoe glues can be dried faster by applying heat or using a hair dryer on a low setting. However, it’s important to follow the manufacturer’s instructions to ensure that the glue sets properly.