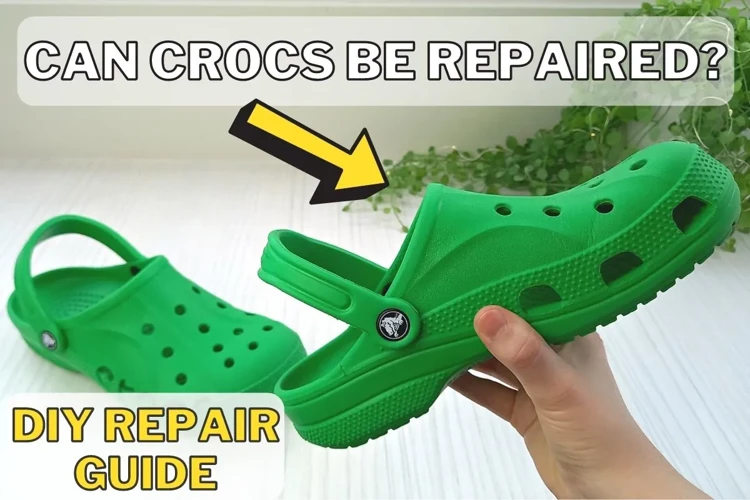
Have you ever had a favorite pair of Crocs that suddenly broke? It can be extremely frustrating and disappointing, especially if you don’t want to spend money on a brand new pair. Well, fear not, because in this comprehensive guide we will show you step-by-step how to glue Crocs back together. Not only will this save you money, but it will also give you the satisfaction of repairing your own shoes. So grab your materials and let’s get started!
What You Will Need
When it comes to fixing your Crocs, having the right materials and tools is essential. You don’t want to end up with a botched repair job simply because you were using the wrong glue or didn’t have the necessary items. To ensure your Crocs are properly glued, you’ll need a few things. In this section, we’ll provide a list of the materials and tools required to carry out this task successfully. Don’t know what glue to use? No worries! We’ve got you covered. Check out our article on what shoe glue is and how to choose the right one.
Glue
When it comes to glue for fixing your Crocs, there are a few options on the market. It’s important to choose the right one to ensure a successful repair. Here are a few types of glue to consider:
- Cyanoacrylate glue: Also known as super glue, it dries clear and quickly. It can be a good option for small repairs or hairline cracks.
- Epoxy glue: This is a two-part adhesive that creates a strong bond. It can handle larger repairs and can be used on various surfaces. However, it takes longer to dry and requires mixing the two parts together.
- Shoe glue: Specifically designed for shoe repairs, this glue creates a flexible bond that can withstand repeated use. It can be a good option if you plan on wearing your Crocs often.
It’s important to read the instructions on the glue you choose and use it accordingly. For example, some glues may require curing time or specific application methods. If you’re unsure which glue to use, consult with a home improvement store or shoe repair shop for recommendations.
If you’re looking for more information on gluing other materials or shoe types, check out our guide on gluing leather, how to glue glitter on shoes, or what Shoe Goo glue is.
Tools
In addition to the glue, there are a few tools that are necessary for gluing your crocs. It’s important to have all of these items on hand before you begin your repair to avoid any interruptions in your work.
The tools that you will need are:
- Cotton swabs: These will be used to apply the glue to the surface of your croc. They are also useful for cleaning up any excess glue that may be left over after the repair.
- Clamps: Once the glue has been applied, clamps will be used to hold the damaged area together while the glue dries. This will ensure that the repair is secure and long-lasting.
- Sandpaper: You will need sandpaper to rough up the surface of your croc before applying the glue. This will help the glue adhere better to the surface of the croc.
- Scissors: These will be used to trim any excess material after the repair has been completed.
- Masking tape: This is important for protecting the surrounding area of the croc from accidentally getting glue on it.
If you don’t have any of these tools at home, they can easily be purchased at your local hardware store. Having the right tools on hand will make the process of gluing your crocs together much easier and ensure that your repair is done correctly.
For more information on specific types of glue and their uses, check out our article on what glue to use for leather or how to make shoe glue. These resources will be helpful for selecting the right kind of glue for your crocs.
Preparing Your Crocs for Gluing
Preparing your crocs for gluing is an essential and straightforward step that you should not skip. This step will ensure that the glue adheres correctly and that the repair lasts. In this section, we will discuss two crucial steps that you need to follow: cleaning the damaged area and sanding the surface. Both steps are simple to do but are essential for a successful repair. So, let’s get started! And if you’re interested in gluing other items, check out what glue to use on a leather belt.
Clean the Damaged Area
Before starting to glue your Crocs, you need to ensure that the affected area is clean. Unclean surfaces can prevent the glue from adhering properly, resulting in a weak bond or the glue eventually coming undone. Follow these steps to clean the damaged area:
- Gently clean the area using a mild soap and water. This will help to remove any dirt or debris that may be present.
- Pat the area dry with a clean towel.
- If necessary, use a cotton swab dipped in rubbing alcohol to remove any remaining grime or oils that could interfere with the adhesive properties of the glue.
It is crucial to clean the damaged area thoroughly before proceeding with the repair process to ensure the best possible results. By doing so, you will get rid of any contaminants that could interfere with the bonding process of the glue. Once you have cleaned the area, proceed to the next step in the gluing process.
If you’d like to learn more about gluing other types of products, check out our article on why to glue pennies to shoes. You may also be interested in our article on how to use E6000 glue on shoes, which covers some tips and tricks for applying glue to shoes for optimal results.
Sand the Surface
Before applying the glue, the surface of the damaged area on your Crocs needs to be sanded. Sanding will help the glue adhere better to the surface, ensuring a strong and long-lasting bond. Here are the steps to properly sand the surface:
| Step | Description |
|---|---|
| Step 1 | Clean the area: Use a clean cloth to wipe off any dirt or debris from the damaged area. |
| Step 2 | Select sandpaper: Choose a fine-grit sandpaper, around 220 grit, to sand the surface of your Crocs. A finer grit will prevent any scratches that might affect the look or texture of your Crocs. |
| Step 3 | Sand the surface: Gently sand the damaged area in a circular motion, applying light to medium pressure. Keep the sanding motion smooth and consistent to ensure that the surface is evenly sanded. |
| Step 4 | Wipe the area clean: After sanding, use a clean cloth to wipe off any residue left from the sandpaper. This will ensure that the glue adheres properly to the surface. |
It’s important to make sure that the surface is clean and free of any debris before sanding, as this will ensure that the sandpaper will be effective. Additionally, be careful not to apply too much pressure when sanding, as this can damage the surface you’re trying to repair.
Pro Tip: If your Crocs have any deep scratches or gouges, you may need to use a coarser grit sandpaper to smooth out the surface before using the finer grit sandpaper.
Sanding is an essential step in the gluing process, and doing it properly will help ensure a strong and long-lasting repair. Now that you’ve sanded the surface of your Crocs, it’s time to move on to applying the glue. If you’re interested in learning how to glue Beats headband, check out our guide here.
Applying the Glue
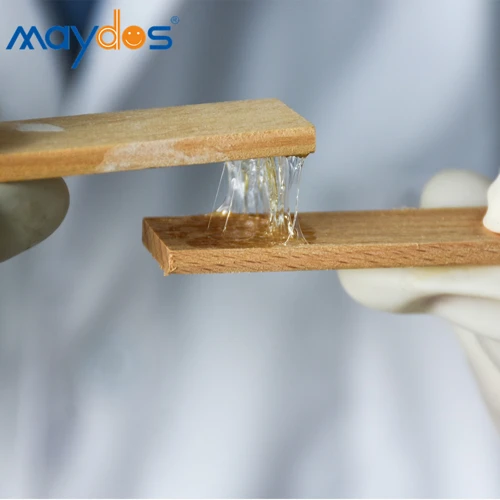
Now that you have prepared your Crocs for gluing, it’s time to apply the glue. This step is crucial in ensuring that your repair lasts for a long time. But before you start, there are a few things you need to keep in mind. Applying glue may seem simple, but there are several factors to consider, such as the type of glue to use and the technique of application. In this section, we will discuss the details of how to apply glue effectively and achieve the best results. So let’s get started!
Choose the Right Type of Glue
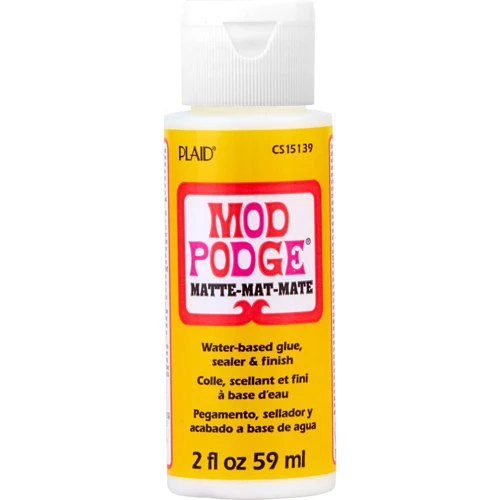
When it comes to gluing crocs, choosing the right type of glue is crucial for a successful repair. The wrong type of glue can result in a weak bond or damage to the material. Here are some of the best glue options for croc repairs:
| Glue Type | Features |
|---|---|
| Shoe Goo |
|
| E6000 Craft Adhesive |
|
| Barge All-Purpose Cement |
|
| Gorilla Super Glue |
|
When selecting your glue, it’s also important to read the manufacturer’s instructions carefully and to choose a glue that is appropriate for the type of damage you are repairing. Always test the glue on a small, inconspicuous area before applying it to the damaged area. This can help prevent further damage and ensure a successful repair.
Applying the Glue
Applying the glue to your Crocs is a critical step to ensure a strong and long-lasting repair. Here are the steps you need to follow for applying the glue:
| Step | Instruction |
|---|---|
| 1 | Clean the damaged area of your Crocs with a damp cloth and let them dry completely. |
| 2 | Apply a small amount of glue to one of the surfaces you will be gluing. Be careful not to use too much, as this can result in a mess and an ineffective repair. |
| 3 | Spread the glue evenly over the surface, using a toothpick or a similar tool. Be sure to cover the entire surface with glue, but not so much that the glue oozes out from the sides of the repair. |
| 4 | Press the surfaces together firmly and hold them in place for at least 30 seconds. This helps to ensure that the glue adheres well to both surfaces. |
| 5 | Repeat steps 2-4 for any remaining areas that need to be repaired, making sure to work quickly before the glue dries. |
Remember to use a glue that is appropriate for your Crocs material to get the best possible results. Once you have applied the glue, be sure to clamp the repair area to hold the Crocs in place while the glue dries. This helps ensure that the repair is strong and long-lasting.
Clamping the Repair Area
After applying the glue, it’s important to clamp the repair area to ensure a strong bond between the glue and the Crocs. This step may seem unnecessary, but it’s essential for getting the best results.
Here are the steps for clamping the repair area:
- Place the Crocs on a flat surface with the damaged area facing up.
- Use clamps to hold the two parts of the Crocs together, ensuring they are aligned correctly.
- Place a cloth or a piece of paper between the clamps and the Crocs to prevent the clamps from sticking to the surface and damaging the Crocs.
- The number of clamps you need depends on the size of the repair area. Typically, one clamp every 2 inches is sufficient.
- Leave the clamps in place for at least 24 hours to allow the glue to dry completely.
Why Clamping Is Important
Clamping allows the glue to spread evenly across the surface and eliminates any air bubbles that might interfere with the bond. The clamps hold the Crocs in place so that the glue can set effectively, ensuring a strong and enduring bond.
Remember: Don’t remove the clamps too early, even if the glue seems dry. The recommended time for leaving the clamps in place is at least 24 hours. If you remove them too early, there’s a risk that you might weaken the bond, or the repair might not hold up well over time.
Drying and Finishing
As you complete the process of gluing your Crocs, it is essential to allow the glue to dry completely before wearing them again. The drying and finishing stage is the final step in repairing your Crocs, and it is vital to take your time to ensure that the glue is completely dry and set. With the right tools and techniques, you can achieve a seamless repair that will make your Crocs look as good as new. In this section, we will discuss how to dry and finish your Crocs after gluing them back together.
Leave it to Dry
After applying the glue to your Crocs, it’s important to let it dry completely before wearing them again. This will ensure that the repair will last as long as possible.
Here are some key steps to follow:
- Set the Crocs aside in a cool, dry place away from direct sunlight and heat sources.
- Avoid touching or moving the shoes while the glue dries, as this can disrupt the bonding process and potentially damage the repair.
- Check the drying time on the glue that you used. Depending on the type of glue, it may take anywhere from a few hours to overnight to fully dry and cure.
- Be patient! Rushing the drying process could cause the repair to fail, which means you’ll have to start all over again.
Leaving your Crocs to dry completely is crucial to the efficacy of the repair. By following these steps and being patient, you’ll be able to enjoy your like-new Crocs for many wears to come!
Clean Up the Residue
After the glue has dried, it’s time to clean up any residue left behind. This residue can be unsightly and get in the way of your Crocs looking as good as new. Here are some tips for cleaning up the residue:
| Do: | Don’t: |
| Use rubbing alcohol to remove any excess glue. | Use water to clean up the residue, as this can cause the glue to become sticky again. |
| Gently peel off any excess glue that can be lifted without damaging the repair job. | Use sharp objects like scissors or a knife to scrape off the residue, as this could also lead to damaging the repair work. |
| Use a soft cloth or sponge to wipe away the residue once the excess glue has been removed. | Use abrasive materials like steel wool to try to scrub away the residue, as this could scratch and damage the surface of your Crocs. |
It’s important to avoid using water when cleaning up the residue as this can cause the glue to become sticky again and undo the repair work. Instead, use rubbing alcohol and gently peel off any excess glue that can be removed without causing damage. Once the excess glue has been removed, use a soft cloth or sponge to wipe away any remaining residue. Avoid using abrasive materials like steel wool that could scratch the surface of your Crocs.
By following these tips, your Crocs will be looking as good as new after a successful gluing job.
Tips for Gluing Crocs
After going through the process of gluing your Crocs back together, you want to ensure that they hold up well and don’t require a repeat repair. To help you get the most out of your glued Crocs, we’ve put together a list of some important tips and considerations. So, before you step out in confidence with your favorite pair of Crocs, let’s take a look at some do’s and don’ts that you should keep in mind.
Do’s:
When it comes to gluing your Crocs, there are a few things you can do to ensure a successful repair. Here are some helpful do’s to keep in mind:
- Do clean the damaged area: Before applying any glue, it’s important to make sure the area you will be gluing is clean and free of debris. Use a damp cloth to wipe away any dirt, dust, or other particles.
- Do sand the surface: Sanding the surface of the damaged area will help the glue adhere better. Use a fine-grit sandpaper to lightly sand the surface of the area you will be gluing.
- Do choose the right type of glue: Different types of glue are better suited for different materials. When repairing your Crocs, be sure to choose a glue that is specifically designed for the type of material your Crocs are made of.
- Do clamp the repair area: Holding the repair area together with clamps while the glue dries will ensure a stronger bond. Be sure to use enough clamps to hold the area tightly together.
- Do leave it to dry: Once you have applied the glue and clamped the repair area, leave it to dry completely before wearing your Crocs again. This will ensure that the repair is fully set and strong.
By following these do’s, you’ll be well on your way to successfully gluing your Crocs and extending their lifespan.
Don’ts:
When it comes to gluing your Crocs, there are certain things that you absolutely should not do. Adhering to these guidelines can help you ensure a successful repair that lasts for a long time. Here are the “don’ts” to keep in mind:
- Don’t rush the repair: It can be tempting to try to finish the repair as quickly as possible, but don’t sacrifice quality for speed. Rushing the process can result in a poor bond that won’t last as long.
- Don’t use too much glue: Applying too much glue can cause it to seep out of the sides, creating unsightly residue and potentially limiting the flexibility of your Crocs.
- Don’t forget to sand the surface: Skipping this step can result in a weak bond. Make sure to sand the surface to provide a rough area for the glue to adhere to.
- Don’t ignore the type of glue: Not all glues are created equal. Make sure to choose a glue that is appropriate for the material of your Crocs, such as E6000 or a superglue designed for plastic.
- Don’t remove clamps too soon: It can be tempting to remove the clamps as soon as the glue seems dry to the touch, but doing so can compromise the strength of the bond. Leave the clamps in place for the recommended amount of time indicated by the manufacturer of your chosen glue.
- Don’t avoid cleanup: Leaving excess glue on the surface of your Crocs can leave an unsightly residue that is difficult to remove once it dries. Make sure to clean up any excess glue using a rag or cotton swab before it dries.
By avoiding these common mistakes throughout the gluing process, you can ensure that your hard work pays off with a successful and long-lasting repair.
Conclusion
After following the steps outlined in this ultimate guide on how to glue Crocs, you should have successfully repaired any damages to your beloved shoes. Remember that choosing the right type of glue is essential for a long-lasting fix. Additionally, preparing the surface properly and clamping the repair area will greatly enhance the strength of the bond.
It is important to note that while gluing your Crocs can restore them to their former glory, it may not always be the best solution. If the damages are too extensive or affect the structural integrity of the shoe, it may be time to replace them.
Overall, by following the steps outlined in this guide and taking the necessary precautions, you can easily and effectively fix any damages to your Crocs. With proper care and maintenance, your shoes will provide you with comfort and style for years to come.
Frequently Asked Questions
Can Crocs be repaired?
Yes, Crocs can be repaired using glue and proper techniques. In fact, repairing Crocs can save you money from buying a new pair.
What type of glue works best for repairing Crocs?
A strong adhesive like E6000, Shoe Goo, or Gorilla Glue works best for repairing Crocs.
How long does it take for the glue to dry?
The drying time of the glue may vary depending on the type and brand of adhesive used. It can take anywhere from 24 hours to a few days for the glue to completely dry.
Should I clamp the repair area after applying the glue?
Yes, clamping the repair area can help the glue dry evenly and securely. Use adjustable clamps or clothespins for better control.
Can I wear my repaired Crocs right after gluing?
It’s best to wait for the glue to completely dry and cure before wearing your Crocs. Follow the instructions on the glue packaging for the recommended drying time.
How long does a glued Crocs repair last?
The lifespan of a glued Crocs repair depends on the quality of glue used and how well the repair was done. A properly repaired Crocs can last for months or even years.
Can I clean my Crocs after gluing them?
Yes, you can clean your Crocs after gluing them. Be gentle and avoid scrubbing the area where the glue was applied.
Do I need to sand the surface before gluing?
Sanding the surface where the glue will be applied ensures better adhesion. Use fine-grit sandpaper and gently roughen the surface to create a better bonding surface for the glue.
How can I avoid getting glue on my hands?
Wear protective gloves or use a popsicle stick or cotton swab to apply the glue. Avoid touching the glue with your bare hands to prevent sticking.
Can I use regular super glue for repairing Crocs?
No, regular super glue is not recommended for repairing Crocs as it may not be strong enough to hold the material together. Use a stronger adhesive designed for shoe repairs.