Are you looking to add a touch of sparkle to your wardrobe? Crafting glitter shoes DIY is a fun and fashionable way to transform a plain pair of shoes into something truly eye-catching. Whether for a special event or just to zest up your daily attire, creating your very own homemade glitter shoes can be both satisfying and stylish. In this post, we will guide you through the dazzling journey of applying glitter to shoes, ensuring that by the end, you’ll be stepping out in a pair of sparkling masterpieces crafted by none other than you.
Materials and Tools for Crafting Glitter Shoes

Before diving into the shoe customization with glitter, it’s essential to gather all the necessary materials and tools. The success of your project hinges on the quality and suitability of each component you use.
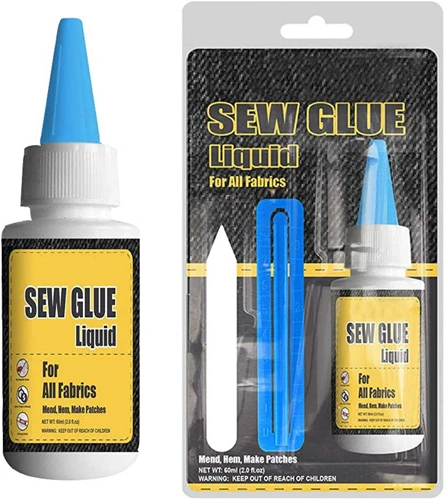
Choosing the Best Glue for Shoe Glitter
Securing permanent glitter on shoes starts with selecting the best glue for shoe glitter. An adhesive that is flexible, strong, and clear-drying is ideal for this project. Options like fabric glue, permanent craft glue, or specialty shoe adhesive can work wonders in keeping the sparkle firmly in place.
Selecting the Perfect Glitter for Your Project
The type of glitter you choose can significantly affect the outcome. For a uniform and brilliant finish, fine glitter is often recommended. However, if you’re after more texture or a unique look, larger glitter flakes can also be used. Ensure the glitter is colorfast and resistant to fading for long-lasting shine.
Preparation for Shoe Customization with Glitter
Proper preparation is key to a seamless glitter shoe transformation. Starting with a clean and well-prepped surface will make the application process much smoother.
Cleaning the Shoes
Begin by thoroughly cleaning your shoes to remove any dirt or oils that could prevent the glue from adhering properly. A gentle soap and water solution should suffice for most shoe materials.
Taping Off Areas
Next, use painter’s tape to mask off any areas of the shoe that you don’t want to glitter. This includes the soles, any logos, or embellishments that should remain untouched. Precision in this step ensures a clean, professional-looking result.
Applying Glitter to Shoes: Step-by-Step Guide

With your shoes cleaned and taped, you’re now ready to embark on the most exciting part: applying glitter to your shoes. Patience and attention to detail are your best friends here.
Glitter Adhesive Techniques
There are a few glitter adhesive techniques you can employ. One method is to mix your glitter with glue to create a paste and then apply it with a brush. Another technique is to apply a layer of glue to the shoe and then sprinkle glitter over it. Whichever method you choose, ensure even coverage for a cohesive look.
How to Apply Glitter Evenly
For an even coat, work in small sections and build up the glitter layers gradually. A soft brush can help distribute the glitter uniformly, and a shaker or sieve might aid in controlling the amount of glitter applied. Let each layer dry before adding the next to avoid clumping.
Sealing and Protecting Your Homemade Glitter Shoes
Once you’ve achieved the desired level of sparkle, it’s vital to seal the glitter to prevent it from shedding and to ensure its longevity.
Ensuring Permanent Glitter on Shoes
To keep the glitter from flaking off, apply a layer or two of a sealant over the entire glittered area. This can be a clear-drying glue or a specific glitter sealant designed for maintaining the sparkle while offering protection.
Recommended Sealants
Some of the recommended sealants include water-based varnishes or clear acrylic sprays that are designed for flexibility. These products will create a protective shield that is also invisible, so your glitter’s brilliance is not compromised.
Glitter Shoe Transformation: Final Touches
With the glitter secured and sealed, you are nearly at the finish line of your glitter shoe transformation.
Drying and Curing Time
Allow your shoes to dry completely, which may take anywhere from a few hours to overnight, depending on the products used. Curing time is crucial to achieve a durable finish, so be patient and resist the urge to wear them too soon.
Adding Additional Embellishments
If you’re feeling extra creative, consider adding additional embellishments like crystals, bows, or charms. These can be glued on top of the glitter for an even more personalized and elaborate effect.
Care and Maintenance of Your Glitter Shoes
To keep your newly crafted glitter shoes looking fabulous, proper care and maintenance are a must.
Cleaning Tips
To clean, gently wipe with a soft, damp cloth to remove any surface dirt. Avoid harsh scrubbing which could dislodge the glitter. If your shoes get wet, allow them to air dry away from direct heat.
Storage Advice
- Store your glitter shoes away from sunlight to prevent the color from fading.
- Keep them in a dry place to avoid any glue from weakening.
- Consider using a shoe box or dust bag to protect them from getting scratched or dusty.
If you’re looking to add some sparkle to your wardrobe, gluing glitter on shoes can be a fun DIY project! For guidance on how to achieve that perfect glittery look, check out our comprehensive tutorials. We have a step-by-step guide on how to glue glitter to various surfaces. And if you want to expand your crafting skills, take a look at our specific instructions for applying glitter to fabric in our article on how to glue glitter on fabric, or learn about adding glitter to paper projects by visiting our page on how to glue glitter on paper. With these resources, you’ll be ready to make your shoes — and any other projects — shine!
Conclusion and Showcase of Glitter Shoe DIY
In conclusion, creating your own glitter shoes DIY can be a rewarding and stylish project. With the right materials, preparation, and techniques, you can achieve a glamorous and permanent glitter on shoes. We hope this guide inspires your next shoe customization with glitter and leads to a stunning and unique glitter shoe transformation. Show off your creativity and step out in sparkle!