Leather is a premium material widely used for its durability and aesthetic appeal. However, when it comes to repairing or crafting with leather, the choice of adhesive is crucial. A suitable leather adhesive ensures that leather items remain intact and functional for as long as possible. In this article, we delve into the world of leather adhesives to help you make an informed decision for your leather projects.
Understanding Leather Bonding Glue
Leather bonding glue is specifically formulated to create a durable bond between leather surfaces. Its unique composition allows it to penetrate the leather’s porous texture, creating a strong and lasting hold. Whether you’re repairing a beloved leather bag or crafting a new wallet, understanding the properties of leather glue is essential for a successful outcome.
Types of Leather Glue
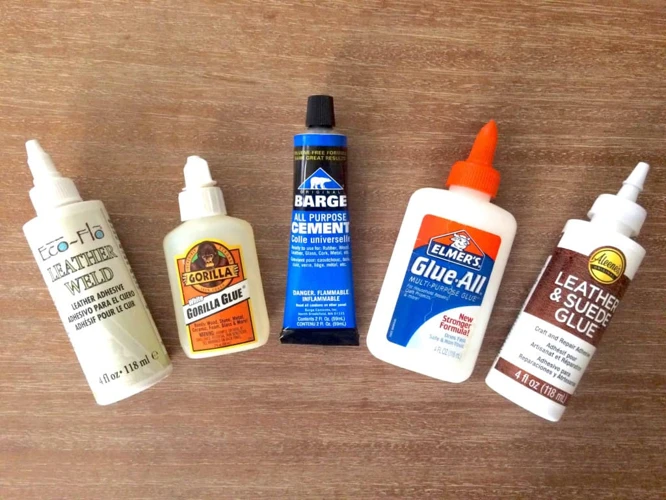
Different leather projects require different types of adhesives. Some projects may need a flexible bond, while others require waterproofing or extra strength. Knowing the available options will help you choose the best glue for leather that suits your specific needs.
Best Glue for Leather Projects
For general leather crafting, a versatile leather craft glue that offers a reliable bond and is easy to work with is ideal. This type of adhesive provides a clear finish and doesn’t stiffen the leather, ensuring that your projects maintain their natural look and feel.
Strong Glue for Leather Repairs
When repairing leather, a strong glue for leather is necessary to withstand wear and tear. Such adhesives are designed to bond quickly and provide a high-strength hold that can resist pulling and heavy use, making them ideal for fixing tears or reattaching parts.
Flexible Glue for Leather
Leather items often need to maintain their flexibility, and a flexible glue for leather accommodates this need. These adhesives allow the leather to retain its natural movement without cracking or breaking the bond, perfect for items like jackets and bags that are constantly on the move.
Waterproof Glue for Leather
Exposure to water can be a concern for leather goods. Waterproof glue for leather ensures that your leather items can withstand the elements. This type of adhesive is designed to resist water penetration, protecting the leather from damage and maintaining the integrity of the bond.
Choosing the Right Leather Repair Glue
With various adhesives in the market, selecting the right one for your leather repair can be daunting. Consider the specific requirements of your repair job to narrow down your choices.
Leather Glue Repair Kit Options
A leather glue repair kit often includes a selection of adhesives and tools tailored for fixing leather. These kits are convenient for quick repairs and can save time and money by providing everything you need in one package.
Leather Craft Glue for DIY Projects
DIY enthusiasts should look for a leather craft glue that is easy to handle and offers a strong bond without damaging the leather. These glues often come in user-friendly packaging and have a longer working time to allow for adjustments during the crafting process.
How to Apply Leather Adhesive
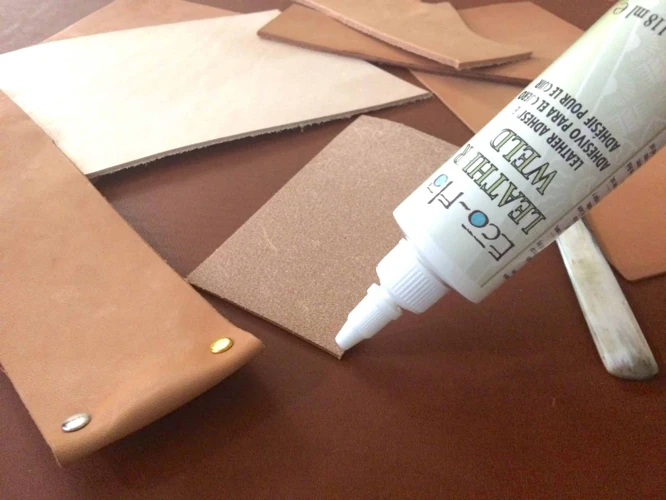
Proper application of leather adhesive is key to a successful repair or craft project. The process involves preparation of the leather surface, precise application of the glue, and securing the bond.
Step-by-Step Guide for Leather Repair
- Clean the leather surface to remove any oils or debris.
- Apply a thin layer of leather repair glue to one side of the leather.
- Press the two pieces of leather together firmly.
- Use a clamp or weight to maintain pressure as the glue dries.
- Allow adequate time for the adhesive to cure completely.
Specific Applications
Different leather items may require specialized adhesives to address their specific needs and challenges.
Glue for Leather Sofa Repair
A glue for leather sofa repair must offer a strong and lasting bond to handle the weight and friction of daily use. It should also dry clear to maintain the sofa’s appearance and blend seamlessly with the existing material.
Shoe Glue: Repairing Leather Footwear
Shoes undergo a lot of stress and movement, making the choice of shoe glue critical. An adhesive that can withstand flexing, moisture, and changes in temperature will ensure that your leather footwear remains in top condition.
Maintaining The Durability of Leather Bonds
Once you have repaired or created a leather item, maintaining the bond’s durability is crucial to extend its lifespan.
Tips for Long-Lasting Leather Adhesion
- Avoid exposing the item to extreme temperatures or moisture.
- Condition the leather periodically to keep it supple.
- Handle repaired items with care, especially during the initial curing period.
Product Reviews and Recommendations
With numerous products on the market, finding the right adhesive can be overwhelming. Reviews and recommendations can guide you to the best options available.
Top Rated Leather Adhesive Products
Seek out top-rated leather adhesive products that have positive feedback from users. These products have proven their effectiveness in a variety of situations and are often trusted by professionals and hobbyists alike.
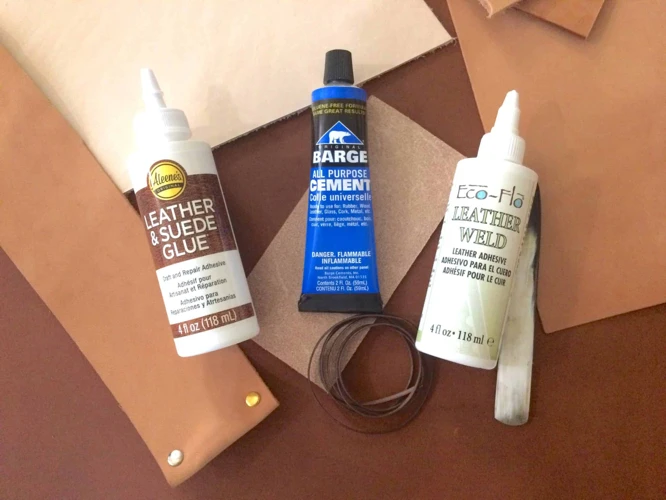
Comparing Leather Repair Glues
When comparing different leather repair glues, consider factors like bonding strength, drying time, flexibility, and waterproof capabilities. This will help you find the most suitable adhesive for your needs.
Conclusion
Choosing the right adhesive is essential for any leather project. Whether you’re repairing a tear, crafting a new item, or maintaining an existing bond, the correct leather glue will make all the difference.
When it comes to working with leather, choosing the right adhesive can make all the difference in the quality and durability of your project. Whether you’re repairing a leather belt or crafting from scratch, it’s crucial to use a glue that’s specifically suited for leather. For insights into the best practices for gluing leather, be sure to check out our guide on how to glue leather. If you’re specifically looking to repair a leather belt, our article on what glue to use on a leather belt can help you choose the right product for a strong, lasting bond. And for those curious about adhesives for other materials, our piece on what glue for wallpaper might come in handy for your home decor projects.
Summary of Best Practices for Leather Gluing
To ensure success, always clean the leather surface before application, apply the glue according to the manufacturer’s instructions, and allow for proper curing time. By following these best practices, your leather projects will hold up to the test of time.