Have you ever gazed upon a pair of glittery shoes and felt the urge to have a pair of your own? Adding glitter to your shoes can elevate your style from ordinary to extraordinary. However, choosing the right glue to use can be overwhelming. Will the glitter stick for the long haul or will the shoes fall apart after a short wear? Stress no further – this ultimate guide will walk you through the different types of glues to use on shoes for glitter and provide you with a step-by-step process for glittering your shoes successfully. Get ready to shine bright like a diamond in your glitter shoes!
Types of Glue for Glitter Shoes
When it comes to adding some glam and sparkle to your footwear, choosing the right glue is crucial. Using the wrong one can result in a glittery disaster, leaving you with a sticky mess that won’t hold. Don’t worry, we’ve got you covered! In this section, we’ll explore different types of glue suitable for attaching glitter to your shoes, ensuring a durable and long-lasting bond. Whether you’re blinging out your Birkenstocks or adding some shine to your sneakers, keep reading to find out which glue to use.
Regular Craft Glue
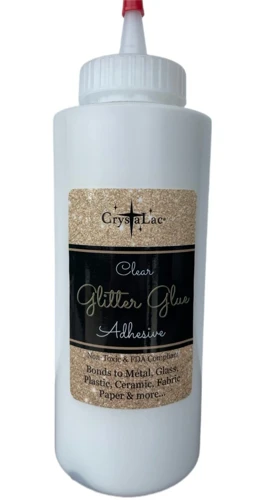
Regular Craft Glue is a popular choice for DIY glitter shoe projects due to its accessibility and affordability. This type of glue works well on a variety of surfaces and is easy to find at any craft store or online marketplace. However, it’s important to note that regular craft glue may not be the most durable option for long-term use.
| Pros | Cons |
|---|---|
| Easy to find and purchase | May not be the most durable option |
| Affordable | Can be messy and time-consuming to apply |
| Works well on a variety of surfaces | May not hold up well to water or wear and tear |
If you decide to go with regular craft glue, it’s important to apply it evenly and thinly to avoid clumping and lumps of glue under the glitter. To make the glue more durable, add a fabric medium or mix it with clear sealant. This will help prevent the glitter from flaking off and make the shoes more wearable over time.
Using regular craft glue to glue glitter on shoes is a fun and easy DIY project that can elevate a pair of plain shoes into a dazzling, eye-catching accessory. However, if you’re looking for a more durable and long-lasting option, you may want to consider other types of glue such as fabric glue or spray glue.
If you’re interested in fixing other shoe-related problems, check out our article on how to glue Converse shoes or how to glue Birkenstocks.
Fabric Glue
Fabric glue is another popular option for gluing glitter on shoes. Fabric glue is specially formulated to bond fabrics together without hardening and cracking, making it a great choice for use on shoes. This type of glue is best suited for cloth and canvas shoes, but it can also work well on leather if the shoes are flexible enough.
One of the benefits of using fabric glue is that it dries clear, so you don’t have to worry about unsightly glue marks. It also dries flexible, which means it won’t crack or flake off when the shoes are worn.
To use fabric glue for glitter shoes, start by cleaning the shoes thoroughly and prepping your workspace. Mix the glue and glitter together, then apply a thin layer of the glue mixture to a small section of the shoe. Sprinkle glitter over the glue- covered section and pat it down firmly. Repeat the process, working in small sections until the entire shoe is covered.
It is essential to note that not all fabric glues are created equal, so be sure to choose a high-quality brand specifically designed for use on shoes. You can find a variety of fabric glues for shoes online or at your local craft store. Make sure to follow the manufacturer’s instructions carefully for best results.
When working with fabric glue, it’s crucial to note that it can take longer to dry than other types of glue, sometimes up to 24 hours, depending on the brand. Be sure to allow enough time for the shoes to dry completely before wearing them.
Fabric glue is an excellent choice for adding glitter to your shoes, especially if you’re working with cloth or canvas shoes. If you’re working with leather shoes that require a stronger bond, check out our guide on what glue to use for leather shoes.
Spray Glue
When it comes to gluing glitter on shoes, spray glue can be an excellent choice for those who want to achieve an even, consistent coat of glitter. Spray glue can also be much quicker and easier to apply than other types of glue, making it an efficient option for those who are short on time.
To use spray glue, start by cleaning your shoes properly and prepping your workspace. Then, spray a light layer of glue onto the parts of the shoe where you want glitter to adhere. Be sure to hold the can at around six inches away from your shoes to avoid over-saturating them.
Once you have applied the spray glue, quickly sprinkle glitter over the areas coated with glue. Be sure to apply the glitter evenly for a consistent finish. Gently press the glitter into the glue to ensure that it sets properly.
As with other types of glue, it’s important to let the spray glue dry completely before wearing your glitter shoes. Don’t forget to seal the glitter with a clear sealant to prevent it from falling off.
While spray glue can be an excellent option for gluing glitter onto shoes, it may not work as effectively on all materials. For example, leather shoes may require a different type of glue to ensure that glitter adheres properly. Additionally, it’s always a good idea to test your spray glue on a small, inconspicuous area of your shoe before applying it on a larger scale.
Spray glue can be a great option for those who want to add some sparkle to their shoes. However, it’s important to use it correctly and to ensure that it’s the right choice for your particular shoe material.
How to Glue Glitter on Shoes
Once you’ve gathered all the necessary materials for your DIY glitter shoe project, it’s time to learn how to glue glitter on shoes. It may seem intimidating at first, but with the right technique and some patience, the process is easier than you might think. To help you get started, we’ve put together a step-by-step guide on how to create glitter shoes that sparkle and shine. So, grab your glitter, glue, and shoes, and let’s get started! And if you’re interested in learning more about glueing shoes, check out our article on how to glue shoes.
Clean the shoes properly
Cleaning the shoes properly is a crucial step before applying glue and glitter. Failure to do so can lead to poor adhesion, resulting in a subpar end result. Follow the steps below to ensure that your shoes are ready for a glittery transformation:
| Step 1: | Remove any dirt, dust or debris from the shoes with a soft-bristled brush or a clean, dry cloth. This will ensure that the glue and glitter adhere properly to the shoe surface. |
| Step 2: | Next, use a damp cloth with soap or detergent to wipe down the surface of the shoes. Pay close attention to seams, edges and crevices where dirt and grime can accumulate. Rinse the soap off with clean water and allow the shoes to dry completely. |
| Step 3: | If you are using an alcohol-based cleaner, make sure to spot test it on a small, inconspicuous area of the shoe first to ensure that it does not damage the surface. If the shoe material is delicate, such as suede or velvet, use a specialized cleaner that is appropriate for that type of material. |
By following these steps, you will have a clean and ready surface for the glue and glitter to adhere to, and your shoes will be one step closer to sparkling like new. For more information on gluing various materials to shoes, check out our articles on how to glue fabric to shoes, or our step-by-step guide on how to glue glitter on shoes.
Prep the workspace
Preparing your workspace is a crucial step in gluing glitter onto your shoes. You want to make sure that your area is clean and free of any debris that might get mixed up with the glue and glitter.
One way to ensure your workspace is prepped is to cover your work surface with a plastic tablecloth or newspaper. This will protect your work area from glue and glitter residue. It will also make it easy to clean up once you’ve finished.
Another important step is to gather all the necessary supplies and have them within arm’s reach. This includes your glue of choice, glitter, a brush or sponge for applying the glue, and any additional decorations or tools you might need.
If you’re working indoors, make sure the area is well-ventilated. Some types of glue can have strong fumes that can be harmful if inhaled for an extended period of time. It’s a good idea to open a window or door to allow fresh air to circulate.
It’s also important to consider the lighting in your workspace. Make sure you have enough light to see clearly, especially when working with small details. If you’re working on a project for an extended period of time, you might also want to consider using a magnifying glass to help you see more clearly.
Taking the time to properly prep your workspace will make the gluing process much smoother and will help ensure that your shoes turn out exactly as you envision them.
Check out our other articles on shoe repair:
Mix the Glue and Glitter
Mixing the glue and glitter is a crucial step in the process of making glitter shoes. It’s important to get the right consistency in order to get the best results. Here’s a step-by-step guide to mixing the glue and glitter:
- Choose the right type of glue: Depending on the type of glitter you are using, choose the right type of glue. If you are using large glitter flakes, use a thicker glue such as fabric glue. If you are using fine glitter, a regular craft glue can be used.
- Get a mixing bowl: Use a clean, dry mixing bowl for this step. Make sure it is large enough to fit the amount of glue and glitter you will need.
- Measure the glue: Measure out the amount of glue you will need for your shoes. It’s better to have too much than too little. A good rule of thumb is to use about 2-3 ounces of glue per shoe.
- Add the glitter: Add the glitter to the bowl of glue and start mixing. It’s best to add the glitter gradually and mix it in between additions. This will help to ensure that the glitter is evenly mixed throughout the glue.
- Check the consistency: Check the consistency of the glue and glitter mixture. It should be thick, but still able to drip off the mixing spoon. If it is too thick, add a little bit more glue. If it is too thin, add more glitter.
It’s important to mix the glue and glitter thoroughly to ensure that the glitter adheres properly to the shoes. Once the mixture is ready, move on to the next step of applying the glue onto the shoes.
Apply the Glue on the Shoes
Before applying the glue, be sure that your shoes are clean and prepped. Now, let’s move on to the next step: applying the glue.
Step 1: Apply the glue to a small area first. This will help prevent the glue from drying before you’re ready.
Step 2: Using your brush, spread the glue evenly on the area where you want to apply the glitter. Avoid applying too much glue as it may cause lumps or runs. For larger areas, divide them into smaller sections and work on one area at a time.
Step 3: Apply the glitter to the area with the glue. While the glue is still wet, pour or sprinkle over the glitter, making sure to cover every spot. You can also use a spoon or your fingers to gently press the glitter onto the glue, ensuring that it sticks properly.
Step 4: Shake off any excess glitter onto a sheet of paper or a tray. On the paper or tray, tilt the shoe slightly to let the excess glitter fall off. This way, you can reuse the glitter for other areas of the shoes.
Step 5: Repeat steps 1 to 4 until you’ve covered all the areas where you want the glitter to be. Let the shoes dry completely before applying a sealant.
Tip: It’s important to work quickly since the glue dries fast. If the glue dries up before you can apply the glitter, just apply another layer of glue and try again.
Here’s a table summarizing the steps:
| Steps | Description |
| Step 1 | Apply the glue to a small area first. |
| Step 2 | Using your brush, spread the glue evenly on the area where you want to apply the glitter. |
| Step 3 | Apply the glitter to the area with the glue. |
| Step 4 | Shake off any excess glitter onto a sheet of paper or a tray. |
| Step 5 | Repeat steps 1 to 4 until you’ve covered all the areas where you want the glitter to be. Let the shoes dry completely before applying a sealant. |
Follow these steps and you’ll have beautiful, glittery shoes in no time!
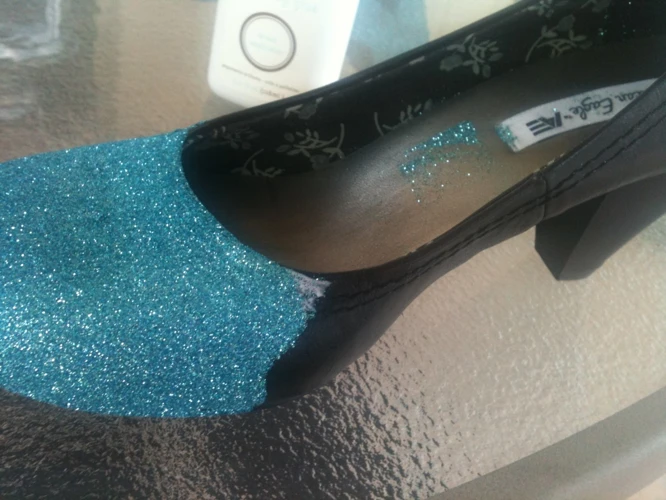
Glitter the Shoes
Now comes the fun part – adding the glitter to your shoes! Follow these steps to make sure your shoes come out looking fabulous:
1. Pour out the glitter: Get a suitable container and pour out the glitter in it. Make sure it is deep enough to accommodate your shoes.
2. Apply glue mixture: Using a smaller brush, apply the glue mixture in the sections you want to add glitter. Do not worry if you apply glue on areas that do not require glitter. Just remember to clean it up before it dries.
3. Press the shoe into the glitter: Gently place the shoe into the glitter container and press it down. Use your fingers to help distribute the glitter evenly. Make sure to cover the entire glued surface with glitter.
4. Shake off excess glitter: Gently shake off any excess glitter from the shoe and put it back in the container. You can also use a soft brush to dust off any excess glitter that is still stuck on the shoe.
5. Repeat the process: Repeat the process until the entire shoe is covered with glitter. Make sure to let each section dry before moving on to the next one.
Note: If you’re using multiple colors, be sure to clean the brush and container in between each color. This will prevent any color mixing and keep your glitter shoes looking neat.
6. Let the shoes dry: Once you’re done adding all the glitter, let the shoes dry completely for 24 hours. Make sure to keep them in a dry, dust-free area.
7. Seal the glitter: To prevent any glitter fallout or fading, seal the glitter on the shoes. You can use a spray sealant or fabric glue for this step. Apply a thin layer of sealant or glue all over the glittered area and let it dry completely.
8. Clean up: Once the sealant is dry, gently dust off any excess glitter from the shoes. Your glitter shoes are now ready to wear!
| Steps to Glitter Your Shoes | Description |
|---|---|
| 1 | Pour out the glitter into a deep container |
| 2 | Apply the glue mixture to the sections you want to glitter using a small brush |
| 3 | Gently press the shoe into the glitter container and use your fingers to distribute the glitter evenly |
| 4 | Shake off excess glitter and put it back in the container. Dust off any extra glitter using a soft brush |
| 5 | Repeat the process until the whole shoe is covered in glitter. Let each section dry before moving onto the next one |
| 6 | Let the shoes dry for 24 hours in a dry, dust-free area |
| 7 | Seal the glitter on the shoes using a spray sealant or fabric glue |
| 8 | Once the sealant is dry, dust off any excess glitter from the shoes |
Dry and Seal
Once you have finished applying glitter to your shoes, you need to let them dry completely. This can take anywhere from a few hours to overnight. It’s important not to rush the drying process, as this can cause the glitter to come off easily.
After the shoes are fully dry, you will need to seal them to ensure the glitter stays in place. You can use a clear sealant spray or a clear fabric glue for this step. A spray sealant is a popular choice because it creates an even finish and dries quickly. Alternatively, a clear fabric glue can be applied with a small brush for more control.
Here are some tips to keep in mind when it comes to drying and sealing your glitter shoes:
| Tips for Drying and Sealing Glitter Shoes |
|---|
| A well-ventilated area is best for drying glitter shoes. |
| Make sure the shoes are completely dry before applying the sealant. |
| If using a fabric glue sealant, apply a thin layer and let it dry completely before applying a second layer. |
| If using a spray sealant, hold the can at least 6 inches away from the shoes and apply a light layer. Repeat as needed. |
| Let the sealant dry completely before wearing the shoes. |
| Store your glitter shoes in a cool, dry place to prevent the glitter from rubbing off. |
By following these tips, you can ensure that your glitter shoes stay sparkly and beautiful for as long as possible. Remember to take your time, and enjoy the process of creating your own unique, glittery shoes!
FAQs
As you begin your journey in crafting glitter shoes, you may come across a few questions and concerns regarding the process. To help ease any uncertainties, we’ve gathered some of the most frequently asked questions and answered them below. Take a look and let us put your mind at ease as you continue to create your own sparkly, personalized footwear.
What kind of shoes work best with glitter?
When it comes to adding glitter to shoes, not all types of shoes are equal. Some types of shoes work better with glitter due to the materials they are made of and their texture. Here’s a breakdown of what kind of shoes work best with glitter:
| Shoe Type | Best Glittering Material | Notes |
|---|---|---|
| Canvas Shoes | Fine Glitter | Canvas shoes with a smoother finish work better for glittering. |
| Satin Shoes | Chunky Glitter | Satin shoes look great with chunky glitter that adds dimension and sparkle. |
| Leather Shoes | Sequins | Sequins adhere better to the smoother surface of leather shoes. |
| Plastic or Vinyl Shoes | Fine Glitter | Due to their plastic texture, fine glitter works well with these shoes. |
Keep in mind that the glue used to attach the glitter may not adhere well to shoes with certain textures or finishes. It is important to do a small test patch to ensure that the glue adheres properly to the shoe surface.
Can I use a glue gun to put glitter on my shoes?
Many DIY enthusiasts wonder if they can use a glue gun to put glitter on their shoes. The short answer is yes, but it is not the most ideal method. Here’s a breakdown of the pros and cons of using a glue gun for glitter shoes:
| Pros | Cons |
|---|---|
| Quick and easy to use | The glue may not hold glitter securely |
| Creates a thick layer of glue | May create a bumpy and uneven surface |
| Readily available and affordable | May burn your fingers or damage the shoe if the glue is too hot |
While using a glue gun can be a quick and easy solution, it may not provide the best results. The glue from a glue gun may not hold the glitter securely, which can cause it to fall off easily. Additionally, the thick layer of glue created by a glue gun may create a bumpy and uneven surface, which is not ideal for a smooth finish.
Regardless of these drawbacks, if you still want to use a glue gun, there are some tips that can help you make the most of this method. First, make sure to use a low-temperature glue gun to avoid burning your fingers or damaging the shoe. Additionally, apply a thin layer of glue and glitter to avoid creating a thick and uneven surface.
While a glue gun can be used to put glitter on shoes, it may not be the most effective method. Using a fabric or spray glue is more recommended for a stronger and smoother finish.
What can I do if glue gets on the wrong part of the shoe?
It’s not uncommon to accidentally get glue on the wrong part of the shoe when applying glitter. But don’t worry, there are ways to fix it without ruining the entire shoe.
1. Act quickly
The key is to act quickly before the glue dries. Use a cotton swab or a clean cloth to wipe away as much of the excess glue as possible before it sets.
2. Try a solvent
If the glue has already dried, don’t panic just yet! Try using a solvent such as rubbing alcohol or nail polish remover on a cotton swab. Test the solvent on a small area first to ensure it won’t damage the shoe material.
3. Sand it down
If the glue has dried and cannot be removed with a solvent, try sanding it down gently with fine-grit sandpaper. Be careful not to damage the shoe material or remove too much of the surface.
4. Cover it up
If all else fails, consider covering up the glue mark with some extra glitter or a decorative element to make it look intentional.
In any case, always test any solution on a small, inconspicuous area of the shoe first to avoid causing more damage. With a little patience and resourcefulness, you can fix any glue mishaps and end up with a stunning pair of glitter shoes!
Conclusion
After going through this comprehensive guide on what glue to use on shoes for glitter, you should have a good understanding of the different types of adhesives you can use to create sparkly, eye-catching footwear. It’s important to remember that not all glue is created equal, and certain types are better suited for different materials and surfaces.
If you’re working with fabric shoes, fabric glue is your best bet as it is specifically designed to bond with textiles and is flexible enough to withstand movements, so the glitter won’t crack or peel off. On the other hand, if you’re working with plastic or leather shoes, regular craft glue and spray adhesive are great options.
When it comes to the application process, it’s important to follow the steps carefully, from prepping the workspace to allowing enough time for the glue and glitter to dry and set. In the end, you’ll have a gorgeous pair of glitter shoes that will surely turn heads and make a statement.
In the end, using the right type of glue and following the proper steps will ensure your glitter shoes look their best and last a long time. Just remember to work in a well-ventilated area and wear gloves to avoid any potential messes. So, why not grab some glitter, glue, and shoes and give it a try? You might be surprised at how easy and fun creating glitter shoes can be!
Frequently Asked Questions
What kind of glitter works best for shoe projects?
Fine glitter is the best choice as it will adhere better and create a smoother finish. Chunky or coarse glitter can be clumpy and create an uneven surface.
How long will glitter shoes last?
The durability of glitter shoes will depend on how well they are taken care of. If properly sealed and cared for, they should last for several wears.
Can I use regular school glue to add glitter to shoes?
You can use regular school glue, but it may not adhere as well as other types of glue and may not last as long.
Should I use a paintbrush or my fingers to apply the glue?
A paintbrush can help create a cleaner and more even application, but using your fingers can be convenient for smaller areas or harder to reach spots.
Can I use hairspray to seal the glitter onto the shoes?
While hairspray may provide some temporary hold, it is not recommended for long-term use as it may yellow or flake off.
Can I use regular glitter glue pens for glitter shoes?
Glitter glue pens may not provide enough coverage and may create a clumpy texture. It is best to use fine loose glitter and a separate glue adhesive.
What can I do if the glitter starts to fall off my shoes?
You can try adding another layer of glue and glitter, or using a clear sealant to further secure the glitter.
Can I use hot glue to add glitter to my shoes?
Hot glue can warp or melt certain types of shoe materials and may not be the best choice for glitter shoes. Use a glue specifically designed for use on shoes.
How long do I need to wait for the glue to dry before applying glitter?
The drying time for glue will depend on the type used and environmental factors, but typically it should be dry to the touch within an hour or two before applying glitter.
What can I do if I accidentally get glue on the wrong part of the shoe?
Try using a damp cloth or cotton swab to gently remove the excess glue before it dries. If it has already dried, you may need to carefully scrape it off with a sharp tool.