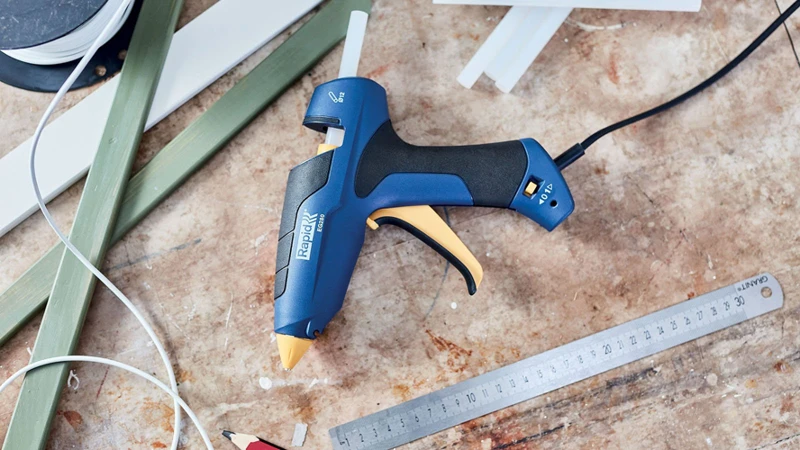
Introduction
Crafting and DIY projects are a great way to unwind and express your creativity. To successfully complete many of these projects, hot glue is often the go-to adhesive. Knowing how to melt hot glue sticks is a vital skill for any DIY enthusiast. It can help you achieve a perfect finish and ensure your project stands the test of time. In this article, we will guide you through the process of melting hot glue sticks step-by-step, offering tips and tricks to help you achieve your desired outcome. So, grab your glue gun, and let’s get started!
What is Hot Glue?
Hot glue is a type of adhesive that’s used to bond materials together. It consists of heat-activated thermoplastic polymer that comes in the form of sticks or pellets. When heated, the glue melts and becomes sticky, allowing it to adhere to a wide range of surfaces such as paper, fabric, plastic, and wood. Unlike other types of glue, hot glue dries quickly and creates a strong bond that can withstand high levels of stress. This makes it an ideal choice for a variety of DIY projects, crafts, and repairs. Hot glue is often used with a glue gun, which is a handheld device that melts the glue stick and allows it to be applied precisely and evenly. Hot glue is versatile, easy to use, and can be found at most hardware and craft stores, making it a popular adhesive for both professionals and hobbyists.
Why Melt Hot Glue Sticks?
Why Melt Hot Glue Sticks?
Melted hot glue sticks have several uses in different industries. When melted, the glue can be applied to different materials to bind them together. This is useful in various DIY projects, such as building a jewelry box or fixing a broken vase. Additionally, it can be used to create intricate details and designs due to its ability to dry quickly and adhere strongly. This is particularly useful in crafting and scrapbooking. Hot glue is also used in woodworking, upholstery, and automotive repair.
Melted hot glue sticks are more versatile than solid glue sticks as they can be applied in different ways. They can be poured into molds to create custom shapes, spread using a spatula to make a smooth and even surface, or brushed on to create a textured finish. Melting hot glue sticks ensures that the glue is distributed evenly.
While there are other alternative methods for creating adhesive bonds, melting hot glue sticks is more cost-efficient as a single stick can be used for multiple projects. It is also more convenient as hot glue guns are readily available and easy to use.
In the next section, we will look at the different types of glue guns available and which one to choose for your specific project. You can also check out our guide on how to use a glue gun stick for more information.
| Advantages of Melted Hot Glue Sticks | Disadvantages of Melted Hot Glue Sticks |
| Adheres quickly and strongly | Can be messy to work with |
| Can be used for multiple projects | May not be suitable for use on certain materials |
| Cost-efficient | May cause burns if not handled carefully |
| Easier to distribute evenly |
Types of Glue Guns
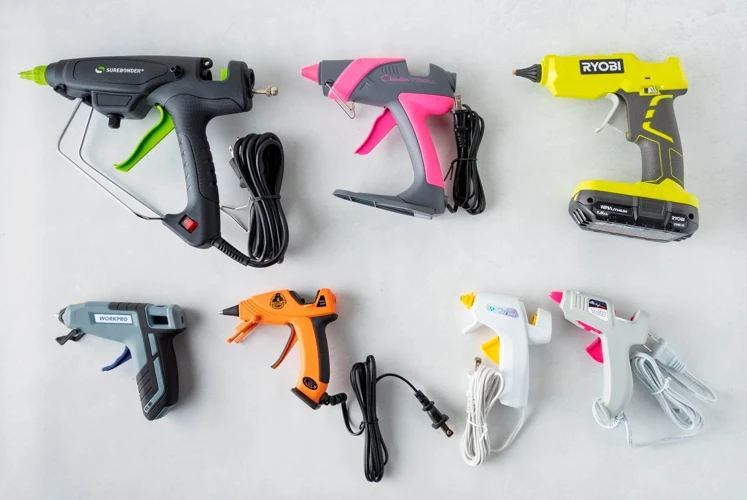
If you’re starting a hot glue project for the first time, you’ll quickly realize that there’s a range of glue guns to choose from. Each type of glue gun has its pros and cons and works best for specific situations. Choosing the right type of glue gun can make your project more efficient and uniform. In this section, we’ll explore two types of glue guns: low-temperature and high-temperature. We’ll also highlight their particular specifications, so you know which one is the perfect fit for your next project. If you’re interested in crafting with hot glue, be sure to check out our guide on using a glue gun for crafts and making objects with popsicle sticks and hot glue.
Low Temperature Glue Gun
When it comes to low temperature glue guns, they operate around 250°F (121°C) which makes melting hot glue sticks more controlled and less messy. They are perfect for delicate materials like lace, ribbon, or foam that may get damaged by higher temperature glue guns.
Below is a comparison table outlining some key differences between low and high temperature glue guns:
| Low Temperature Glue Gun | High Temperature Glue Gun | |
|---|---|---|
| Temperature Range | 250°F (121°C) | 380°F (193°C) to 450°F (232°C) |
| Glue Stick size | Bigger and longer sticks (typically 0.45” in diameter) | Smaller sticks (typically 0.28” in diameter) |
| Drying Time | Longer drying time | Quicker drying time |
| Strength | Low to medium | High |
| Application | Delicate materials like lace or foam | Heavy-duty materials like metal or wood |
Using a low temperature glue gun also means a lower risk of burns, although it is still important to take the necessary safety precautions. It is crucial to note that a low temperature glue gun may not work as well on heavy-duty materials and may not provide the same level of durability and strength as a high temperature glue gun.
If you’re looking for more detailed instructions on how to use a glue gun, check out our article “How to Glue Up a Box”. And if you don’t have a glue gun on hand, but still need to use hot glue, read our article “How to Use a Glue Stick Without a Gun” for some alternative methods.
High Temperature Glue Gun
When it comes to hot glue guns, there are two main types to consider, and one of them is the High Temperature Glue Gun. High temperature glue guns melt the glue at a higher temperature than low temperature glue guns, which allows the glue to bond more strongly. The glue produced by high temperature glue guns is suitable for use on a wide range of materials, including metal, plastic, and wood. However, high temperature glue guns should be used with caution because the heated glue can cause severe burns.
Here is a comparison table that highlights the differences between low temperature and high temperature glue guns:
| Low Temperature Glue Gun | High Temperature Glue Gun | |
|---|---|---|
| Temperature | Approximately 250°F | Approximately 380°F |
| Bond Strength | Moderate | Strong |
| Materials | Delicate fabrics, foam, lace, ribbon, and lightweight materials | Metal, plastic, wood, and other materials that need a strong bond |
| Safety | Less risky due to low temperature | Requires caution and protective measures due to the high heat |
It is important to note that high temperature glue guns should not be used on delicate or heat-sensitive materials, such as foam, lace, or ribbon. For those materials, a low temperature glue gun is a better option. Additionally, high temperature glue guns should be kept out of reach of children and pets and should never be left unattended while plugged in.
If you need to melt hot glue sticks for a project, be sure to use the appropriate type of glue gun for the materials you will be working with. Always follow the manufacturer’s instructions for use and safety precautions. For more information on using cold glue guns, check out our article on What is a Cold Glue Gun? or if you need to glue metal or plastic, see our guide on How to Glue Aluminum Foil to Paper.
Choosing the Right Hot Glue Sticks
Choosing the right hot glue sticks can make all the difference in the success of your project. It may seem like a small detail, but the size, color, and material of the glue stick can impact the strength and appearance of the bond. Size and Length is an important consideration when selecting hot glue sticks. Different glue guns require different sizes, so be sure to check the packaging for compatibility. The length of the stick will also affect how many glue sticks you will need for your project. Another important factor is Color and Material. Glue sticks come in various colors and materials, such as clear or colored, and high or low viscosity. Make sure to select the right type of glue stick for your project to ensure a strong and durable bond.
Size and Length
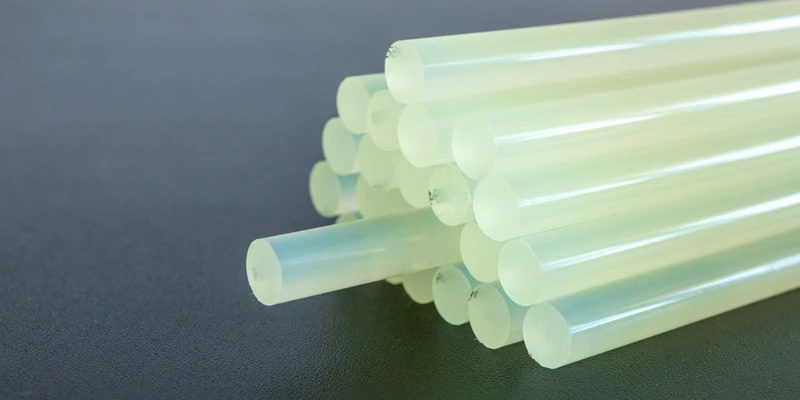
Choosing the right size and length of hot glue sticks is essential for a successful project. The length of the hot glue stick should match the size of your glue gun. Most standard glue guns use sticks that are 4 inches in length. However, some glue guns can use longer sticks up to 10 inches. So, make sure to check the manufacturer’s recommendation or your glue gun’s manual to determine the right length of glue sticks to use.
The size of the glue stick determines the amount of glue that will be dispensed. The standard size for hot glue sticks is 0.44 inches in diameter. However, larger or smaller sizes are available for specialized projects. For example, mini hot glue sticks are only 0.27 inches (7mm) in diameter and can be ideal for intricate projects or for those requiring a small amount of glue.
It is always best to choose hot glue sticks that are made for your glue gun to avoid any compatibility issues. Additionally, consider the amount of glue needed for your project. If you have a larger project, it may be cost-effective to buy hot glue sticks in bulk. On the other hand, if you only need a small amount of glue, you may want to purchase smaller packs.
Remember, the size and length of hot glue sticks that you choose can affect the overall outcome of your project. So, choose wisely!
Color and Material
When choosing hot glue sticks, the color and material are important considerations in achieving the desired result. The most common colors for hot glue sticks are clear and opaque shades of white, black, and brown. There are also a variety of colored hot glue sticks available. While colored glue sticks might seem like an easy way to add decoration to a project, it is important to ensure that the color will suit the project and not clash. For example, a brightly colored stick might be great for an art project but not suitable for a more serious project.
The material of a hot glue stick is another key consideration. There are a variety of materials available, but the most common are made of either polyamide or ethylene-vinyl acetate (EVA) resins. Polyamide hot glue sticks have a stronger bond, are more flexible, and are more resistant to high temperatures, making them a good choice for projects that will be exposed to extreme heat or require a strong bond. EVA hot glue sticks are a good choice for bonding materials that are non-porous, or light in weight, such as paper, cardboard, and some fabrics. They are also less likely to char and produce smoke when heated.
It is important to choose hot glue sticks that are compatible with the glue gun being used. Some glue guns only accept sticks of a certain size or material, so double-checking the requirements before purchasing is essential. Additionally, it may be useful to purchase a sample pack of different materials and colors to experiment with before committing to a larger project.
While hot glue sticks are available in a range of colors and materials, it is important to choose the correct stick for the project. Taking into account factors such as the intended use and required bond strength can help ensure the project’s success.
Internal link: how-to-shape-hot-glue
Preparing to Melt Hot Glue Sticks
You have your hot glue gun ready and your glue sticks in hand, but before you start melting the glue, there are a few important steps you need to take to ensure a successful project. Preparing to melt hot glue sticks involves gathering materials, cleaning your work area, and taking protective measures to avoid burns and other safety hazards. By following these instructions, you’ll be ready to start melting your hot glue sticks in no time! And, if you’re interested in learning about using hot glue for car bumper repairs or even melting hot glue sticks in the microwave, be sure to check out our guides on how to glue your bumper and how to melt hot glue sticks in the microwave.
Gather Materials
Before you start melting hot glue sticks, it’s important to gather all the necessary materials to ensure a smooth and safe process. Here’s a list of what you’ll need:
- Hot glue gun: Make sure you choose the proper glue gun that corresponds with the type of glue sticks you’ll be using.
- Hot glue sticks: Pick the right size and color hot glue sticks according to your project.
- Utility knife or scissors: You’ll need these tools to trim away any excess glue from your project.
- Wax paper or silicone mat: These materials can be used to cover the surface where you’ll place the glue gun, preventing any accidental drips or spills from damaging your furniture or work surface.
- Painters tape: You can use painters tape to mask off an area, or to keep the glue gun and stick holder in place while you work.
- Protective gloves: Hot glue can cause severe burns, so a pair of protective gloves can help prevent unwanted accidents.
Make sure you have all these materials organized and within reach before you start melting the glue sticks. Proper preparation is key to ensuring a pleasant and safe experience while working on your project.
Clean Work Area
Keeping a clean work area is essential when melting hot glue sticks. It not only helps to ensure that your project turns out as expected but also helps to prevent accidents. Here are some tips to keep your work area clean and safe:
| Tip #1: | Clear the clutter – Make sure your work area is free of any unnecessary items that could get in the way or cause a mess. Keep everything that you need close at hand and put away anything that is not needed for the project. |
| Tip #2: | Spread out a protective covering – Lay a newspaper or a drop cloth on your work surface to protect it from any hot glue that may drip or spill. |
| Tip #3: | Wipe down your glue gun – Before starting your project, wipe down your glue gun with a clean cloth. This will remove any dust or debris that may have collected on the gun. A clean glue gun will help to ensure that the glue flows smoothly and consistently. |
| Tip #4: | Clean as you go – While working on your project, wipe up any excess glue or drips with a cotton swab or a clean cloth. This will help to prevent any glue from getting onto surfaces where it shouldn’t be and will keep your work area clean. |
| Tip #5: | Dispose of waste properly – When finished with your project, be sure to dispose of any used glue sticks and other materials in the appropriate manner. Do not leave them lying around where someone could accidentally come into contact with them. |
By following these simple tips, you can ensure that your work area is clean, organized, and safe when melting hot glue sticks.
Protective Measures
Protective measures are an important part of melting hot glue sticks. This process involves exposing hot glue, which can burn and stick to your skin, so taking necessary precautions is vital. Here are some protective measures you need to follow when melting hot glue sticks:
- Wear protective gloves: Any gloves that are made with heat-resistant material, such as silicone, can provide a barrier between your hands and the hot glue. They are helpful in preventing accidental burns and injuries.
- Use safety goggles: Hot glue can splatter, causing burns to your eyes. Wear safety goggles to protect your eyes from spatters and debris.
- Protect your work surface: Use a heat-resistant mat or other protective layer to prevent the hot glue from damaging your work surface. You may also consider placing newspaper or other disposable covering on the table underneath your work area as an extra protective measure.
- Avoid inhaling fumes: Adhesives can release fumes that can irritate the skin or lungs. It is essential to work in a well-ventilated area or use a respirator that can prevent inhaling the fumes.
- Be mindful of hot glue temperature: If the temperature is too high, hot glue can release toxic fumes. Always follow the manufacturer’s instructions and keep your working area ventilated.
By following these protective measures, you’ll be able to enjoy melting hot glue sticks without any accidents or injuries. It is essential to take precautions and ensuring safety for yourself and people around you.
How to Melt Hot Glue Sticks
Now that you’ve learned about the different types of glue guns and hot glue sticks, as well as how to choose the right ones for your project, it’s time to dive into the process of melting hot glue sticks itself. This step-by-step guide will walk you through how to melt hot glue safely and effectively, as well as provide tips and tricks to achieve a professional-looking finish. So grab your materials and get ready to master the art of hot gluing!
Step-by-Step Instructions for Low Temperature Glue Gun
When using a low temperature glue gun to melt hot glue sticks, follow these step-by-step instructions:
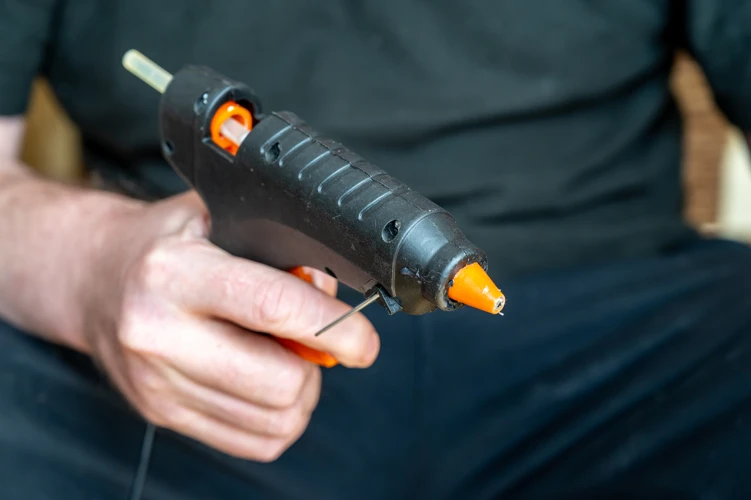
- Plug in the Glue Gun: Begin by plugging in the glue gun and allowing it to heat up for several minutes.
- Insert Glue Stick: Once the glue gun is heated up, insert the appropriate size low temperature glue stick into the back of the gun. Ensure that the glue stick is securely in place.
- Squeeze Trigger: Squeeze the trigger of the glue gun to begin melting the glue stick. Only apply a small amount of pressure on the trigger as the glue will quickly melt and flow out of the gun.
- Apply Glue: Carefully apply the melted glue onto the materials to be bonded. Hold the materials together until the glue cools and dries.
- Unplug Glue Gun: Once finished, unplug the glue gun and allow it to cool before storing it away.
It is important to note that low temperature glue guns are typically used for delicate and heat-sensitive materials as they will not cause damage or warping. When using a low temperature glue gun, it is best to prioritize safety and take the necessary precautions to avoid burns and other hazards.
Step-by-Step Instructions for High Temperature Glue Gun
When working with a high temperature glue gun, it’s important to exercise caution and take safety measures to avoid burns and accidents. Here are step-by-step instructions for effectively melting hot glue sticks with a high temperature glue gun:
- Choose the right temperature: High temperature glue guns typically have an adjustable heat setting. Set the temperature to the appropriate level for your project.
- Insert the glue stick: Insert the hot glue stick into the gun’s chamber. Make sure it’s pushed all the way in and seated firmly.
- Wait for the gun to heat up: High temperature glue guns take longer to heat up than low temperature models. Typically, it takes around 5 minutes for the gun to reach its maximum temperature.
- Prepare your work area: Lay out your materials and make sure your work area is clear of debris.
- Squeeze the trigger: Pull the trigger slowly to release the melted glue. Apply steady pressure to ensure an even flow of glue.
- Apply the glue: Carefully apply the hot glue to the surface you’re working on. Use a small amount of glue at a time, applying it in short, even strokes as you go.
- Hold the pieces together: Press the pieces you’re joining together, holding them in place until the glue sets.
- Clean up: Wipe away any excess glue with a clean cloth or tissue. Be careful not to touch the hot glue with your bare hands.
- Store the glue gun: Once you’re done using the glue gun, let it cool down completely before storing it away. Keep it in a safe, dry place where it won’t be knocked over or damaged.
By following these step-by-step instructions for using a high temperature glue gun, you should be able to successfully melt hot glue sticks for all your DIY projects.
Alternatives to Glue Guns
If you don’t have a glue gun or want to try a different method for melting your hot glue sticks, there are several alternatives that can work just as well. Here are some options to consider:
- Hot Knife: A hot knife is essentially a knife-like tool that heats up and can be used to cut through materials. Some hot knives come with attachments specifically designed for melting hot glue sticks. This tool is a good alternative for those who want more precision in their application.
- Stove Top: You can also melt hot glue sticks on a stove top. Simply heat up a pan or pot, place the hot glue sticks in a heat-resistant container and then place the container onto the hot surface. Be sure to use caution and protective gloves during this process, as spillage could cause burns.
- Lighter: Believe it or not, you can also use a lighter as an alternative to a hot glue gun. Hold the hot glue stick above the flame and let it melt, being careful not to burn yourself or the surrounding area. This method should only be used in a well-ventilated area with adult supervision.
- Heat Gun: A heat gun is a tool used for drying and melting materials such as paint, and can also be used for melting hot glue sticks. The heat gun should be set to a low temperature to avoid scorching or burning the hot glue.
While these alternatives may work in a pinch, it’s important to remember that they may not be as safe or effective as a glue gun. Always use caution and protective gear when melting hot glue sticks, regardless of the method used.
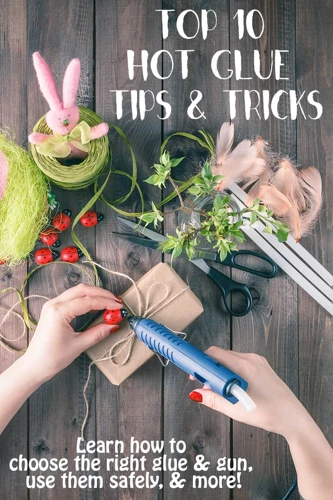
Tips and Tricks
As with any craft or hobby, mastering the art of melting hot glue sticks can take some practice and patience. However, with a few tips and tricks, you can easily create beautiful, long-lasting projects that look like they were made by a professional. In this section, we’ll share some valuable insights on how to avoid common issues, achieve a smooth finish, and even remove hot glue if necessary. So grab your glue gun and let’s get started!
How to Avoid Common Issues
When it comes to melting hot glue sticks, there are some common issues that people often face. These can be easily avoided with the right knowledge and preparation. Here are some tips to help you avoid common issues while melting hot glue sticks:
| Issue | Solution |
|---|---|
| Glue not melting evenly | Make sure that your glue gun is fully heated before you start using it. If it’s still warming up, the glue may not melt evenly. Also, be sure to move the glue gun at a steady pace while squeezing the trigger to ensure that the glue comes out smoothly. |
| Glue sticking to the nozzle | One solution is to wipe the nozzle of the glue gun with a damp cloth before starting. This can help prevent the glue from sticking to the nozzle. Another option is to use a silicone mat or parchment paper to catch any excess glue drips. |
| Glue not sticking properly | Be sure to apply the glue while it is still hot and in a liquid state. If you wait too long, the glue may start to harden and won’t stick properly. Also, make sure that you’re applying enough glue to create a strong bond. |
| Uneven or bumpy surface | Before applying the glue, make sure that the surface is clean and dry. Also, try applying the glue in small, even dots rather than one big blob. This can help create a smoother, more even surface. |
| Glue stringing or dripping | If you’re using a high-temperature glue gun, try using a lower temperature setting to reduce the amount of stringing or dripping. Also, try moving the glue gun more quickly while applying the glue to prevent excess from forming. |
By following these simple tips, you’ll be able to avoid common issues that may come up while melting hot glue sticks and achieve a smooth, even finish on your project.
How to Achieve a Smooth Finish
To achieve a smooth finish when working with hot glue, there are several things you can do. These tips and tricks will help you create a professional looking project that you can be proud of.
1. Use the right amount of glue: Applying too much glue can result in a bumpy surface, while using too little can cause your project to fall apart. Experiment with different amounts until you find the right balance for your project.
2. Keep the glue gun steady: When applying the hot glue, make sure to keep the gun steady and move at a consistent pace. Sudden jerks and movements can create uneven surfaces.
3. Smooth out the glue: While the glue is still hot and pliable, use a smooth tool, such as a plastic spoon or a popsicle stick, to gently press and smooth the glue in place. This will help to create a uniform surface.
4. Sand the surface: If you are working with a project that requires a perfectly smooth surface, you may want to consider sanding the glue after it has cooled. Use a fine-grit sandpaper to carefully sand the surface until it is completely smooth.
5. Choose the right temperature: If you are using a high temperature glue gun, you may find that the glue dries too quickly, leaving a bumpy or uneven surface. In this case, try lowering the temperature setting and experiment with different speeds until you find the optimal combination.
By following these tips and tricks, you can ensure that your hot glue projects have a smooth and professional looking finish. Remember to stay patient and experiment with different techniques until you find what works best for your project.
How to Remove Hot Glue
Removing hot glue can be a bit of a challenge, but with the right tools and techniques, it can be done easily and safely. Here are some helpful tips for removing hot glue from various surfaces:
1. Heat and Peel – One of the easiest ways to remove hot glue is to use heat. Simply use a hair dryer or heat gun to warm up the glue until it becomes soft and pliable. Once the glue is soft, use a plastic tool or your fingers to gently peel it away from the surface.
2. Rubbing Alcohol – Rubbing alcohol can also be used to remove hot glue. Simply apply a small amount of rubbing alcohol to a cloth or cotton swab and rub it over the glue until it starts to dissolve. Once the glue has dissolved, use a plastic tool or your fingers to gently remove it from the surface.
3. Acetone – Acetone can be used to remove hot glue from certain surfaces, such as glass or metal. Simply apply a small amount of acetone to a cloth or cotton swab and rub it over the glue until it dissolves. Be sure to wear gloves and work in a well-ventilated area when using acetone.
4. Freezing and Scraping – For larger areas of hot glue, you can try freezing it first. Simply place the item with the hot glue in the freezer for a few hours. Once the glue is frozen, use a plastic tool or scraper to gently pry it away from the surface.
5. Sanding – If the hot glue has hardened and none of the above methods work, you can try sanding it away. Use a fine-grit sandpaper and gently sand the surface until the glue is removed.
Remember to always work carefully and slowly when removing hot glue to avoid damaging the surface underneath. Also, be sure to wear gloves and protective eyewear when using acetone or other chemicals.
Safety Considerations
As with any DIY project involving tools and materials, safety should always be a top priority. This is especially true when working with hot glue guns and sticks. While they may seem like harmless crafting supplies, they can cause serious burns and injuries if not handled properly. In this section, we’ll discuss essential safety measures to take before, during, and after using a hot glue gun. Please read carefully and follow these guidelines to protect yourself and those around you.
Preventing Burns
Hot glue can cause painful burns if not handled carefully. Here are some important tips for preventing burns when working with hot glue:
- Wear protective gloves: Wearing heat-resistant gloves can help protect your hands from hot glue. These gloves have thick, insulated material that can help reduce the risk of burns.
- Use a heat-resistant surface: Place your hot glue gun on a heat-resistant surface such as a silicone mat or aluminum foil. This will help prevent surfaces from becoming overheated and reduce the risk of fire.
- Be cautious: Always handle your hot glue gun with caution. Never touch the nozzle or the heated end of the gun, even if it appears to have cooled down. It is best to treat it as if it is still hot until you are certain it has cooled down completely.
- Work in a well-ventilated area: Hot glue can produce fumes that can be harmful to inhale. Working in a well-ventilated area can help dissipate these fumes and reduce the risk of respiratory problems.
- Keep hot glue away from children: Hot glue guns and sticks should be stored securely out of the reach of children. It is important to supervise children during crafting projects that involve hot glue to ensure their safety.
By following these simple tips, you can prevent burns while working with hot glue and ensure a safe and enjoyable crafting experience.
Protecting Your Eyes and Skin
When melting hot glue sticks, protecting your eyes and skin is of utmost importance. The hot glue can cause severe burns, resulting in painful injuries. Here are some tips on how to protect yourself:
- Wear safety glasses: Always wear safety glasses to protect your eyes from hot glue splatters. If the glue comes in contact with your eyes, immediately flush them with water and seek medical attention.
- Wear gloves: Wear gloves to protect your skin from hot glue spills and drips. Latex or nitrile gloves work well.
- Work in a well-ventilated area: The fumes from hot glue can cause respiratory irritation. Work in an open, well-ventilated area or use a fan to blow the fumes away from your face.
- Handle the gun with care: Always hold the glue gun by the handle and keep your fingers away from the tip when it’s hot to prevent burns.
- Keep children and pets away: Hot glue guns and melted glue sticks are not toys. Keep them out of the reach of children and pets.
By following these safety guidelines, you can avoid injuries and enjoy the benefits of using hot glue in your DIY projects. Always be careful and take precautions to ensure your safety.
Storing Hot Glue Guns and Sticks Safely
Proper storage of hot glue guns and sticks is crucial to ensure they remain in good condition and safe to use. Follow these tips to store hot glue guns and sticks safely:
| Step 1: | Always turn off and unplug the glue gun after use. Allow the gun to cool down completely before storing. |
| Step 2: | Store hot glue guns in a dry and cool place, away from direct sunlight or sources of heat. Moisture and heat can significantly affect the glue gun’s performance and lifespan. |
| Step 3: | Consider using a storage case or a designated area for your hot glue gun to keep it organized and protected from accidental damage. This also helps to avoid misplacing it. |
| Step 4: | Storing hot glue sticks can be a bit tricky as they tend to melt in hot temperatures. Keep them in a cool and dry place and avoid storing them in direct sunlight or near heat sources. Using a storage container with a lid can help keep the sticks from melting and protect them from moisture or dust. |
| Step 5: | If you have partially used hot glue sticks, wrap them in plastic wrap or aluminum foil to protect them from the elements and keep them from drying out. Alternatively, store them in an airtight container or a sealable plastic bag. |
By following these steps, you can protect your hot glue guns and sticks from damage and extend their lifespan. Proper storage also ensures that you can always rely on your hot glue gun when you need it next time.
Conclusion
The Art of Melting Hot Glue Sticks: Tips and Tricks
Hot glue can be a versatile and useful adhesive, perfect for crafting, DIY projects, and repairs. However, melting hot glue sticks can be a tricky task that requires knowledge and skill. In this article, we’ve explored different types of glue guns, discussed how to choose the right hot glue sticks, and provided step-by-step instructions on how to melt hot glue sticks properly.
It’s important to remember that preparation is key when working with hot glue. Gathering materials, cleaning your work area, and taking protective measures are all crucial steps that can prevent accidents and ensure the best results. Whether you’re using a low temperature glue gun or a high temperature glue gun, following our instructions can help you achieve a smooth and consistent finish.
In addition to the basics, we’ve also provided tips and tricks on how to avoid common issues, achieve a smooth finish, and remove hot glue. Safety considerations are also a critical component of this process. Preventing burns, protecting your eyes and skin, and storing hot glue guns and sticks safely are all important precautions that can protect you and your loved ones.
By mastering the art of melting hot glue sticks, you can add new dimensions to your creative projects and take on new challenges with confidence. So go ahead and experiment with different materials, colors, and textures – the possibilities are endless!
Frequently Asked Questions
Can I use any hot glue sticks for my glue gun?
No, you need to choose hot glue sticks that are compatible with your glue gun. Check the manufacturer’s recommendations before purchasing.
What kind of materials can I bond together with hot glue?
Hot glue can bond many different types of materials together, including paper, wood, fabric, lace, plastic, and foam.
Can hot glue be used for outdoor projects?
Yes, there are hot glue sticks available that are designed for outdoor use and can withstand various weather conditions.
Do I need a special technique to use a low temperature glue gun?
No, low temperature glue guns are user-friendly and easy to use. Simply follow the manufacturer’s instructions and safety guidelines.
What is the benefit of using a high temperature glue gun?
A high temperature glue gun can provide a stronger bond and is better suited for tougher materials such as metal or ceramics.
How long does it take for hot glue to dry?
Hot glue can dry in just a few seconds or up to several minutes, depending on the temperature of the glue gun and the type of materials being bonded.
Can hot glue be removed if applied incorrectly?
Yes, hot glue can be removed using certain solvents such as rubbing alcohol or acetone. It’s important to use caution and follow safety guidelines when using solvents.
Why should I wear gloves when working with hot glue?
Wearing gloves can protect your hands from burns and also help you achieve a smoother finish on your project.
How do I store my hot glue gun and sticks safely?
Store your hot glue gun and sticks in a cool, dry place away from direct sunlight. Keep them out of reach of children and pets.
What should I do if hot glue accidentally touches my skin?
Immediately run the affected area under cool water and then gently peel the glue away from the skin. Seek medical attention if necessary.