Have you ever wondered how to shape hot glue? Maybe you’ve even attempted to mold it into a certain shape, only to find that it quickly hardens and loses its form. Fear not, because with the right tools and techniques, you can shape hot glue into just about any shape or texture you desire. In this guide, we’ll go over the tips and tricks you need to know to shape hot glue like a pro. From tools and techniques to step-by-step instructions, we’ve got you covered. So let’s dive in and learn how to transform hot glue into a work of art!
What is Hot Glue and Why is it Used?
Hot glue is a popular adhesive used in a wide range of crafting and DIY projects. It is a thermoplastic adhesive that can be melted and applied with a hot glue gun, making it a versatile and easy-to-use choice for a variety of applications. From creating intricate jewelry to repairing household items, hot glue is a go-to product for many. In the following sections, we will explore some useful tips and tricks for shaping hot glue to enhance the aesthetic value of your projects. But before we delve into that, let’s take a closer look at what hot glue is and why it is so widely used. To learn how to load a glue gun, please check this article.
Why is Shaping Important?
Shaping hot glue is an important skill for a variety of crafting projects. By shaping hot glue, you can create unique and intricate designs that are highly customizable. **Shaping can add depth and dimension to your projects**, and it allows you to create details that would be difficult or impossible with other materials. With hot glue, you can make everything from snowflakes to putty, and the only limit is your imagination!
It’s also important to note that shaping hot glue is not just about aesthetics. **Shaping can improve the functionality of your hot glue creations**. When you shape hot glue, you can create an ideal fit for your project, which can help it to adhere better and increase its durability. For instance, if you are gluing cork board to cardboard, shaping the hot glue to the exact contours of the cork board can create a more secure bond.
There are many reasons why you might want to shape hot glue! Whether you are making earrings, cobwebs, or ribbon flowers, hot glue shaping can take your crafts to the next level. However, it’s important to use caution when working with hot glue.
Tools Required
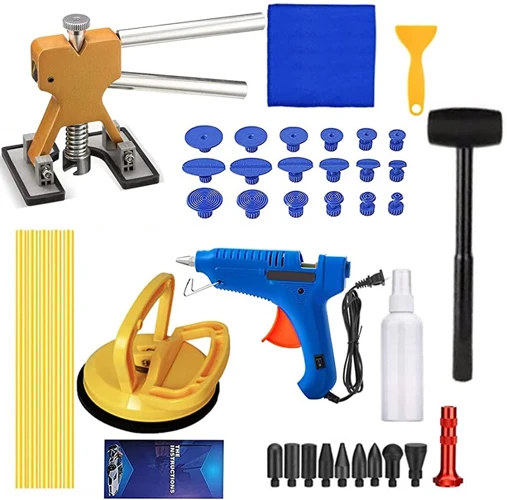
Preparing to shape hot glue requires a few essential tools that are easy to obtain. With the right tools at hand, anyone can create intricate designs and shapes with hot glue. Here are some of the tools needed to shape hot glue: a hot glue gun, heat-resistant gloves, craft scissors, a craft knife, and a heat gun or embossing tool. Each tool plays an important role in shaping hot glue and ensuring that the final product is exactly as intended. For more information on hot glue and related topics, check out this article on gluing techniques.
Hot Glue Gun
When it comes to shaping hot glue, a hot glue gun is an essential tool that every crafter should have. A hot glue gun is typically made from plastic, and it has a trigger that controls the flow of molten glue from the gun’s nozzle. It is important to choose a high-quality hot glue gun that is comfortable to hold and has a controllable nozzle. Here are some things to consider when choosing a hot glue gun for shaping hot glue:
- Size: Hot glue guns come in different sizes, ranging from mini to full-sized guns. Mini hot glue guns are best for small crafting projects, while the larger guns are better suited for bigger projects.
- Wattage: The wattage of the hot glue gun determines how quickly it heats up and melts the glue stick. Higher wattage hot glue guns heat up faster and melt glue sticks more quickly.
- Trigger: A good hot glue gun should have an easy-to-use trigger that controls the flow of hot glue. Some hot glue guns have a low/high setting, while others have an adjustable trigger that allows you to control the flow of glue more precisely.
- Nozzle: The nozzle of the hot glue gun should be a good size for the project you are working on. Some hot glue guns come with interchangeable nozzles that can be swapped out depending on the project you are working on.
- Stand: Most hot glue guns come with a stand that holds the gun upright when not in use. Make sure the stand is sturdy and will keep the gun from tipping over.
A hot glue gun is a versatile tool that can be used for a wide variety of crafting projects, from making ribbon flowers with hot glue to melting hot glue sticks in the microwave. It is important to choose a high-quality hot glue gun that is comfortable to hold and has a controllable nozzle to ensure successful hot glue shaping.
Heat-Resistant Gloves
When you are shaping hot glue, it is important to protect your hands from any burns or injuries. This is where heat-resistant gloves come in. These gloves are designed to withstand high temperatures, allowing you to handle hot glue and other materials without burning your skin.
Heat-resistant gloves come in different styles and materials, but the most common material used is silicone. These gloves offer good heat resistance and flexibility, allowing you to move your fingers and grip tools easily. Other materials used for heat-resistant gloves include Kevlar, neoprene, and leather.
When choosing heat-resistant gloves, make sure to select a pair that fits your hands properly. Gloves that are too big may slip, making it difficult to hold your tools securely, while gloves that are too small may be uncomfortable to wear and restrict your movements. You can find heat-resistant gloves at most craft stores or online retailers.
It is important to note that heat-resistant gloves are not indestructible. While they can protect your hands from burns, they can still get damaged by hot glue or other materials. If you notice any tears or holes in your gloves, it is time to replace them.
Remember, although heat-resistant gloves provide protection, they are not a substitute for caution and proper handling of hot glue. Always be mindful of your surroundings and be aware of any potential hazards.
To learn more about hot glue techniques, check out our article on how to make cobwebs with a glue gun.
Craft Scissors
Craft scissors are an essential tool for shaping hot glue. These scissors are specially designed to cut through a range of materials, including paper, fabric, and hot glue. The blades of craft scissors are usually made of stainless steel, which provides durability and prevents rusting. The handles of craft scissors are often made of plastic or rubber, which makes them comfortable to grip and easy to hold.
When working with hot glue, it’s important to have a pair of craft scissors that are sharp and easy to maneuver. This will allow you to make precise cuts and shapes in the hot glue without damaging the surrounding areas. It’s also important to have a pair of scissors that are dedicated to hot glue, as the glue can be difficult to remove from the blades.
Tip: To keep your craft scissors in good condition, it’s important to clean them after each use. Use a damp cloth to wipe away any hot glue residue and store them in a dry place.
Craft scissors can be used in a variety of ways when shaping hot glue. They can be used to trim excess glue from the edges of a shape or to cut out intricate designs. Craft scissors can also be used to add texture to the hot glue by snipping at it in a random pattern.
When using craft scissors with hot glue, it’s important to work slowly and carefully. Make sure the scissors are sharp and that you have a good grip on them. It’s also important to keep your fingers out of the way of the scissors, as they can quickly become hot when cutting through the glue.
Tip: If you’re having trouble cutting through thicker hot glue, try heating up your craft scissors with a heat gun or embossing tool for a few seconds before cutting.
Having a pair of good-quality craft scissors on hand when shaping hot glue can make a world of difference. They allow you to be precise and creative in your designs, and they make cutting through the glue much easier. If you’re interested in learning more about hot glue, check out our article on how to glue earrings back together, how to color hot glue, or how to make putty with glue.
Craft Knife
One of the essential tools needed for shaping hot glue is a craft knife. A craft knife is a precision cutting tool that is perfect for trimming and shaping small details in hot glue. The sharp, pointed blade can be used to make fine cuts and carve intricate designs in the glue.
When choosing a craft knife, consider the blade’s material and length. Stainless steel blades are durable and rust-resistant, while carbon steel blades are sharper and last longer. A longer blade makes it easier to make precise cuts, but shorter blades offer more control.
Before using the craft knife, make sure it is sharp and clean. Dull blades can tear and damage the hot glue, while dirty blades can transfer debris to the glue.
Here are some tips for using a craft knife with hot glue:
- Use a light touch when cutting or carving hot glue to avoid tearing or chipping the material.
- Make sure the blade is perpendicular to the surface of the glue to ensure clean, straight cuts.
- Start with small, light cuts and build up to larger cuts as needed.
- Use a cutting mat or other protective surface to avoid damaging your work surface.
- Always cut away from your body and keep your fingers clear of the blade.
By using a craft knife in combination with other shaping techniques, you can create precise and elaborate designs in hot glue. Just remember to take your time and work carefully to achieve the desired results.
Heat Gun or Embossing Tool
When it comes to shaping hot glue, a heat gun or embossing tool can be extremely helpful tools to have on hand. These tools allow you to apply heat to the glue, which can make it easier to melt, shape, and manipulate into the desired form. Here are some tips for using a heat gun or embossing tool in your hot glue shaping projects:
- Choose the right tool: While both heat guns and embossing tools can be used to shape hot glue, they have slightly different designs and capabilities. Heat guns are typically larger and more powerful, and they may have multiple heat settings that you can adjust depending on the thickness and type of glue you’re working with. Embossing tools, on the other hand, are smaller and more precise, and they’re often designed with a nozzle or tip that allows you to concentrate the heat in a specific area. Consider the needs of your project when choosing which tool to use.
- Use caution: Heat guns and embossing tools both produce high temperatures that can be dangerous if not used properly. Always wear heat-resistant gloves to protect your hands from burns, and be sure to work in a well-ventilated area to avoid inhaling fumes. Keep the tool at a safe distance from your skin and other objects to avoid damaging them or causing a fire.
- Apply heat carefully: When using a heat gun or embossing tool to shape hot glue, it’s important to apply the heat carefully and slowly. Start with a low heat setting and gradually increase the temperature as needed. Hold the tool a few inches away from the glue and move it in a circular motion to distribute the heat evenly. Avoid overheating or burning the glue, as this can cause it to bubble, smoke, or catch on fire.
- Experiment with different techniques: There are several different techniques you can use with a heat gun or embossing tool to shape hot glue. For example, you might try melting the glue and then pressing it into a mold to create a specific shape. You could also use the heat to smooth out rough edges or add dimensional details to your project. Practice different techniques on a scrap piece of glue or cardboard to see what works best for you.
A heat gun or embossing tool can be a useful addition to your hot glue shaping toolkit. Just be sure to use these tools with caution and care, and experiment with different techniques to find the methods that work best for your particular project.
Hot Glue Shaping Techniques
When it comes to hot glue shaping, there are several techniques that you can utilize to achieve your desired outcome. Each technique involves a different process and approach, allowing for a wide range of possibilities. Whether you’re molding and modeling or adding texture and depth, the key to successful hot glue shaping is understanding the techniques available and using them to your advantage. In this section, we’ll explore some of the most popular and effective hot glue shaping techniques.
Molding and Modeling
One of the most popular ways to shape hot glue is molding and modeling. This technique involves using your hands to sculpt the glue and create various shapes and designs. Here are some steps to help you get started with molding and modeling:
- Prepare your workspace: Make sure you have a clean and clear area to work in. Place a sheet of wax paper on your work surface to prevent the hot glue from sticking.
- Heat your glue gun: Preheat your glue gun and insert a glue stick. Make sure the glue is warm and pliable before you start molding.
- Start molding: Once the glue is heated up, start molding it into the desired shape. You can use your hands, sculpting tools, or even objects like cookie cutters as molds.
- Add texture: To add texture and detail to your molded hot glue, use sculpting tools or even a toothbrush to create small lines and indentations. This will give your shape a more realistic and unique look.
- Let it cool: Once you’re satisfied with the shape and texture of your hot glue creation, let it cool completely. This should only take a few minutes.
- Paint or embellish: Once the hot glue is cool, you can paint it, add glitter or other embellishments to give it a finished look.
Molding and modeling hot glue is a versatile technique that can be used to create a wide range of shapes and designs. From flowers to animals to jewelry, the possibilities are endless. It’s also a great way to let your creativity run wild and create unique and personalized pieces. Just be sure to work carefully and take breaks if needed, as hot glue can be quite hot and sticky.
Texturizing and Stippling
One of the most interesting ways to shape hot glue is through texturizing and stippling. This technique creates a unique look by adding texture and depth to your hot glue project. Texturizing involves using tools to create patterns and shapes on the surface of the glue, while stippling is the process of dabbing a tool onto the glue to create a dotted or speckled effect.
To achieve the best results when texturizing and stippling, you will need a variety of tools with different tip sizes and shapes. Some of the most commonly used tools for this technique include:
| Tool | Description |
| Screwdriver | A flat or round screwdriver can be used to create lines and grooves in the hot glue |
| Paintbrush | A small paintbrush can be used to create delicate striations and swirls in the hot glue |
| Ballpoint pen | A ballpoint pen can be used to make small, even dots on the surface of the glue |
| Fork | A fork can be used to create a texture of small lines or hatchmarks on the glue |
| Toothpick | A toothpick can be used to create small dots or grooves in the hot glue |
To texturize the hot glue, you can use any of the tools listed above to create patterns and shapes on the surface of the glue. You can create lines, swirls, dots, or other designs by carefully pressing or dragging the tool across the surface of the glue. The key is to be very deliberate with your movements, and avoid pressing too hard or dragging too quickly, as this can cause the hot glue to become misshapen.
Stippling, on the other hand, involves dabbing the tool onto the surface of the hot glue to create a speckled effect. To do this, you will need a tool with a small, pointed tip, such as a toothpick or ballpoint pen. Dip the tip of the tool into the hot glue, and then quickly dab it onto the surface of the glue, creating small dots or speckles. Repeat this process as desired to create a unique texture on your hot glue project.
Texturizing and stippling can be a fun and creative way to add depth and interest to your hot glue projects. Experiment with different tools and techniques to create a variety of unique effects and designs that will make your hot glue creations stand out.
Layering and Embedding
Layering and embedding are two techniques that can add depth and dimension to your hot glue projects. Layering involves stacking multiple layers of hot glue on top of each other to create a raised surface or texture. Embedding, on the other hand, involves placing small objects or materials into the hot glue while it is still soft, creating a unique and personalized effect.
To use the layering technique, start by applying a thin layer of hot glue to your surface. Once this layer has dried, apply another layer on top, making sure to slightly overlap the previous layer. Continue this process until you have achieved the desired height or texture. Be careful not to apply too much hot glue at once, as it can melt the layers underneath or cause the glue to drip.
To use the embedding technique, begin by placing your chosen object or material onto the surface where you want it embedded. Then apply hot glue over the object, making sure to cover it completely. It’s important to work quickly with this technique, as the hot glue will harden fast and the object may not adhere properly if you take too long. Once the hot glue has cooled and hardened, gently remove any excess glue around the edges of the embedded object.
Both layering and embedding can add depth and interest to your hot glue projects, and can be combined with other techniques like molding and modeling for even more creative possibilities. Practice these techniques on scrap materials before applying them to your final project, and experiment with different textures and materials to create unique and personalized designs.
Step-by-Step Guide
Are you ready to start shaping hot glue like a pro? Grab your tools and follow these step-by-step instructions to create beautiful and intricate designs with this versatile material. With a little practice and some useful tips and tricks, you’ll be able to create stunning hot glue creations in no time. So, let’s get started!
Step 1: Gather Your Tools and Materials
Before you start shaping hot glue, it’s important to gather all the necessary tools and materials. With the right supplies on hand, you can achieve the best results and create truly stunning, professional-looking projects. Here are the tools and materials that you will need:
| Tools | Materials |
|---|---|
| Hot Glue Gun: A reliable hot glue gun that heats up quickly and maintains a consistent temperature is essential for shaping hot glue. Look for a gun with adjustable settings and a comfortable grip. | Hot Glue Sticks: Choose high-quality hot glue sticks that are appropriate for the project you have in mind. |
| Heat-Resistant Gloves: Hot glue can be very hot to the touch, so protect your hands with heat-resistant gloves. Choose gloves that fit well and are comfortable to wear for long periods of time. | Scrap Paper or Cardboard: Use these materials to practice your shaping techniques before moving on to your actual project. |
| Craft Scissors: These are essential for cutting and trimming hot glue shapes. Look for scissors with sharp blades and a comfortable grip. | Embossing Powder or Pigment: If you are looking to add color or texture to your hot glue shapes, you will need embossing powder or pigment. |
| Craft Knife: A craft knife is helpful in creating more precise cuts and shapes. Make sure your knife has a sharp blade and a comfortable grip. | Paintbrush: A small paintbrush can be used to apply embossing powder or pigment to your hot glue shapes. |
| Heat Gun or Embossing Tool: A heat gun or embossing tool is necessary if you want to shape thicker hot glue. These tools emit a high level of heat that melts the glue quickly and easily, making it easier to shape. | Baking Paper: This is useful for protecting your work surface from hot glue drips and spills. |
Having these tools and materials on hand will allow you to get the most out of your hot glue shaping experience. With the right gear, you can create beautiful, intricate designs that will impress your friends and family. Plus, with practice and experimentation, you’ll be able to develop your own unique style and take your hot glue art to the next level.
Step 2: Preheat Your Hot Glue Gun and Install the Glue Stick
Before you start shaping hot glue, it’s important to ensure that your glue gun is properly preheated. Follow these steps to get your glue gun ready for use:
- Plug in your hot glue gun: Make sure that your glue gun is properly plugged into an electrical outlet.
- Insert the glue stick: Insert a new glue stick into the back of the glue gun. The glue stick should fit snugly and extend out of the front of the glue gun nozzle.
- Preheat the glue gun: Turn on your glue gun and wait a few minutes for it to heat up. Most hot glue guns will have an indicator light that will turn on when the glue gun is ready for use. You can check the readiness of the glue gun by squeezing the trigger to see if the hot glue comes out smoothly.
Keep in mind that different types of glue guns may have different preheating times and instructions. Make sure to read the manufacturer’s instructions carefully before using your hot glue gun. It’s also important to be cautious around hot glue as it can cause burns. Wear heat-resistant gloves, and be careful not to touch the heated nozzle.
Step 3: Practice on a Scrap Piece of Paper or Cardboard
Before you start shaping your hot glue, it’s important to practice on a scrap piece of paper or cardboard. This will allow you to get a feel for the hot glue and figure out the best techniques to use. Here are some tips for practicing on a scrap piece:
- Choose the Right Surface: Use a smooth, flat surface to practice on. This will make it easier to create smooth shapes and lines.
- Test Different Temperatures: Experiment with different temperature settings on your hot glue gun. This will help you figure out which temperature works best for the type of project you’re working on.
- Create Basic Shapes: Start by creating simple shapes, such as circles and triangles. This will help you get comfortable with the hot glue and understand how it behaves.
- Try Different Techniques: Use different techniques to create texture and detail on your practice piece. This will help you understand the different effects you can achieve with hot glue shaping.
- Take Breaks: Hot glue can be difficult to work with for long periods of time. Take breaks as needed to prevent fatigue and ensure your safety.
By taking the time to practice on a scrap piece, you’ll be better prepared to start shaping your hot glue for your actual project. It may take some time and patience, but the more you practice, the easier it will become.
Step 4: Start Shaping Your Hot Glue
Now that you have practiced and are comfortable with the hot glue, it’s time to start shaping it.
1. Be Patient
Shaping hot glue can take some time, especially if you’re working on a complex design. Don’t rush the process, as you may end up damaging your project.
2. Use Small Amounts of Glue
When shaping hot glue, it’s important to start with small amounts of glue, as it’s easier to add more than to remove excess glue. Use your hot glue gun to add small drips or dots of glue, then shape them as desired.
3. Work in Small Sections
It’s easier to handle hot glue in small sections. As you shape the glue, try to work in sections that are small enough for you to easily manipulate. This will help you avoid the need to constantly reheat the glue.
4. Use Your Tools
Craft scissors and knives are great for shaping hot glue, but don’t limit yourself! Try tools like toothpicks, wire brushes, and even forks to create different textures and shapes.
5. Experiment!
Don’t be afraid to experiment with your hot glue shapes. The beauty of hot glue is that it can be removed or reworked if you don’t like the shape you’ve created. So, try different textures and designs until you find the perfect shape for your project.
| Step 4: Start Shaping Your Hot Glue |
|---|
| Be Patient |
| Use Small Amounts of Glue |
| Work in Small Sections |
| Use Your Tools |
| Experiment! |
Step 5: Continue Shaping and Adding Detail
Now that you’ve mastered the basic hot glue shaping techniques, it’s time to move on to the final step – adding detail to your creation. This is where your creativity can really shine, so don’t be afraid to experiment with different textures, shapes, and finishes.
1. Layering: One way to add depth and dimension to your hot glue creation is by layering it with additional glue. Simply apply a small amount of glue to the surface and press it down gently with your fingers or a tool. Repeat this process until you achieve the desired effect.
2. Stippling: Stippling is a technique where you add small dots or marks to the surface of the hot glue. This can create a realistic texture, such as wood grain or scales on a fish. To stipple, use the tip of a craft knife or a toothpick to create small dots and lines in the glue.
3. Carving: With a craft knife, you can carve shapes, designs or patternds into your hot glue creation. This works best on flatter surfaces. Note that this technique takes some practice.
4. Coloring: If you wish to add some color to your creation, oil-based paints or markers are perfect for using on hot glue surfaces.
Remember that these techniques need to be worked patiently and carefully with concentration and with a gentle touch, especially when adding details. It’s important that you work in a slow, steady rhythm to avoid damaging the glue or removing previously applied shapes. Once you feel confident with the detail work, you can turn a basic hot glue shape into a work of art!
Tips and Tricks
Crafting with hot glue can be a fun and creative process, but it can also be tricky to get just right. That’s why we’ve compiled a list of tips and tricks to help take your hot glue shaping skills to the next level. From using the right tools to experimenting with different textures and finishes, these tips will help you achieve the perfect look for your hot glue projects. Keep reading to learn more!
Use a Heat Gun or Embossing Tool to Shape Thicker Glue
When working with hot glue, it’s important to know that not all glue sticks are created equal. Some hot glue sticks are thicker than others, and shaping them with just a hot glue gun may prove to be a challenge. If you’re working with thicker hot glue sticks, you can use a heat gun or an embossing tool to help you shape your glue.
What is a Heat Gun?
A heat gun is a tool that blows hot air, much like a hair dryer. It is often used in DIY projects, particularly those that involve electronics and plastics. A heat gun can be used to soften and mold thicker hot glue sticks, making them easier to shape. However, it’s important to remember that heat guns can reach much higher temperatures than hot glue guns, so use them with caution.
What is an Embossing Tool?
An embossing tool is a tool used in paper crafts to create texture and designs on paper. However, it can also be used to shape thicker hot glue sticks. An embossing tool is similar to a heat gun, but it has a smaller nozzle and more precise control over the amount of heat it emits.
How to Use a Heat Gun or Embossing Tool for Shaping Hot Glue
1. Make sure you have the appropriate safety gear, including heat-resistant gloves and eye protection.
2. Choose the appropriate heat setting for your tool. For thicker hot glue sticks, you may need to use a higher heat setting than you would for thinner glue.
3. Hold your heat gun or embossing tool a few inches away from the glue and move it back and forth over the glue until it softens. Be careful not to overheat the glue, as it can cause it to become too thin or even burn.
4. Once the glue is softened, use your tools to mold it to your desired shape. You can use your fingers, a silicone tool, or any other shaping tool that works for you.
5. When you’re done shaping the glue, allow it to cool and harden before handling it.
Final Tips for Using a Heat Gun or Embossing Tool
– Practice on scrap pieces of glue before working on your final project.
– Keep the tool moving to avoid overheating and burning the glue.
– Always wear appropriate safety gear when using a heat gun or embossing tool.
– Be patient and take your time. Shaping thicker glue with a heat gun or embossing tool may take longer than shaping thinner glue with just a hot glue gun.
By following these tips and techniques for shaping hot glue, and incorporating the use of a heat gun or embossing tool for thicker glue, you can create intricate and detailed designs with ease.
Dip Your Tools in Water to Prevent Glue from Sticking
Preventing glue from sticking to your tools is important when shaping hot glue, as it can make the process much more difficult. To avoid this, you can dip your tools in water before using them. Here are some steps to follow when using this technique:
- Prepare a small container of water: You don’t need a large container of water for this technique. Simply find a small container that fits your tools and fill it with water.
- Dip your tools into the water: Before using your tools, dip them into the water and shake off any excess water. This will create a thin layer of water on your tools that will prevent glue from sticking.
- Wipe your tools dry: After dipping your tools, wipe them dry with a paper towel or cloth. You don’t want excess water on your tools when shaping hot glue.
This technique works especially well when shaping hot glue with a craft knife or scissors as it prevents the glue from sticking to the blades. However, be careful not to get water on your hot glue as it can affect the bond of the glue and weaken it. Only use this technique on your tools and not on the glue itself.
By using this simple technique, you can avoid frustration and ensure that your hot glue shaping process goes smoothly.
Experiment with Different Textures and Finishes
One of the fun parts of using hot glue for shaping is experimenting with different textures and finishes. By adding small details and unique touches to your hot glue creations, you can really make them stand out. Here are a few ideas for how you can play around with texturing and finishes:
| Technique | Description |
|---|---|
| Stippling | Create a textured surface by dabbing your hot glue gun onto your project in a consistent pattern. This technique is great for creating a bumpy or spiky texture that adds interest to your hot glue shapes. |
| Sanding | Smooth out rough edges on your hot glue creations using a fine-grit sandpaper. This technique is ideal for creating a clean, polished finish and can be especially useful for shaping hot glue that will be visible in your final project. |
| Wire Brushing | Use a wire brush to add a brushed texture to your hot glue creations. This technique can create a rustic or reclaimed look, and is perfect for making faux metal or stone finishes. |
| Painting | Paint is a great way to add color and texture to your hot glue creations. By experimenting with different paint techniques, you can create stunning finishes that really make your projects pop. |
| Glittering | Add a touch of sparkle to your hot glue projects with glitter. This technique is perfect for creating faux gemstones, snowflakes, or other shiny finishes that catch the light. |
Keep in mind that experimentation is key when it comes to creating unique hot glue shapes. Don’t be afraid to try out new techniques and see what works best for your specific project. By exploring different textures and finishes, you can elevate your hot glue creations from simple shapes to stunning works of art.
Clean Your Tools After Each Use
Keeping your tools clean after every use is an essential part of maintaining them for a long time to come. When working with hot glue, it is important to keep your tools clean so that you can use them again without any issues.
Here are some steps you can take to clean your hot glue shaping tools after each use:
- Turn off your hot glue gun: Before cleaning any of your tools, make sure you turn off and unplug your hot glue gun. This will ensure that you don’t accidentally burn yourself while cleaning the tools.
- Wipe off excess glue: With a clean paper towel, gently wipe off any excess glue from your tools. This will prevent the glue from hardening on the tools and causing issues the next time you use them.
- Soak in warm water: Fill a container with warm water and soak your tools for 5-10 minutes. This will help loosen any glue residue from the tools.
- Scrub with soap: After soaking, use a mild soap and a soft-bristled brush to scrub any remaining glue off the tools. Be gentle to avoid damaging the tools.
- Rinse and dry: Once you have scrubbed the tools, rinse them thoroughly with clean water and dry them off with a clean towel. Make sure that all the soap is removed, as it can affect the next use of your tools if left on.
By following these steps, you can keep your hot glue shaping tools clean and ready to use for your next project. Proper cleaning will help prolong the life of your tools and ensure that they continue to perform well for years to come.
Safety Guidelines
When working with hot glue, safety should always be a top priority. The melted glue can reach extremely high temperatures, and if mishandled, can cause painful burns or other injuries. The fumes produced by hot glue can be harmful if inhaled. This is why it’s important to follow certain safety guidelines when shaping hot glue. By taking the necessary precautions, you can ensure a safer and more enjoyable crafting experience. Here are some important safety tips to keep in mind.
Wear Heat-Resistant Gloves to Avoid Burns
When working with hot glue, it’s important to take precautions to protect your skin from getting burned. One of the most essential tools you can use is a pair of heat-resistant gloves. These gloves are designed to withstand high temperatures and can be used to handle hot objects without getting burned.
Here are some reasons why you should wear heat-resistant gloves when working with hot glue:
- Prevent Burns: Hot glue can reach temperatures of up to 400°F, which can cause serious burns if it comes into contact with your skin. Heat-resistant gloves act as a barrier between your skin and the hot glue, reducing the risk of burns and injuries.
- Better Grip: Heat-resistant gloves are designed to provide a better grip, making it easier to handle hot glue and shape it into the desired form.
- Comfort: When using a hot glue gun for extended periods, the heat can make your hands sweat, which can cause the glue to stick to your skin. Heat-resistant gloves prevent this from happening and make the process more comfortable.
When choosing heat-resistant gloves, make sure they are made of a material that can withstand high temperatures, such as Kevlar or silicone. Leather gloves may not be suitable as they can retain heat and cause burns.
It’s important to wear heat-resistant gloves throughout the entire process of shaping hot glue, from preheating the glue gun to cleaning up after you’re done. This will help prevent accidents and keep your hands safe.
Work in a Well-Ventilated Area to Avoid Inhaling Fumes
When using hot glue, it is important to work in a well-ventilated area to avoid inhaling the fumes that are released during the heating process. These fumes can cause respiratory problems and can be especially harmful to those with asthma or other respiratory issues. Here are some tips to help you stay safe:
- Open Windows: If possible, open windows to increase the amount of fresh air circulating in your workspace. This can help to reduce the concentration of fumes in the air.
- Use a Fan: A fan can help to circulate the air in your workspace and push fumes away from your breathing zone. Point the fan towards an open window to create a cross-breeze.
- Wear a Respirator: If you are working with hot glue for long periods of time, consider wearing a respirator to protect your lungs from fumes. Look for a respirator that is specifically designed for use with hot glue or other adhesives.
- Avoid Confined Spaces: Try to avoid working in small, confined spaces without proper ventilation. If you must work in these types of spaces, take frequent breaks to get some fresh air.
- Clean Up Carefully: When you are finished working with hot glue, be sure to clean up carefully. Dispose of any unused glue sticks and wipe down your workspace with a damp cloth to remove any lingering fumes.
By taking these precautions, you can help to ensure your safety when working with hot glue. Remember to always work in a well-ventilated area and to take breaks as needed to avoid inhaling too many fumes.
Unplug Your Hot Glue Gun After Use
It is crucial to unplug your hot glue gun after use to ensure safety. leaving a plugged-in hot glue gun unattended could lead to accidents such as burns, fires, or electrocution. To prevent such incidents, always make it a habit to unplug the glue gun and store it safely.
To avoid forgetfulness, consider placing a note near your workspace to remind you to unplug your hot glue gun once you are done using it. This simple act of unplugging the glue gun can save you from serious injuries and property damage.
Additionally, make sure to let the glue gun cool down before putting it away. While some glue guns have automatic shut-off features, not all do. So, it’s best to allow the gun to cool down for several minutes before handling it or storing it away.
Remember, safety should always be a top priority, especially when working with hot glue guns. By unplugging and letting the gun cool down, you can reduce the risk of accidents and prevent any harm to your workspace.
Always unplug your hot glue gun after use and allow it to cool down before storing it away. Safety should always come first.
| What to do | Why it’s important |
|---|---|
| Always unplug your hot glue gun after use | To prevent accidents such as burns, fires, or electrocution |
| Let the glue gun cool down before storing it away | To prevent damage to the workspace and reduce the risk of accidents |
Safety should always be a top priority when working with hot glue guns. By keeping these simple safety precautions in mind, you can minimize the risks and enjoy the crafting process with peace of mind.
Conclusion
In conclusion, hot glue can be shaped into a variety of forms using a few simple techniques and tools. Whether you are a seasoned crafter or a beginner, with a bit of practice and experimentation, you can create intricate designs and embellishments for your DIY projects using hot glue.
It’s important to keep in mind that safety should always come first when working with hot glue. Wearing heat-resistant gloves and working in a well-ventilated area can prevent burns and exposure to fumes.
In terms of tools, having a hot glue gun, heat-resistant gloves, craft scissors, craft knife, and heat gun or embossing tool can make the shaping process easier and more efficient. Dip your tools in water to prevent the glue from sticking, and clean them after each use to ensure they remain in good condition.
When it comes to shaping techniques, molding and modeling, texturizing and stippling, and layering and embedding are great starting points to create different shapes, textures, and finishes.
Finally, don’t be afraid to experiment with different textures, colors, and finishes of glue to create unique designs and embellishments. With a bit of creativity and patience, you can create beautiful and functional projects with hot glue.
Frequently Asked Questions
How can I shape hot glue without a hot glue gun?
Unfortunately, it is not possible to shape hot glue without a hot glue gun. The heat from the glue gun helps to soften the glue, making it easier to manipulate into the desired shape.
What type of hot glue is best for shaping?
A low-temperature hot glue is best for shaping, as it gives you more time to work with the glue before it hardens. High-temperature hot glue can also be used, but you need to work quickly before it cools and hardens.
How can I prevent the hot glue from sticking to my tools?
You can dip your tools in water before using them with hot glue. This helps to prevent the glue from sticking and makes it easier to shape the glue.
What should I do if I get hot glue on my skin?
Immediately run the affected area under cold water until the glue hardens. Once it is hard, gently peel it off. If the glue is still soft and pliable, do not attempt to remove it as this could cause a burn.
Can I paint or color hot glue after shaping it?
Yes, you can paint or color hot glue after shaping it. However, make sure the paint or coloring is dry before handling the glue, as the moisture can cause it to soften and lose its shape.
Can I reuse hot glue after it has been shaped?
No, once hot glue has been shaped and hardened, it cannot be reshaped or reused.
How long does it take for hot glue to cool and harden?
It usually takes around 30 seconds for hot glue to cool and harden, depending on the type of glue and the temperature of the room.
What can I make with shaped hot glue?
You can make a wide range of crafts and DIY projects with shaped hot glue, from jewelry and hair accessories to home decor and art pieces.
What is the best way to clean hot glue off of my tools?
The best way to clean hot glue off of your tools is to wipe them down with a cloth dipped in hot, soapy water. If the glue is particularly stubborn, you can also use rubbing alcohol or nail polish remover.
Can hot glue be used to bond materials together?
Yes, hot glue is a popular adhesive for bonding materials together. However, it is important to choose the right type of hot glue for the materials you are bonding and to follow proper safety precautions when using it.