Introduction
Crafting is a wonderful hobby, and learning to make beautiful ribbon flowers can add a new level of creativity to your repertoire. Whether you’re decorating a gift or creating a home decor project, ribbon flowers are a versatile and charming decoration. In this article, we will explore step-by-step instructions on how to make ribbon flowers with hot glue, tips and tricks to create unique designs, and ideas for using them in your DIY projects. So, grab your tools and let’s get started!
Overview of Hot Glue and Ribbon Flowers
When it comes to crafting, hot glue is one of the most versatile adhesives available. This adhesive works well with a variety of materials, including fabric, felt, and of course, ribbons. Hot glue is preferred by many crafters because it dries quickly, has excellent holding power, and can be used to create a range of craft projects. In this article, we will explore the world of hot glue and ribbon flowers, and show you how to create beautiful flowers with just a few simple tools and materials.
Hot glue is a type of thermoplastic adhesive that is applied using a hot glue gun. When heated, the glue melts and becomes liquid, allowing it to be easily applied to a range of surfaces. As it cools, it solidifies and forms a strong bond with the surface. Hot glue is a popular choice for crafting because it is easy to use, inexpensive, and provides excellent adhesion.
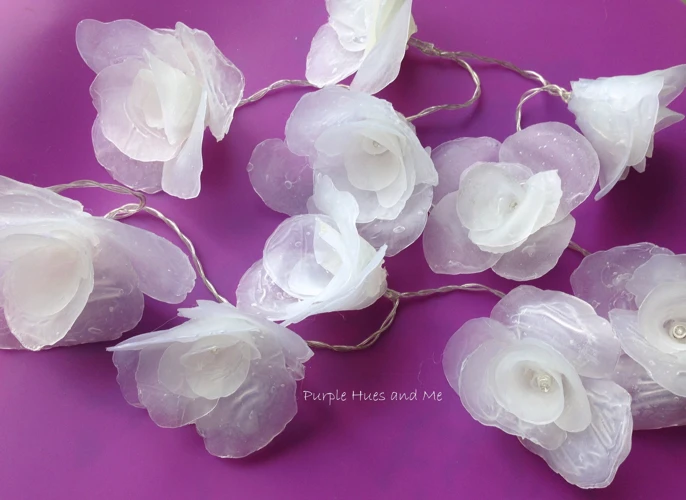
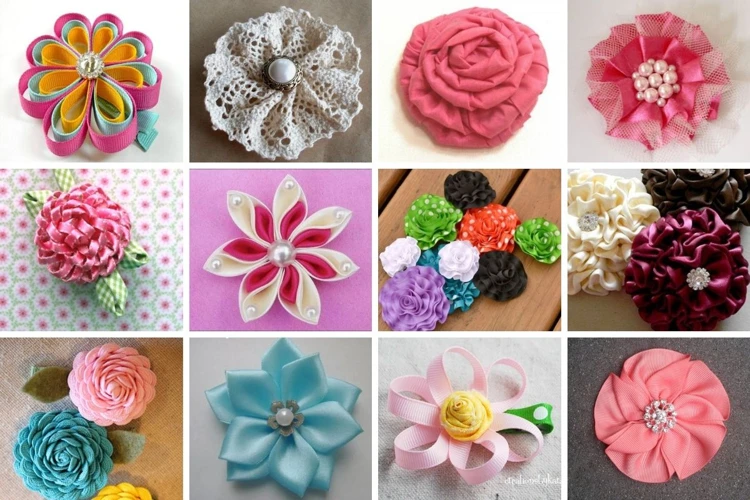
Ribbon flowers are a type of embellishment that can be used to add a unique and beautiful touch to a range of projects. These flowers can be created in a variety of sizes, colors, and styles, making them a popular choice for DIY enthusiasts. Making ribbon flowers with hot glue is a fun and easy way to create beautiful embellishments for a range of projects.
In the following sections, we will discuss the materials and tools you will need to make ribbon flowers with hot glue, as well as step-by-step instructions for creating your own beautiful flowers. Additionally, we will provide tips and tricks for working with hot glue and for storing your finished flowers. It is important to use hot glue safely, so be sure to check out our guide to using a glue gun safely before getting started.
What You Will Need
Before you can make beautiful ribbon flowers with hot glue, you’ll need to gather some essential materials and tools. Without these supplies, your crafting project won’t be successful. So, let’s take a look at what you will need to create colorful and stylish ribbon flowers that will impress anyone who sees them!
Materials: To make ribbon flowers, you’ll require a few basic supplies, including ribbons of different colors and textures, hot glue gun, glue sticks, and scissors.
Tools: While making ribbon flowers, certain tools are necessary to manipulate the ribbon in the right way. These tools include a clear ruler and a candle or lighter for flame-sealing the ribbon. If you want to add creative touches to your flowers, you can also use embellishments such as beads, buttons or felt and a needle and thread to sew on the embellishments.
Note: Make sure to prepare your workspace by covering it with old newspaper or an unused mat to protect your table from any hot glue mess. If you’re new to using a hot glue gun, please visit this guide on How to Insert Glue Stick in Glue Gun.
Materials
To make ribbon flowers with hot glue, there are some materials you need on-hand. Here are some of the materials you can prepare:
- Ribbons: You can use ribbons with various colors and sizes for creating different types of flowers. For beginners, satin ribbons with widths of 1 to 2 inches are easier to work with.
- Scissors: You will need a pair of scissors for cutting your ribbons into desired lengths and shapes.
- Lighter or Candle: A lighter or candle is used for flame-sealing the ribbon edges to prevent fraying. Be careful when using an open flame and practice proper safety measures.
- Hot Glue Gun: A hot glue gun is essential for assembling the ribbon petals and center. It’s recommended to use a low-temperature glue gun to avoid warping or melting the ribbons.
- Hot Glue Sticks: Prepare a few hot glue sticks to go with the glue gun.
- A Sheet of Paper or Foam Board: Use a sheet of paper or foam board as a work surface for gluing the ribbon petals and center.
- Embellishments: Optional embellishments like beads, pearls, rhinestones, buttons, or feather can be used to add extra flair to your ribbon flowers.
Remember to prepare all the materials before starting the project so you can work smoothly without interruptions. If you need additional help with gluing techniques, check out some relevant guides such as how to glue Lego base plate to wood, how to glue up a box, or what glue to use on redneck wine glasses.
Tools
To make beautiful ribbon flowers with hot glue, you will need the following tools to complete the project without hassle:
1. Hot glue gun: A hot glue gun is essential for this project as it helps in quickly and easily adhering the ribbon strips into flower shapes. If you face any issues with your glue gun during the project, you can refer to our guide on why your glue gun is not working.
2. Glue sticks: Choose the correct glue sticks that will work with your glue gun. While starting, it’s worth using clear glue sticks. This will make it easier to see where you’re adding the glue.
3. Ribbon: To make ribbon flowers, you’ll need a ribbon of your choice. Satin or grosgrain in various thicknesses will work perfectly, and you may choose any colors and patterns to match your craft project.
4. Scissors: While you’re working with the ribbon, you’ll need scissors to cut and shape the ribbon strips. So it’s important to have sharp scissors that can cut through cleanly.
5. Flame: To seal the edges of the ribbon and prevent fraying, you’ll need to apply heat. You can use a lighter or candle flame to do so. Be sure to handle the ribbon carefully while working with the flame! If you want to learn more about flame sealing, check out how to glue pipe cleaners, which include the sealing process.
6. Embellishments: After completing the flower, you can add embellishments to make it even more beautiful. Rhinestones, buttons, beads, or pearls will add some sparkle and character to the flowers. You can learn more about adding embellishments in our guide on how to glue chocolate together.
7. Tweezers: Tweezers will help in holding small flower parts easily and will prevent any hot glue burns. You can quickly and efficiently apply glue while using tweezers.
Keep these tools handy while creating your stunning ribbon flowers, and you’re all set to start!
Preparing Ribbon Strips
Preparing the ribbon strips is a crucial step in creating beautiful and realistic ribbon flowers. Cutting Ribbons to the right size and shape and Flame-Sealing Ribbons to prevent them from fraying are essential to achieve the desired look. By doing this correctly, you can ensure that the ribbon flowers you make will be long-lasting and stunning. Before we jump into the step-by-step guide, make sure you have all the materials and tools you need.
Cutting Ribbons
To create ribbon flowers, you’ll need to start by cutting your ribbon strips to size. The width of your ribbon will determine the width of your flower petals, so choose a ribbon width that works for your project. For larger flowers, you might choose a wider ribbon, while smaller flowers can be made with thinner ribbon.
To cut your ribbon, you’ll need a pair of sharp scissors and a flat surface to work on. It’s important to cut your ribbon strips straight and evenly to ensure your petals are uniform in size. You can use a ruler or measuring tape to measure out your desired ribbon length, and then mark the spot where you’ll need to cut using a pen or pencil.
Once you’ve measured and marked your ribbon, use your scissors to make a clean, straight cut along the line. Avoid using dull scissors, as they can crush or fray the ribbon, resulting in uneven edges.
Here’s a helpful table outlining the ribbon length and width you’ll need for different flower sizes:
| Flower Size | Ribbon Length | Ribbon Width |
|---|---|---|
| Small | 4 inches | 1/2 inch |
| Medium | 6 inches | 3/4 inch |
| Large | 8 inches | 1 inch |
Note that these are just suggestions and you can adjust the size of your ribbon strips based on personal preference or project requirements.
Remember, cutting ribbon can be dangerous if proper safety precautions are not taken. Always use sharp scissors on a stable surface and be sure to keep your fingers clear of the blades. If you’re not confident using scissors, ask for assistance from an adult or someone experienced in using them.
If you’re looking for other fun hot glue projects, you can check out our tutorials on how to glue picture frame corners or how to glue bottle caps to a picture frame.
Flame-Sealing Ribbons
Before starting to create ribbon flowers, it is important to prepare ribbon strips. One important step is to flame-seal the ribbon edges to prevent fraying.
- Step 1: Cut the ribbon strips to the desired length. A length of 4-5 inches is ideal for making flowers with a diameter of about 2 inches.
- Step 2: Light a candle or a lighter. Hold the ribbon end about an inch above the flame, slightly angling it downwards.
- Step 3: Gently rotate the ribbon, allowing the flame to kiss the edges. Make sure not to hold the ribbon in the flame for too long as it can burn and damage the quality of the ribbon.
- Step 4: Repeat the process with the other end of the ribbon. Allow the ribbon to cool off before handling it.
Flame-sealing ribbons not only prevents fraying but also gives the edges a neat and professional look. It is a simple and quick step that can make a big difference in the final outcome of your ribbon flowers. Remember to always exercise caution when working with fire and never leave the flame unattended.
Shaping the Flowers
As you hold your ribbon strips in your hands, it’s time to mold them into a beautiful flower shape. How can you transform these simple ribbons into stunning blossoms? This is where your creativity and patience will come into play. With a few easy techniques, you can begin shaping the petals and forming the center of your ribbon flower. Let’s explore some helpful steps to get started with shaping your ribbon flowers.
Creating Petals
To create the petals for your ribbon flowers, follow these simple steps:
- Cut a piece of ribbon to your desired length for the petals. Tip: Longer ribbons create larger petals.
- Fold the ribbon in half and use a pair of scissors to make a diagonal cut at the open end of the fold. Repeat on the opposite end.
- Unfold the ribbon and you should now see a V-shaped notch in the center of the ribbon.
- Hold the ribbon with the notch facing up. Fold the right side of the ribbon across the center and overlap it slightly with the left side.
- Press down on the right side of the ribbon where it overlaps with the left side to create a crease.
- Repeat the folding process with the left side of the ribbon, overlapping it slightly with the right side. Press down on the left side of the ribbon where it overlaps with the right side to create another crease.
- Continue folding the ribbon back and forth until you have reached the end.
- Pinch the bottom of the folded ribbon to create a pointed edge, which will become the tip of the petal.
- Use a dot of hot glue to secure the petal in place.
- Repeat these steps to create as many petals as you need for your desired flower size.
Remember to experiment with different ribbon lengths and widths for varying petal shapes and sizes. You can also add extra folds to create more intricate petal shapes. With practice, you will be able to create a variety of beautiful ribbon flowers using these simple steps.
Forming the Flower Center
To form the center of the ribbon flower, take a new piece of ribbon and fold it in half at a right angle. This should create a triangular shape with a crease down the middle.
Step 1: Cut a new ribbon piece to a length of about 3 inches.
Step 2: Fold the ribbon in half at a right angle so that it forms a triangle shape.
Step 3: Take the two shorter ends of the triangle and bring them together, creating a loop at the top and a point at the bottom.
Step 4: Hold the loop and point together and flip the loop over the point.
Step 5: Use your fingers to pinch the bottom point of the loop and flatten it against the loop. This should create a small cone shape.
Step 6: Apply a small drop of hot glue to the bottom of the cone shape and press it onto the center of your petal base.
Step 7: Hold the center in place for a few seconds until the hot glue dries and sets.
Repeat this process with additional ribbon pieces if you want to create a more layered flower center. You can play around with different sizes and colors of ribbon to create a unique look for your ribbon flower.
Assembling the Flowers
With all the petals prepared and the flower center formed, it’s finally time to assemble the stunning ribbon flower! This is where your patience and attention to detail will really pay off. Follow the steps below carefully and your ribbon flowers will come together beautifully. Don’t rush through this part of the process, take your time and enjoy the creative journey. Let’s dive into the assembling process and create a gorgeous ribbon flower together.
Gluing the Petals and Center
Once you have created your floral components, it’s time to assemble them into a beautiful ribbon flower. This process involves gluing the petals and the center together using hot glue.
Step 1: Start by laying out the ribbon petals in the desired arrangement. Make sure the petals are evenly spaced and symmetrical.
Step 2: Take the floral center and place it in the middle of the arranged petals. Make sure that it is centered and level.
Step 3: Apply a small amount of hot glue to the back of the center and press it firmly onto the petals.
Step 4: Start attaching the petals to the center by applying a small amount of hot glue to the bottom edge of the petals and pressing them onto the center. Hold the petals in place for a few seconds until the glue sets.
Step 5: Continue attaching the petals around the center, working your way outwards. Make sure that each petal is evenly spaced and attached securely.
To make sure that the flower is secure, you may want to go back over the petals with an extra dab of hot glue. Be careful not to apply too much glue, as this can create a mess and may be difficult to remove.
Tip: A helpful technique while gluing the petals and center is to place the flower on a vertical surface like a wall or bulletin board. This will allow you to press the petals and center together easily without worrying about them moving out of place.
| Materials | Tools |
|---|---|
| Hot glue gun | Scissors |
| Hot glue sticks | Lighter or matches |
| Ribbon in desired colors | Ruler |
| Embellishments (optional) | Pencil |
Adding Embellishments
After creating beautiful ribbon flowers, adding some embellishments can take your DIY project to the next level. There are various ways to decorate your flowers to fit your taste and the occasion you are using them for. From glamorous rhinestones to natural-looking leaves, the possibilities are endless. In this section, we’ll explore some creative ways to embellish your ribbon flowers and elevate their beauty. So, grab your hot glue gun and let’s get started!
Optional Embellishments Ideas
Now that you have successfully made some beautiful and colorful ribbon flowers, it’s time to add some extra flair with embellishments. Here are some optional embellishment ideas to make your flowers stand out even more:
- Buttons: Add a button to the center of your flower for a cute and classic touch. You can use a matching color or a contrasting color to make the button pop.
- Beads: Glue some small beads around the edges of the petals or in the flower center for a sparkly effect.
- Rhinestones: Bring some bling to your flowers by adding rhinestones to the center or around the petals.
- Faux Pearls: If you want a more elegant look, glue some faux pearls in the center of your flowers or around the petal edges.
- Feathers: For a boho or whimsical vibe, attach some small feathers to the sides of your flower or underneath the petals.
- Ribbon Streamers: Take the leftover ribbon strips you used to make the flowers and cut them into long strips. Glue them to the back of your flower to create streamers that flow as you move the flower.
- Leaves: Cut out some small leaf shapes from green felt or ribbon and glue them to the back of your flower for a natural touch.
Remember, the embellishments are optional and it’s up to you to decide how you want to decorate your ribbon flowers. Have fun and get creative!
Using Ribbon Flowers for DIY Projects
After putting so much effort into creating beautiful ribbon flowers, it’s time to put them to good use! These floral embellishments are versatile and can be used in various DIY projects. They add an elegant and feminine touch to any craft or accessory. Here are some unique and creative ways to utilize these ribbon flowers for your next DIY project.
Ideas for Using Ribbon Flowers
Ribbon flowers are versatile and can be used in many DIY projects to add a touch of beauty. Some unique ideas for using ribbon flowers include:
- Wedding bouquets: Use ribbon flowers to make a unique bouquet that will last forever, unlike fresh flowers. Mix and match different colored ribbon flowers to create a stunning effect.
- Home decor: Add ribbon flowers to your curtains, pillows or lampshades to brighten up any room. You can also make a wreath or garland using ribbon flowers to add a special touch to your home.
- Greeting cards: Make your own greeting cards and add ribbon flowers for a personalized touch. This is a great way to add the recipient’s favorite colors or patterns to the card.
- Hair accessories: Make your own hair accessories using ribbon flowers. Add a clip or a headband to the back of the flower to secure it in your hair. Different sizes and colors can be used to create a variety of styles.
- Gift wrapping: Add ribbon flowers to your gift wrapping for a unique touch. Instead of using a standard bow, attach a ribbon flower. This will make your gift stand out and look beautiful.
- Jewelry: Make your own jewelry using ribbon flowers. Attach the flower to a metal ring base or thread a ribbon through the back of the flower to make a necklace or bracelet.
These are just a few ideas for using ribbon flowers in your DIY projects. Get creative and see where your imagination takes you. With ribbon flowers, the possibilities are endless!
Tips and Tricks
Crafting ribbon flowers with hot glue can be a fun and rewarding hobby. However, like any craft, it comes with its own set of challenges. This is where tips and tricks can come in handy. Here are some essential pieces of advice to help you create the best ribbon flowers possible, without the frustration that may come with learning the ropes. From safety precautions to hot glue application techniques, keep reading to learn the tricks of the trade.
Precautions
It is important to take certain precautions when making ribbon flowers with hot glue to ensure safety and a successful outcome. Here are some precautions to keep in mind:
- Protective gear: Make sure to wear protective gear like gloves, safety goggles and a mask to avoid any injuries and inhaling harmful fumes.
- Use a heat-resistant surface: Use a heat-resistant surface, like a silicone mat or aluminum foil, when using the hot glue gun to avoid damaging your workspace.
- Keep children away: Hot glue can cause serious burns if it comes into contact with skin. It’s important to keep children away from the workspace and to store the hot glue gun in a safe place after use.
- Avoid using a high-temperature hot glue gun: Using a high-temperature hot glue gun can lead to burns or damage to delicate ribbons. Use a low-temperature hot glue gun to avoid any potential injuries.
- Allow the glue gun to cool: After use, allow the glue gun to cool down before touching it or storing it away.
By following these precautions, you can ensure a safe and enjoyable ribbon flower-making experience. It’s important to prioritize safety to prevent any potential injuries or mishaps.
Hot Glue Application Techniques
When it comes to hot glue application for making ribbon flowers, knowing the right technique is crucial to ensure that the flowers stick together and last longer. Here are some hot glue application techniques that you can use:
| Technique | Description |
|---|---|
| Dotting | This technique involves applying small dots of hot glue in strategic areas of the flower to add volume and texture. This is particularly recommended for creating the petal edges and the flower center. |
| Line | With this technique, glue is applied in a line to ensure a strong hold between two surfaces. This technique is useful when attaching the flower to a surface such as a hair clip or a headband. |
| Layering | This technique is used when creating multi-layered flowers. Hot glue is applied onto the center of each petal, layering them on top of each other to form the flower. |
| Texture | Adding texture to the hot glue can help create a more natural look, especially when creating flowers with irregular petals. Simply apply the hot glue and run a textured tool or toothpick through it while it’s still soft. |
Keep in mind that hot glue can be a bit tricky to work with, so be careful not to burn yourself. Always use caution, especially when handling the hot glue gun. With these hot glue application techniques, creating beautiful ribbon flowers will be a breeze.
Storing the Flowers
To ensure the longevity of your ribbon flowers, proper storage is essential. Avoid storing them in areas that are exposed to direct sunlight or high humidity, as this can cause the colors to fade and the ribbons to become warped. Instead, find a cool, dry place to keep them.
One option for storage is a clear plastic container with a snap-on lid. Arrange the flowers gently in the container and separate each layer with a piece of tissue paper or soft cloth to prevent crushing. Another option is to wrap the flowers individually in tissue paper and store them in a cardboard box.
Tip: Label the box or container with the date you created the flowers to keep track of their age.
It is also important to handle the flowers with care when taking them out of storage. Gently remove them from the container or box and fluff the petals back into place.
Note: If the ribbons have become wrinkled during storage, use a warm iron on the lowest setting to smooth them out. Be careful not to burn the ribbons with the iron!
Proper storage can help preserve the beauty of your ribbon flowers for years to come. Take the time to store them carefully and you will be able to enjoy them for a long time.
Conclusion
As we come to the end of this tutorial, it’s time to summarize what we’ve learned about making ribbon flowers with hot glue. Throughout this guide, you’ve discovered various techniques for cutting, shaping, and assembling ribbon strips into beautiful and unique blooms. With the right tools and materials, you can bring your creative vision to life and use these flowers for a variety of DIY projects, from hair accessories to home décor. But before we part ways, let’s review some final tips and tricks to ensure your success in crafting ribbon flowers with hot glue.
Final Thoughts
After following these steps, you should now have a stunning ribbon flower that you can use for a variety of DIY projects. Even if you are not an expert crafter, with a little practice, you can master the art of making ribbon flowers with hot glue. Remember, the key to making a beautiful flower is in the details. Pay attention to the placement and size of each petal, and don’t forget to add the finishing touches with embellishments.
Final Thoughts:
Creating ribbon flowers with hot glue is a great way to add a personal touch to your DIY projects. Whether you’re making a hair accessory, corsage, or adding a decorative element to a craft project, these flowers are a simple and affordable way to elevate your design. Plus, with the variety of ribbons available, the possibilities are endless.
It’s important to note that while hot glue is a fast and efficient adhesive option, it can also be dangerous if not used with caution. Be sure to follow all precautions when handling hot glue, and always supervise children when crafting with it.
When storing your ribbon flowers, it’s best to keep them in a cool, dry place. If you want to maintain their shape, try storing them in a small box with tissue paper to help hold their form.
Making ribbon flowers with hot glue is a fun and rewarding DIY project. With a little creativity and practice, you can create beautiful and unique flowers that will enhance any project. So why not try making your own ribbon flower today and see what you can come up with?
Frequently Asked Questions
What type of ribbon is best for making ribbon flowers?
Satin or grosgrain ribbon in a width of 1-2 inches work best for making ribbon flowers.
Can I use regular glue instead of hot glue?
While you could use regular glue, hot glue is more effective at holding the ribbon together and creating a sturdy flower.
Do I need a special hot glue gun for this project?
No, any hot glue gun will work for making ribbon flowers as long as it can melt the glue quickly and evenly.
How many petals do I need for each flower?
This will depend on the size and shape of the petals you create. Start with 5-7 petals for a basic flower and adjust as needed.
How long does it take for the hot glue to dry?
Hot glue typically dries within a minute, but give it a few minutes to fully set before handling the flower.
What are some embellishments that I can add to my ribbon flowers?
You can add beads, rhinestones, feathers, or even small fabric flowers to your ribbon flowers for a unique touch.
Can I use ribbon scraps to make ribbon flowers?
Yes, ribbon scraps can be used to make ribbon flowers. Just make sure the scraps are long enough to create the petals and center.
How do I prevent burns while using a hot glue gun?
Always use caution when using a hot glue gun and never touch the tip of the gun. Keep a bowl of ice water nearby to dip your fingers in if you accidentally get burned.
What are some DIY projects that I can use ribbon flowers for?
You can use ribbon flowers to embellish headbands, hairpins, clothing, handmade cards, and even home decor items like picture frames and curtains.
Can I store my ribbon flowers for later use?
Yes, store your ribbon flowers in a cool, dry place to prevent any damage or melting of the hot glue.