Picture this: you’re sitting at home on a rainy day, bored out of your mind. You’re scrolling through social media when suddenly, you come across the mesmerizing video of colorful putty being squished and molded. You can’t help but think about how satisfying it would be to play with that putty yourself. What if we told you that you could make your own putty using just a few simple ingredients? Yes, it’s true! In this article, we’ll be giving you a step-by-step guide on how to make putty with glue. Not only is it a fun DIY project, but it’s also a great stress reliever and can even improve your fine motor skills. So, roll up your sleeves and get ready to make some putty!
Materials
As with any DIY project, having the right materials is key to success. For this project, you will need a few common household items. Don’t worry if you don’t have everything on hand, these materials are easy to come by and won’t break the bank. In order to make some satisfying putty, you will need white school glue, lotion, cornstarch, and optionally, some food coloring to add some pizzazz to your putty. If you’re unsure about what type of glue to use in your DIY projects, check out our article on what a glue gun is for more information.
What you will need
To make putty with glue, you will need the following materials:
| Materials | Quantity |
| Glue | 1/2 cup |
| Lotion | 1/2 cup |
| Cornstarch | 1 cup |
| Food coloring (optional) | A few drops |
Glue: For making your putty, white PVA glue is essential. You can buy it from any hardware store or online. The glue should be of good quality and should not be too old.
Lotion: You will need any type of unscented, plain white lotion. The lotion helps to make the putty stretchy, pliable, and soft. You can use any type of lotion, but make sure it is white and unscented as colored and scented lotions may change the color and scent of your putty.
Cornstarch: Cornstarch is used to thicken the putty mixture and make it less sticky. You can buy cornstarch at any grocery store.
Food coloring: This is optional, but if you want colored putty, then use food coloring to add your desired color. You can make any color you want by mixing different food colors.
Keep in mind that these amounts are for making a small batch of putty. If you want to make a larger quantity, just double or triple the amount of each ingredient.
Recipe
Get ready to make your own homemade putty with this simple yet fun recipe! With just a few basic materials, you can create a stretchy, moldable, and enjoyable putty that will keep you entertained for hours. This recipe is suitable for both kids and adults alike and can be made in a matter of minutes. So, let’s get started on making our own DIY putty! But before we start, make sure you have all the necessary materials. You can check out what type of glue to use on redneck wine glasses or how to make a glue bomb after you’ve finished making your putty!
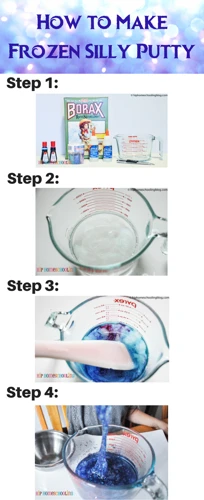
Step 1: Prepare the ingredients
Step 1: The first step is to gather all the necessary materials and prepare them for use. For making putty with glue, you will need three main ingredients – glue, lotion, and cornstarch.
| Material | Quantity |
| White glue | 1/2 cup |
| Lotion | 1/4 cup |
| Cornstarch | 1/2 cup |
| Food color (optional) | A few drops |
Make sure you have all the ingredients available before starting the process. You can use any white glue, but it is recommended to use craft glue or school glue. Avoid using a hot glue gun, as it will not work for this recipe. For lotion, you can use any type of lotion, but unscented lotion is preferred. The cornstarch should be fresh and not lumpy.
Before starting the process, it is also essential to clean the workspace properly. If you are using a table or countertop, clean and dry it thoroughly. Make sure to wear an apron or old clothes that you don’t mind getting dirty.
Now that you have all the ingredients and workspace ready, move on to the next step.
Step 2: Mix the glue and lotion
Mixing the glue and lotion is the second step in making putty with glue. This step is crucial because it forms the base of our putty and the consistency is largely dependent on how well these two ingredients are mixed.
To start mixing, take a bowl and add one part (1/2 cup) of glue to it. Then, add one part (1/2 cup) of lotion to the bowl. This is important to maintain the required ratio of both ingredients.
Once you have added both ingredients, mix them thoroughly until they are well combined. It is recommended to use a wooden spatula or spoon for this step. The mixture will be slightly lumpy, but don’t worry, we will fix that in the next step.
Pro-tip: If you are having trouble finding lotions, try using body lotion. It can be found at any drugstore and works just as well.
If you want to add some color to your putty, this is the time to add in food coloring or paint. Mix it thoroughly with the mixture to get an even color.
The mixture should be smooth without any lumps, and have a thick, sticky texture. If it is too sticky, you can add more lotion, but be careful not to add too much as it will affect the consistency of the putty.
Pro-tip: If you want to add a fun twist to your putty, try adding some glitter to it. It will make it sparkle and add a unique touch to your creation.
Now that the glue and lotion are mixed, it’s time to move on to the next step and add cornstarch to the mixture. Follow the instructions in this article to learn how to make fake blood with glue using a similar process.
Step 3: Add cornstarch and mix well
Adding cornstarch to your glue mixture is the key step in achieving the perfect putty consistency. The cornstarch will thicken the glue mixture, making it less sticky and more moldable. Here’s how to do it:
- Step 1: Slowly add cornstarch to the glue mixture while stirring. It’s important to add it slowly to avoid clumping.
- Step 2: Keep adding cornstarch until the mixture becomes less sticky and more dough-like. You may need to use your hands to work the cornstarch in.
- Step 3: If the mixture is still too sticky, add more cornstarch until you reach the desired consistency.
It’s important to note that the amount of cornstarch you will need varies depending on the type of glue you are using and the humidity in the air. Test the consistency of the putty by grabbing a small handful and rolling it into a ball. If it’s too sticky, add more cornstarch.
Once you’ve achieved the perfect putty consistency, you can mold it into different shapes and let it air dry. You can also add food coloring or glitter to make it more fun and colorful.
If you’re having trouble with your putty sticking to your hands, try dusting them lightly with cornstarch before molding. And if you’re looking to create more crafts with hot glue, be sure to check out our article on how to paint hot glue.
Step 4: Add color (optional)
Step 4: Add color (optional)
Now, it’s time to add a pop of color to your putty! This step is optional, but it’s a great way to make your putty more fun and enjoyable to play with. You can use food coloring or any type of coloring agent you prefer. Here’s how:
| Materials: | Food coloring or any type of coloring agent |
|---|---|
| Instructions: | Add a small drop of your preferred coloring agent to the mixture and knead it well until it’s evenly distributed. Add more coloring if you desire a more vibrant color. Be careful not to add too much liquid coloring or the putty may become too sticky. |
There you go, now you have your custom-colored putty! Remember, the color is optional, and you can skip this step if you prefer the natural color of your putty.
If you are interested in learning more about glue guns, check out our article on how hot is a low-temp glue gun? or if you are struggling with hot glue drips, head over to our article on how to stop glue gun from dripping. Additionally, if you want to make sure your hot glue sticks better, read our article on how to make hot glue stick better. Finally, if you want to learn how to smooth hot glue or use glue stick without a gun, check out our articles on those topics too!
Step 5: Final mixing
After following the previous steps, you should now have a smooth and stretchy putty mixture. To achieve optimal results, the next step is crucial. You need to do the final mixing to ensure all ingredients are well combined. This step is important because it determines the consistency of the putty and how long it will last.
Take the putty mixture and knead it with your hands on a flat surface until it becomes a soft and stretchy ball. It should no longer be sticky to the touch. This process of kneading helps to activate the glue and warm it up, making it more pliable.
Pro Tip: If the putty is too sticky or wet, add a small amount of cornstarch and knead it into the mixture until you achieve the desired consistency.
Your final putty should be smooth and easy to mold. If it’s too hard or crumbly, you can add a few drops of water and knead the putty again until it becomes more workable.
Congratulations! You’ve successfully made your own putty using glue and a few other household items. Your new putty can be used for many things, including stress relief, playing, and even as a fun educational tool for kids.
Internal Link: If you’re wondering how to smooth out hot glue for your next DIY project, check out our guide on how to smooth hot glue for some helpful tips. Also, if you’re out of glue guns but need to use a glue stick, our guide on how to use a glue stick without a gun can come in handy.
How to Use Your Putty
Once you have made your putty, it’s time to have some fun with it! Here are some ways you can use your homemade putty:
1. Stress Relief: Putty is a great stress reliever. You can keep it on your desk and use it throughout the day to work out your stress and anxiety.
2. Finger Exercises: Putty is also a great tool for finger exercises. Squeeze and stretch it to improve your finger strength and dexterity.
3. Playtime: Children will love playing with putty. They can use cookie cutters or small toys to make shapes out of the putty, or they can create their own unique designs.
4. Simulation: Putty can also be used for simulations. For example, dentists can use putty to simulate teeth for students to practice drilling and filling techniques.
5. Creative Projects: Putty is an excellent medium for creative projects. You can make sculptures, jewelry, or other decorative objects out of your putty.
No matter how you choose to use your putty, it can provide hours of entertainment and relaxation. Just be sure to store it in an airtight container when you’re done playing with it so that it stays fresh and pliable for future use.
Tips and Tricks
Once you have successfully made your putty, you may notice that it’s too sticky or too dry to play with. Here are some tips and tricks that will help you make the most out of your homemade putty:
1. Adjust the consistency: If your putty is too dry, add a small amount of lotion or oil. If it’s too sticky, add more cornstarch. You can adjust the consistency until you get the perfect texture that you desire.
2. Experiment with colors: Adding colors to your putty can make it more visually appealing. You can use food coloring or even eyeshadow to give your putty the desired shade. However, be careful as too much coloring might stain your hands or your clothes.
3. Store your putty: When not in use, store your putty in an airtight container to prevent it from drying out. You can reuse an old playdough or plastic container for this purpose.
4. Play with it regularly: The more you play with your putty, the softer and more pliable it becomes. So, make sure to take it out for a spin often. This can also be a great stress reliever!
5. Make different types of putty: You can experiment with different types of glue to create different types of putty. For instance, you can use clear glue to create transparent putty or glitter glue to create sparkly putty.
Remember, the possibilities are endless with homemade putty. Just let your imagination run wild!
Conclusion
After following the above steps, you should have successfully made your own putty using glue and lotion. Congratulations! You can now enjoy the squishy and stretchy texture of your homemade putty. This recipe is not only fun to make, but it is also budget-friendly compared to buying putty from stores.
Remember to store your putty in an airtight container to preserve its elasticity and prevent it from drying out. If your putty gets a little sticky, you can add more cornstarch to firm it up.
Furthermore, you can experiment with different colors and scents to make your putty unique. You can add glitter, essential oils, food coloring, or even small beads to make it sparkle.
Making putty with glue is not only a great way to have fun, but it can also be a stress-relieving activity. The process of mixing ingredients and kneading the dough can be therapeutic and calming. It can also be a fun group activity for families or friends to enjoy.
Overall, making putty is a simple and enjoyable activity that anyone can try with just a few ingredients. So why not give it a go and explore your creative side with this DIY putty recipe?
Frequently Asked Questions
Can I use any type of glue for this recipe?
You can use any white glue, such as Elmer’s glue, for this recipe.
Do I have to use lotion?
Yes, lotion is essential for creating the perfect consistency for your putty.
What consistency should I be aiming for?
You want your putty to be stretchy, not too sticky, and easy to mold. Think of it like a cross between slime and play-dough.
Do I have to use cornstarch?
Yes, cornstarch is a key ingredient in this recipe. If you don’t have cornstarch, you can use flour, but it will change the consistency of your putty.
What coloring can I use?
You can use food coloring or gel coloring to add color to your putty. Just be aware that food coloring may stain surfaces or fabrics.
How long will my putty last?
Your homemade putty will last for several weeks if stored in an airtight container or bag.
Can I make this putty without using my hands?
While it’s recommended to mix and knead the putty by hand for the best results, you can also use a stand mixer with a dough attachment or a food processor.
What can I use my putty for?
You can use your putty to relieve stress, improve hand strength, or as a fun sensory activity for kids.
Is this putty safe for children?
Yes, this putty is safe for children, but it’s always recommended to supervise young children when playing with putty.
Can I add scent to my putty?
Yes, you can add a few drops of essential oil or fragrance oil to your putty for a pleasant scent.