Crafting is a beloved hobby for many, and one of the most essential tools in any crafter’s arsenal is a glue gun. Whether you’re a professional artist or just starting, a glue gun can come in handy for a variety of projects. But if you’re new to the craft or have never used a glue gun before, you might be wondering where to start. Have no fear! In this guide, we’ll walk you through everything you need to know about using a glue gun for crafts. From choosing the right glue gun to creating the perfect effect, we’ve got you covered. So, grab your glue sticks and let’s get started!
Choosing the Right Glue Gun
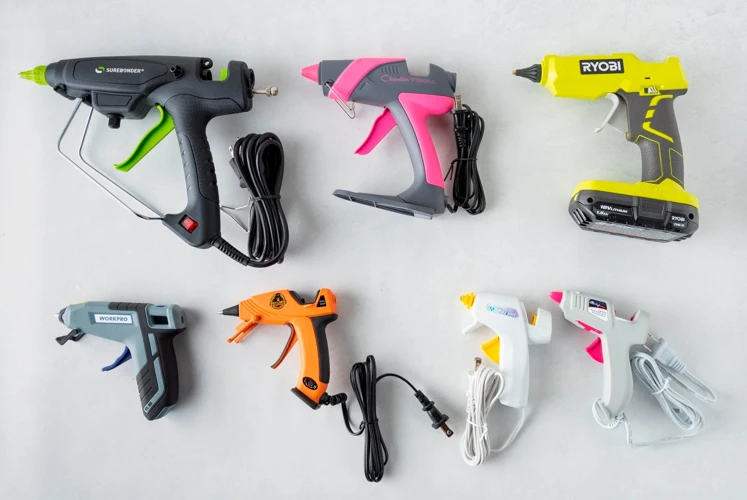
When it comes to crafting with a glue gun, choosing the right one is crucial. With so many options on the market, it can be overwhelming to decide which glue gun is best for your projects. The type of crafting you’ll be doing as well as the size and type of glue gun are important factors to consider. Take the time to make the right choice and your glue gun will become an indispensable tool in your crafting arsenal, allowing you to create everything from delicate paper crafts to sturdy DIY projects. So let’s delve deeper into how to choose the right glue gun for your crafting needs. To learn more about using your glue gun, check out our article on how to use a hot glue gun without strings.
Consider the Type of Crafting You’ll Be Doing
When choosing a glue gun for your crafting projects, it’s important to consider the type of crafting you’ll be doing. Different types of glue guns are better suited for different crafting tasks. Before purchasing a glue gun, make sure it’s the best fit for your project.
To help you decide, here is a table comparing different types of glue guns and their recommended uses:
| Glue Gun Type | Recommended Uses |
|---|---|
| Mini Glue Gun | Small and delicate projects, such as jewelry making or attaching embellishments to homemade cards |
| Standard Glue Gun | General crafting, such as attaching fabric or paper to surfaces |
| High-Temperature Glue Gun | Heavy duty projects, such as woodworking or metalworking |
| Low-Temperature Glue Gun | Projects using heat-sensitive materials, such as foam or ribbon |
Keep in mind that the size of your glue gun also matters. A smaller glue gun is easier to maneuver for smaller projects, while a larger glue gun is better for bigger projects that require a lot of glue.
Additionally, before choosing a glue gun, consider the type of glue sticks it uses. Some glue guns only accept certain size glue sticks and can only be used with specific types of glue. Research and read the manufacturer’s instructions before purchasing a glue gun.
By considering the type of crafting you’ll be doing before purchasing a glue gun, you can ensure that you have the right tools for the job and avoid any mishaps during your crafting process.
Think About the Glue Gun Size and Type
When thinking about the size and type of glue gun you need for your crafting project, there are a few important factors to consider. Firstly, you’ll need to think about the type of crafting you’ll be doing. Will you be doing small, intricate projects, or larger, more heavy-duty ones? This will help determine whether you need a mini glue gun or a full-size one.
Mini glue guns are great for smaller projects that require more precision, such as detailed decorations on cards or delicate whittling. They are also more lightweight and portable, making them a good choice if you need to take your crafting on the go.
Full-size glue guns are better suited for larger projects that require a stronger hold, such as securing wood or fabric. They also have bigger glue sticks which means you’ll need to refill them less often and thereby reduces disruptions and wastes during work.
Additionally, you might want to consider whether you need a high-temperature or low-temperature glue gun. High-temperature glue guns melt the glue at a higher temperature, which means the glue will dry more quickly and with a stronger hold. Low-temperature glue guns, on the other hand, are safer to use since they melt the glue at a lower temperature and carry a lower risk of burns. Keep in mind that glue sticks can vary in temperature tolerances too so it is important to check which temperature your glue guns use before selecting right one.
Now that you know about the different types and sizes of glue guns available, you can choose the one that best fits your crafting needs. Don’t forget to check out our article about how hot glue is made for further information about this versatile craft tool.
Preparing Your Workspace
Get ready to start crafting by preparing your workspace! Setting up your work area properly can make all the difference when it comes to using a glue gun for crafts. Not only will it help keep you organized, but it can also protect your work surface and make sure you have all the supplies you need within reach. Consider covering your work surface with newspaper or a protective mat and gathering all necessary supplies beforehand to minimize mess and maximize efficiency. By following these steps, you’ll be able to easily focus on your project and create to your heart’s content. Once your workspace is prepped and ready to go, it’s time to move on to using your glue gun safely and effectively.
Cover Your Work Surface
When starting a project that involves a glue gun, one of the most important steps is to cover your work surface. This serves two purposes: it protects your workspace from any accidental glue drips or spills, and it ensures that you can remove any excess glue from your project without damaging your surface.
There are a few different materials that are commonly used for covering a work surface when using a glue gun. The most popular options are listed in the table below:
| Material | Pros | Cons |
|---|---|---|
| Wax paper | -Inexpensive -Easy to find -Non-stick surface |
-Can tear easily -Not always reusable |
| Parchment paper | -Non-stick surface -Can be reused multiple times -Resists tearing |
-Can be more expensive than other options -May not be readily available in all stores |
| Newspaper | -Inexpensive -Easy to find -Can be thrown away after use |
-Can leave ink residue on project or work surface -Not reusable |
| Plastic tablecloth or shower curtain | -Easy to clean with soap and water -Reusable multiple times -More durable |
-Can be more expensive than other options -May not be readily available in all stores |
No matter which material you choose, be sure to anchor the material to your work surface with tape to ensure it stays in place while you work. This prevents the material from sliding around while you use the glue gun, which could result in an uneven coating of glue or an unfortunate accident.
It’s always a good idea to have some extra material on hand in case of any glue mishaps. If you accidentally apply too much glue or cause a drip, you can quickly remove it from the surface without damaging it or your project. If you plan to work on multiple projects with a glue gun, you should consider dedicating a specific area or surface for your workspace.
Now that you have your work surface covered and anchored, you’re ready to proceed with your project. Keep in mind that different materials may have different drying times for hot glue. For more information on that topic, check out our article on how long hot glue takes to dry.
Gather Your Supplies
Gathering the necessary supplies is an essential step in using your glue gun for crafts. Before starting any project, you’ll want to make sure you have all the necessary items within reach. Here’s a list of supplies you may need:
- Glue gun: Choose a glue gun that suits the type of project you’re working on and consider the size of the glue gun. If you’re working on smaller crafts, a mini glue gun may be more suitable.
- Glue sticks: The type of glue stick you use will depend on the material you’re working with. For example, a high-temperature glue stick is suitable for working with wood, plastic, and metal while a low-temperature glue stick may be better suited for delicate materials like lace or ribbon.
- Workspace mat: To protect your workspace, use a mat or old sheet to cover the area where you’ll be working. This will catch any glue drips and make cleaning up easier.
- Crafting materials: Depending on the project, you may need a variety of materials, such as fabric, ribbons, beads, and buttons.
- Scissors: A good pair of scissors is necessary for cutting materials to the desired size and shape.
- Tweezers: Using a pair of tweezers can be helpful for placing small items in the right position.
- Protective gloves: If you’re working on a project that involves high-temperature glue, consider wearing protective gloves to protect your hands from accidental burns.
- Craft knife: A craft knife can be helpful for cutting more intricate shapes out of materials like foam board or cork.
Remember, the supplies you’ll need will depend on the project you’re working on. If you’re new to glue gun crafting, start with a simple project that requires minimal supplies. As you gain more experience, you can move on to more complex projects that require additional materials and tools. And if you need some inspiration, check out some of our other glue gun articles, such as “How to Glue Frags Together” or “How to Make Hot Glue Stencils” for some creative ideas!
Using Your Glue Gun
After you’ve chosen the right glue gun and prepared your workspace, it’s time to start using your glue gun for crafting. Using a glue gun can be easy and fun, but it’s important to handle it properly and be aware of safety precautions. In this section, we’ll go through the steps of installing and heating the glue gun, applying glue to your craft projects, and removing any residue that might be left behind. We’ll also share some tips and tricks for getting creative with your glue gun. So, let’s dive into the world of hot glue and see what we can create!
Before we begin, if you want to learn how to glue sand on cardboard, be sure to check out our guide on how to do it. It’s a great project that can be done with a glue gun, and it’s a fun way to add some texture to your crafts.
Installing and Heating the Glue Gun
When using a glue gun, it is important to know how to properly install and heat it before use. Here are the steps to follow:
- Choose a secure and stable surface to place your glue gun on.
- Insert a glue stick into the back of the gun. Make sure it fits snugly and securely, using the manufacturer’s instructions if necessary.
- Plug in the glue gun, and allow it to heat up. The time this takes may vary depending on the model, but it’s usually around 5-10 minutes.
- While waiting for the glue gun to heat up, prepare your workspace and craft materials.
- Check that the glue is melting and oozing freely from the nozzle of the gun before using it.
- Be careful not to touch the hot tip of the glue gun or the melted glue as it can cause severe burns. Always use the glue gun in a well-ventilated area as fumes can occur.
Remember to always follow the manufacturer’s instructions and guidelines when using your specific glue gun model. Now that your glue gun is installed and hot, you can begin using it for your crafting projects.
If you want to know how to shape hot glue or make cobwebs with a glue gun, check out our guide to shaping hot glue or tutorial for making cobwebs with a glue gun.
Using the Glue Gun Safely
When using a glue gun, safety should always be a top priority. Here are some tips to ensure that you use your glue gun safely:
| Tip | Description |
| 1. | Always wear safety glasses to protect your eyes from any accidental splatters or drips. |
| 2. | Keep your fingers away from the hot tip of the glue gun. The melted glue can cause serious burns if it comes into contact with your skin. |
| 3. | Never leave the glue gun unattended while it is turned on and hot. If you need to take a break, unplug the glue gun and set it aside to cool down. |
| 4. | When not in use, store the glue gun safely in a designated area out of reach of children and pets. |
| 5. | To avoid any fire hazards, never set the glue gun down on a flammable surface while it is still on or hot. |
| 6. | When finished using the glue gun, unplug it and allow it to cool down completely before storing it away. |
Remember, always prioritize safety when working with a glue gun. By following these tips, you can ensure a safe and enjoyable crafting experience. In the next section, we will discuss the proper techniques for applying glue to your craft project. However, before we move to the next section, check out this linked article to learn more about using glue in a unique way.
Applying Glue to Your Craft Projects
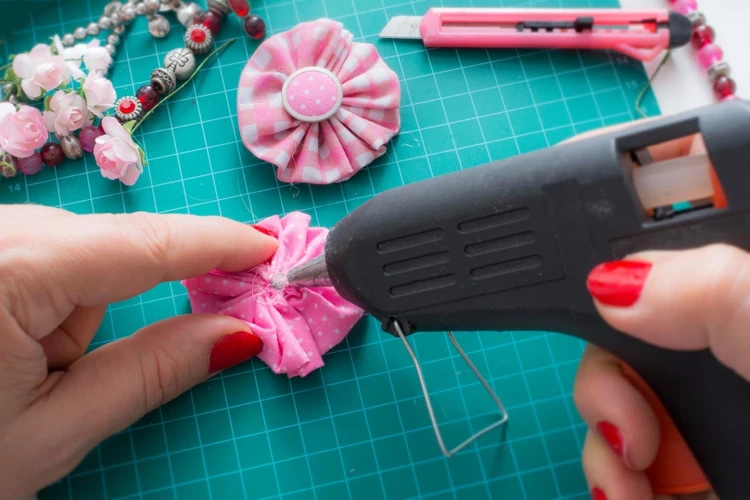
When it comes to applying glue to your craft projects, there are a few things to keep in mind to ensure the best results. Firstly, you’ll want to make sure your glue gun has heated up fully to ensure a smooth application. Once it has, you can begin by squeezing the trigger to apply the glue to your project. Depending on the size of your craft project, you may need to work in sections as the glue can cool and harden quickly.
Be sure to apply the glue evenly, taking care not to use too much or too little. A good rule of thumb is to use a small amount at a time and work quickly to spread it out before it begins to cool and harden.
Using a toothpick or craft stick can be helpful for spreading the glue evenly and reaching tight spaces.
When gluing together two separate pieces, it’s essential to hold them in place while the glue dries. You can apply a small amount of pressure for a few seconds to help the glue adhere better.
Additionally, it’s important to be cautious and stay safe while using a glue gun. You should avoid touching the glue directly as it can be hot and cause burns. Instead, you can use a craft stick to press the glue into place once it has cooled slightly.
If you happen to make a mistake or apply too much glue, don’t worry. You can easily remove excess or unwanted glue residue with a scraper or by rubbing a clean eraser over it.
Lastly, if you would like to explore different types of adhesives, such as putty or sticky tack, check out our articles on how to make sticky tack with liquid glue and how to make putty with glue stick. These options may offer unique benefits and results for your crafting needs.
Here is a summary of tips for applying glue to your craft projects:
| Tip | Description |
|---|---|
| Apply the glue evenly | Use a small amount at a time and work quickly to spread it out before it hardens. |
| Hold the pieces together | Apply a small amount of pressure for a few seconds to help the glue adhere better. |
| Stay safe | Avoid touching the glue directly as it can be hot and cause burns. |
| Remove excess glue residue | Use a scraper or eraser to remove unwanted glue residue. |
Removing Glue Residue
Once you’ve completed your crafting project and the glue has dried, you may find that there’s some leftover residue. But don’t worry, removing glue residue is a simple process! Here are some effective ways to get rid of it:
1. Rubbing Alcohol: Dampen a cloth with rubbing alcohol and gently rub the glue residue in a circular motion. This will help dissolve the glue and make it easier to wipe away.
2. Acetone or Nail Polish Remover: These products are known for their ability to dissolve certain types of glue residue. Apply a small amount to a cloth or cotton ball and gently rub the affected area.
3. Vinegar: Soak a cloth in white vinegar and lay it on top of the glue residue for 15-20 minutes. This will help loosen the glue, making it easier to wipe away.
4. Boiling Water: If the glue residue is on a heat-resistant surface, you can try pouring boiling water over it. This will soften the glue and make it easier to scrape away with a plastic scraper or credit card.
5. Goo Gone: This commercial product is specially formulated to remove tough adhesive residue. Apply it to the affected area and let it sit for a few minutes before wiping it away.
Remember to always test a small, inconspicuous area before using any of these methods on your crafting project. And be sure to follow all safety precautions, such as wearing gloves and using these products in a well-ventilated area.
Tips and Tricks for Glue Gun Crafting
So you’ve got the basics down and you’re feeling confident in your ability to use a glue gun for your crafting projects. But what if you want to take your glue gun skills to the next level? That’s where these tips and tricks come in handy! From working with different materials to creating unique effects, there’s a whole world of creativity waiting for you with your trusty glue gun. So let’s dive in and explore some of the ways you can elevate your glue gun crafting game.
Working with Different Materials
When it comes to crafting with a glue gun, it’s important to consider the materials you’ll be working with. Different materials may require different techniques, so it’s important to be aware of any particular considerations before you get started.
Here’s a guide to working with some common crafting materials:
| Material | Considerations |
|---|---|
| Fabric | When working with fabric, it’s important to choose a low-temperature glue gun to avoid scorching or melting the material. Apply a thin layer of glue and work in small, manageable sections to prevent the glue from drying too quickly. |
| Wood | For wood projects, a high-temperature glue gun is generally recommended. This type of gun will help to ensure a strong bond between the wood pieces. Be sure to apply the glue in small dots or lines, and work quickly as the glue can dry fast. |
| Metal | Working with metal requires the use of a high-temperature glue gun. Apply the glue sparingly, as too much can cause the metal to warp or bend. Work in small sections and be sure to wear protective gloves as the metal can become very hot. |
| Paper/Cardstock | A low-temperature glue gun is best for paper and cardstock projects. Apply small dots or lines of glue and work quickly to prevent the paper from wrinkling or warping. |
| Plastic | When working with plastic, it’s important to choose the correct type of glue gun. Some plastics may require a low-temperature gun, while others may require a high-temperature gun. Be sure to test the glue on a small area first and work in small sections to avoid any warping or damage to the plastic. |
Remember to always be cautious when working with a glue gun, regardless of the material you’re using. Be sure to handle the gun carefully, use protective gloves and clothing if necessary, and work in a well-ventilated area to avoid inhaling fumes. With these considerations in mind, you’ll be able to create beautiful and long-lasting crafts with your glue gun.
Creating Different Effects with Glue Guns
When it comes to crafting, using a glue gun can help you create a variety of unique and interesting effects. By experimenting with different techniques and materials, you can use your glue gun in new and creative ways to take your craft projects to the next level.
One way to create interesting effects with a glue gun is by using different types of glue. For example, if you want to create a raised or 3D effect on your project, try using a thicker, dimensional glue. Alternatively, if you want to add a bit of shimmer or sparkle to your project, consider using a glitter or metallic glue.
Another way to create unique effects is by using your glue gun to create texture. For example, you can use your glue gun to make faux stitches or “emboss” designs onto your project. Simply apply a thin line of glue in the shape of your desired pattern, and once it dries, you can paint over it or leave it as is.
You can also use your glue gun to create interesting patterns and designs on your projects. For example, you can create a “lace” effect by applying a thin line of glue in a lacy pattern onto your project, and then painting over it with a contrasting color. Or, you can create a “crackle” effect by applying a layer of glue over your project and then painting over it once it dries, so that the paint cracks and shows the glue underneath.
Finally, you can use your glue gun to add a bit of texture and dimension to your project by creating “drips” of glue. This can be a bit messy, so make sure you have a protected work surface and wear gloves if you’re concerned about getting glue on your skin. To create drips, simply hold your glue gun upside down and let the glue droop onto your project, then move it around to create a desired pattern or texture. Make sure to let it dry completely before handling your project.
The key to creating different effects with a glue gun is to experiment and have fun. Try out different materials, techniques, and patterns until you find what works best for you and your project. And remember, with a little bit of creativity and a lot of patience, the possibilities with a glue gun are endless.
Conclusion
In conclusion, learning how to use a glue gun for crafts can open up a world of creative possibilities. Whether you are decorating your home, making personalized gifts, or creating unique pieces of art, a glue gun is a versatile tool that can help you achieve your crafting goals.
It is important to choose the right glue gun for your specific crafting needs, including considering the type of crafting you’ll be doing and the size and type of glue gun. Preparing your workspace with a covered surface and necessary supplies is also crucial for a safe and successful crafting experience.
When using your glue gun, remember to always practice safety measures, including wearing protective gloves and avoiding touching the hot glue. Applying glue to your craft projects can be done with precision and ease, and removing any glue residue can be achieved with a few simple steps.
Finally, by experimenting with different materials and techniques, you can create a wide variety of effects with your glue gun. From adding texture and dimension to creating intricate designs, the possibilities are endless.
In summary, mastering the art of using a glue gun for crafts takes practice and patience, but with the right tools and techniques, you can unlock your creative potential and bring your visions to life. So, go forth and create something amazing with your glue gun!
Frequently Asked Questions
How long does it take for a glue gun to heat up?
The time it takes for a glue gun to heat up varies depending on the type and size of the gun. Generally, it can take between 1 to 5 minutes to heat up fully.
Do I need to use a special type of glue stick?
Yes, it’s recommended to use glue sticks that are specifically designed for your particular glue gun. Using the wrong type of glue stick can result in reduced adhesion or damage to your gun.
Can glue guns be used on fabric?
Yes, glue guns can be used on fabric, but it’s important to make sure that the glue stick you’re using is suitable for fabric. It’s also important to test a small area before applying the glue to your entire project.
Can I use a glue gun on plastic?
Yes, glue guns can be used on plastic, but it’s important to choose the correct type of glue stick for the job. Some glue sticks may melt or damage certain types of plastic, so it’s important to do your research beforehand.
How do I clean my glue gun?
To clean your glue gun, allow it to cool down completely, then gently wipe the nozzle and any excess glue with a damp cloth. Be very careful not to use water or any other liquid on the heating element or the inside of the gun.
What can I do if the glue from my glue gun turns yellow over time?
If your glue has turned yellow over time, it’s likely due to the chemical breakdown of the glue. Unfortunately, there’s not much you can do to prevent this from happening, but it shouldn’t affect the adhesion of the glue.
Can I use a glue gun to fix broken ceramic items?
Yes, glue guns can be used to fix broken ceramic items. However, it’s important to choose a glue stick that’s suitable for ceramics, and to make sure that your repaired item is not exposed to extreme temperatures or moisture.
How do I stop my glue gun from dripping?
If your glue gun is dripping, try adjusting the angle of the gun or using a higher temperature setting. Additionally, you can try using a more viscous glue stick to reduce the likelihood of drips.
Can I use a glue gun to make jewelry?
Yes, glue guns can be used to make jewelry, but it’s important to choose a glue stick that’s appropriate for the materials you’re working with. You’ll also want to be careful not to use too much glue, as it can be difficult to remove excess glue from small gems or beads.
Are there any safety concerns when using a glue gun?
Yes, there are some safety concerns when using a glue gun. Always follow the manufacturer’s instructions, use common sense, and wear appropriate protective gear such as gloves and eye protection. Be sure to keep children and pets away from your workspace when using a glue gun.