When it comes to crafting and DIY projects, spray glue can be a game-changer. It can make tasks easier and faster, and create a smooth and seamless finish. However, using spray glue may seem intimidating to beginners. With so many types of spray glue available, and various steps to follow, it can be overwhelming to get started. Fear not! This comprehensive guide will walk you through the process step-by-step, and provide tips to help you achieve great results. Let’s dive in and learn how to spray glue like a pro.
Types of Spray Glue
When it comes to adhesive options, spray glue is a popular choice among DIY enthusiasts, artists, and professionals alike. Whether you need a permanent bond or a temporary fix, spray glue can get the job done quickly and easily. Understanding the different types of spray glue available can help you choose the right one for your project. When selecting a spray glue, you’ll want to consider the strength of the bond, drying time, and repositionability. Let’s explore the options: Permanent Spray Glue, Repositionable Spray Glue, and Temporary Spray Glue. If you want to know more about glue guns, check out our article on how long can you leave a hot glue gun on?
1. Permanent Spray Glue
Permanent Spray Glue is a versatile adhesive that provides a strong and long-lasting bond. It is ideal for use on materials where a permanent bond is required, such as plastics, fabrics, and metals. This type of spray glue is often used in automotive and upholstery applications because of its strength and durability.
Here are some common uses for Permanent Spray Glue:
| Material | Application |
|---|---|
| Plastic | Automotive trim and interior parts |
| Fabric | Upholstery and clothing repairs |
| Metal | Sheet metal and HVAC fabrication |
| Wood | Furniture repair and laminate bonding |
It is important to note that Permanent Spray Glue sets quickly, so be sure to have your materials properly aligned before making contact. Once the bond is made, it cannot be easily undone, so make sure you are ready for a permanent result.
For those who are concerned about the toxicity of their adhesive, Permanent Spray Glue is typically non-toxic and safe for general use. However, it is always a good idea to read the manufacturer’s safety information before use.
Tip: If you accidentally get Permanent Spray Glue on your hands, try using rubbing alcohol or nail polish remover to remove it.
If you are looking for a more flexible adhesive option, Repositionable Spray Glue may be a better fit for your project needs.
2. Repositionable Spray Glue
Repositionable spray glue is a temporary bonding solution that allows you to move and reposition your project without damaging it. This type of spray glue is perfect for those who want flexibility in their crafting process without the fear of ruining their project.
Here are some of the main features of repositionable spray glue:
| Drying Time | 30 minutes to 1 hour |
| Bond Strength | Low to Medium |
| Temporarily Repositionable | Yes |
| Uses | Scrapbooking, temporary displays, creating mockups |
Since repositionable spray glue is not a permanent bond, it is great for scrapbookers who want to make sure their layout is perfect before committing to a final placement. It’s also great for creating temporary displays or creating mockups for projects.
One thing to keep in mind when using repositionable spray glue is: it may lose its tackiness over time. This means that if you plan on keeping your project for a long time, you may want to consider using a permanent spray glue instead.
If you’re not sure which spray glue is right for your project, check the manufacturer’s recommendations. They will usually indicate which type of glue is best suited for certain materials and applications.
And remember, always follow safety precautions when using spray glue. If you’re not sure how to use it properly, check out our step-by-step guide above.
If you need to reposition your glued items frequently, repositionable spray glue is the perfect solution for you.
3. Temporary Spray Glue
When it comes to temporary spray glue, it is ideal for projects where a temporary hold is needed. This type of spray glue allows you to reposition your item before the glue sets, making it a great choice for those who need some flexibility. Temporary spray glue can be beneficial when working on collages, layouts, and even costume design.
| Pros | Cons |
|---|---|
| Allows for repositioning of items | The hold is only temporary |
| The glue is repositionable for up to an hour | Not suitable for long-term projects |
| Does not leave a residue on surfaces | May not work well with heavy materials |
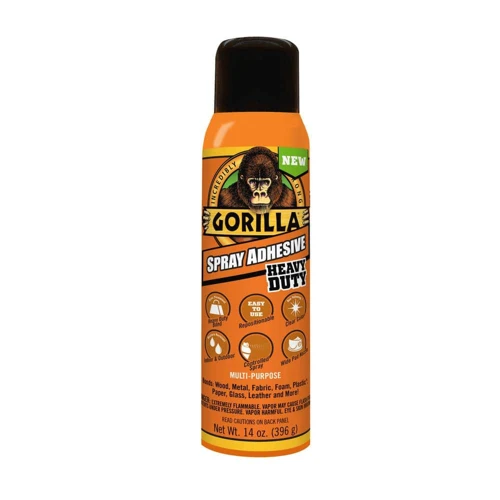
3M Super 77 Multipurpose Temporary Spray Adhesive and Gorilla Temporary Spray Adhesive are great options to consider if you are looking for temporary hold spray glue. They both have good reviews and come from reputable brands. However, it’s always important to read the label to ensure that it is suitable for your specific project needs.
Remember that using spray glue can be messy, so always be sure to work in a well-ventilated area and wear gloves and a mask if necessary. Also, be sure to follow the steps for clean up to keep your work area tidy and the nozzle from clogging.
Temporary spray glue can be an excellent tool to have in your crafting arsenal, especially when you need the flexibility to reposition your items before creating a permanent bond.
If you’re interested in learning more about hot glue and its uses, check out our article on
is hot glue toxic when dry?
Step-by-Step Guide to Spraying Glue
Now that you have selected the appropriate spray glue for your project, it’s time to start applying it. Applying spray glue can be straightforward, but it’s essential to do it properly to achieve optimal results. In this part, we will lead you through a step-by-step guide for spraying glue so that your project turns out amazing. Whether you’re working on a craft project or repairing your furniture, these steps will help you understand how to apply spray glue like a pro. So, grab your spray glue can and let’s get started!
Before we dive into the guide, check out these links if you need information on other types of glue:
How strong is hot glue?,
How to fix a glue gun?,
How to glue pipe cleaners?,
How to glue LED strips?,
How to make hair bows with a glue gun?,
How to tuck using glue?,
How to make fake teeth with hot glue?
1. Prep your work surface
Before starting any project with spray glue, it is essential to prep your work surface properly. Proper preparation ensures that the glue bonds well and your project stays intact. Here are some essential steps to follow when prepping your work surface:
| Prepping Steps | Explanation |
|---|---|
| Clean the surface: | Wipe the surface with a clean cloth to remove any dust, dirt, or debris. The presence of foreign materials can affect the bonding process of the glue. |
| Protect surrounding surfaces: | Cover any surface near the project area with a plastic sheet or newspaper as the spray can create a mess. This step is particularly important when working with permanent spray glue. |
| Abrade the surface: | Lightly sand the surface using a fine-grit sandpaper. Abrading the surface creates a rough surface, which enhances the bonding ability of the glue, particularly when working with non-porous surfaces. |
| Mask off areas: | Mask off areas that do not require any adhesive. This step is crucial when working with small projects where you need to maintain neat and precise edges. |
Following these steps will ensure that your work surface is ready for application of the spray glue and will result in a professional-looking final product. Proper preparation creates a strong bond and limits the risk of the glue loosening or coming apart. Remember, the way you prepare your surface has a significant impact on the durability and longevity of your project.
2. Shake the spray glue can well
Before using spray glue, it is important to shake the can well. Shaking the can helps to ensure that the glue is well-mixed and will spray evenly onto the surface. When the can sits for long periods of time, the glue inside can separate or settle, causing the glue to be less effective and potentially ruin the project.
To shake the spray glue can properly, follow these steps:
| Step | Action |
|---|---|
| Step 1 | Hold the can upright, with the nozzle pointing away from you. |
| Step 2 | Twist the cap to release it from the can. |
| Step 3 | Hold the can firmly with one hand and shake it vigorously up and down for at least 30 seconds. |
| Step 4 | Stir the nozzle tube gently to help mix the glue inside the can. |
| Step 5 | Replace the cap by twisting it firmly back onto the can. |
It is important to note that shaking the can too aggressively can cause the glue to bubble or spray unevenly, so be sure to shake it vigorously but not forcefully. Also, if the can has been stored in very cold temperatures, it is recommended to warm it up by placing it in a warm area for a short period of time before shaking it.
By shaking the can well before use, you can ensure that the glue sprays evenly and is effective in bonding surfaces together.
3. Test spray on scrap material
Before spraying glue onto your desired surfaces, it is essential to test the spray on a scrap material. This step will help you to determine the glue’s strength and ensure that it is suitable for your project. Testing the glue on a scrap material will also help you to avoid any potential mistakes, as it will give you a chance to practice your spraying technique.
Here are the steps to test spray on scrap material:
- Select a scrap material: Choose an extra piece of the same material you want to spray glue on. For instance, if you’re spraying fabric, you can use an extra piece of fabric as a scrap material.
- Spray glue onto scrap material: Hold the spray nozzle about 6 inches away from the scrap material and spray a light mist over the surface.
- Wait for glue to set: Allow the glue to dry for a few seconds – the glue should be tacky after a few seconds.
- Test the bond: Press the scrap material onto another surface and apply pressure. Hold the two surfaces together for a few seconds and make sure the bond is secure.
Testing the spray on the scrap material will help you to check the glue’s suitability, so if the bond isn’t strong enough, you can either choose a different type of glue or check if you need to use more layers to get the desired results. Remember that you should never rush and always wait for the glue to dry completely before making any adjustments.
By taking the time to test the spray glue on the scrap material, you’ll be able to avoid making mistakes and ensure that your project will be successful.
4. Spray glue onto surface
Now that you have tested the spray glue and you are confident it’s the right one for your project, it’s time to spray the glue onto your surface. Follow these steps for a successful application:
- Hold the can upright: It’s important to hold the spray glue can at a 90-degree angle to the surface you’re spraying. This ensures an even distribution of the glue and prevents overspray.
- Start spraying: Aim the nozzle at the surface and press down on the spray button. Keep the can moving constantly to avoid a buildup of glue in one spot. A light, even coat is preferable to a heavy coat that may cause the glue to run or take longer to dry.
- Spray in a sweeping motion: Move the can from side to side or up and down, depending on the shape of the object you’re gluing. Be sure to cover the entire surface with glue.
- Apply a second coat if necessary: Depending on the project, you may need a second coat of glue to ensure a secure hold. Wait for the first coat to dry completely before applying the second coat. Always refer to the manufacturer’s instructions for the recommended drying time.
Remember to work in a well-ventilated area and wear a mask and gloves to protect yourself from the fumes and chemicals in the spray glue. Using a steady hand and applying the glue in a sweeping motion will result in a smooth and even layer of glue that will securely hold your project together.
5. Press surfaces together
After spraying the glue onto the surface, it is important to press the surfaces together firmly to ensure a strong bond. Here are some tips on how to properly press surfaces together:
| Step | Instructions |
|---|---|
| Step 1 | Align the surfaces you want to bond together. Ensure that they are level and properly aligned before pressing them together. |
| Step 2 | Apply even pressure to the surfaces. You can use your hands or a roller to evenly press the surfaces together. If using a roller, start at the center of the surface and roll towards the edges. |
| Step 3 | Hold the surfaces together for at least 30 seconds. This will allow the glue to properly adhere to both surfaces. |
Taking the time to properly press surfaces together can make all the difference in the strength and durability of the bond. Remember to align the surfaces, apply even pressure, and hold them together for at least 30 seconds. Following these tips will result in a strong and long-lasting bond.
Tips for Using Spray Glue
Now that we’ve gone over the basic steps of how to spray glue, it’s time to delve into some tips and tricks that can make your experience with spray glue more effective and safe. Here are some key pointers to keep in mind while using spray glue.
1. Work in a well-ventilated area
When using spray glue, it is important to work in a well-ventilated area to avoid inhaling harmful fumes. The fumes emitted by spray glue can be irritating to the eyes, nose, and throat, and can even cause dizziness or headaches. It is important to ensure that you are working in a properly ventilated area to avoid these issues.
To help you understand what constitutes a well-ventilated area, here are a few tips:
| Tip | Description |
|---|---|
| 1 | Work outdoors if possible |
| 2 | If working indoors, open windows and doors to promote air circulation |
| 3 | Make sure the room is not too small or cramped |
| 4 | Avoid using spray glue in a room with poor ventilation, such as a basement or attic |
By following these tips, you can ensure that you are working in a well-ventilated area, which will help to minimize any risk of inhaling harmful fumes. It is also a good idea to wear a mask and gloves when using spray glue for added protection. Remember, taking precautions when using spray glue will help to ensure that your project is a success while keeping you safe at the same time.
2. Use a mask and gloves
It is important to take safety precautions when using spray glue. One of the key safety measures to keep in mind is using a mask and gloves. The fumes from spray glue can be harmful if inhaled, and the glue itself can be quite difficult to remove from skin. That’s why using gloves can provide an additional layer of protection.
Here are some tips on choosing the right mask and gloves for the job:
- Mask: When selecting a mask, make sure it is a respirator with a proper filtration system. A simple dust mask will not provide enough protection for the type of fumes released by spray glue. Look for a mask that is labeled NIOSH-approved. Make sure you are using the correct size for your face so that there are no gaps that can allow fumes to leak in.
- Gloves: Choose gloves that are made of nitrile or latex. These materials will provide a barrier between the glue and your skin. They are also resistant to most solvents, including the ones used in spray glue. Make sure the gloves fit snugly but aren’t too tight, to ensure comfortable usage.
Remember, even with a mask and gloves, it’s still a good idea to work in a well-ventilated area to reduce exposure to fumes. Taking these extra steps can help ensure a safe and successful spray glue project.
3. Don’t overspray
While using spray glue, it is crucial to avoid overspraying the adhesive. This not only wastes the glue, but it can also result in a messy and uneven application. Here are some tips to avoid overspraying:
| Tip | Description |
|---|---|
| Hold the can at an appropriate distance | Read the instructions on the spray glue can or the manufacturer’s website to determine the appropriate distance to hold the can. Holding the can too close can result in overspraying, while holding it too far will result in an inconsistent application. |
| Use short, controlled bursts | Instead of holding down the spray nozzle continuously, use short and controlled bursts of spray. This will help you to apply the glue evenly and avoid overspraying. |
| Apply multiple thin coats | If you need to apply more glue, it is better to apply multiple thin coats rather than a single thick coat. This allows the glue to dry more evenly and will also help you to avoid overspraying. |
| Practice on scrap material | If you are new to using spray glue, it is a good idea to practice on scrap material before applying it to your project. This will give you a better idea of how much glue you need to apply and help you to avoid overspraying. |
By following these tips, you can avoid the mistakes that can often result in overspraying and achieve a more even application of your spray glue. Remember to always work in a well-ventilated area, wear a mask and gloves, and allow the glue to dry completely before handling your project.
4. Use a steady hand
Using a steady hand is crucial when spraying glue. If the hand is unsteady, the glue can be sprayed unevenly, resulting in an unsatisfactory bond. It is essential to maintain a consistent speed and distance while spraying the glue. Below are some tips on how to use a steady hand while spraying glue:
| Tips for a Steady Hand |
|---|
| Hold the can with both hands for better control. |
| Keep your arms close to your body to minimize movement. |
| Breathe slowly and steadily while spraying to keep yourself calm. |
| Position yourself comfortably, either standing or sitting, to avoid fatigue. |
| Start spraying from one end of the surface and move evenly across it, using a sweeping motion. |
| Overlap each pass slightly to ensure an even application. |
| Use short bursts instead of a continuous spray for better control. |
| Keep your eyes on the surface as you spray, rather than on the can, to maintain a consistent distance. |
By following these tips, you can ensure a smooth and even application of spray glue, resulting in a reliable and long-lasting bond. Remember to take your time and practice before tackling any large projects.
5. Allow glue to dry completely
After pressing the surfaces together, it is vital to allow the glue to dry completely. The drying time can vary depending on the type of spray glue used, the material surfaces, and the environment. Here is a table summarizing the approximate drying times for each type of spray glue.
| Spray Glue Type | Approximate Drying Time |
|---|---|
| Permanent Spray Glue | 24-48 hours |
| Repositionable Spray Glue | 5-10 minutes |
| Temporary Spray Glue | 1-5 minutes |
It is critical to follow the drying time recommended by the spray glue manufacturer. Rushing the process and not allowing enough drying time can cause the bond to weaken or even break completely. On the other hand, excessively long drying times may impede the bond from forming altogether.
Once the glue has dried completely, check the bond’s strength by lightly tugging on the materials. If the bond feels strong and secure, you can safely continue with your project. However, if the bond feels weak or unstable, you may need to reapply the spray glue and repeat the pressing step.
Allowing the glue to dry completely is a crucial step in achieving a strong, secure bond between surfaces. By following the recommended drying time and conducting a bond strength test, you can ensure that your project will be successful and long-lasting.
Clean Up
After successfully completing your project with spray glue, there’s one important step left – clean up. Proper clean up is crucial to maintain the longevity of your crafting tools and to prepare for future projects. Neglecting to clean up can result in clogged spray nozzles and ruined surfaces. In this section, we’ll tell you how to properly clean up after using spray glue. So, let’s roll up our sleeves and get cleaning!
1. Clean spray nozzle
After using spray glue, it’s important to clean the nozzle of the canister to prevent clogging and ensure the longevity of the product. Here are some steps to follow for nozzle cleaning:
- Step 1: Remove the spray nozzle from the top of the canister. Make sure the cap is secure to prevent any accidental discharge of the glue.
- Step 2: Soak the spray nozzle in a bowl of acetone. This will help break down any remaining glue and clean the nozzle efficiently.
- Step 3: Use a small bristle brush (a toothbrush works well) to clean the inside of the nozzle. Make sure you scrub gently to avoid damaging the nozzle.
- Step 4: Rinse the nozzle thoroughly with hot water, making sure to remove any traces of acetone.
- Step 5: Dry the nozzle with a clean cloth or paper towel, and make sure it is completely dry before reattaching it to the canister.
By following these simple steps, you can ensure your spray canister stays in excellent condition and ready to use for future projects. Remember, keeping your spray nozzles clean is an essential part of maintaining your tools and equipment to ensure they remain in top working condition.
2. Wipe up any overspray
After you finish using spray glue, it’s important to clean up any overspray that may have landed on surfaces other than your intended project. This will help prevent any unintentional bonding or damage to other materials.
To do this, gather a clean cloth or paper towel and a mild solvent such as rubbing alcohol or acetone. Be sure to wear gloves to protect your skin from the solvent.
Then, dampen the cloth or paper towel with the solvent and gently wipe the affected areas. It’s important to be careful and avoid rubbing too hard or using too much solvent, as this can cause damage or discoloration to the surface.
If you notice that the overspray is particularly stubborn or difficult to remove, you can try using a non-abrasive cleaning pad or sponge along with the solvent.
Once you have finished cleaning up the overspray, be sure to dispose of any used materials properly, following your local guidelines for hazardous waste.
By taking the time to properly clean up any overspray, you can help ensure that your spray glue application is precise and effective while also minimizing any potential mess or damage to surrounding surfaces.
| Materials needed: | Steps: |
|---|---|
| Clean cloth or paper towel | 1. Dampen cloth with mild solvent 2. Gently wipe affected areas 3. Avoid rubbing too hard or using too much solvent |
| Rubbing alcohol or acetone | – |
| Non-abrasive cleaning pad or sponge (optional) | – |
| Gloves | – |
3. Store spray glue properly
Proper storage of spray glue is essential to ensure its longevity and effectiveness. It is important to read and follow the manufacturer’s instructions for specific storage requirements. Here are some general tips for storing spray glue:
- Store in a cool, dry place: Heat can cause the glue to break down and lose its adhesive properties. Do not store spray glue near any heat sources or in direct sunlight. A cool, dry place such as a cabinet or drawer is ideal for storage.
- Keep away from flames and sparks: Spray glue is flammable and should be kept away from any flames or sparks. Do not smoke near the glue or spray it near an open flame.
- Use within expiration date: Like any product, spray glue has an expiration date. Check the label for the expiration date and use the glue before that date has passed.
- Seal the nozzle: When finished using the spray glue, make sure to close the nozzle tightly. This will prevent the glue from drying out and clogging the nozzle.
- Store upright: Spray glue should be stored upright to prevent leakage. Make sure the can is not leaning or lying on its side.
- Keep out of reach of children: Always store spray glue in a secure location out of reach of children. The chemicals in spray glue can be harmful if ingested or inhaled.
By following these storage tips, you can help ensure the longevity and effectiveness of your spray glue for your next project.
Conclusion
After following this comprehensive guide on how to spray glue, you should have a better understanding of the different types of spray glue available and how to use them effectively. Whether you’re working on a craft project or a home improvement task, spray glue can be a valuable tool to have in your toolkit.
Remember to always work in a well-ventilated area, wear a mask and gloves, and use a steady hand when spraying glue onto surfaces. Don’t overspray, and allow the glue to dry completely before handling your project or moving on to the next step.
When you’re finished using the spray glue, be sure to clean the nozzle and wipe up any overspray. Store the spray glue properly to ensure it stays fresh and effective for future use.
By following these tips and techniques, you can achieve great results with your spray glue projects and enjoy the many benefits that this versatile adhesive has to offer. So go ahead and experiment with different types of spray glue and techniques, and let your creativity take flight!
Frequently Asked Questions
1. Can I use spray glue on all types of materials?
Spray glue can be used on a variety of materials such as paper, fabric, foam, plastic, and metal. However, be sure to check the label of the spray glue to ensure it is suitable for your specific material.
2. How long does it take for spray glue to dry?
The drying time of spray glue varies depending on the brand and the type of spray glue used. Generally, it can take anywhere from 1-24 hours for spray glue to dry completely.
3. Can I reposition items after using spray glue?
If you are using repositionable spray glue, you can easily reposition and adjust items before the glue dries completely. However, if you are using permanent or temporary spray glue, the bond will be stronger and it may be more difficult to reposition items.
4. Is spray glue waterproof?
Some spray glues are waterproof, while others are not. Check the label of your spray glue to ensure it is waterproof if you will be using it for projects that may be exposed to water.
5. Can I use spray glue on a vertical surface?
Yes, you can use spray glue on a vertical surface. However, be sure to apply the glue in a thin, even layer to avoid drips or excess glue.
6. Can I paint over spray glue?
Yes, you can paint over spray glue once it has dried completely. However, the bond between the materials may be stronger than the paint, so be sure to test the paint on a small area first.
7. How do I remove excess spray glue?
You can remove excess spray glue with a solvent such as acetone or rubbing alcohol. Be sure to test the solvent on a small, inconspicuous area first to ensure it does not damage the material.
8. Can spray glue be used for outdoor projects?
Some spray glues are suitable for outdoor projects, but be sure to check the label to ensure it is rated for outdoor use and can withstand exposure to the elements.
9. Will spray glue work on oily or greasy surfaces?
No, spray glue will not work on oily or greasy surfaces. Make sure the surfaces are clean and free from any grease or oils before applying spray glue.
10. What should I do if the spray nozzle becomes clogged?
If the spray nozzle becomes clogged, you can try removing it and soaking it in warm water or solvent. If this does not work, you may need to replace the spray nozzle.