Have you ever been in the middle of a project when suddenly your trusty glue gun stops working? It can be frustrating, but don’t fret! With a little bit of know-how and some basic tools, you can easily fix your glue gun yourself. No need to rush out and buy a new one just yet. In this step-by-step guide, we will show you how to fix your glue gun and get back to crafting in no time. So grab your tools and let’s get started.
Step 1: Identify the Issue
Identifying the issue with your glue gun is the first step in fixing it properly. While glue guns are generally easy to use and require little maintenance, they can occasionally experience issues that need to be resolved. Before you can fix your glue gun, you need to know what the problem is. This step will cover different types of issues that can occur with your glue gun, the tools you need to fix it, and safety precautions you should take while doing so. By the end of this step, you will be ready to diagnose and fix the issue with your glue gun. If you’re interested in how to use a glue gun for crafts, check out our other article on this topic.
1.1 – Types of issues
When it comes to fixing a glue gun, it’s important to identify the issue at hand. Here are some common types of issues that can happen with glue guns:
| Issue | Description |
|---|---|
| Not heating up | If your glue gun is not heating up at all, there may be an issue with the power cord or heating element. |
| Heating up too slowly | If your glue gun is heating up much slower than it used to, there may be an issue with the heating element or power source. |
| Glue not coming out | If the trigger of your glue gun isn’t releasing glue, there may be a blockage in the nozzle or the glue stick feeder. |
| Glue dripping from nozzle | If your glue gun is constantly dripping glue from the nozzle, there may be an issue with the nozzle or the temperature control mechanism. |
| Other issues | Other issues may include a broken nozzle, a damaged power cord, or a damaged heating element. |
Identifying the issue is the first step to fixing your glue gun. Once you have an idea of what’s wrong, you can move on to the next steps in the process.
1.2 – Tools you will need
Tools are important when it comes to fixing a glue gun. In order to get started with fixing your glue gun, you need to have the right tools. Here are some of the tools that you will need for the process:
| Tools | Descriptions |
|---|---|
| Screwdriver | A screwdriver will help you to disassemble the glue gun to check for the faulty parts. |
| Hobby Knife | You will need a hobby knife to remove glue residue from the nozzle or body of the glue gun. |
| Replacement Parts | If there are any faulty parts that need to be replaced, you will need to have the new parts ready before you start. |
| Cloth | Have a clean cloth ready to use for cleaning parts of the glue gun. |
| Hot Glue Sticks | You will need hot glue sticks to test your glue gun once it is fixed. |
Having the right tools is essential in order to successfully fix your glue gun. Once you have the tools required, the process will be more efficient. In the next section, we will discuss the safety precautions that you need to keep in mind when fixing your glue gun.
If you are interested in how to glue headphones back together, click on this link for more information.
1.3 – Safety Precautions
Safety Precautions to Consider when fixing your Glue Gun:
When working on your glue gun, safety should be your top priority. Here are some important safety precautions you should always consider:
| Safety Precaution | Description |
| Unplug the Glue Gun | Before fixing your glue gun, unplug it from the power source to prevent any accidents.(source) |
| Use Protective Gear | Wear protective gloves and safety goggles to prevent injury from any hot glue or tool while fixing your glue gun. |
| Work in a Well-Ventilated Area | A well-ventilated area will help to prevent inhaling any toxic glue fumes that might come from the glue gun.(source) |
| Keep Water Away from the Glue Gun | Never use water to clean or fix your glue gun, as it can cause electrical shock or damage to the tool. |
| Avoid Touching the Hot Parts | Be aware of the hot parts, such as the heating element and nozzle, to prevent burns. Always use tools or gloves to handle them. |
By following these safety precautions, you can protect yourself from any potential hazards that may arise while fixing your glue gun and ensure a safe and successful repair.
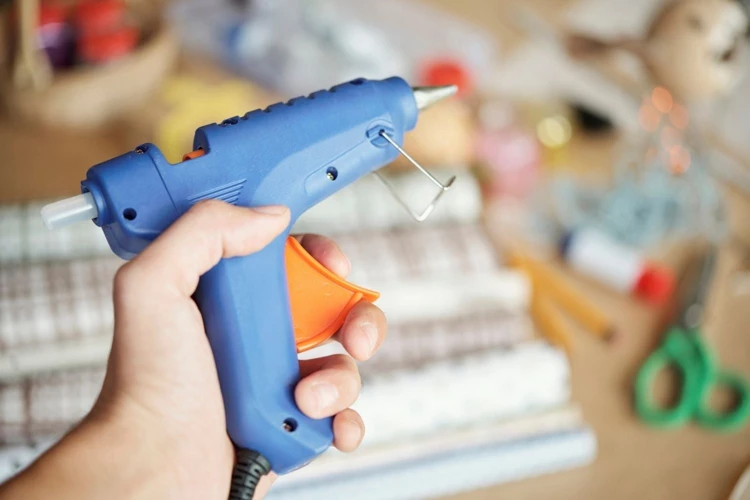
Step 2: Check the Glue Gun
After identifying the issues in Step 1, it’s time to move on to Step 2 and check the glue gun to determine what’s causing the problem. By performing a thorough check, you’ll be able to identify the source of the issue and take the necessary steps to fix it. This step is important to ensure that your glue gun stays in good working condition and is ready to be used for your next project. So, grab the tools you need and let’s get started! If you’re interested in learning how to glue a poster to a foam board, follow this link for more information.
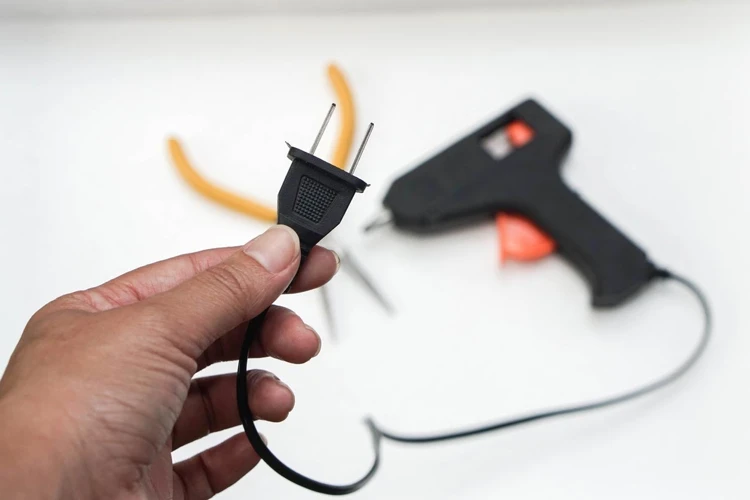
2.1 – Check the power cord
One of the most common reasons for a glue gun malfunctioning is a faulty power cord. To check the power cord, first, unplug the glue gun from the electrical socket. Then thoroughly examine the power cord for any visible damage such as cuts, nicks, or frays. If there are no visible damages, plug the cord back in and switch the glue gun on. If the gun heats up and starts dispensing glue properly, this means the power cord is working fine, and you can move on to the next step. If, on the other hand, the gun remains cold and doesn’t dispense glue, try wiggling the cord around to see if the gun turns on. If the glue gun starts working, then there could be a short circuit in the cord.
It is important to always check the power cord before proceeding with other troubleshooting steps, as damaged cords can cause serious injury or even fire hazards. You should never attempt to operate a glue gun with a damaged or frayed power cord.
Now that you have checked the power cord, you can move on to checking the heating element in the next step. However, if you are facing issues with clogging or nozzle blockage, consider checking out our article on how to unclog a hot glue gun, which provides detailed steps on how to clear any blockages in your glue gun’s nozzle.
Learn how to unclog a hot glue gun.
2.2 – Check the heating element
When checking the heating element, you need to make sure that it is working correctly. If the glue gun is turned on, but the tool is not heating up, the problem could be with the heating element. To check the heating element, follow these steps:
1. Unplug the glue gun: Before performing any checks on a glue gun, make sure that it is unplugged to avoid electrocution.
2. Check the heating element for damage: Carefully examine the heating element to see if there are any visible signs of damage such as cracks, breaks, or burns. If the heating element is damaged, it will need to be replaced.
3. Test the resistance of the heating element: You can use a multimeter to test the resistance of the heating element. Set the multimeter to the resistance setting and place the probes on each end of the heating element. If the reading shows no resistance, the heating element is broken and needs to be replaced.
If the heating element is damaged, you can replace it by following the steps outlined in Step 4.1 – Replace the heating element. Checking the heating element is an essential step in troubleshooting glue guns that are not adequately heating up. Once you have checked the heating element and replaced it if necessary, you can move on to the next steps to fix the glue gun and use it for various DIY projects like creating cobwebs with a glue gun or gluing balloons to the wall.
Step 3: Disassemble the Glue Gun
As you continue to troubleshoot your glue gun, you may find that the issue is beyond a simple fix and requires further investigation. In this step, we will guide you on how to disassemble your glue gun to identify the faulty parts and prepare for replacement or repair. Before proceeding with the disassembly process, ensure that you have all the necessary tools and follow the safety precautions outlined in the previous step. Once you are ready, let’s get started on the disassembly process.
3.1 – Remove the nozzle
Before you can replace or repair a faulty nozzle in your glue gun, you must first remove it. The nozzle is the part of the glue gun where the melted glue flows out, and it can become clogged or damaged over time. Follow these steps to remove the glue gun nozzle easily:
- Step 1: Unplug the glue gun from the power source and let it cool down completely. This is important as you could burn yourself if you try to remove the nozzle while it’s still hot.
- Step 2: Locate the retaining clip that holds the nozzle in place. The retaining clip is a small metal piece that sits at the base of the nozzle.
- Step 3: Carefully remove the retaining clip using a pair of pliers or a screwdriver. Be gentle and take your time, as you don’t want to damage the clip or the nozzle.
- Step 4: Once you have removed the retaining clip, gently pull the nozzle out of the front of the glue gun.
If the nozzle is stuck and won’t come out easily, try gently wiggling it back and forth while pulling it at the same time. If this still doesn’t work, you may need to use a bit more force or enlist the help of a professional.
Note: It’s important to handle the nozzle carefully, as it can be fragile and break easily. Additionally, if you notice that the nozzle is damaged or worn out, it’s important to replace it before using the glue gun again.
Now that you have removed the nozzle, you can proceed with the necessary repairs or replacements. If the nozzle is just clogged, you can clean it and reuse it. However, if it’s damaged, you may need to replace it with a new one.
For more inventive DIY projects using glue, you can check out our guide on how to make a glue bomb or how to make sticky tack with liquid glue.
3.2 – Remove the glue stick
Removing the glue stick is an important step in disassembling the glue gun. This step is necessary if the glue stick is not feeding correctly or if it has become jammed inside the gun.
To remove the glue stick, first, unplug the glue gun and allow it to cool completely. Then, gently pull the trigger to release any remaining glue inside the gun.
Next, locate the end of the glue stick at the back of the glue gun and use a pair of pliers to firmly grip and remove it. Make sure to wear gloves as the glue stick and the interior of the gun may still be hot to the touch.
If the glue stick is still stuck, use a small flathead screwdriver to gently push it through the back of the gun until it comes out of the front.
To avoid damaging the gun, use caution when removing the glue stick and try to avoid pulling too hard on it.
You can refer to the following table for a quick overview of the steps to remove the glue stick:
| Step | Action Required |
|---|---|
| Step 1 | Unplug the glue gun and allow it to cool completely |
| Step 2 | Release any remaining glue by pulling the trigger |
| Step 3 | Use pliers to grip and remove the glue stick |
| Step 4 | If the glue stick is stuck, use a screwdriver to gently push it through |
By following these steps, you will be able to safely and effectively remove the glue stick from the glue gun without causing any damage to the gun itself.
3.3 – Remove the heating element
To properly remove the heating element from your glue gun, you will need to follow a few steps. First, ensure that the glue gun is unplugged and has had time to cool down. Once it is safe to handle, you can proceed with the following steps:
- Remove the casing: Locate and remove any screws or clips that may be holding the casing of the glue gun in place. Once these have been removed, you can gently pry the casing away from the body of the gun, being careful not to damage any of the internal components.
- Locate the heating element: Once the casing is removed, you should be able to locate the heating element. This is typically a small, cylindrical part that is situated near the nozzle of the gun.
- Disconnect the heating element: Depending on your particular glue gun model, the heating element may be connected by a set of wires or by a soldered connection. Either way, you will need to carefully disconnect the heating element from the rest of the gun before you can remove it completely.
- Remove the heating element: Once the heating element has been disconnected, you should be able to gently lift it out of the gun. Be sure to inspect the part carefully for any signs of damage or wear and tear that may be contributing to the gun’s malfunction.
- Replace or repair the heating element: If you have determined that the heating element is the cause of your glue gun’s issues, it will need to be either replaced or repaired. Depending on your experience with electrical repairs, you may be able to fix the issue yourself. Otherwise, it is best to take your gun to a professional for repair or replacement.
Properly removing and inspecting the heating element of your glue gun is a crucial step in fixing any issues it may be experiencing. By following these steps carefully and safely, you can get a better understanding of the problem and determine the best way to proceed with repairs.
Step 4: Replace or Repair the Faulty Parts
Now that you have identified the issue and checked the glue gun, it’s time to move on to Step 4 and address the faulty parts. It’s important to remember that replacing or repairing parts of your glue gun can help extend its lifespan and save you money in the long run. However, it’s crucial to have the necessary tools and take precautionary measures to ensure your safety. In this step-by-step guide, we will walk you through the process of replacing or repairing faulty parts of your glue gun. So, gather your tools and let’s get started!
4.1 – Replace the heating element
When it comes to fixing a glue gun, the heating element is one of the most important components to check. If it is faulty or burned out, it can prevent the glue gun from functioning properly. Here are the steps to replace the heating element:
- Unplug the glue gun: Before you begin to work on the heating element, make sure that the glue gun is unplugged and has had time to cool down.
- Remove the screws: The heating element is typically held in place by a few screws. Use a screwdriver to remove them.
- Disconnect wiring: Once you have removed the screws, you should be able to disconnect the wiring connected to the heating element. Take note of where each wire is connected so that you can easily reconnect them later.
- Remove the old heating element: With the wiring disconnected, you can now remove the old heating element. Discard it and move on to the next step.
- Replace with a new heating element: Purchase a new heating element that is compatible with your glue gun model. Carefully connect the wiring to the new heating element in the same place you disconnected it from the old one.
- Screw in the new heating element: Position the new heating element where the old one was and screw it in place. Make sure it is secure before proceeding.
Replacing the heating element can be a bit tricky, but it is a crucial step in fixing a glue gun. If done correctly, you should notice a significant improvement in how your glue gun operates.
4.2 – Clean the nozzle
When it comes to fixing a glue gun, cleaning the nozzle is one of the most common steps. A clogged nozzle can cause issues such as irregular glue flow or even no glue flow at all. Here’s a step-by-step guide to cleaning the nozzle of your glue gun:
| Step 1 | Prepare the Glue Gun for Cleaning |
|---|---|
| 1.1 | Plug the glue gun into a power source and turn it on. Make sure that it has had enough time to heat up. |
| 1.2 | Remove any glue that may be in the gun by pulling the trigger or pushing it out using a wooden dowel. |
| 1.3 | Unplug the glue gun from the power source and let it cool down fully before proceeding with the cleaning process. |
After preparing the glue gun for cleaning, the next step is to clean the nozzle itself.
| Step 2 | Clean the Nozzle |
|---|---|
| 2.1 | Get a pin or a needle and use it to remove any excess glue that may be in the nozzle. |
| 2.2 | Using a clean cloth or a swab dipped in rubbing alcohol, gently clean the inside of the nozzle. Be careful not to damage or scratch the surface of the nozzle. |
| 2.3 | Repeat the above steps until the nozzle is clean and free from any glue residue. |
Once you have cleaned the nozzle, it is important to reassemble it correctly and test the glue gun to ensure that it is now working properly. Remember to also clean the rest of the glue gun and its components regularly to prevent any further issues and to extend the life of your glue gun.
Step 5: Reassemble the Glue Gun
Now that you have replaced or repaired the faulty parts in your glue gun, it is time to put everything back together. This may seem like a daunting task, but with a little patience and attention to detail, you can easily reassemble your glue gun. Here are the following steps for reassembling your glue gun.
5.1 – Reattach the heating element
Now that you have replaced or repaired the faulty parts of the glue gun in the previous step, it’s time to reassemble the glue gun. The first step of reassembling the gun is to reattach the heating element. Here’s what you need to do:
Step 5.1: Reattaching the Heating Element
| Tools you will need | Materials you will need |
|---|---|
| Screwdriver | New heating element (if the old one was faulty) |
1. Take the new or repaired heating element and align it correctly with the glue gun. Make sure that it is secure and flush against the body of the glue gun.
2. Screw the heating element back in place using the same screwdriver. Double-check that the screws are tight enough and that the heating element is not loose.
3. Ensure that you have reconnected any wires that you may have disconnected during the disassembly process. It is important to make sure that everything is properly connected to avoid any electrical mishaps and to ensure that the glue gun heats up properly.
4. Once you have reattached the heating element and made sure that everything is properly connected, you are ready to move on to the next step and insert a glue stick.
By following these steps carefully, you should be able to reattach the heating element of your glue gun with ease, ensuring that your gun functions once again.
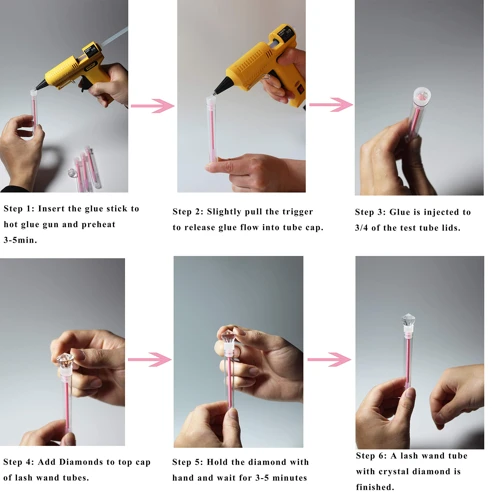
5.2 – Insert a glue stick
After reattaching the heating element in the previous step, it’s time to insert a new glue stick into the gun. Here are the steps to follow:
- Choose the right size glue stick: Before you insert a glue stick, make sure that it’s the right size. Most glue guns can accommodate either regular or mini-sized glue sticks. Check the manufacturer’s instructions or packaging to ensure you’re using the right size.
- Prepare the glue stick: Open the package containing the new glue stick, if you haven’t already. Remove any paper or plastic wrapping and inspect the glue stick for any defects or damages.
- Insert the glue stick: Insert the glue stick into the back of the glue gun. Push it gently until it reaches the end of the glue gun’s barrel.
- Wait for the glue stick to feed into the heating element: Once the glue stick is inserted, give the gun a minute or two to heat up and melt the stick. You should be able to see the melted glue oozing out of the nozzle. If it doesn’t, wait a little longer for the heating element to fully melt the glue stick.
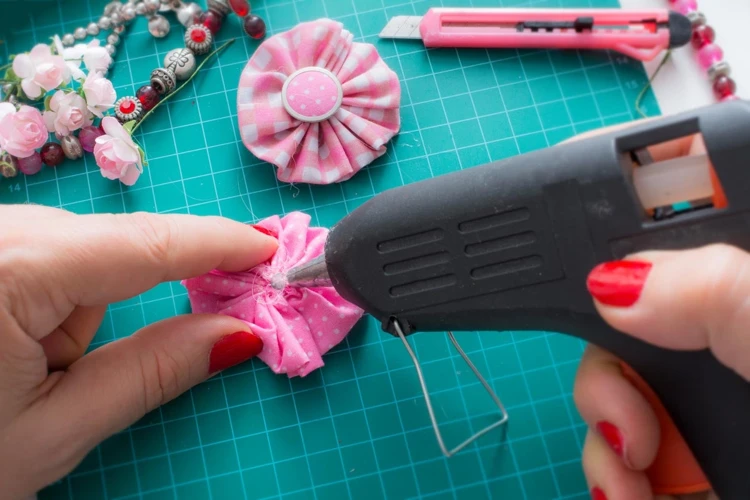
- Adjust the temperature settings: Depending on the type of glue gun you have, you may be able to adjust the temperature settings. If you’re using a high-temperature glue gun, which is ideal for bonding materials like wood, metal, and plastic, set it to the appropriate temperature level. If you’re using a low-temperature glue gun, which is generally used for bonding delicate materials like foam, fabric, and ribbon, set it to the right temperature as well.
Remember to always exercise caution when handling hot glue guns and sticks. If the glue gun gets too hot or starts to malfunction, turn it off immediately and follow the troubleshooting steps in the previous sections. With these steps, inserting a glue stick into your glue gun should be a breeze!
5.3 – Attach the nozzle
To attach the nozzle to the glue gun, follow these simple steps:
| Step | Description |
|---|---|
| Step 1: | Make sure that the nozzle is clean and free from any debris or old glue. If it is not clean, use a clean cloth or paper towel to remove any debris or old glue from the nozzle. |
| Step 2: | Line up the nozzle with the heating element on the glue gun. |
| Step 3: | Gently push the nozzle onto the heating element until it is snugly in place. |
| Step 4: | Tighten the nozzle with the nozzle tightening screw or nut. This will secure the nozzle in place and prevent it from falling off during use. |
| Step 5: | Plug in the glue gun and allow it to heat up for a few minutes before using it. This will ensure that the glue is at the right temperature and consistency for use. |
It is important to note that proper maintenance of the nozzle is essential to ensure that it remains in good working condition. After each use, clean the nozzle thoroughly to remove any excess glue or debris. This will prevent clogging and ensure that the glue gun continues to function properly.
Step 6: Test the Gun
Now that you have fixed your glue gun, it’s time to put it to the test. This step is crucial to ensure that your glue gun works properly before you start using it for your projects. In this step, you will learn how to test your glue gun, both with and without glue, to make sure that it’s heating up properly and that the glue is flowing smoothly. So, let’s dive into the testing process and ensure that your glue gun is ready to tackle any project you throw its way.
6.1 – Test the gun without glue
Before testing the glue gun with actual glue, it is important to ensure that all the parts are functioning properly. Testing the gun without glue can help identify any remaining issues that need fixing. Here are the steps for testing the glue gun without glue:
| Step | Description |
|---|---|
| Step 1 | Plug in the glue gun and wait for it to heat up according to the manufacturer’s instructions. |
| Step 2 | Insert a glue stick into the gun and carefully observe the glue as it comes out of the nozzle. |
| Step 3 | If the glue is not coming out properly, turn off the glue gun and unplug it. Check that the heating element and nozzle are clean and properly attached. Reassemble the glue gun and test again. |
| Step 4 | If the glue flows steadily, without any issues, try squeezing the trigger while pointing the nozzle in different directions. This will help ensure that glue comes out smoothly and without any clogging. |
| Step 5 | Once you are satisfied with the performance of the glue gun, turn it off and unplug it before proceeding to the next step. |
Testing the glue gun without glue is an important step that ensures the user is prepared to work with the gun safely and efficiently. Identifying issues at this stage can help prevent any accidents or mishaps while using glue later on.
6.2 – Test the gun with glue
Now that you have tested the glue gun without any glue, it’s time to test it again, this time with glue. Follow these steps to test your glue gun with glue:
- Plug in the glue gun: Plug in the glue gun and allow it to heat up fully. This usually takes around 5 minutes, but the heating time can vary depending on the model of the glue gun.
- Insert a glue stick: Once the glue gun is heated up, insert a glue stick into the glue gun’s chamber as per the manufacturer’s instructions.
- Ensure glue is flowing smoothly: Gently squeeze the trigger of the glue gun to check if the glue is flowing smoothly. If the glue flows out smoothly, then your glue gun is ready to use!
- Check the consistency: Squeeze out a small amount of glue onto a piece of scrap material and check its consistency. The glue should come out evenly and smoothly. If the glue is too thick or too thin, then it indicates that there is some issue with the heating element or nozzle of the glue gun.
- Check for leaking: Finally, check for any glue leakage from the nozzle/kickback. Any leakage indicates that there is still an issue with the glue gun, which needs to be fixed.
If you notice any issues with the glue gun while testing it with glue, refer back to the relevant steps in this guide to diagnose and fix the issue. Remember to always follow the safety precautions when handling a glue gun, as they can be dangerous if not used properly.
Step 7: Clean the Glue Gun
As you continue to use your glue gun over time, it is inevitable that it will start to accumulate some residue and debris. This can, in turn, affect the overall efficiency and performance of the tool. As such, it is essential to regularly clean your glue gun to ensure that it continues to function optimally. In this step, we will provide you with a comprehensive guide on how to clean your glue gun thoroughly, ensuring that it remains in tip-top condition for your next project. So grab your cleaning supplies, and let’s get started!
7.1 – Cleaning the Nozzle
Cleaning the nozzle is an essential part of maintaining your glue gun, as it can get clogged with debris over time. Here is a step-by-step guide on how to clean your glue gun nozzle:
| Step | Instructions |
|---|---|
| Step 1 | Unplug the glue gun and wait for it to cool down completely. |
| Step 2 | Remove any remaining glue stick from the gun. |
| Step 3 | Take a piece of soft cloth or paper towel and dampen it with warm water. |
| Step 4 | Gently wipe the inside and outside of the nozzle with the damp cloth or paper towel, cleaning off any debris or residue that may have accumulated. |
| Step 5 | If there is stubborn residue caked on the nozzle, you can use a toothpick or a small brush to remove it, being careful not to scratch the nozzle surface. |
| Step 6 | Dry the nozzle completely with a clean, dry cloth or paper towel. |
| Step 7 | Reattach the nozzle to the glue gun. |
It’s important to note that cleaning the nozzle regularly will prevent it from getting clogged and keep your glue gun working smoothly. This will also extend the life of your glue gun and ensure that it always produces a consistent flow of glue.
7.2 – Cleaning the body of the glue gun
After cleaning the nozzle, it’s time to pay attention to the body of the glue gun. Here’s how to clean the glue gun body:
Step 1: First, make sure your glue gun has cooled down completely before you start cleaning the body.
Step 2: Get a clean, damp cloth and gently wipe the outside of the glue gun. Make sure you don’t scratch the surface of the glue gun.
Step 3: If there are stubborn spots or stains on the glue gun, you can use a mild detergent solution with warm water. Take a soft-bristled toothbrush and gently scrub the surface to remove the dirt or stain.
Step 4: After cleaning with the detergent solution, rinse the glue gun with lukewarm water and dry it with a clean cloth.
Step 5: If you want to give your glue gun a shiny new look, you can use a silicone-based wax and polish the surface with a clean cloth.
It’s important to keep your glue gun clean to avoid any dust or dirt getting inside the device which can cause clogs or malfunctions. Make sure you don’t use any harsh chemicals or abrasive materials while cleaning it as that can damage the glue gun.
| Materials Needed | Instructions |
|---|---|
| Clean, damp cloth | Gently wipe the outside of the glue gun. |
| Mild detergent solution with warm water | If there are stubborn spots or stains on the glue gun, use a soft-bristled toothbrush and gently scrub the surface to remove the dirt or stain. |
| Lukewarm water | Rinse the glue gun with lukewarm water. |
| Soft-bristled toothbrush | Gently scrub the surface with a mild detergent solution to remove the dirt or stain. |
| Silicone-based wax | Polish the surface with a clean cloth after applying the wax. |
Take good care of your glue gun and it will serve you well for years to come.
Conclusion
In conclusion, fixing a glue gun is not a difficult task if you follow the step-by-step guide we have provided. By taking the time to identify the issue, check the gun, disassemble it, replace or repair faulty parts, reassemble it, test it, and clean it, you can have your glue gun working like new again in no time.
Remember, always prioritize safety, and follow the manufacturer’s instructions. Be sure to use the right tools and replacement parts.
If you still encounter issues with your glue gun, it may be best to seek professional help. However, most issues with glue guns can be easily resolved with a little bit of troubleshooting and DIY repairs.
By fixing your glue gun rather than replacing it, you can save money and reduce waste, making it an eco-friendly and budget-friendly option. So don’t throw away that glue gun just yet – follow our guide and get it working like new again!
Frequently Asked Questions
1. Can a glue gun be repaired?
Yes, it can be repaired. A glue gun is an easy-to-repair tool that can usually be fixed with a few simple steps.
2. What is the most common issue with glue guns?
The most common issue with glue guns is the heating element not working.
3. Can I fix a glue gun if I have no experience?
Yes, you can fix a glue gun even if you have no experience. This guide provides step-by-step instructions to help you repair your glue gun.
4. How do I know if my glue gun is overheating?
Your glue gun may be overheating if it feels too hot to the touch or if it is releasing smoke or a burning smell.
5. Can I replace the cord on my glue gun?
Yes, you can replace the cord on your glue gun. It is a simple process that requires basic tools.
6. Can I use a glue gun without a nozzle?
No, you should not use a glue gun without a nozzle. The nozzle helps control the flow of glue and prevents accidents.
7. Can I use a glue gun on fabric?
Yes, you can use a glue gun on fabric. However, you should use the appropriate glue and follow specific precautions to avoid damaging the fabric or injuring yourself.
8. How often should I clean my glue gun?
You should clean your glue gun after every use to avoid clogs and to prevent glue residue from building up and affecting the performance of the tool.
9. Can I use different types of glue sticks on my glue gun?
It depends on the type of glue gun. Some glue guns are designed to work with specific glue sticks, while others can use a variety of glue sticks. Refer to your glue gun’s user manual to determine which type of glue sticks are compatible with your tool.
10. Can I use my glue gun for other tasks besides crafting?
Yes, you can use your glue gun for various tasks. Glue guns are versatile tools that can be used for woodworking, DIY projects, home repairs, and much more.