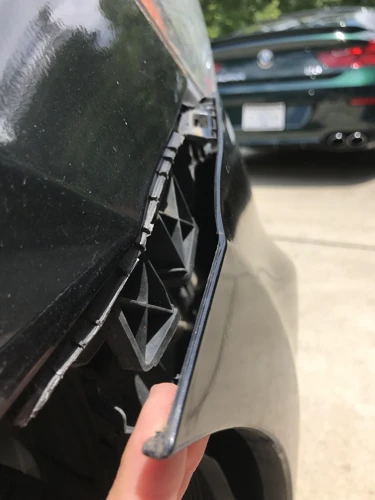
Car maintenance can often be an expensive affair, especially when it comes to bodywork. However, with the right approach, fixing car bumper damage doesn’t have to break the bank. Engaging in DIY bumper repair can be a rewarding challenge that saves money and gives you a sense of accomplishment.
Understanding Bumper Repair Adhesive
To successfully repair a bumper, one must first understand the role of bumper repair adhesive. This specialized glue is engineered to create a strong bond specifically suited for the materials used in bumpers, which are often plastic or composites.
Benefits of Fixing Your Car Bumper Yourself
By opting to fix your car bumper yourself, you not only save on labor costs but also gain valuable skills. The process can be relatively straightforward, provided you follow the correct bumper glue instructions and use the suitable materials and techniques.
Types of Automotive Adhesive for Bumper Repair
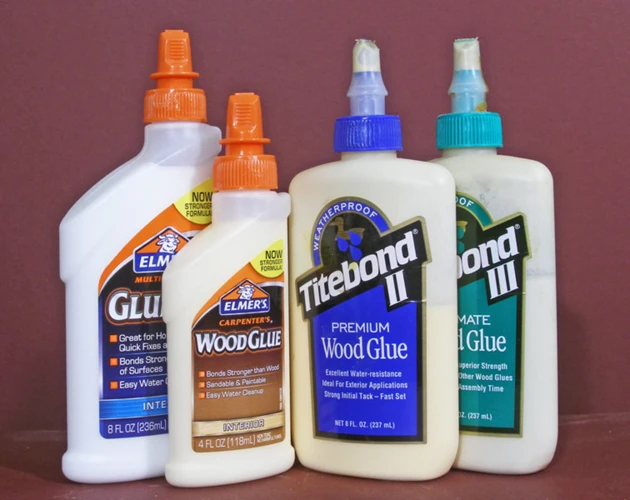
Not all adhesives are created equal, especially when it comes to car bumper glue. The market offers a variety of options, each designed for specific materials and types of damage.
Choosing the Right Car Bumper Glue
Selecting the correct automotive adhesive is crucial for a lasting repair. It’s essential to pick a product that is compatible with your bumper’s material and the nature of the damage.
Comparing Glue for Car Parts
When comparing glue for car parts, factors such as curing time, strength, flexibility, and ease of use should be considered. Some adhesives are more suited for quick fixes, while others may offer a more durable bond but require a longer curing time.
Preparation for Gluing Your Bumper
Preparation is key to ensuring a successful repair. A well-prepared surface can make the difference between a bond that lasts and one that fails.
Gathering Materials for DIY Bumper Repair
- Bumper repair adhesive
- Clean rags or towels
- Sanding tool or sandpaper
- Masking tape
- Clamps or heavy-duty tape
Cleaning and Prepping the Bumper Surface
Before applying the adhesive, the bumper surface must be clean and free of any contaminants. Sanding the area can help create a rougher surface for better adhesive bonding.
How to Attach a Bumper Using Bumper Glue Instructions
With your materials gathered and the surface prepped, it’s time to move on to the main event: attaching the bumper using bumper glue.
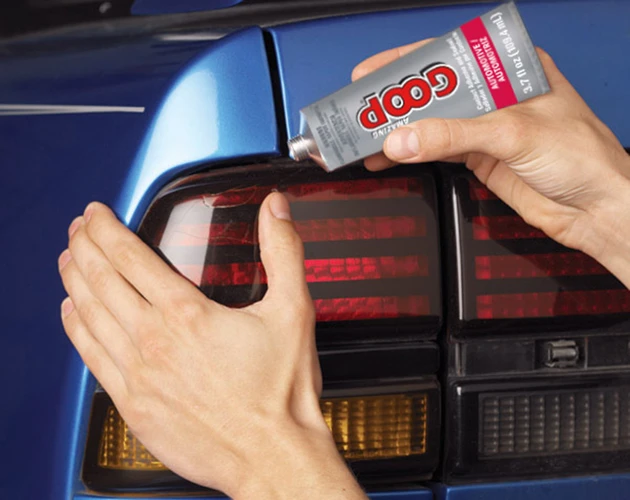
Step-by-Step Guide to Applying Bumper Repair Adhesive
- Apply the adhesive according to the manufacturer’s instructions.
- Position the bumper carefully and press it firmly into place.
- Wipe away any excess adhesive before it cures.
Ensuring Proper Adhesion for Plastic Bumper Repair
For plastic bumper repair, ensuring proper adhesion means applying the adhesive evenly and allowing it to cure without disturbance. It may also be necessary to apply heat to some adhesives to activate their bonding properties.
Finishing Touches and Curing Process
Once the bumper is in place and the adhesive is applied, there are still a few steps left to ensure a professional finish.
Smoothing and Clamping for Optimal Bonding
Smoothing out the adhesive and applying clamps can help maintain even pressure across the bond, resulting in optimal bonding.
Waiting Times and Curing Tips
Adhering to the recommended waiting times for the adhesive to cure is essential for a durable repair. Curing tips often include maintaining a certain temperature and avoiding moisture.
Troubleshooting Common Issues in Bumper Gluing
Even with careful preparation and application, issues can arise in the process of bumper gluing. Knowing how to address these can save your repair job.
Addressing Weak Bonds and Air Bubbles
Weak bonds or the presence of air bubbles can compromise the repair. These can often be fixed by applying additional adhesive or by using a pin to release trapped air.
When to Seek Professional Car Repair Tips
If you encounter a problem that seems beyond your expertise, it’s important to know when to seek professional car repair tips. Sometimes, a second opinion can save you from a more costly mistake.
Maintenance and Care Post Bumper Repair
After the repair is complete, maintenance is necessary to ensure the longevity of the repair.
Protecting and Cleaning the Repaired Area
Protecting the repaired area from harsh chemicals and cleaning it with the right products can help maintain the integrity of the repair.
Long-term Considerations for Glued Bumpers
Consider how environmental factors like temperature changes and physical impacts could affect the glued bumper over time, and take precautions accordingly.
Conclusion
DIY bumper repair is a practical skill that can save car owners time and money. With the right materials and a little patience, most minor bumper damage can be effectively repaired at home.
Recap of Bumper Glue Instructions and Best Practices
Remember to choose the right bumper repair adhesive, prepare the surface thoroughly, apply the adhesive carefully, and allow proper curing time for a strong, long-lasting repair.
For the DIY enthusiasts and automotive hobbyists, our blog offers a wealth of knowledge on various adhesive applications. If you’re looking to secure your motorcycle grips, be sure to check out our step-by-step guide on how to glue motorcycle grips. For the remote control vehicle fans, our article on how to glue RC tires can help you keep your tires firmly in place during those high-speed races. Additionally, if your car’s interior could use a touch-up, our tips on how to glue a dashboard in a car could be just what you need. And for those looking to fix up their car’s exterior, stay tuned for our upcoming piece on How To Glue Your Bumper, which will ensure your bumper stays put, no matter the road ahead.
Encouragement for DIY Enthusiasts in Automotive Repairs
For DIY enthusiasts, automotive repairs offer a chance to learn and grow. Don’t be afraid to tackle bumper repair; with the right approach, you can achieve professional-looking results.