Introduction
The dashboard of a car is one of the most important parts that not only enhances the interior but also provides vital information about the vehicle’s performance. However, the constant exposure to sunlight, extreme temperatures, and other factors can make the dashboard materials brittle and prone to cracking or breaking. Gluing the damaged parts of your car’s dashboard is an effective solution to maintain its functionality and aesthetics. In this guide, we will walk you through the step-by-step process of how to glue a dashboard in a car and provide essential tips to get the best results. Let’s get started!
Definition of the Dashboard
The dashboard is an essential part of every car that houses various instruments and controls. It is the front panel of the car’s interior situated beneath the windshield and in front of the driver’s seat. The dashboard comprises several components, including the speedometer, fuel gauge, temperature gauge, tachometer, radio, air conditioning vents, and many other switches. It is typically made of plastic, leather, or vinyl and can easily get damaged over time due to regular use and exposure to sunlight.
Proper maintenance of the dashboard can keep it looking great and performing well. However, sometimes it may need repair or repositioning, and that’s where gluing it comes in. Gluing the dashboard can help fix any damage or keep it in place. But before we move on to the steps for gluing a dashboard, let’s first identify the essential tools and materials required.
To learn about how to effectively use a glue gun on plastic, feel free to check out our article by clicking the link – How to Use a Glue Gun on Plastic.
Tools and Materials
For successful dashboard gluing, you will need the right tools and materials. Working with the wrong tools or materials can lead to a botched job that will cost you time and money to fix. It’s important to have everything at hand before starting the gluing process. Here are the necessary tools and materials you’ll need for this project. Don’t have them yet? Check out how to use a glue gun on wood for more information on how to use a glue gun correctly.
Tools Needed
When it comes to gluing the dashboard in your car, having the right tools is crucial for a successful outcome. Here are the tools you’ll need for the job:
- Scraper or putty knife: This will help you remove any loose parts or old glue from the dashboard.
- Masking tape: You can use this to hold the dashboard in place while the glue dries, or to protect any parts of the car from accidentally getting glued.
- Cloth: Have a cloth at hand to wipe off any dirt or dust before applying glue.
- Rubber gloves: Wearing rubber gloves will protect your hands from getting the glue on them.
- Glue gun: A glue gun can be used to apply the glue quickly and precisely. Check out our article on how to use a mini glue gun for tips on operating this handy tool.
- Single component adhesive: If you choose to use a single component adhesive instead of a glue gun, you’ll need to use an applicator brush or nozzle to apply the glue. Make sure you have a steady hand and apply the glue evenly.
Having these tools handy will make the gluing process much smoother and easier.
Materials Needed
Materials Needed:
- Dashboard Cleaning Solution: Before gluing, the surface should be free from dirt, dust, and grease. You may use any routine cleaning solution, or simply make one at home by mixing water and dish soap.
- Water: Water can help you rinse off any cleaning residue and debris as it acts as a solvent.
- Soft Cloth: An old microfiber towel works best to avoid scratches on the dashboard surface.
- Loose Part Removing tool: A screwdriver or pliers may be needed to remove any loose parts from the dashboard.
- Glue: The most important material needed to glue the dashboard, for which you can choose from a few types of glue.
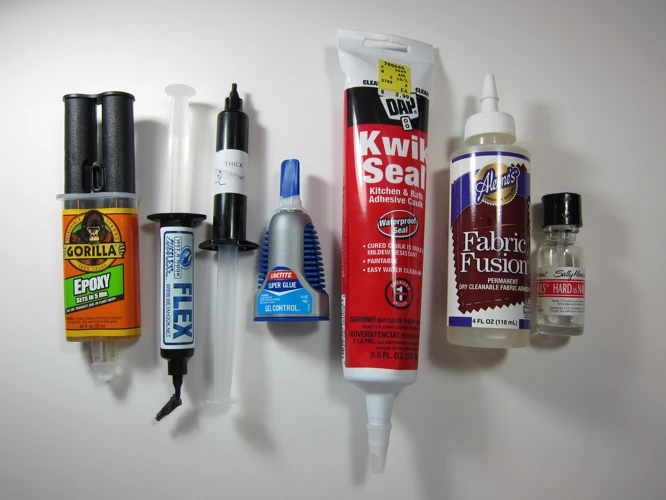
The type of glue you choose for gluing your dashboard together is a deciding factor in the success of this DIY task. You can choose from hot glue sticks, super glue, epoxy, or other adhesives. Before choosing the glue, you should know about the type of material your dashboard is made from and how strong the bond needs to be.
Besides the glue materials, you may also need other materials like Styrofoam glue, a microwave-safe container, and a bag of sand for support in case you are gluing a large part that won’t stay up straight. For specific types of DIY projects, you may also need materials such as balloons, twine, or jars of sand.
Preparation
Before you begin gluing your car’s dashboard, it’s important to prepare the surface and any other necessary materials. This helps ensure a strong and long-lasting bond between the dashboard and the glue. Follow these preparation steps to maximize the effectiveness of your gluing process.
First, it’s important to thoroughly clean the dashboard and windshield to remove any dirt, dust, or grime that may interfere with the glue’s bonding ability. Secondly, removing any loose or unnecessary parts will make it easier to apply the glue to the dashboard. Once you complete these steps, you can proceed to the gluing process with confidence.
Clean the Dashboard and Windshield
Cleaning the dashboard and windshield is an essential step before gluing the dashboard. Cleaning the surfaces will ensure that the glue adheres properly. Here are the steps to clean the dashboard and windshield properly:
1. Remove Any Loose Debris: Start by removing any loose debris from the dashboard and windshield. You can use a dry cloth to wipe away any dust, dirt, or other debris. For hard-to-reach areas, use a soft-bristled brush.
2. Use a Dashboard Cleaner: Apply a dashboard cleaner to a clean microfiber cloth, and gently wipe down the dashboard. Make sure to follow the instructions on the cleaner to avoid any damage to the dashboard. Avoid using cleaners that contain silicone or wax as it can leave a residue on the dashboard that may affect the bond of the glue.
3. Clean the Windshield: Use a glass cleaner to clean the windshield. Spray the cleaner onto a clean microfiber cloth and wipe the windshield in a circular motion. Avoid using ammonia-based cleaners as they can damage the dashboard and windshield.
4. Dry the Surfaces: Use a clean dry microfiber cloth to dry the dashboard and windshield thoroughly. Ensure that no liquid or moisture remains on the surfaces.
By properly cleaning the dashboard and windshield, you are ensuring a better bond for the glue to adhere to the surfaces. Once the cleaning is completed, move on to the next step and remove any loose parts before applying the glue.
Pro tip: If you are looking for some interesting ways to use glue, check out how to make a pipe out of a glue stick or how to glue sand in a jar articles for some unconventional glue uses. However, please note that these projects do not involve gluing a dashboard in a car.
Remove Loose Parts
Before applying glue to your car dashboard, it is important to remove any loose or extra parts. Loose parts can interfere with the gluing process and create a messy look. You will need a few tools to safely remove any loose parts from the dashboard. Here is a list of items you will need:
| Tools Needed | Materials Needed |
|---|---|
| Trim removal tool | Microfiber cloth |
| Retractable razor blade knife | Plastic gloves |
| Screwdriver | Adhesive remover (optional) |
Once you have gathered all the necessary tools, you can begin removing any loose parts from the dashboard. Start by gently prying off any decorative pieces, such as air vents or buttons, using a trim removal tool. Be careful not to break or scratch these pieces as they can be fragile.
Use a retractable razor blade knife to carefully cut away any excess material that may be dangling or hanging off the dashboard. Be sure to work slowly and cautiously to prevent any damage to the dashboard.
If there is any adhesive residue left behind after removing the loose parts, apply adhesive remover to a microfiber cloth and gently rub the area until it comes clean. Wear plastic gloves when using adhesive remover to protect your skin.
Now that you have removed any loose parts and cleaned the surface, your dashboard is ready for gluing. Be sure to choose the right glue for the job. Factors to consider when selecting the right glue for your car dashboard are the type of material your dashboard is made of, the climate you live in, and the strength of the glue needed.
Choose the Right Glue
When it comes to gluing your car dashboard, it is crucial to choose the right type of glue. The wrong choice can result in a weak bond, discoloration, or even damage to your dashboard. It is important to review the available options and consider various factors before deciding on the best glue. In this section, we will discuss types of glue for dashboard and factors to consider when selecting the glue. This information will help you make an informed decision and ensure a successful outcome for your project.
Types of Glue for Dashboard
When it comes to gluing a dashboard in a car, you need a reliable adhesive that can withstand high temperatures and vibrations. There are several types of glue that work well for this purpose.
Epoxy Glue: Epoxy glue is a two-part adhesive that is known for its strength and durability. It works well on a variety of surfaces, including plastic and metal. However, it can be difficult to remove if you need to make changes to your dashboard later on.
Silicone Adhesive: Silicone adhesive is a popular choice for automotive applications because it can withstand high temperatures and vibrations. It also has excellent water resistance and is easy to apply. However, it may not be as strong as other types of glue.
Hot Melt Glue: Hot melt glue is a great option for bonding plastic parts together. It dries quickly and creates a very strong bond. However, it is not recommended for areas that are exposed to high temperatures.
Double-Sided Tape: Double-sided tape is a quick and easy solution for attaching lightweight objects to your dashboard. It works well on smooth surfaces and is very easy to use. However, it may not be strong enough for heavier objects or areas that are exposed to high temperatures.
When choosing a glue for your dashboard, it’s important to consider the specific needs of your project. Factors such as temperature exposure and durability should be taken into account.
Disclaimer: If you’re looking for tips on how to melt hot glue sticks in the microwave, check out our guide here. Or, if you’re interested in learning how to glue balloons to the wall, read our article here.
Factors to Consider
When choosing the right glue for your car’s dashboard, there are several factors to consider. Below is a table summarizing the key factors you should keep in mind:
| Factor | Description |
|---|---|
| Adhesion | Choose a glue that has strong adhesion and is designed specifically for plastic and automotive applications. The last thing you want is for the dashboard to detach and create a safety hazard while driving. |
| Flexibility | Dashboards are exposed to fluctuating temperatures and vibrations while driving. It is important to choose a glue that can withstand these conditions and maintain its bond. Look for glues that are flexible but also have a strong bond. |
| Viscosity | The viscosity, or thickness, of the glue can affect how easy it is to apply and how well it spreads. A glue that is too thin may not provide enough support, while a glue that is too thick can be difficult to spread and create clumps. |
| Drying Time | Consider the glue’s drying time before application. If the glue sets too quickly, you may not have enough time to position the dashboard properly. On the other hand, if the glue takes too long to dry, it can be an inconvenience and delay the reinstallation of loose parts. |
| Color | If the glue is visible, you may want to consider the color. Many types of glue dry clear, while others may dry yellow or brown. If you have a colored dashboard or trim, try to find a glue that matches the color as closely as possible. |
| Odor | Some types of glue can have a strong odor that may linger even after the glue has dried. If you have a sensitivity to strong smells or if you do not want your car to smell like glue, look for low-odor or odorless options. |
Taking the time to consider these factors will help you make an informed decision when choosing the right glue for your dashboard. By selecting the right glue, you can ensure a strong and long-lasting bond that will keep your dashboard securely in place for years to come.
Step-by-Step Gluing Guide
Now that you have prepared the dashboard and chosen the right glue, it’s time to start the step-by-step gluing process. Following these instructions carefully will ensure that your dashboard stays firmly in place for the long haul. So, if you’re ready to tackle the project, roll up your sleeves and get ready to glue!
Step 1: Test Fit
Before applying any glue, it’s essential to ensure that the dashboard fits perfectly. This step is crucial to prevent any misaligned parts or uneven surfaces.
To test fit the dashboard, follow these simple steps:
- Start by dry fitting the dashboard on the car. This will enable you to determine whether the dashboard fits well.
- If you notice any gaps or areas that don’t fit evenly, make sure to address them before moving on to the next step.
- Use a clean cloth to wipe off any grease or grime on the dashboard, ensuring an even surface.
- If the dashboard needs cleaning before fitting, wait till it dries before proceeding with gluing.
It’s important to ensure that the dashboard fits correctly before applying any glue. This step will help you to avoid any inconsistencies in the final result. Once you’re satisfied that the dashboard fits perfectly in its location, you can proceed with the gluing process.
Step 2: Apply the Glue
Before applying the glue, make sure to follow the instructions on the label. It is important to choose the right glue for your dashboard material. Once you have selected the appropriate glue, follow these steps to apply it:
Step 1: Squeeze the glue onto the surface of the dashboard where you need it.
Step 2: Use a small brush or applicator to spread the glue evenly over the surface. Make sure you apply enough glue to hold the dashboard in place firmly.
Step 3: If using a contact adhesive, apply glue to both the dashboard and the windshield mounts.
Step 4: Spread the adhesive evenly and let it dry for a few minutes until it becomes slightly tacky.
Step 5: Align the dashboard and press it firmly into place. You may want to have someone help you with this step to make sure the dashboard is lined up perfectly.
Step 6: Apply pressure to the dashboard for at least 30 seconds to ensure a good bond.
Remember that it is important to work quickly, as some types of glue dry fast. Take breaks if needed, but be sure to clean your applicator and brush if you stop for an extended period to prevent the glue from drying on them.
Step 3: Press Firmly
Once the glue has been applied to the dashboard, the next step is to press the dashboard firmly in place. This will ensure that the glue bonds the dashboard effectively with the windshield and no air bubbles remain.
To press the dashboard firmly, you will need to have a plastic spatula or a similar tool. You can also use your fingers, but make sure to wear gloves to avoid getting glue on your skin.
Here’s how to press the dashboard firmly:
| Step | Action |
| 1 | Starting from the center of the dashboard, press firmly towards the edges |
| 2 | Use your spatula or fingers to smooth out any wrinkles or air pockets that may have formed underneath the dashboard |
| 3 | Apply consistent and firm pressure for at least 1-2 minutes to ensure good bonding |
It’s important to note that if you’re using a two-part epoxy glue, mix the two parts thoroughly before applying it to the dashboard. Also, make sure to follow the manufacturer’s instructions on how long to keep the pressure on the dashboard (usually between 5 and 30 minutes, depending on the type of glue).
Pressing the dashboard firmly is a crucial step in the gluing process, as it ensures a strong and long-lasting bond. Take your time in this step and make sure to apply sufficient pressure to the dashboard to avoid any mishaps in the future.
Step 4: Allow to Dry
After pressing the dashboard onto the car, it’s essential to allow enough time for the glue to dry completely. This step is crucial as it ensures that the dashboard remains in place and doesn’t move or fall off while driving. Follow these tips to ensure optimal drying:
- Avoid touching or moving the dashboard: Once you’ve pressed the dashboard in place and applied the glue, avoid touching or moving it around. Any movement can cause the glue to shift, which can result in a crooked or uneven dashboard.
- Leave the dashboard untouched: It’s best to leave the dashboard untouched for at least 24 hours to allow the glue to dry completely. It is also recommended to avoid driving the car for at least 24 hours as well.
- Don’t expose the dashboard to moisture: Moisture can cause the glue to weaken and fail. So, it’s essential to keep the dashboard dry during the drying process.
- Check the glue’s instructions: Different types of glue may recommend varying drying times. Be sure to refer to the instructions that come with the glue you’re using and follow them accordingly.
By allowing the glue to dry completely, you’re ensuring that the dashboard adheres tightly to the car and won’t shift or fall off while driving. This step is vital for ensuring a secure and safe driving experience.
Post-Gluing Tips
Once you have successfully glued your dashboard back in place, there are some post-gluing tips that you should keep in mind to ensure a long-lasting bond. It’s important to remember that even though the glue may seem to have set, it is still curing and needs time to fully harden. In this section, we will discuss some tips that will help you maintain the integrity of the glue and prolong the lifespan of your newly repaired dashboard. So, let’s dive in!
Keep the Dashboard Clean and Dry
After successfully gluing your dashboard, it is important to keep it clean and dry to prevent any damage or loosening of the glue. Here are some tips to ensure that your dashboard stays in great condition:
| Tip | Description |
|---|---|
| 1. | Avoid using harsh chemicals: Strong cleaning chemicals can damage the dashboard and even the glue, causing them to loosen. Instead, use a gentle cleaning solution and a microfiber cloth to gently clean the surface of the dashboard. |
| 2. | Remove any spills immediately: In case of spills or stains on the dashboard, it is important to clean them up immediately using a damp cloth. Leaving them there for a long time can damage the material and compromise the glue. |
| 3. | Avoid direct sunlight: Prolonged exposure to the sun can cause the glue to weaken and eventually loosen. It is best to park your car in a garage or under a shade to avoid direct sunlight on the dashboard. |
| 4. | Avoid extreme temperatures: Extreme temperatures, whether hot or cold, can also weaken the glue. If possible, park your car in a temperature-controlled garage or use a windshield sunshade to protect the dashboard from extreme heat or cold. |
| 5. | Gently clean: When cleaning the dashboard, make sure to use a soft microfiber cloth and avoid scrubbing too hard or using abrasive materials. This will prevent scratches and damage to the material and glue. |
By following these tips, you can prolong the life of your glued dashboard and ensure that it stays in great condition for years to come.
Allow the Glue to Cure Completely
Once you have successfully glued your dashboard, one of the most crucial steps is to ensure that you allow the glue to cure completely before using your vehicle. Allowing the glue to dry completely will ensure that the dashboard is securely attached, and prevent any issues that may arise due to a hastily fixed dashboard.
What is curing?
Curing is the process where the glue sets and hardens to form a strong bond between two surfaces. It is essential since a premature attempt to use your car may cause the glue to loosen or even tear off the dashboard, requiring you to repeat the procedure all over again.
How long does it take for the glue to cure?
Different types of glue take varying amounts of time to cure, and this is important information to keep in mind. For instance, some glues may take only a few hours, while others may take up to 24 hours or longer. It is, therefore, crucial to read the instructions on the glue container to determine how long it will take your particular glue to cure.
Factors that may influence the curing process
Several factors may influence the curing process, and therefore, it is essential to keep these in mind. Such factors include temperature, humidity, and ventilation. High humidity levels may prolong the curing time, while high temperatures may speed up the process. Adequate ventilation also helps to speed up the curing process by allowing air to circulate around the glued surface.
What to do during the cure time
During the curing process, it is essential to refrain from using the dashboard, opening the car windows, placing items on the dashboard, or touching the glued surface. Doing any of these things while the glue is curing may compromise the bond strength and, in some cases, even lead to a complete failure.
Allowing the glue to cure entirely is one of the most crucial steps in the process of glueing your dashboard. You should ensure that you give the glue enough time to cure based on the instructions on the glue container, and you should refrain from interfering with the curing process in any way. Doing so will guarantee a strong bond that will last for a long time.
| Aspects to consider for proper curing | Actions to take |
|---|---|
| Glue type | Read the instructions on the glue container to determine how long it will take your particular glue to cure. |
| Humidity levels | High humidity levels may prolong the curing time. |
| Temperature | High temperatures may speed up the curing process. |
| Ventilation | Adequate ventilation helps to speed up the curing process by allowing air to circulate around the glued surface. |
Safety Tips
When it comes to gluing the dashboard in your car, safety should always be a top priority. Here are some important safety tips to keep in mind:
Work in a Well-Ventilated Area: Glue fumes can be toxic, so make sure you’re working in a space that has plenty of fresh air circulating. Open doors and windows to improve ventilation, and consider wearing a mask to protect your lungs from the fumes.
Wear Protective Gear: When handling glue, it’s important to protect your skin and eyes. Wear gloves and safety glasses to prevent glue from getting on your skin or accidentally splashing into your eyes.
Keep Glue Away from Children and Pets: Many glues can be poisonous if ingested, so make sure you keep glue and all associated materials out of reach of children and pets.
Avoid Inhaling Fumes: In addition to working in a well-ventilated area, try to avoid breathing in any glue fumes. If you start to feel lightheaded or dizzy, take a break and step outside to get some fresh air.
Follow the Manufacturer’s Directions: Different types of glue may have different safety precautions, so make sure you carefully read and follow the manufacturer’s instructions. This will help you avoid any safety hazards and ensure that your glueing job goes smoothly.
By following these safety tips, you can help prevent any accidents or injuries while working on your car’s dashboard. Always take precautions to protect yourself and those around you when using any kind of glue or other hazardous materials.
Conclusion
After following the step-by-step guide provided, you should now have successfully glued your dashboard back in place. Congratulations on a job well done!
Remember, the dashboard is an important component of your car and must be treated with care. Be sure to keep it clean and dry to prevent any damage or cracks from developing.
When choosing a glue, make sure to consider the factors discussed earlier to ensure long-lasting adhesion. Selecting the right glue and following the correct techniques are crucial for a successful dashboard repair.
Lastly, it’s important to prioritize safety when working on your car. Always use caution when handling tools and chemicals, and never attempt to repair your car while driving or in motion.
By following these tips and guidelines, you can confidently repair your dashboard and get back to enjoying your car.
Frequently Asked Questions
Can any glue be used for gluing a car dashboard?
No, not all glues are suitable for gluing a car dashboard.
What factors should be considered when choosing the right glue for a dashboard?
Factors to consider include the type of material to be glued, the temperature range the glue can withstand, and the moisture and UV resistance of the glue.
What are the different types of glue that can be used to glue a car dashboard?
Cyanoacrylate glue, silicone adhesive, two-part epoxy glue and polyurethane glue are all suitable for gluing a car dashboard.
How long should I wait for the glue to dry?
The time it takes for the glue to dry depends on the type of glue used. It can range from a few minutes to several hours. It’s important to follow the manufacturer’s instructions.
Can I glue a dashboard in extremely cold temperatures?
It’s not recommended to glue a dashboard in temperatures below 50°F as it can affect the adhesion of the glue and the curing process.
Will gluing the dashboard damage my car?
No, gluing the dashboard is a harmless process if done correctly.
Do I need to wear protective gear when using glue?
It’s recommended to wear gloves and safety glasses when using glue to avoid any potential skin irritation or eye injury.
Can I drive my car immediately after gluing the dashboard?
No, it’s recommended to wait at least 24 hours for the glue to cure completely before driving the car.
What should I do if the glue doesn’t adhere properly?
If the glue doesn’t adhere properly, it’s recommended to remove it and clean the surfaces before trying again with a different type of glue.
Can I glue a dashboard that has already been glued?
It’s not recommended to glue a dashboard that has already been glued as it can affect the adhesion of the glue and the structural integrity of the dashboard.
