As crafters, we’re always on the lookout for new and exciting projects to tackle. Twine balls have been a popular trend in the DIY scene for a few years now and it’s not hard to see why. These charming decorative pieces can add a rustic touch to any room. But with so many types of glues available, choosing the right one can be a daunting task. Don’t worry, we’ve got you covered. In this article, we’ll explore everything you need to know about creating twine balls, from choosing the right glue to step-by-step instructions for making them. Let’s get started!
What are Twine Balls?
Twine balls are decorative ornaments made by wrapping string or twine around a balloon and coating it with glue to harden the twine. Once the glue dries, the balloon is popped and removed, leaving a hollow ball made of twine. Twine balls are a popular DIY craft for both adults and children, as they can be customized with various colors and textures of twine. They can be used for home decor by placing them in bowls or hanging them from the ceiling, but can also be used as party decorations or centerpieces. Making twine balls is easy and fun, and can be a great way to add a personal touch to your home or event decor. If you’re not sure how to get started, check out our guide on how to use a glue gun or our tips on how to use hot glue to help you get started.
What Can You Use Twine Balls For?
Twine balls are not just a fun craft to make, but they can also be used in many different ways. One popular way to use them is as decorative accents. A bowl filled with twine balls can add a rustic touch to any room, while twine balls strung on a garland can make for charming, country-style decor. Additionally, twine balls make for affordable and unique ornaments for a Christmas tree or other holiday decorations.
Another way to use twine balls is as a way to add texture and interest to a gift. Instead of simply tying a bow around a gift, consider attaching a twine ball or two to the ribbon for a more visually appealing look.
For those who enjoy outdoor entertaining, twine balls can also be used as decorative lighting. By inserting small lights into the twine balls and hanging them from string or wire, they can create a soft, ambient glow in any backyard or patio setting.
Lastly, twine balls can be used for practical purposes as well. By attaching hooks to them, they can be used to hang hats, scarves, or other accessories. The possibilities for using twine balls are truly endless and limited only by one’s creativity.
If you’re interested in learning more about different craft materials and techniques, check out our article on how to color hot glue or how to glue aluminum foil to paper. Or, if you’re looking for tips on working with a mini glue gun, read our article on how to use a mini glue gun.
Why is Choosing the Right Glue Important?
Choosing the right glue is crucial when it comes to making twine balls. The type of glue you choose can determine the durability of your twine balls, how long it takes for the glue to dry, and more. Using the wrong type of glue can result in a weak, messy, or unstable twine ball.
The glue must be strong enough to hold the twine together, but not too strong that it creates a hard and inflexible twine ball. At the same time, the glue must not dry too quickly, as this can make wrapping the twine difficult, causing it to loosen or fall apart.
Additionally, clarity is essential if you want to maintain the natural color of the twine while still holding it together. Choosing a clear glue that dries clear, ensures that the twine ball looks cohesive and aesthetically pleasing.
Finally, choosing the right glue for twine balls is important for your overall crafting experience. It can save you time, effort, and money. The last thing you want is to use a glue that doesn’t work well and end up having to start the project all over again.
When selecting adhesive for your twine balls, consider the following factors: The Materials Used, Strength, Drying Time, and Clarity. By paying attention to these characteristics, you will be able to choose the right glue to ensure an enjoyable crafting process and a high-quality end product.
If you want to create DIY resin charms using hot glue, check out our article on “How to Make Resin Charms with Hot Glue” for more information.
Choosing the Right Glue
When it comes to making twine balls, choosing the right glue is crucial to achieve the desired result. There are various types of glue available on the market, and each one has its own unique properties. It is essential to consider a few factors before selecting the glue that suits your needs the best.
Consider the Materials Used
The first thing to consider when selecting glue for twine balls is the material of the twine and the surface you will be gluing it to. Different materials require different types of glue. If you are working with porous surfaces like paper mache, you need a glue that can be absorbed by the surface for better bonding. On the other hand, if you’re gluing twine to a non-porous surface like ceramic or glass, you need a glue that will dry clear and won’t damage the surface.
Consider the Strength Needed
Another important factor to consider is the strength of the glue. If you are making decorative twine balls that do not need to be strong, you can choose a regular glue. However, if you’re looking to make larger twine balls or ones that will be subjected to stress, you need to choose a stronger adhesive like E6000.
Consider the Drying Time
The drying time of the glue is another essential factor to consider. If you’re working on a project with time constraints, choose a glue that dries quickly, such as hot glue. However, if you have ample time to spare and want to ensure a secure bond, go for a glue with a longer drying time that allows you to make adjustments and realign the twine if needed.
Consider the Clarity
Lastly, consider the clarity of the glue. If you are making transparent twine balls, you need to choose a glue that dries clear. However, if you’re making opaque or colored twine balls, the clarity of the glue is not a significant factor.
When it comes to making twine balls, the right glue can make all the difference. Consider the materials used, the strength needed, the drying time, and the clarity of the glue to choose the best adhesive for your project. By choosing the right glue, you can ensure a successful and long-lasting project.
Consider the Materials Used
When considering which glue to use for your twine balls, one important factor to consider is the materials used. Not all glues adhere well to all materials. Twine balls are typically made with twine and a balloon, so you want to choose a glue that will bond effectively to both of these materials.
For the twine: Since twine is typically made of natural materials such as cotton or hemp, it is important to choose a glue that is compatible with these materials. A water-based glue such as Mod Podge or Tacky Glue can work well since they are gentle and won’t damage or discolor the twine. Additionally, some crafters recommend using clear-drying school glue for twine since it dries clear and won’t leave a residue.
For the balloon: When it comes to the balloon, it’s important to choose a glue that will adhere well without damaging the balloon’s surface. Some glues can cause the balloon to break or deflate, ruining the overall shape of the twine ball. Hot glue is not recommended for balloons since the heat can cause the balloon to burst. Instead, consider using a gentle water-based glue or a strong adhesive like E6000.
By carefully considering the materials used in your twine ball project, you can select a glue that will work effectively without causing any damage or mishaps during the crafting process.
Pro tip: Before starting your project, test the glue on a small section of twine and balloon to ensure compatibility and adhesion. If you need to unclog a hot glue gun or learn how to make glue stick, be sure to check out our articles on those topics for helpful tips.
Consider the Strength Needed
When considering the strength needed for your twine balls, it’s important to think about their purpose. If you plan to use them purely for decoration, a weaker adhesive may suffice, but if you plan to use your twine balls for activities or games, you’ll want a stronger glue that will hold up over time.
Mod Podge is a popular choice for those who want a gentle but reliable bond for their twine balls. Mod Podge is a water-based sealer, glue, and finish that dries clear and securely. It’s made to be a lighter adhesive, perfect for when you don’t need a monumental amount of strength to hold everything together.
If you need a more solid adhesive, Tacky Glue may be a good choice. Tacky Glue is a strong, quick-drying adhesive that can be used on materials such as paper, fabric, and even wood. It dries clear and is easy to clean up with warm water.
If you need a high-strength glue, Hot Glue is great for a variety of different materials, including twine. However, it’s important to note that hot glue can be very hot and potentially dangerous, so be sure to handle it with care. To ensure the strength of the bond, make sure to use enough glue and apply it evenly.
For an even stronger hold, E6000 is a great choice. E6000 is an industrial-strength adhesive that can bond to a wide range of materials, including twine, wood, plastic, and metal. It also dries clear, ensuring that there won’t be any visible residue left behind.
When choosing your glue, make sure to consider the strength needed for your specific situation. By taking into account the purpose of your twine balls, you can select an adhesive that will hold up over time and provide the necessary amount of strength for your needs.
If you’re having trouble getting your glue to stick properly, you can check out our article on how to make glue stick. Alternatively, if you’re having issues with a clogged hot glue gun, our guide on how to unclog a hot glue gun may be able to help. And if you’re having trouble even opening your glue gun, check out our tips on how to open a glue gun.
Consider the Drying Time
When choosing the right glue for twine balls, it’s important to consider the drying time. You don’t want to spend hours creating the perfect twine ball just to have it fall apart because the glue didn’t have enough time to set properly. Some glues dry quickly, while others take several hours or even overnight. If you’re short on time, a quick-drying glue may be your best option, but keep in mind that it may not be as strong as a slower-drying glue. On the other hand, if you have more time to spare and want to ensure that your twine ball is as strong as possible, a slower-drying glue may be the better choice.
Another factor to consider is the environment in which you’ll be working. If you’re crafting in dry, warm conditions, you may find that faster-drying glues work better. However, if you’re working in a cool or humid environment, a slower-drying glue may be necessary to ensure that it sets properly. Take note of the glue’s recommended drying temperature range, as this can also affect the adhesive’s performance.
It’s also important to think about how long you want your twine ball to last. If you’re making a temporary decoration for a party or event, a quick-drying glue may be all you need. However, if you’re creating a long-lasting home decor item, you’ll want to use a glue that dries slowly and forms a strong bond. This will ensure that your twine ball remains intact for years to come.
When choosing a glue for your twine ball project, consider the drying time as an essential factor. The drying time affects the strength of the bond, the durability of the twine ball, and the environment where you are working. You can choose between quick-drying glues or slower-drying ones, depending on your goals and conditions. With the right glue, you can create a beautiful and long-lasting twine ball that will be an impressive addition to your home decor.
Consider the Clarity
When selecting a glue for twine balls, clarity is an important factor to consider. The clarity of glue determines how visible it will be on the finished product. If you plan to use colored twine, you will want to use a clear glue that won’t affect or alter the color.
Clear and Transparent Glues: Clear and transparent glues, such as Mod Podge and E6000, are ideal for making twine balls because they won’t discolor the twine or affect its color. They will also dry clear, making them perfect for clear or translucent balloons.
Opaque Glues: Opaque glues, such as hot glue and tacky glue, are not as clear as transparent glues. They can dry with a cloudy or hazy appearance, which may alter the appearance of your twine ball. However, if you plan to paint or decorate your twine ball with other materials, the opacity of the glue may not be a concern.
Ultimately, the type of glue you choose will depend on your personal preferences and the look you are trying to achieve. If you want to maintain the natural color and clarity of your twine, choose a clear or transparent glue. If you plan to use other decorative elements or have no aversion to a slightly cloudy appearance, opaque glues may be a better option. Upon researching, make sure to find the best fit based on both the clarity of the glue and the other important factors like strength and drying times.
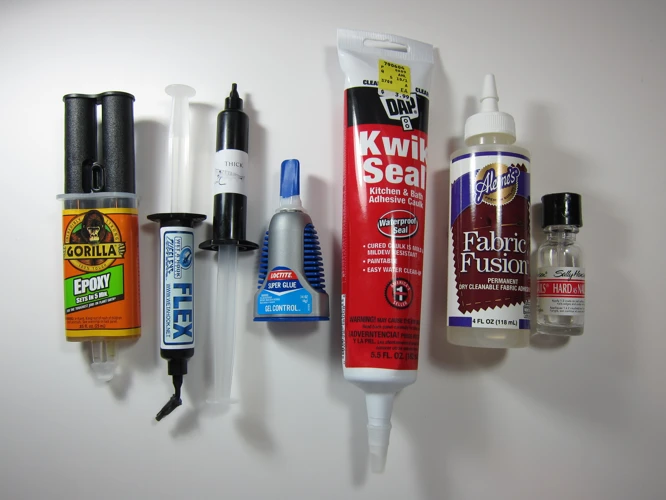
The Best Glue Options for Twine Balls
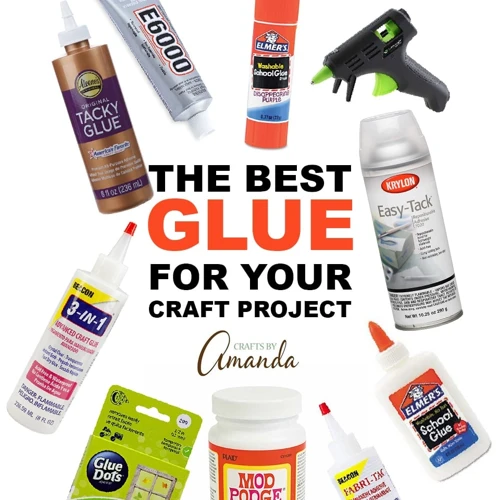
When making twine balls, choosing the right glue is crucial for a successful outcome. Mod Podge is a popular choice because it acts as both a glue and sealer. It dries clear and is easy to work with, making it a great option for beginners. It also comes in different finishes such as matte, glossy, and satin, allowing you to choose the best one for your project.
Another option is Tacky Glue, which is known for its strong adhesive properties. It dries clear and has a thicker consistency, making it perfect for securing heavier materials like twine. Tacky Glue is also water-resistant, which makes it ideal for outdoor projects.
For those who prefer a quicker drying time, hot glue is a suitable option. Hot glue dries within seconds, allowing you to move on to the next step of your project without having to wait for the glue to dry. However, it is important to be cautious when using hot glue as it can easily burn your fingers.
If you need a glue that is strong and durable, E6000 is a great option. This industrial strength adhesive can bond difficult surfaces such as metal and plastic. It also dries clear and remains flexible after drying, making it perfect for projects that require a strong and long-lasting hold.
Ultimately, the best glue option for your twine ball project depends on your specific needs. Consider the materials used, strength needed, drying time, and clarity when deciding on the best glue for your project.
Mod Podge
Mod Podge is a versatile glue option that works well for making twine balls. This water-based glue is famous for its ability to work with a plethora of materials, including Twine. Mod Podge is known for its strong and sturdy bond, so you don’t have to worry about your twine balls falling apart any time soon.
Mod Podge comes in different finishes, including matte and glossy. The glue dries clear, making it an excellent option for creating twine balls where clarity is essential. You can choose from a variety of mod podge formulas to find one that fits your specific needs, such as Mod Podge Outdoor for twine balls that are meant to be displayed outdoors.
One great thing about Mod Podge is that it’s incredibly easy to use; all you need to do is apply it to your twine and wrap your balloon. Additionally, the glue has a fast drying time, which means you can complete your twine balls in no time. If you’re looking for a reliable, easy to use and quick drying glue for your TWine balls project, Mod Podge is a solid option to consider.
Tacky Glue
Tacky glue is a popular adhesive for various projects, including making twine balls. Its unique formulation makes it ideal for bonding porous materials and it dries clear, making it a perfect choice for projects where transparency is important. This glue is also known as PVA (polyvinyl acetate) glue and is water-soluble when wet, which allows for easy cleanup, but once it dries, it becomes rigid and durable.
One of the best things about tacky glue is that it has a strong bond but doesn’t dry as quickly as hot glue. This makes it easier to correct mistakes before the glue sets. Tacky glue is also less likely to burn or cause blistering, making it a safer option when working with children.
When using tacky glue for twine balls, it is important to apply a thin, even layer of glue to the twine as you wrap it around the balloon. If you apply too much glue, it may take longer to dry, which can prolong the project. You can also use a brush to apply the glue, which gives you more precision on where to apply the adhesive.
One downside of tacky glue is that it may take longer to dry compared to other glue types. This can be frustrating for those who want to finish their project quickly, but it is important to wait until the glue is completely dry before popping the balloon and removing it from the twine ball.
Tacky glue is a versatile option that can be used for many projects, including making twine balls. Its strength, versatility, and ease of use make it a popular choice for crafters of all skill levels.
Hot Glue
Hot glue is a popular option for creating twine balls because it dries quickly and creates a strong bond. It’s also relatively easy to work with and can be used for a variety of projects. Hot glue is made from a thermoplastic adhesive that melts when heated and then solidifies as it cools. This allows for precise application and easy clean-up.
When using hot glue for twine balls, it’s important to keep in mind that it can be a bit messier than other types of glue, as it can sometimes seep through the twine. To minimize this, take care to apply the glue in small amounts and work quickly.
While hot glue is a great option for many types of projects, it may not be the best choice for all twine ball applications. For example, if you plan to use your twine balls outside or in areas that will be exposed to high temperatures, hot glue may not hold up as well as other types of glue.
Hot glue is a solid choice for creating twine balls. Its fast drying time and strong bond make it a reliable option. However, it’s important to consider the specific needs of your project when deciding which type of glue to use.
E6000
E6000 is a heavy-duty industrial adhesive that is a popular choice for creating twine balls. It is a strong adhesive that can bond a variety of different materials, including wood, metal, plastic, leather, and more. While it is not specifically designed for use with twine, many crafters have found it to be a reliable choice for creating sturdy and long-lasting twine balls.
One of the benefits of using E6000 is its strength. This adhesive creates a very strong bond that can hold up well over time. This is particularly important when creating twine balls, as they can be quite heavy once they are completed. The last thing you want is for your twine ball to fall apart due to a weak adhesive.
Another advantage of using E6000 is its versatility. This adhesive can bond a variety of different materials, so if you are using other materials in addition to twine in your craft project, E6000 may be a good choice. Additionally, it dries clear, so you don’t have to worry about any unsightly glue marks on your finished product.
However, one potential downside of using E6000 is its drying time. This adhesive can take several hours to fully dry, so you will need to be patient and allow plenty of time for your twine ball to dry before handling it. This can be a drawback if you are working on a tight deadline.
Despite this minor drawback, E6000 is a great option for those looking for a strong and versatile adhesive for their twine ball project. If you decide to use this adhesive, be sure to follow the manufacturer’s instructions carefully and take the necessary safety precautions to ensure that you use it safely and effectively.
Step-by-Step Guide to Making Twine Balls
Gather Your Materials
Before you begin, make sure you have all the necessary materials. You will need twine, a balloon, glue, scissors, and a bowl to hold the balloon while you work.
Prepare Your Work Area
Protect your work area from any potential mess by laying down newspaper or a plastic tablecloth. This will ensure that any glue or twine residue will not damage your workspace.
Apply Glue to Twine
Starting at the end of the twine, apply glue to about a foot-long section. Use your fingers to spread the glue evenly across the twine.
Cover Balloon with Twine
Starting at the knot of the balloon, wrap the twine around the balloon, making sure to press down firmly to secure the twine to the glue. Continue wrapping the twine around the balloon in a criss-cross fashion until the entire balloon is covered in twine. Make sure to leave a small opening near the knot to allow air to escape when you’re ready to pop the balloon.
Let Dry and Pop Balloon
Allow the glue to dry completely before popping the balloon. This can take several hours or overnight. Once the glue is dry, use a pair of scissors to carefully puncture the balloon at the opening. The balloon will slowly deflate, and you can remove it from the inside of the twine ball.
By following these simple steps, you can create beautiful twine balls that can be used for a variety of purposes, such as home decor or centerpieces at weddings or parties. Experiment with different types of twine and glue to find the perfect combination that suits your needs. Just remember to take your time and be patient as you work through the process.
Gather Your Materials
Before you start making your twine balls, it’s important to gather all the necessary materials for this project. You’ll need a few items, including twine, balloons, a bowl, scissors, a ruler, and, of course, glue.
Firstly, you’ll need twine – make sure to choose a type that suits your needs. Some twine is thicker or thinner than others, and the material can come in a variety of colors or textures to match your personal preferences. Be sure to measure how much twine you’ll need for the size of the balloon you want to use, so you don’t run out halfway through the project.
Next, you’ll need balloons to use as a mold for the twine balls. Balloons come in different sizes, so make sure to select ones that are the right size for the twine balls you want to create. It’s best to have a few extras just in case some of the balloons pop during the process.
Thirdly, you’ll need a bowl to mix and hold the glue, which makes dipping the twine easier. The bowl should be big enough to accommodate the twine without tangling.
Additionally, you’ll need a pair of scissors to cut the twine to size and to trim the excess twine once the ball is complete.
A ruler can come in handy to help measure the length of the twine you need, which is especially helpful if you’re making several balls of the same size.
Lastly, and most importantly, you’ll need glue to bind the twine together into a ball. Make sure to choose the right glue for your project based on the factors discussed in the previous section of the article.
By having all of these materials prepared and within reach before you start the twine ball-making process, you can ensure a smoother and more efficient crafting experience.
Prepare Your Work Area
Preparing your work area before starting to create your twine ball is essential to ensure a smooth and hassle-free process. The last thing you want is to be running around looking for supplies in the middle of the project, or worse yet, have a messy work area that makes it difficult to work with the glue and the twine. So, let’s take a look at how to prepare a suitable work area for making your twine ball.
1. Choose a Flat and Stable Surface: Begin by choosing a flat and stable surface to work on, such as a table or desk. Ensure that the surface is clean, dry, and free of any dust or debris to prevent the glue from sticking to unwanted materials.
2. Cover the Work Surface: Protect your work surface with a few sheets of old newspaper or a plastic tablecloth. This will protect your work surface from stains or adhesive spills, making clean-up a lot easier.
3. Keep Supplies Within Reach: Gather all the supplies you need and keep them within easy reach. This will help you avoid wasting time and becoming frustrated when you can’t find what you need. Having everything you need at your fingertips will make the process much easier.
4. Get Some Paper Towels: Glue gets sticky fast, so it’s a good idea to have plenty of paper towels or a washcloth handy. This way, you can quickly and easily wipe up any excess glue that gets on your hands or work surface.
5. Wear Gloves (Optional): Wearing gloves is optional, but it can be helpful if you’re sensitive to glue or want to keep your hands clean. Latex or vinyl gloves are inexpensive and widely available, and they’ll keep your hands free from glue.
Preparing your work area before starting to create your twine ball will help you stay organized, save time, and make a mess-free project. So, make sure to follow these simple steps and enjoy the process of creating your very own twine ball.
Apply Glue to Twine
Before applying glue to the twine, it’s important to have the right glue and a smooth, clean surface to work on. Once you have your materials ready, pour a generous amount of glue onto a disposable plate or bowl. Then, take a small paintbrush and dip it into the glue, ensuring that the bristles are fully coated with the adhesive.
Next, take a few pieces of twine and lay them out on your work surface. Holding one end of the twine down with your non-dominant hand, use the paintbrush to apply the glue onto the twine in a thin, even layer, starting at the end and working your way down to the other end. Be careful not to apply too much glue, as this can cause the twine to become sticky or create lumps.
Once you’ve applied the glue, you can use your fingers to smooth the twine and ensure that it is evenly coated. If there are any areas where the twine has separated or become frayed, you can use your fingers to gently press the strands back together.
Repeat this process, working with small sections of the twine at a time, until you have enough twine to cover the balloon. Remember to periodically dip your paintbrush into the glue to ensure that it stays fully coated.
Applying glue to the twine is an essential step in creating a sturdy and durable twine ball. It’s important to take your time and work carefully to ensure that each piece of twine is fully coated and evenly spaced. With the right glue and technique, your twine ball will be sure to impress.
Cover Balloon with Twine
Now that you have applied glue to the twine, it’s time to cover the balloon. This step is crucial as it shapes the twine into the desired form and creates the spherical structure of the twine ball.
Take the end of the twine and start wrapping it around the balloon. Make sure to wrap it tightly so that there are no gaps between the twine strands. Hold the end of the twine in place with one hand, and wrap with the other.
As you wrap, rotate the balloon in your hand to maintain a smooth and uniform coverage. Don’t worry if the first few rounds are not perfectly aligned, you can always adjust the twine later.
Continue wrapping the twine around the balloon until it is fully covered. If you want to create a pattern or design, you can alternate the angles of the wrapping to create a woven look. You can also add different colors of twine to create a more vibrant look.
Be sure to cover the entire balloon, leaving a small opening at the top for the balloon knot. Once you have reached the desired amount of coverage, tie the end of the twine to the starting point and cut off the excess.
At this point, you should have a twine-covered balloon that resembles a giant ball. Be sure to check for any gaps or holes where the balloons may be peeking through. If you find any, simply apply a bit of glue and cover with additional twine.
Now that you have covered the balloon with twine, the glue will need time to dry. It is recommended to let it dry overnight to ensure that the twine is securely attached to the balloon. Once the glue is completely dry, it’s time to move onto the next step – popping the balloon.
Let Dry and Pop Balloon
After you have covered the balloon with twine, you will need to let it dry completely before removing the balloon. This step is important to ensure that the glue has fully set and the twine has adhered properly to the surface. It is recommended to let the twine ball dry for at least 24 hours.
Tip: You can hang the twine ball by attaching a string to the knot or loop on the balloon before covering it with twine. This will make it easier to dry and keep it from rolling around.
Once the twine ball is completely dry, it is time to pop the balloon. The easiest way to do this is to use a sharp object such as a pin or needle to prick the balloon. Slowly poke the needle into the balloon until it pops. It is important to do this step carefully so as not to damage the twine ball. You can also try gently deflating the balloon by squeezing on the outside of the twine ball before pricking it with the needle.
Tip: If the balloon does not pop easily, it may have not fully deflated. You can try wiggling the balloon around inside the twine ball to loosen it up before pricking it with the needle.
Once the balloon has been popped, you can gently pull it out of the twine ball. If the balloon does not come out easily, you can try pushing on the sides of the twine ball to loosen it up. Be careful not to pull too hard or you may damage the twine ball.
Note: If there are any rough spots or glue drips on the twine ball, you can use a small pair of scissors or sandpaper to smooth them out.
Congratulations, you have successfully made a twine ball using the right glue and technique! Now you can use it as a decorative piece, for a party or wedding decoration, or gift it to someone.
Conclusion
In conclusion, creating twine balls can be a fun and unique way to add some rustic charm to any space. However, choosing the right glue is important to ensure that your twine balls are strong enough to hold their shape and last for a long time. When choosing glue, it’s important to consider the materials you’re working with, the strength needed, the drying time, and the clarity of the glue once it dries.
Mod Podge is a great option for those looking for a clear, glossy finish on their twine balls. Tacky glue provides a strong hold and is perfect for those who don’t have access to a hot glue gun. Hot glue is a versatile and fast-drying option that is great for those with experience using it. E6000 is perfect for creating a permanent hold and can be used on a variety of surfaces.
When making twine balls, follow the step-by-step guide carefully to ensure that your balls come out just the way you want them. Remember to gather all of your materials before starting and prepare your work area to avoid any mess. Apply enough glue to your twine and cover your balloon carefully before allowing it to dry completely. Once dry, you can pop the balloon and you’ll be left with a beautiful twine ball.
Overall, making twine balls can be a fun and rewarding craft, especially if you have the right glue and follow the proper steps. So, get creative and make some unique twine balls to add some character to your home decor!
Frequently Asked Questions
What type of twine works best for twine balls?
Cotton twine is the best choice for twine balls because it is durable and adheres well to glue.
How do I make sure the twine ball is smooth and not lumpy?
Apply the glue to small sections of the balloon at a time, and make sure to smooth out any lumps or bumps as you go.
Can I use regular craft glue for twine balls?
Regular craft glue can work, but it may not be as strong and may take longer to dry. It’s best to choose a glue specifically designed for the materials you are using.
Can I reuse the balloons after making the twine balls?
No, the balloons will be covered in glue and twine and will not be suitable for reuse.
Can I add color to my twine balls?
Yes, you can add color to your twine balls by using colored twine or painting them after they have dried.
How long does it take for the glue to dry?
The drying time depends on the type of glue used, but typically takes between 6-12 hours.
Do I need to use a sealant on my twine balls?
No, it is not necessary to use a sealant on twine balls as the glue will provide a protective coating.
Can I hang twine balls outside?
Twine balls can be used outside, but it’s important to use a strong glue and sealant to protect them from the elements.
What is the best way to store twine balls?
Twine balls should be stored in a cool, dry place to prevent them from getting damaged or warped.
Can I use different types of string or yarn for twine balls?
Yes, you can experiment with different materials, but keep in mind that the type of glue you choose may not adhere to all materials equally.