Have you ever been in a situation where you need to use a glue gun, but have no idea how to even open it? You’re not alone! The world of tools can be perplexing, especially for beginners who are new to the DIY scene. Luckily, with this beginner’s guide, you’ll soon be able to confidently open and use your glue gun. Follow these simple steps and you’ll be a pro in no time! Get ready to discover how to open a glue gun step by step with ease.
Step 1: Preparation

Before jumping into opening your glue gun, it is crucial to take the necessary steps to prepare. By doing so, you can ensure a smooth and safe process. In this step, we’ll go over the materials you’ll need and how to choose a suitable work area for your project. By being fully prepared, you’ll be able to handle any situation that comes your way. And, if you’re wondering what you can make with a glue gun, check out how to glue rhinestones to wine glasses or how to glue balloons to the wall.
Gather materials
Before you can learn how to open a glue gun, you need to gather the necessary materials. Having everything you need on hand will help make the process smoother and faster. Here are the materials you’ll need:
- A glue gun: You can’t open a glue gun if you don’t have one! If you don’t already own a glue gun, you can easily purchase one at any hardware or craft store.
- Glue sticks: Make sure you have the right size glue sticks for your glue gun. Check the manual or packaging for the right size. You can also find the right size by measuring the old glue stick.
- A flat work surface: Choose a flat surface to work on, like a table or desk. Make sure it’s clear of any clutter or debris to ensure safety while using the glue gun.
- Paper towels or a cloth: Glue guns can get messy, so it’s important to have something nearby to clean up any excess glue.
Having all of these materials on hand will ensure that opening and using your glue gun is a smooth process. If you want to learn how to use a glue gun without making a mess, click on this link for more information.
Choose a work area
When choosing a work area for your glue gun, it’s important to consider a few key factors to ensure a safe and efficient work space. Firstly, choose a flat and stable surface for your glue gun. This will prevent any accidents or spills caused by an unstable surface. A sturdy table or desk is ideal, but avoid using surfaces that are too small or delicate, as the heat from the glue gun may damage the surface.
Next, consider the amount of space you have around your work area. Ensure that you have enough room to move freely and work comfortably, keeping in mind the length of the glue gun cord, which can limit your movement if the work space is too small. Additionally, it’s important to work in a well-ventilated area, as the fumes from the glue can be harmful if inhaled for prolonged periods of time.
Lastly, consider the surrounding objects and materials in your work area. Keep flammable materials, such as paper and fabrics, away from the glue gun to prevent any accidents. It’s also a good idea to cover your work surface with a protective layer, such as a plastic sheet or newspaper, to catch any glue drips or spills.
By taking these precautions and creating a safe and efficient work area, you can ensure a successful glue gun project. If you need more information on how long it takes for hot glue to dry, check out our informative article on how long it takes hot glue to dry.
Step 2: Turning the Glue Gun On
As you prepare to start your crafting project, the next step after selecting your work area and gathering the necessary materials is to turn on your glue gun. This may seem like a straightforward process, but there are a few necessary steps to follow to ensure your glue gun heats up properly. In this section, we will guide you through the process of turning on a glue gun and preparing it for use. Once your glue gun is ready, you can then move on to the fun part of the project. So let’s get started!
For tips on how to melt hot glue sticks, you can check out our article “How to Melt Hot Glue Sticks: A Beginner’s Guide”.
Insert glue stick(s)
Before you can open a glue gun, you need to insert glue stick(s) into the gun. Here is a step-by-step guide on how to insert glue sticks:
| Step | Description |
|---|---|
| Step 1 | Choose the right size glue stick. Make sure the glue stick you are using fits the size of your glue gun. Using the wrong size can cause the glue gun to malfunction and damage your materials. |
| Step 2 | Remove any old glue sticks. If there are any old glue sticks in the glue gun, gently pull them out and discard them in a safe trash bin. |
| Step 3 | Insert the new glue stick at the back of the glue gun. Hold the glue gun in one hand and insert the glue stick at the back of the gun, where you removed the old glue stick. Push the glue stick gently into the gun until you feel resistance. |
| Step 4 | Push the glue stick further into the gun. To secure the glue stick in place, push it further into the gun until it reaches the metal nozzle. Make sure the glue stick is centered and straight to prevent jams. |
| Step 5 | Do not overload the glue gun. Overloading the glue gun with too many glue sticks can cause it to overheat and damage both the gun and your materials. |
Now that you have successfully inserted the glue stick(s) into the glue gun, you can proceed to the next step of plugging it in. If you need more information on how to use a glue gun, check out our comprehensive guide on how to use glue in Minecraft or our article on what glue to use for rhinestones on tumblers.
Plug the glue gun in
Before you can open your glue gun, you need to turn it on by plugging it into an electrical outlet. Make sure to plug the glue gun into a power source that is close to your work area to prevent accidents. Once you have a location for your glue gun, follow these steps:
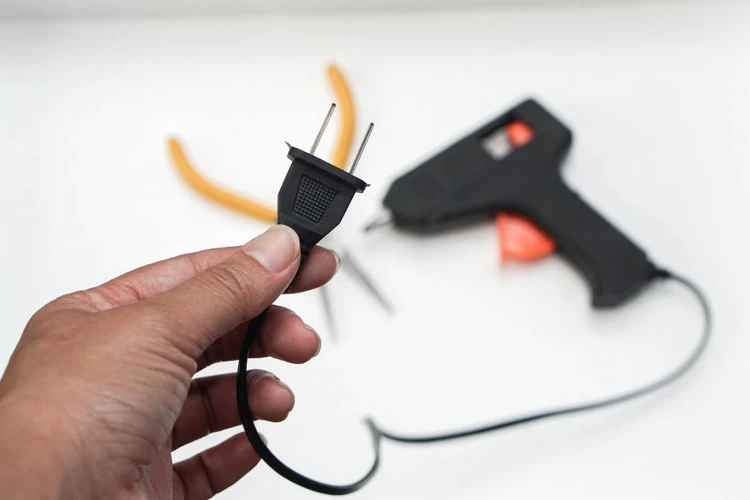
- Locate the electrical cord on the glue gun.
- Check that the cord is not damaged or frayed before plugging it in.
- Insert the plug into an electrical outlet.
It is important to note that glue guns can get very hot, so NEVER leave a plugged-in glue gun unattended. This can potentially cause a fire or harm someone nearby. Additionally, do not touch the nozzle or glue until the glue gun has fully heated up.
If you’re interested in learning how to make your own glue gun, we have an article on How to Make a Glue Gun. Or if you want to learn some tips and tricks on how to use glue for tucking fabrics, check out How to Tuck Using Glue. And if you need to know how to properly glue chipboard together, we have a guide on How to Glue Chipboard Together.
Wait for the glue gun to heat up
After plugging the glue gun in, you will need to wait until it heats up before using it. This typically takes about 5-10 minutes, although it can vary depending on the model you are using. It’s important to be patient during this step, as using the glue gun before it has fully heated up can result in uneven glue distribution or even damage to the gun.
While waiting for the glue gun to heat up, you can use this time to gather any additional materials you may need for your project or prepare your work area. Here are some tips you can follow to make the most out of your waiting time:
- Check the glue stick: Before starting your project, double-check that your glue stick is the right fit for your glue gun. Using an incompatible glue stick could result in jamming or other issues.
- Prepare your work area: Ensure that your work area is well-ventilated and covered with protective materials, such as a drop cloth or newspaper, to prevent any glue spills from damaging your work surface.
- Organize your tools: Gather any additional tools or materials you may need for your project, such as scissors or ribbon, and organize them in a nearby space for easy access once you begin gluing.
By following these tips and allowing the glue gun to properly heat up, you can ensure that your project will be a success without any interruptions or mishaps.
Step 3: Opening the Glue Gun
Now that you’ve turned on your glue gun, it’s time to open it up so you can insert a glue stick. This process may seem intimidating, but with the right approach, it’s actually quite simple. In this step, we’ll guide you through the process of opening your glue gun with ease. Just follow these clear and concise instructions to successfully open your glue gun and prepare it for use.
Unplug the glue gun
Before opening the glue gun, it’s important to unplug it to avoid any accidents. This step is crucial for your safety and the safety of those around you. Here are the detailed steps on how to unplug the glue gun:
Step 1: Turn off the glue gun by switching the ON/OFF button to ‘OFF’ mode or unplugging it from the power source.
Step 2: Wait for the glue gun to cool down completely. Touching the glue gun or the glue stick while it’s still hot can cause severe burns.
Step 3: Once the glue gun has cooled down, gently remove it from the power supply. If the plug is caught, don’t force it. Instead, carefully wiggle the plug until it comes out without any resistance.
Step 4: Place the glue gun on a heat-resistant surface to cool it down further.
It’s important to note that unplugging the glue gun is also essential when changing the glue stick. If the glue gun is still plugged in when changing the glue stick, it can result in the glue gun accidentally turning on, causing burns or other accidents.
By following these simple steps of unplugging the glue gun, you can ensure that you’re taking the necessary precautions to avoid any accidents and stay safe.
Release the trigger
Releasing the trigger on your glue gun is an important step in the process of opening it up. This will ensure that the glue gun is not hot and will not dispense any glue while you are trying to open it. To release the trigger, follow these simple steps:
| Step 1: | Ensure that the glue gun is unplugged from the power source. |
| Step 2: | Hold the glue gun with your dominant hand, keeping your fingers away from the trigger. |
| Step 3: | Use your other hand to gently pull the trigger back as far as it will go. |
| Step 4: | While still holding the trigger, release the pressure on the trigger by slowly letting it slide back to its original position. |
It is important to remember that even though you have released the trigger and the glue gun is not dispensing glue, the metal tip may still be hot from the last use. Be careful not to touch the tip until it has cooled down completely. Once you have released the trigger, you are ready to move on to the next step in opening your glue gun.
Press the release mechanism
After unplugging the glue gun in Step 3, the next crucial step in opening the glue gun is to press the release mechanism. The release mechanism is usually found at the back of the glue gun, and it is what releases the pressure buildup within the glue gun.
To make it easier to understand, let me break it down into a simple step-by-step process:
| Step 1 | Locate the release mechanism at the back of the glue gun |
| Step 2 | Hold the glue gun with one hand and use the other hand to press the release mechanism |
| Step 3 | Hold down the release mechanism for a few seconds until all the pressure is released from the glue gun |
| Step 4 | Release the release mechanism |
Pressing the release mechanism is a crucial step as it allows any pressure buildup within the glue gun to be safely released, preventing any potential accidents or burns. After holding down the release mechanism for a few seconds, you should hear a hissing sound or air release, signaling that all the pressure has been released from the glue gun.
By following the above steps, you should now have safely released all the pressure buildup within the glue gun, enabling you to open the glue gun comfortably, without any concerns about potential safety hazards.
Step 4: Loading the Glue Stick
Now that you have opened and prepared your glue gun, it’s time to load the glue stick. This step is crucial as it will determine the effectiveness of the glue gun. Loading the glue stick can be tricky for beginners, but with the right guidance, it can be achieved easily. In this step, we will guide you through the process of loading the glue stick into the glue gun, ensuring that you are using the right glue type and that the glue stick is inserted correctly. So, let’s dive into the process and learn how to load the glue stick into your glue gun like a pro!
Remove the old glue stick
Before you can insert a new glue stick, you’ll need to remove the old one. Here are the steps to remove the old glue stick from your glue gun:
- Unplug the glue gun from the electrical outlet and wait for it to cool down. The temperature of the melted glue inside the glue gun can cause serious burns, so it’s important to let the glue gun cool before attempting to remove the glue stick.
- Locate the end of the glue stick that is inside the glue gun. This is usually at the back of the glue gun, near the trigger.
- Grasp the end of the glue stick and gently pull it out of the glue gun. If the glue stick is still hot, use a pair of pliers or gloves to protect your hands from the heat.
- Inspect the glue gun to make sure that the old glue stick has been completely removed. If there are still small pieces of glue inside the glue gun, use a skewer or other sharp object to remove them.
It’s important to make sure that all of the old glue is removed from the glue gun before inserting a new glue stick. Any leftover glue can clog the nozzle and prevent the glue gun from working properly. Once you’ve removed the old glue stick and inspected the glue gun, you’re ready to insert a new glue stick and start gluing.
Insert the new glue stick
Inserting a new glue stick into the glue gun is a crucial step in the process, and it is important to do it correctly to ensure the gun works properly. Follow these steps for a seamless experience:
- Make sure the glue gun has been unplugged and allowed to cool down.
- Take the new glue stick and remove any stickers or packaging that may be on it.
- Insert the new glue stick through the back of the gun, and make sure the end with the label or colored portion is facing the trigger.
- Gently push the glue stick in and continue doing so until the stick touches the back of the barrel. This ensures the glue stick is properly seated and will not become dislodged while in use.
Note: It is crucial to make sure the gun is fully cooled down before inserting a new glue stick. This can help prevent any injury or burns from occurring during the process.
| Materials needed: | New glue stick |
|---|---|
| Time needed: | 1-2 minutes |
| Difficulty: | Easy |
Once the glue stick is inserted, the glue gun is ready to be used again. Make sure to follow proper safety precautions when using the glue gun.
Step 5: Closing the Glue Gun
As you near the end of your glue gun project, it’s important to properly close up the device to avoid any potential accidents or damage. The final step in the process is closing the glue gun, which requires a bit of finesse to ensure the glue inside doesn’t drip out. Let’s take a closer look at how to effectively close your glue gun using the following step-by-step instructions.
Press the two ends together
When it comes to closing the glue gun after loading a new glue stick, one of the final steps is to press the two ends of the gun together. This may seem straightforward, but it’s important to do it correctly to ensure that the glue gun is securely closed and ready for use.
To press the two ends together, first, make sure that the glue stick is properly loaded and positioned in the gun. Next, use both hands to grip the two ends of the glue gun firmly. Apply moderate pressure to ensure that both ends are fully engaged.
It’s crucial to ensure that the two ends are pushed together all the way. If they’re not fully engaged, the glue gun may not work correctly, and the glue may leak out or not come out at all.
You can check that the gun is closed properly by inspecting it visually and attempting to pull it apart gently. If the gun stays together, it means you’ve successfully pressed the two ends together, and the gun is ready for use.
Remember: Always be gentle when handling a glue gun, especially when pressing the two ends together. Avoid putting too much pressure, as this could damage the gun or cause the glue to leak. With a little bit of practice, you’ll master this step in no time.
To summarize, when you are ready to close the glue gun, ensure that the glue stick is correctly loaded and positioned. Then press the two ends together gently, making sure that they are fully engaged. Check visually to confirm that the gun is properly closed, and you’re ready to start using it!
Squeeze the trigger to seal the glue gun
After pressing the two ends of the glue gun together, the final step in closing the glue gun is to squeeze the trigger to seal it shut. This helps to ensure that the glue gun stays closed and the glue stick remains securely in place.
To properly squeeze the trigger to seal the glue gun, follow these steps:
| Step | Description |
|---|---|
| 1 | Hold the glue gun securely with one hand. |
| 2 | Using your other hand, grasp the trigger near the bottom of the handle. |
| 3 | Squeeze the trigger firmly until you hear or feel a click. |
| 4 | Without releasing the trigger, press the two ends of the glue gun together with the other hand. |
| 5 | Continue to hold the glue gun together until the glue inside the gun begins to cool and harden. |
It’s important to make sure that you squeeze the trigger firmly to ensure that the glue gun stays sealed shut. This will help to prevent the glue stick from falling out and creating a mess. Additionally, be sure to continue holding the glue gun shut until the glue inside begins to cool and harden.
Following these steps will ensure that your glue gun is properly sealed and ready for use.
Step 6: Final Checks
After going through the process of opening, using, and closing your glue gun, the last step before you start your project is to perform some final checks. These checks will ensure that your glue gun is working properly and that it will not cause any trouble during your DIY activity. In this step, we will detail the crucial things you need to look for before diving headfirst into your project. So, let’s take a closer look at the final checks you should perform before starting your project.
Double-check the glue gun
After you have finished loading the glue gun, it’s crucial to double-check the device to make sure everything is secure and ready to use. Here are a few things to inspect:
- Glue Stick: Make sure that the glue stick is completely loaded and secure within the glue gun. If the glue stick is loose or not secured properly, it may slip out and cause accidents while using it.
- Trigger: Check the trigger to see if it is functioning correctly. Press it a couple of times to verify if it is dispensing the right amount of glue. If the trigger doesn’t function properly, check the glue gun’s user manual for troubleshooting tips.
- Cord: Inspect the cord to see if there are any visible signs of damage, like cuts or frayed wires. If any of these damages are present, do not use the glue gun. It’s essential to purchase a new cord before using the glue gun.
- Glue Residue: Also, inspect the glue gun’s nozzle for any residual glue. Wipe it clean with a dry cloth before storing it away. If any glue residue remains, it may clog the nozzle and hinder the glue gun’s performance.
Thoroughly checking these aspects of the glue gun will ensure safe and efficient use. Remember to always handle the device with care, especially when carrying it around or using it while plugged in.
Test run
After completing all the previous steps, you need to perform a test run to ensure that the glue gun is working correctly and there are no issues with the glue flow.
To perform a test run, follow the below steps:
- Take a piece of scrap material: Take a small piece of scrap material, such as paper or cardboard, to check the glue gun’s glue flow.
- Turn the glue gun on: Turn the glue gun on and let it heat up for the recommended time.
- Squeeze the trigger: Squeeze the trigger of the glue gun to allow the glue to come out. You should notice a consistent flow of glue.
- Check the viscosity: Check the viscosity or thickness of the glue coming out of the glue gun. If the glue is too thick or too thin, adjust the temperature of the glue gun accordingly.
- Move the glue gun: Move the glue gun over the scrap material, making a line of glue. Ensure that the glue is coming out of the nozzle in a steady stream, and there are no interruptions.
- Inspect the glue: After making the line of glue, inspect it. The glue line should be smooth, free from bumps, and evenly applied.
If you notice any issues during the test run, such as inconsistent glue flow or an irregular glue line, repeat the steps above or troubleshoot the glue gun as needed. Once you have confirmed that the glue gun is working correctly, you can start using it for your specific project.
Conclusion
In conclusion, opening a glue gun may seem like a daunting task for beginners, but following these simple steps can make the process a breeze. By gathering the necessary materials and choosing a suitable work area, you can set yourself up for success. Turning on the glue gun involves inserting the glue sticks, plugging it in and waiting for it to heat up. Opening the glue gun requires unplugging it, releasing the trigger, and pressing the release mechanism. Loading the glue stick involves removing the old glue stick and inserting the new one. Finally, closing the glue gun involves pressing the two ends together and squeezing the trigger to seal it.
It’s always important to conduct final checks before starting your project, so double-check the glue gun to ensure that everything is properly aligned and in place. Once that’s done, do a quick test run to make sure that the glue is flowing smoothly and ready to use.
Overall, with a little bit of patience and practice, anyone can learn how to open a glue gun. Just remember to follow the steps outlined in this beginner’s guide and take your time to ensure that everything is done correctly. With these skills under your belt, you can start creating all sorts of fun and exciting DIY projects in no time. Happy gluing!
Frequently Asked Questions
1. How do I know if my glue gun is turned on?
Most glue guns have an LED light that indicates when the gun is powered on.
2. Can I use any type of glue stick with my glue gun?
No, it is best to use glue sticks that are compatible with your specific glue gun. Check the manual for recommendations.
3. How long does it take for the glue gun to heat up?
It typically takes 3-5 minutes for the glue gun to heat up completely. The LED light will usually turn off when the gun is ready to use.
4. Can I open the glue gun while it’s still plugged in?
No, always unplug the glue gun before attempting to open or make any adjustments.
5. How do I know if the glue gun is loaded correctly?
You should be able to see the glue stick within the opening of the glue gun. You can also pull the trigger to test if the glue stick is feeding through properly.
6. Can I use my glue gun for other materials besides paper?
Yes, glue guns are versatile and can work with a variety of materials such as wood, fabric, and plastic. Just make sure to choose the appropriate type and temperature of glue stick for the material you’re using.
7. Do I need to wait for the glue to cool before using the item?
Yes, it’s important to let the glued item cool and set for at least a few minutes before handling or using it.
8. How do I know if a glue stick is running low?
The glue stick will start to look shorter in the opening of the glue gun and may be more difficult to feed through the gun. It’s best to replace the glue stick before it fully runs out.
9. What should I do if glue starts leaking from the nozzle?
Turn off and unplug the glue gun, then let it cool completely. Clean any glue residue from the nozzle and feeding mechanism before attempting to use it again.
10. Can I reuse glue sticks that are partially used?
While it’s possible to reuse partially used glue sticks, it’s not recommended. The adhesive properties may be compromised and could affect the quality of the glue bond.