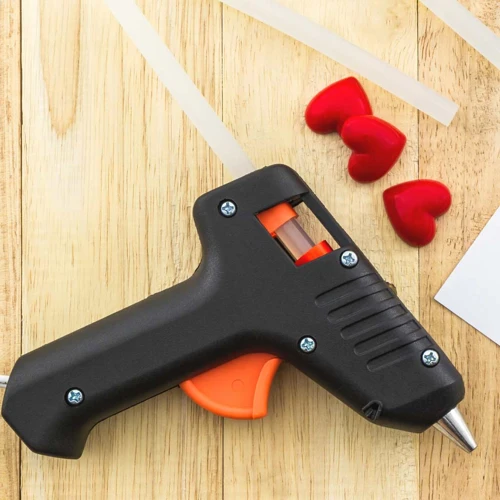
Introduction: Mini glue guns
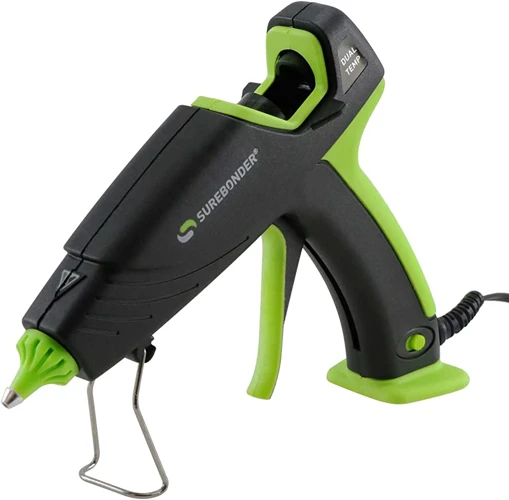
Mini glue guns are an absolute must-have for any DIY enthusiast or crafter. They are small, lightweight, and easy to use for a variety of projects. Whether you’re a beginner or an experienced crafter, a mini glue gun is an essential tool that should be in your crafting arsenal.
Using a mini glue gun may seem simple, but there are certain steps you should follow to ensure you get the best results from your projects. From picking the right glue stick to storing your glue gun safely, we’ll take you through the necessary steps to use the glue gun effectively.
In addition to the essential steps, this article will also provide some useful tips for using a mini glue gun like a pro, such as keeping the glue gun clean and experimenting with different materials. With these tips and ideas, you’ll be inspired to take your crafting skills to the next level and create amazing DIY projects.
We’ll provide four easy and fun projects you can do with your mini glue gun so you can put your new skills to use. With this guide by your side, you’ll be well on your way to mastering the art of using a mini glue gun.
So, let’s get started with this Ultimate Guide to Using a Mini Glue Gun! And if you want to learn more about how to make ribbon flowers with hot glue or what to do with a glue gun in general, check out our other articles on the topic using the internal links provided.
5 Steps to Follow for Using Your Mini Glue Gun
When it comes to using a mini glue gun, it’s essential to understand the basics. Not only can a glue gun be a useful tool for fixing broken items around the house, but it can also be used to create beautiful craft projects. In the following 5 steps, we’ll guide you through the process of using a mini glue gun effectively and safely. By the end, you’ll be ready to tackle all of your hot glue gun projects, from making ribbon flowers to fixing broken toys and household items. So, let’s dive in!
Step 1: Choose the right glue sticks
Step 1: Choose the Right Glue Sticks
Selecting the right type of glue sticks is crucial to get the desired result and ensure that your project stays together. Glue sticks come in different sizes and colors, but the most important factor to consider before choosing one is the material you will be bonding.
| Type of Glue Stick | Material it Bonds |
|---|---|
| Hot-melt glue sticks | Foam, fabric, plastic, paper, ceramics, wood |
| Cold-glue gun sticks | Paper, cardboard, wood, and some plastics |
Hot-melt glue sticks are the most commonly used and work for a variety of materials, including foam, fabric, plastic, paper, ceramics, and wood. Cold-glue gun sticks are suitable for bonding paper, cardboard, wood, and some plastics.
It is also important to check the size of the glue stick before inserting it into the mini glue gun. Mini glue guns usually require smaller glue sticks, which have a diameter of 7mm and 11mm. Using a larger size glue stick can damage the glue gun.
If you are unable to find the specific type of glue stick required for your project, you can also try making your own glue gun sticks at home. While the process may seem complicated, it is relatively easy, and you can make glue sticks using ingredients readily available at home. However, it is recommended only for DIY purposes. You can find step-by-step instructions for creating glue gun sticks at home by following this link.
Choosing the right glue stick can determine the success of your project and ensure that the bond is strong and long-lasting.
Step 2: Insert the glue stick
Inserting the glue stick into your mini glue gun correctly is crucial for it to work effectively. Start by selecting a glue stick that fits the size of your mini glue gun. Usually, mini glue guns use 0.28-inch diameter glue sticks.
Step 1: Take the glue stick and pop it from its package.
Step 2: Place it into the back of the gun, making sure the opening is facing forward, toward the nozzle. If the glue stick is too long, trim it with a pair of scissors to fit snugly.
Step 3: Gently push the glue stick until it touches the back of the heating element.
Step 4: Allow the glue gun some time to heat up and melt the glue stick. This usually takes about 1-3 minutes, but it ultimately depends on the mini glue gun you are using.
Make sure to use proper caution when inserting the glue stick as the gun may be hot. You may also want to consider wearing heat-resistant gloves or handling the gun with a cloth.
Note: It is important to use the correct glue stick for your project, as the incorrect stick may not properly melt or hold. If you are unsure which glue stick to use, consult the manufacturer’s recommendations or do some research online.
Unfortunately, there is no one-size-fits-all answer or glue stick that can do everything. While some glue sticks may perform well in certain applications, they might not be as useful in others. Be sure to have a variety of glue sticks on hand to ensure success in all projects.
If you’re interested in some creative ways to use a glue stick beyond simple crafting, check out this article on what to do with a glue gun. Or, if you’re feeling adventurous and want to try something new, you can learn how to make a glue stick bomb or even a pipe out of a glue stick. However, always exercise caution and follow responsible safety guidelines when handling any glue gun-related projects.
Step 3: Preheat mini glue gun
Step 3: Preheat Mini Glue Gun
Before using your mini glue gun, it is crucial to preheat it properly. This step ensures that the glue melts smoothly and is ready to use. To preheat your mini glue gun, follow these simple steps:
| Step | Instructions |
|---|---|
| 1 | Insert the glue stick into the glue gun. Make sure you are using the right size glue sticks that fit your mini glue gun. |
| 2 | Plug in the mini glue gun and turn it on. |
| 3 | Wait for the glue gun to heat up. The heating time may vary depending on the type and brand of the glue gun, but it usually takes around 2-5 minutes. |
| 4 | Check if the glue stick has melted by squeezing the trigger gently. If the glue is flowing smoothly, the glue gun is ready to use. If not, wait a bit longer for it to heat up. |
It is important not to rush this step and wait for the glue gun to heat up properly. Starting to use it too early can result in uneven glue flow and may cause the glue gun to clog.
Once your mini glue gun is preheated and ready to use, you can move on to the next step and start applying glue to your project. If you need additional information on specific types of glue gun projects, check out our article on gluing rope together, repairing headphones with hot glue, or melting hot glue.
Step 4: Apply glue to surface
When it’s time to apply the glue to your desired surface, follow these steps to ensure a secure and strong hold:
- Position the glue gun nozzle: Hold the glue gun at a 45-degree angle, pointing the nozzle toward the surface you want to glue.
- Squeeze the trigger: Use even pressure to squeeze the trigger with your index finger, pushing the glue stick forward and out of the nozzle. Be sure to move the glue gun at a steady pace to ensure an even application of glue.
- Apply the glue: Slowly move the glue gun along the surface, dragging a thin line of glue as you go. Use the nozzle to control the amount of glue released; a small amount goes a long way.
- Press the surfaces together: After applying the glue, quickly press the two surfaces together while the glue is still hot and pliable. Use firm pressure to ensure a secure bond.
- Hold in place: Once the surfaces are pressed together, hold them in place for a few seconds to allow the glue to cool and set. This will help to ensure a strong hold.
Remember to work quickly when applying the glue, as it will start to cool and harden almost immediately. If you need to reposition the surfaces, do so quickly before the glue dries. And always use caution when working with hot glue, as the nozzle and glue itself can cause burns.
Step 5: Store the mini glue gun safely
When you’re finished using your mini glue gun, it’s important to store it safely to avoid accidents. Here are some tips for storing your mini glue gun safely:
- Unplug the Gun: Before storing your mini glue gun, always unplug it from the power source. This will prevent any accidents if the gun is accidentally turned on.
- Let it Cool: After unplugging your mini glue gun, let it cool down before storing it. This will reduce the risk of burns or unintentional glue drips.
- Store it Upright: When storing your mini glue gun, make sure to keep it upright. This will prevent the glue from leaking out and causing a mess. You can use a glue gun stand or a clean, dry surface to stand the gun up.
- Keep it in a Safe Place: Make sure to store your mini glue gun in a safe place where it’s not easily accessible to children or pets. You can use a cabinet or a storage box to keep it out of reach.
- Check the Cord: Before storing your mini glue gun, check the cord for any signs of damage or wear and tear. If the cord is damaged, do not use the glue gun and replace the cord before using it again.
By following these simple steps, you can ensure that your mini glue gun is stored safely and ready to use the next time you need it. Remember to always use caution when using a mini glue gun and follow the manufacturer’s instructions for best practices.
Tips for Using Your Mini Glue Gun
Now that you know the basic steps for using your mini glue gun, it’s time to take a closer look at some tips that will help you get the most out of this versatile tool. Using a glue gun can be a bit tricky, especially if you’re a beginner, but with the help of these useful tips, you’ll be able to handle your mini glue gun like a pro in no time. So, let’s dive into the tips and tricks that will make your glue gun experience smoother, safer, and more enjoyable!
Tip 1: Start with low temperature
When using your mini glue gun, it’s important to start with a low temperature setting. This will prevent any accidental burns or injuries while you’re working on your project.
Why start with a low temperature?
Starting with a low temperature is important for several reasons. Firstly, it will give you more control over the amount of glue you’re applying, which is especially important if you’re working on delicate materials like paper or fabric. High temperature glue can also damage or melt certain materials, so by starting with a low temperature setting, you can avoid any unwanted mishaps.
How to set your glue gun to a low temperature:
To set your glue gun to a low temperature, simply adjust the temperature setting on the gun before you begin. Most mini glue guns have different temperature settings available, so make sure you choose the lowest possible setting to start with.
The benefits of starting with a low temperature:
By starting with a low temperature, you’ll be able to get a better feel for the glue gun and how it works. You’ll also be able to work more slowly, giving you greater accuracy and precision. This is especially beneficial if you are a beginner or are working on a complicated project.
Additional tips:
– If you’re unsure about which temperature setting to use, start with the lowest and work your way up until you find the right temperature for your project.
– Don’t rush. It’s better to work slowly and carefully than to risk damaging your project or injuring yourself.
– Always test the glue on a small area first before applying it to the entire surface.
– If you’re working on a large project, it’s a good idea to take regular breaks and let the glue gun cool down before continuing.
By following these tips and starting with a low temperature, you’ll be able to use your mini glue gun safely and effectively, allowing you to create beautiful projects with ease.
Tip 2: Keep the glue gun clean
When it comes to using a mini glue gun, it is important to keep it clean to ensure its longevity and effectiveness. Here are some tips to keep your glue gun clean:
| Tip | Description |
|---|---|
| 1. | Wipe the nozzle of the glue gun after each use to prevent drips and buildup of glue residues. |
| 2. | Clean any excess glue that may have dripped or spilled on the surface or work area to avoid any accidents or damages. |
| 3. | Use a damp cloth or rag to clean the body of the gun, making sure to unplug and let it cool down first. |
| 4. | Do not use harsh chemical cleaners or solvents on your mini glue gun, as this may cause damage to the plastic or metal parts. |
| 5. | Store your mini glue gun in a cool, dry place to avoid exposure to dust, dirt, and other elements that may affect its performance. |
Keeping your mini glue gun clean not only helps it function properly but also keeps you safe while using it. Always make sure to follow these tips to ensure long-lasting use of your mini glue gun.
Tip 3: Watch your fingers
When handling a mini glue gun, it is crucial to watch your fingers and take precautionary measures to avoid burns and injuries. Here are some useful tips to keep in mind:
- Always wear protective gloves or use a finger guard: Before using a mini glue gun, it is a good idea to wear protective gloves to prevent your fingers from getting burned. If you don’t have gloves, you can also use a finger guard to protect your fingertips.
- Never touch the glue gun nozzle: The nozzle of a mini glue gun can become extremely hot, so it is important to avoid touching it with your fingers. Instead, use a tool or a pair of pliers to manipulate the nozzle.
- Avoid placing your hands near the glue stream: The glue that comes out of a mini glue gun is extremely hot and can cause severe burns. Always keep your hands a safe distance away from the glue stream.
- Do not place the glue gun near flammable materials: Mini glue guns can cause fires if they come into contact with flammable materials such as fabric, paper, or wood. Always keep your glue gun away from these materials to prevent accidents.
- Unplug the glue gun when not in use: To avoid accidental burns, unplug the mini glue gun when you are not using it. This will also prevent the glue gun from overheating or causing a fire.
By following these tips, you can ensure that you handle your mini glue gun safely and avoid any accidental injuries. Remember, safety always comes first!
Tip 4: Use a stand
When using a mini glue gun, it is important to have a steady hand to ensure that the glue is applied precisely where you want it. That’s why Tip 4 is all about using a stand to help stabilize your mini glue gun.
By using a stand, you can rest your mini glue gun upright and have it ready to go whenever you need it. It also helps to prevent any glue from dripping onto your work surface, which can be especially frustrating if you’re working on a delicate project.
Here are some benefits of using a stand for your mini glue gun:
- Stability: With a stand, your mini glue gun will be more stable, which makes it easier to apply glue exactly where you need it.
- Hands-free: With a stand, you won’t have to hold onto the mini glue gun the entire time, which frees up your hands for other things. This is especially helpful if you’re working on a larger project that requires a lot of gluing.
- Less mess: By using a stand, any excess glue drips will be caught by the stand instead of your work surface, which makes for a much cleaner workspace.
- Protects your surface: Resting your mini glue gun on a stand also helps to protect your work surface from any scorching that might occur if the hot tip of the glue gun touches it.
Using a stand for your mini glue gun is a simple yet effective tip that can make a big difference in your crafting experience. It’s a small investment that can save you a lot of time and frustration in the long run. So, next time you pull out your mini glue gun, make sure to use a stand for a smoother and cleaner crafting experience.
Tip 5: Experiment with materials
One of the best things about owning a mini glue gun is the versatility it offers in terms of materials that can be used with it. When you feel more comfortable with using your mini glue gun, you may want to start experimenting with different materials to create unique projects. Here are some materials that you can experiment with:
- Foam: Foam can be used to create fun and unique crafts. You can make foam bookmarks, puppets, and even costume accessories. Be sure to use a low heat setting on your mini glue gun when working with foam.
- Fabric: Fabric can also be used with a mini glue gun, which makes it a great tool for creating DIY clothing and accessories. You can use it to attach patches, add embellishments, and even hem pants or skirts.
- Wood: Wood is another material that can be used with a mini glue gun. You can use it to create picture frames, small wooden toys, and even jewelry. Make sure to use a high heat setting when working with wood, as it requires a stronger adhesive.
- Paper: Another option for experimenting with different materials is paper. You can use your mini glue gun to create scrapbook pages, paper flowers, and even origami. Keep in mind that paper is delicate, so use a low heat setting to avoid damaging it.
- Plastic: Lastly, plastic is another material that can be used with a mini glue gun. You can use it to create small decorations, fix broken plastic items, and even customize phone cases. Make sure to use a low heat setting when working with plastic to avoid melting it.
By experimenting with different materials, you will be able to create a wider range of crafts and projects. Just remember to adjust the heat setting on your mini glue gun depending on the material that you are working with to avoid damaging it.
Some Projects You Can Do with Your Mini Glue Gun
Are you tired of just using your mini glue gun for simple repairs or DIY projects? Take your creativity up a notch and explore all the possibilities of what you can create with this versatile tool! Let your imagination run wild as you tackle these project ideas that will showcase your crafting skills and impress your friends and family. Get ready to unleash your inner artist with the following projects that you can easily make using your mini glue gun.
Project 1: Create handmade cards
Creating handmade cards is a perfect way to showcase your crafting skills and make something personalized for your loved ones. With a mini glue gun, you can take your card-making skills to the next level.
Materials needed:
- Card stock or heavy paper
- Scissors
- Decorative papers (optional)
- Mini glue gun
- Glue sticks
- Embellishments such as stickers, ribbons, or buttons
Instructions:
- Choose the base for your card. You can use pre-made cards or make your own by folding a piece of card stock in half.
- Cut out decorative paper to accentuate the base of the card. Cut smaller rectangular shapes and glue them onto the front of the card with the mini glue gun.
- Add your chosen embellishments such as stickers, ribbons, or buttons with the mini glue gun. Make sure to position them nicely and hold them in place for a few seconds until the glue sets.
- You can also add glitter or sequins to your card for an extra touch of sparkle. Simply use the mini glue gun to apply glue to desired areas and sprinkle glitter or sequins on top. Allow to dry before shaking off any excess glitter.
- Write your message inside the card with a pen or add a pre-made sentiment that you can also glue on with your mini glue gun.
With these simple steps, you can create a beautiful handmade card that will surely be cherished by the recipient. Experiment with different colors and designs to create unique and personalized cards. Your mini glue gun can help you bring your creative vision to life and make each card special.
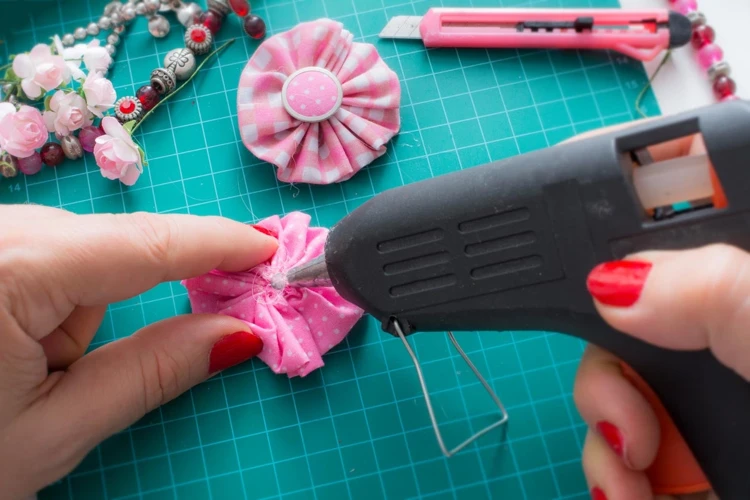
Project 2: Make fabric flowers
Making fabric flowers is a fun and creative project that you can easily do with your mini glue gun. With just a few materials and a little bit of patience, you can make beautiful flowers to decorate your clothes, accessories, or home decor. Let’s take a look at the materials you’ll need and the steps to make fabric flowers with a mini glue gun.
Materials:
| – Fabric (cotton or silk) |
| – Scissors |
| – Mini glue gun |
| – Glue sticks |
| – Floral wire |
| – Pliers |
Steps:
1. Cut out circles of various sizes from your fabric using scissors. You can use a circular template or simply freehand cut the circles.
2. Take one circle and fold it in half, then in half again. Use your fingers to pinch the bottom of the folded circle together to create a petal shape.
3. Apply a small dab of hot glue to one end of a piece of floral wire and insert it into the bottom of the petal. Hold the petal in place until the glue sets.
4. Repeat steps 2-3 with the remaining circles to create more petals. Vary the size and number of petals to create different flower shapes.
5. Once you have enough petals, begin to assemble them into a flower. Apply a dab of hot glue to the bottom of one petal and attach it to the floral wire. Hold it in place until the glue sets.
6. Continue adding petals one-by-one, making sure to slightly overlap each petal to create a natural shape.
7. Once you have added all the petals, twist the bottom of the floral wire to secure them in place. Use pliers to create a loop at the end of the wire, which will serve as a base for the flower.
With these simple steps, you can make beautiful fabric flowers using your mini glue gun. You can experiment with different fabrics, colors, and shapes to create a variety of flowers to use in your DIY projects. Use your fabric flowers to decorate your clothes, accessories, or home decor and impress your guests with your creativity and skills.
Project 3: Fix broken toys and household items
Fixing broken toys and household items is a great way to save money and extend their lifespan. Here are some simple steps to follow with your mini glue gun:
- Assess the damage: Before you start fixing the item, evaluate the damage and think about the best approach to take. Some items may require additional materials or tools.
- Clean the surfaces: Make sure the area you want to glue is clean and free of any dirt or debris. This will help the glue stick better and last longer.
- Apply the glue: Use your mini glue gun to apply a small amount of glue to one of the surfaces you want to connect. Remember that a little glue goes a long way, and you can always add more if needed.
- Press the pieces together: Join the broken pieces together and hold them for a few seconds until the glue sets. Be careful not to burn yourself with the hot glue.
- Let the glue dry completely: Once you’ve joined the pieces together, allow the glue to dry completely before using the item again. This will ensure that the bond is strong and will last for a long time.
Using a mini glue gun to fix broken toys and household items can not only save you money but also reduce waste. Instead of throwing away a broken item, give it a second life with a little bit of glue and some creativity. Whether it’s a broken toy, a chipped vase, or a loose chair leg, a mini glue gun can handle a wide range of repairs. Just be sure to follow the steps carefully and take your time to ensure a strong and lasting bond.
Project 4: Decorate picture frames
Decorating picture frames with a mini glue gun is a fun and simple DIY project that can completely transform the look of your frames. Here are some steps and ideas to get you started:
Step 1: Select a picture frame. It can be an old frame that needs some sprucing up or a new frame that you want to give a personal touch.
Step 2: Choose your decorations. This can range from colorful beads and gems to lace or ribbon. You can even use small seashells or twigs to give it a natural look.
Step 3: Heat up your mini glue gun. Make sure to use a low temperature setting to avoid warping or damaging the frame.
Step 4: Apply the glue to the decoration and press it firmly onto the frame. Be careful not to touch the glue with your fingers as it can be hot.
Step 5: Continue to add decorations until you achieve your desired look. You can also layer different decorations for a more unique and textured look.
Here are some creative ideas for decorating picture frames:
| Idea | Materials Needed |
| Bohemian | Feathers, gold painted beads, embroidery thread |
| Beachy | Small seashells, twine, jute rope, sand dollars |
| Ombre | Colorful buttons, felt flower cutouts, paper circles |
| Vintage | Lace trim, silk flowers, antique buttons |
Mini glue guns are a versatile tool that can bring new life to old picture frames. Experiment with different materials and designs to create a unique and personalized look for your frames. Just remember to use caution with the hot glue, and have fun creating!
Conclusion
After going through this complete guide for beginners on how to use a mini glue gun, you’re now ready to start using your tool with confidence. Remember to choose the right glue sticks for your project, insert them into the glue gun, and preheat it before using it.
Always apply the glue to the surface carefully, watching out for your fingers as you do so. Once you’re done, ensure you store the mini glue gun safely, away from children or pets, and in a cool, dry place.
It’s also essential to follow some tips for using your mini glue gun successfully. Start with a low temperature, keep it clean, and watch your fingers. It would be best always to use a stand and experiment with different materials.
Using a mini glue gun can be exciting, and you can try out some projects once you have gained enough experience. It can be the perfect tool to create handmade cards, make fabric flowers, fix broken toys and household items, and even decorate picture frames.
In conclusion, a mini glue gun can be a great addition to your crafting or DIY kit. Follow the steps and tips provided in this guide, and you can ensure you’re using your mini glue gun effectively and safely. With some practice, your creativity can soar as you utilize this versatile tool.
Frequently Asked Questions
What types of glue sticks should I use with a mini glue gun?
You should use glue sticks that have a diameter of 0.27 inches or 0.28 inches, which is the most common size for mini glue guns.
Can a mini glue gun be used on fabric?
Yes, a mini glue gun can be used on fabric, but it’s recommended to use a low temperature setting so you don’t damage the fabric.
How long does it take for a mini glue gun to heat up?
It can take anywhere from 1-5 minutes for a mini glue gun to heat up completely, depending on the model and brand.
Can you use a mini glue gun for woodworking?
Yes, a mini glue gun can be used for woodworking, but it’s important to choose the right glue stick for the job and to use an appropriate temperature setting.
What temperature should a mini glue gun be set at for paper crafts?
A low temperature setting is best for paper crafts, as a high temperature setting can cause the paper to warp or even burn.
Is it safe to leave a mini glue gun plugged in?
No, it’s not recommended to leave a mini glue gun plugged in when not in use, as it can be a fire hazard and cause damage to the gun.
Can you glue metal with a mini glue gun?
Yes, you can glue metal with a mini glue gun, but it’s important to use a high temperature setting and a strong adhesive glue stick.
What is the best way to clean a mini glue gun?
The best way to clean a mini glue gun is to use a damp cloth or paper towel to wipe away any excess glue residue while the gun is still hot. Once it cools down, any remaining residue can be scraped off with a plastic scraper.
Can a mini glue gun be used for jewelry making?
Yes, a mini glue gun can be used for jewelry making, but it’s recommended to use a low temperature setting and a small nozzle for precision application.
What are some alternative uses for a mini glue gun?
A mini glue gun can also be used for upholstery, floral arrangements, and even for creating 3D art projects.