So, you’ve got some rope that needs to be glued together. Maybe you’re making a craft, repairing a boat, or rigging up a tire swing. Whatever the reason, you want to make sure you do it right the first time. You don’t want your hard work to come undone because of a shoddy gluing job. Luckily, with the right materials and techniques, gluing rope together can be a straightforward and satisfying task. In this guide, we’ll walk you through the steps to successfully glue rope and offer some alternative methods and tips for better gluing. So, grab your rope and some glue, and let’s get started!
Materials Required
Before you start gluing rope together, it is important to collect all the materials you will need. This will ensure that you have everything on hand to complete your project without any interruptions. The materials required for gluing rope together include glue, rope, and cleaning supplies. There are different types of glue that you can use, and we will discuss them in the next section. If you prefer a DIY option, you can learn how to make a glue stick into liquid glue. Before gluing the rope, it is important to clean the surface to remove any debris or dirt that can affect the bond. To learn how to prepare the rope and the different alternatives for gluing rope together, read further and find useful tips and tricks.
Type of Glue
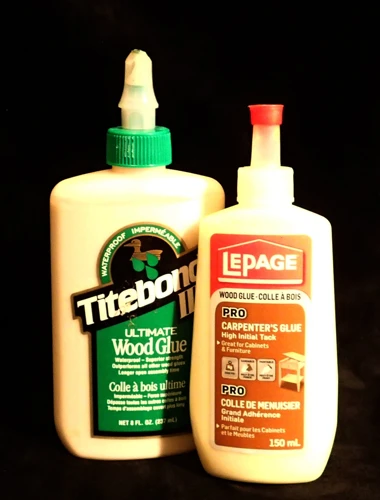
When it comes to gluing ropes together, choosing the right type of glue can make all the difference. There are various types of adhesives available in the market that can be used to glue rope together. Epoxy and cyanoacrylate (super glue) are two popular options for gluing rope. Each of these adhesives has its own characteristics that make them suitable for certain applications.
| Glue Type | Characteristics | Best Use |
|---|---|---|
| Epoxy Glue | Strong, dries clear, water-resistant | Heavy-duty applications, outdoor use |
| Cyanoacrylate (Super Glue) | Quick-drying, forms a strong bond | Light-duty applications, indoor use |
Epoxy glue is a two-part adhesive that consists of a resin and a hardener. When mixed together, they create a strong and durable bond. Epoxy glue is water-resistant, making it ideal for use in outdoor applications. It dries clear, which is especially helpful when gluing ropes together for decorative purposes.
Cyanoacrylates, commonly known as super glue, are quick-drying and form a strong bond. It is not suitable for heavy-duty applications but can be used for light-duty indoor applications, making it an excellent option for bonding ropes together for crafting purposes.
Both types of glue can be found at any hardware store or online. When choosing a glue, make sure to read the label and choose the right adhesive for your specific needs. It is important to note that certain types of rope may require a specific type of glue, so it is always best to research which adhesive will work best for your rope before starting the gluing process.
Choosing the right type of glue is essential for gluing rope together. Whether you opt for epoxy or cyanoacrylate glue, make sure to select a quality adhesive that will create a strong and long-lasting bond between the ropes. If you are unsure which type of glue to use, consult with a hardware or adhesive specialist for guidance.
For more information on different types of adhesives, check out our article on how to make a glue stick into a liquid glue or how to color hot glue.
Rope Preparation
Rope preparation is an essential step to ensure proper adhesion of the glue to the rope. Before beginning the gluing process, ensure that the rope is clean and dry. Any dirt, grease, or oil on the surface can prevent proper adhesion of the glue. Clean the rope using a clean cloth or a mild detergent to remove any dirt or oil residue. Rinse the rope thoroughly with clean water and ensure that it is completely dry before proceeding with the gluing process.
It is essential to choose the right rope for the project. Different ropes have different properties, and not all glues will work with all types of rope. The most common type of rope used in DIY projects is cotton rope, which is known for its strength and durability. However, synthetic ropes made of materials such as nylon, polyester, or polypropylene are often used for their strength and resistance to wear and tear.
It is important to note that not all glues will work with all types of rope. Some types of glue may be too weak or may not be able to bond with certain types of rope. It is recommended to test the glue on a small section of the rope before using it on the entire rope. This will help ensure that the glue works properly and provides the desired results.
Finally, it is crucial to wear protective gloves while handling the rope and glue. Hot glue guns and other types of adhesives can be dangerous if they come into contact with the skin. Wearing gloves will help protect your hands from any potential harm.
Following these tips for rope preparation will ensure that the gluing process is successful, and the rope will adhere to the surface or other materials securely.
Step by Step Instructions for Gluing Rope
If you want to create a sturdy and durable bond between two pieces of rope, glueing them together is a great solution. With the right materials and technique, you can create a strong bond that will last for years. Here, we’ll provide you with step-by-step instructions for gluing rope that are easy to follow, so you can confidently create your own rope creations. Whether you’re working on a DIY project or need to fix a broken rope, these tips and tricks for rope gluing will come in handy. So, let’s get started!
Step 1: Clean the Surface
Proper cleaning of the surface is crucial for strong bonding of the rope. The surface should be free from any dirt, dust, or grease to ensure that the glue adheres to the surface strongly. To clean the surface, follow these steps:
- Step 1: First, use a clean cloth to wipe the surface where you plan to glue the ropes together.
- Step 2: If there is any stubborn dirt or grease on the surface, use rubbing alcohol or acetone to clean it off. However, check if the surface material is compatible with alcohol or acetone before using them.
- Step 3: After cleaning, let the surface dry and wait for at least 10 minutes before applying the glue to the surface.
It is essential to ensure that the cleaning process is thorough, particularly in cases where the ropes will be under pressure or tension. This will guarantee that the rope adheres to the surface firmly, resulting in a strong bond link.
If you want to learn more about hot glue guns, take a look at our article on what a glue gun is.
Step 2: Arrange the Rope
After cleaning the surface, the next step in gluing rope is to arrange it properly. This means positioning the rope in the manner that you want it to be glued. Before applying the glue, make sure the rope is flat and straight.
The way you arrange the rope depends on the project you are working on. If you are gluing two pieces of rope together, line them up next to each other with the ends touching. If you are joining the ends of a rope to create a loop, overlap the ends by a few inches. This will create a strong bond.
Another crucial factor when arranging the rope is ensuring that it is taut. If the rope is loose or has slack, it will not bond properly. To keep the rope taut, use tape to fasten it down or have someone hold it in place for you.
It is also important to ensure that the rope is clean and dry before arrangement. Any dirt, debris, or moisture can compromise the strength of the bond. A soft-bristled brush or a damp cloth can be used to clean the rope. Let it dry completely before proceeding with gluing.
Once the rope is appropriately arranged and secured, you can move on to applying the glue.
Step 3: Apply Glue
After preparing the rope, it is time to apply glue. The type of glue you choose will affect the strength of the bond. Some of the most suitable adhesives for rope are epoxy, cyanoacrylate, and hot glue. However, for this guide, we will be focusing on hot glue.
Step 3: Apply glue to the prepared surface of the rope. Using a hot glue gun, apply hot glue evenly and continuously to the surface of one rope. The glue should be squeezed out slightly ahead of the gun’s nozzle to ensure smooth application. Make sure that the glue covers the area where the two ropes will be joined and that it penetrates all parts of the rope, including the fibers, to create a strong bond.
To help ensure that the glue adheres properly, apply some pressure to the joint as you glue the rope together. Use your hands or a clamp to hold the two pieces of rope firmly against each other. Keep holding the rope steady until the glue cools down and hardens. You can use a cooling spray to speed up the cooling process and reduce the time you have to hold the rope in place.
It is essential to be cautious while using hot glue as it can cause severe burns. Use protective gloves and work in a well-ventilated area to prevent any mishaps. If you need to learn more about hot glue guns in detail, check out this guide for more information.
Step 4: Press and Hold
After applying the glue to the rope, it’s time to press and hold the two pieces together. This step is crucial for creating a strong bond between the ropes. Using firm and even pressure, press the two pieces of rope together, making sure they are aligned correctly. You can use your hands to press the ropes together, or you can use clamps to hold the rope in place while the glue dries.
If you choose to use clamps, be sure to use a clamp that covers the entire surface area of the joint. This will ensure that the pressure is evenly distributed and that the bond is as strong as possible. You can use anything from woodworking clamps to binder clips or even rubber bands.
Remember, the amount of time you need to hold the rope pieces together will depend on the type of glue you’re using. Some high-strength glues can create a strong bond in just a few seconds, while other glues may take several minutes or even hours to fully dry and bond the ropes together. Refer to the instructions of the glue you’re using to determine the appropriate holding time.
While waiting for the glue to dry, avoid moving or disturbing the ropes to prevent the bond from breaking. Once the glue has fully set, remove the clamps or bands. You should now have a strong bond between the ropes that will withstand everyday use.
If you want to read more about glueing, check out our article on how to stop a glue gun from dripping.
Step 5: Allow to Dry
Step 5: Allow to Dry
After pressing and holding the pieces of rope together, it’s time to let the glue dry completely before using the newly bonded rope. Leave it to dry for at least 24 hours, but check the label of your glue for the exact drying time.
It’s important not to rush this step, as the glue needs time to cure and set. If you use the rope before the glue is fully dried, the bond may not be as strong as it could be, and the rope could easily come apart.
During the drying process, it’s best to keep the rope flat and avoid moving it around too much. This will ensure that the glue sets in the right position and the rope doesn’t shift or come apart.
Here are some additional tips to make sure the glue dries properly:
- Do not apply any pressure to the rope while the glue is drying, as this can cause the bond to weaken.
- Keep the rope away from moisture or water while it’s drying.
- Make sure the room is well-ventilated to allow the glue to dry at the right temperature.
- If you’re using hot glue, wait for it to cool down completely before you touch it. This will prevent any burns or injuries.
Once the glue is completely dry, you can use the newly bonded rope for your intended purpose knowing it has been strongly glued together. However, if you notice any weakness in the bond, it’s best to reapply glue and allow it to fully dry again before using it.
No relevant anchors were found for this section.
Alternative Methods for Gluing Rope
As mentioned earlier, gluing rope together can be done successfully by following the step-by-step instructions. However, there are also alternative methods that can be used to create a strong bond. These methods can be useful when the traditional gluing method isn’t the best option for your project. Let’s take a look at some of the alternative methods for gluing rope together that you can try for yourself.
If you’re interested in creating different crafts with a hot glue gun, such as melting glue sticks, changing its glue type, or making hair bows, you can find detailed guides on these topics by clicking on the links provided.
Method 1: Fray the Ends of the Rope
Another method for gluing rope together is by fraying the ends of the rope. This method is particularly useful when trying to join two ropes with different diameters or when dealing with particularly thick ropes.
Materials Required:
- Rope
- Scissors
- Glue
To use this method, begin by fraying the ends of the two ropes that you want to join. Use scissors to unravel the fibers of the rope, making sure to fray each rope for about an inch.
Once the rope is frayed, intertwine the two ends together, ensuring that the frayed ends are interlocked. Apply glue to the frayed ends of the rope, and press them together firmly. Hold the rope in place for at least a minute to allow the glue to set.
This method works best with a strong adhesive like hot glue or craft glue that can withstand tension and stress.
While fraying the ends of the rope ensures a strong bond, it may also cause the rope to be uneven and may need some extra trimming. It is recommended to trim off the excess fraying after the glue has set and the bond is secure.
Benefits of Fraying:
- Fraying helps to bind the two ropes together tightly
- It provides a larger surface area for the adhesive to stick to
- Prevents the rope from unraveling
Drawbacks:
- The process is time-consuming
- The frayed ends may require some extra trimming to achieve a smooth finish
Using the fraying technique provides a durable and reliable bond between two ropes. It is a handy technique to have in your arsenal when dealing with ropes with different diameters, in need of a strong bond, and when traditional gluing methods may not work. However, this method requires patience and precision, but once mastered, it can be an effective solution for joining ropes.
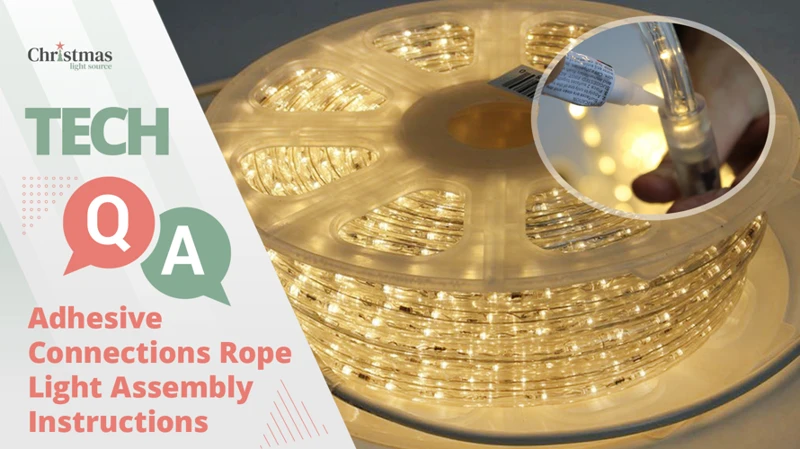
Method 2: Use Heat Shrink Tubing
Method 2: Use Heat Shrink Tubing
If you would like a secure waterproof connection for your rope with not much mess, using heat shrink tubing is a great option. Here are the steps to follow for this method.
| Step 1: | Measure and cut the rope to the length you need. But this time, add an extra inch or two to the rope as compared to the length you usually would cut. |
| Step 2: | Chop the heat shrink tubing to the needed length. Make sure you select a sufficiently long size as compared to the diameter of the rope you want to glue together. Generally, the shrink tubing should be 2 inches longer than the rope’s diameter. |
| Step 3: | Insert the rope into the tubing, leaving about an inch of the rope sticking out on one side. |
| Step 4: | Use a heat gun to heat the tubing, starting from the open end that has the extra one inch of rope sticking out. Move the device steadily towards the tubing’s other side, applying heat to the entire length. |
| Step 5: | Ensure that the tubing is securely attached to the rope and is tight by pressing the tubing together. You have to do this before it cools down since once it cools, the tubing will have already set. |
Heat shrink tubing provides a significantly stronger bond than conventional glue options and provides a waterproof connection. When done correctly, it will last longer, and the rope will not fray. If you don’t have a heat gun, you can use a hairdryer instead. However, heat guns work better, and it is advisable to purchase one if you frequently require heat shrink tubing.
Tips:
– Ensure you pick the right size of tubing.
– Avoid melting the plastic and burning the rope by applying the heat evenly.
– Tightly hold onto the tubing as you prepare to heat the other side.
– Use a heat gun that is strong enough and has a variable temperature control.
With this approach, you now have a secure bond without any danger of the bond breaking. You can use the rope for various purposes, including home use or sporting activities, knowing that the bond is strong and will hold. If you’re interested in other glue gun related topics, check out how to change the glue in a hot glue gun, how to make a glue stick bomb, or how to make hair bows with a glue gun for even more creative ideas.
Tips for Better Gluing of Rope
To ensure the best results when gluing rope together, it’s important to follow certain tips that will help make the bond as strong as possible. Here are some helpful tips that can enhance your gluing process:
1. Choose the Right Type of Glue: It’s crucial to select the most appropriate type of glue for your specific rope material. For example, if you’re using a natural fiber rope like jute or hemp, then a hot glue gun might not be suitable due to the high temperature. Instead, you might opt for a glue that specifically designed to work well with natural fibers.
2. Clean the Surface: A clean surface is key to ensuring the glue bond is sturdy and long-lasting. Dust and dirt can impair the adhesive’s performance. Wipe down the rope with a clean, dry cloth before starting the gluing process.
3. Apply Enough Glue: Apply enough glue to both surfaces (the rope and the object it’s being glued to) to ensure a strong bond. However, be careful not to apply too little or too much; the right amount of glue will help ensure a better hold.
4. Clamp the Pieces Together: After applying the glue, clamp the pieces of rope together to firmly hold the surfaces in position. Use a clamp or a heavy object to apply even pressure on the bond. Leave the rope to bond for the recommended amount of time as per glue instructions.
5. Allow Sufficient Drying Time: Give the glue sufficient time to dry fully. It’s crucial to wait enough time for the glue bond to be strong enough to bear weight before handling or using the rope.
6. Store the Glue Correctly: After use, ensure that you store your glue bottle correctly as per instructions, to keep it from drying out or becoming unusable before you need it next.
By implementing these tips, you can ensure that your glued rope project achieves the desired outcome, a strong and long-lasting bond.
Conclusion
After reading this comprehensive guide on how to glue rope together, we hope you feel confident in your ability to tackle any rope gluing project that comes your way. Whether you’re working on a DIY project, repairing a piece of equipment, or simply need to secure some rope, following the steps outlined in this guide will ensure that your rope is held together tightly and securely.
Remember that choosing the right glue for your project is crucial, and taking the time to properly prepare your rope will ensure the strongest bond possible. By following our step-by-step instructions and incorporating our helpful tips, you’ll be able to glue rope together with ease and precision.
If you find that your first attempt doesn’t produce the desired results, don’t be discouraged. Gluing rope can sometimes require a bit of trial and error, so don’t hesitate to experiment with different types of glue and rope preparation methods until you find the perfect combination.
As always, it’s important to prioritize safety when working with glue and any equipment. Wear protective gear such as gloves and goggles, and make sure to read all instructions and warnings on your chosen glue product.
With these guidelines in mind, you’ll be able to successfully glue rope together for any project or application. Happy crafting!
Frequently Asked Questions
Can any type of glue be used for gluing rope together?
No, not all types of glue are suitable for gluing rope. You should use a strong adhesive such as epoxy, contact cement, or polyurethane glue.
What should I do to prepare the rope for gluing?
To prepare the rope, you should clean the surface by wiping it with a cloth, and allow it to dry thoroughly before gluing.
Is it necessary to arrange the rope before applying glue?
Yes, you should arrange the rope and position it as you want it to be joined before applying the glue.
How long should I press the rope after applying glue?
It’s best to press the rope firmly for at least 5 to 10 minutes after applying glue to ensure a strong bond.
How long should I allow the glue to dry?
The drying time depends on the type of glue used and environmental conditions. Follow the manufacturer’s instructions and allow the rope to dry completely before using it.
What is the first alternative method for gluing rope?
The first alternative method is to fray the ends of the rope, which creates more surface area for the glue to adhere to.
What is the second alternative method for gluing rope?
The second alternative method is to use heat shrink tubing, which is slipped over the two ends of the rope and heated to shrink into place and secure them together.
Can I use a hot glue gun for gluing rope?
A hot glue gun may not provide a strong enough bond for gluing rope, especially for heavy-duty applications.
Can I use the same type of glue for different types of rope?
Not all types of rope are the same. You should use the appropriate glue for the specific type of rope you are joining.
Are there any additional tips for gluing rope?
Yes, some tips include ensuring the rope is completely clean, using the appropriate glue, keeping the rope in place while it dries, and avoiding over-application of the glue.