Crafting enthusiasts and DIY aficionados understand the importance of keeping their tools in prime condition. When it comes to hot glue guns, regular maintenance is key to ensuring seamless operation and longevity. Properly changing glue sticks is a fundamental aspect of hot glue gun maintenance, preventing malfunctions and ensuring strong adhesion for your projects.
Preparing for Glue Stick Replacement
Things You’ll Need
- A compatible hot glue gun
- New glue sticks
- Heat-resistant gloves (optional)
- Wax paper or a silicone mat
Safety and Operating Precautions
Before you embark on glue stick replacement, remember that hot glue guns operate at high temperatures. Wear heat-resistant gloves if necessary, and always place the gun on a surface that won’t be damaged by heat, such as wax paper or a silicone mat. Ensure the gun is unplugged and cool before attempting any maintenance.
How to Change Glue Sticks in Your Hot Glue Gun
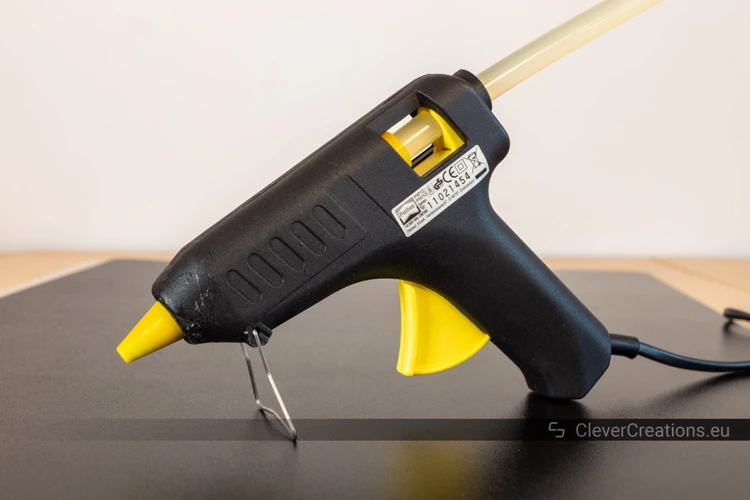
Step 1: Glue Gun Loading and Initial Steps
Begin by plugging in your hot glue gun to warm it up. This will soften any remaining glue inside, making it easier to remove the old stick. Once it’s warm, gently push any leftover glue stick through by inserting a new one behind it. This will help clear the mechanism for the new glue stick.
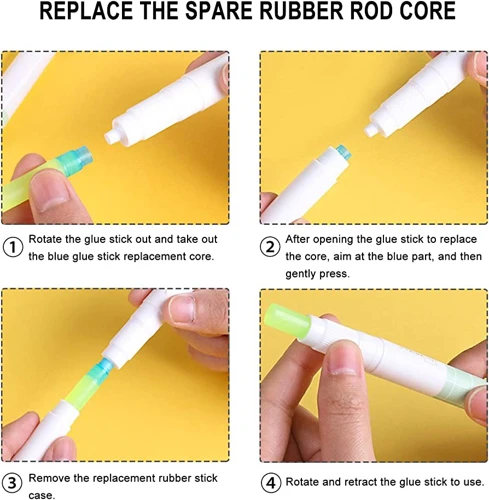
Step 2: Replace Glue in Glue Gun
With the previous stick pushed through or removed, it’s time to insert the new glue stick. Slide it into the back of the gun until it stops. Avoid forcing the stick, as this could damage the internal mechanism.
Step 3: Refilling Hot Glue Gun
Once the new stick is in place, allow the gun to heat up the glue fully. Test the flow on a piece of scrap material before commencing your project. This ensures the glue is hot enough and running smoothly.
Hot Glue Gun Tips for Effective Use
How to Use a Glue Gun Properly
To make the most of your hot glue gun, maintain a steady hand and even pressure when squeezing the trigger. Apply the glue to one surface and quickly join it to the other. Keep the nozzle clean for a consistent glue stream.
Optimizing Glue Gun Performance
For optimal performance, use the correct type of glue stick for your materials and project. Additionally, never leave your hot glue gun unattended while plugged in, and allow it to fully warm up before use to prevent inconsistent glue application.
Glue Gun Troubleshooting
Nozzle Issues and Fixes
A clogged nozzle can hinder your hot glue gun’s performance. To fix this, unplug the gun and let it cool down. Then, remove any obstructions with a toothpick or similar tool. Wipe away any excess glue with a cloth once the nozzle is warm but safe to touch.
Handling Jammed Glue Sticks
If a glue stick becomes jammed, gently push it forward once the gun is heated. If this doesn’t work, you may need to disassemble the gun to remove the stick. Always refer to the manufacturer’s instructions for guidance.
Dealing with Adhesive Surges
Adhesive surges can occur if the glue heats unevenly or too quickly. To manage this, allow the gun to reach a stable temperature before beginning your work. If surges persist, check for issues with the heating element or consider seeking professional advice.
Preventative Hot Glue Gun Maintenance

Diligent maintenance can prevent many common hot glue gun issues. Keep the gun clean, store it properly, and only use recommended glue sticks. Regularly check for signs of wear and tear, which can affect performance.
When to Consider Glue Gun Replacement
Despite good maintenance, hot glue guns have a lifespan. If you notice consistent performance issues, such as uneven heating or mechanical failures, it may be time to consider a replacement. Modern glue guns offer improved features and reliability.
FAQs and Expert Q&A
Q: How often should I change glue sticks? A: Change glue sticks when they run out or if you need a different type of adhesive. Q: Can I leave a glue stick in the gun when not in use? A: Yes, but remove it if you won’t use the gun for an extended period.
Working with a hot glue gun can be incredibly handy for a variety of projects, whether you’re crafting, fixing household items, or working on DIY endeavors. Knowing how to manage the glue sticks in your tool is essential for smooth operation. If you’re new to using a glue gun or just need a refresher, our comprehensive guides are here to help. Learn how to properly insert a new glue stick with our step-by-step tutorial on how to insert a glue stick in a glue gun. If you’re looking to replace an old stick, our article on how to change a glue gun stick will walk you through the process. And for those frustrating moments when a glue stick gets lodged in the gun, don’t miss our tips on how to remove a stuck glue stick from a glue gun. With these guides, you’ll be able to maintain your glue gun in top condition and ensure your crafting sessions go off without a hitch.
Conclusion and Final Thoughts
Changing glue sticks and regular maintenance are essential for the smooth operation of your hot glue gun. By following the steps outlined, you can ensure your gun remains a reliable tool for all your crafting needs. Remember to prioritize safety, and happy crafting!