Starting a new DIY project and need to change the glue stick on your glue gun? It’s a simple process that can be done in just a few easy steps. But if you’re not sure how to do it, don’t worry – we’ve got you covered. In this guide, we’ll show you exactly how to change your glue gun stick, step by step. From gathering your supplies to testing your new stick, we’ll cover everything you need to know. So, roll up your sleeves and let’s get started!
Step 1: Gather Your Supplies
Before we start the process of changing the glue stick in your glue gun, it’s important to make sure you have all the necessary supplies ready. Gathering the right materials will save you time and ensure a smooth transition between old and new glue. Make sure you have the following items on hand:
– Glue gun
– New glue stick
– Heat-resistant surface
– Gloves (optional)
– Pliers (optional)
Now that you have your supplies, we can move onto the first step. If you’re interested in more DIY projects with a glue gun, check out how to make hot glue mushrooms.
Gather These Materials
To change a glue gun stick, you will need to gather a few materials. By having all the necessary supplies on hand, you can easily change your stick without any interruptions. Below is a table outlining the materials you will need:
| Materials | Description |
| Glue gun sticks | Choose the right size for your glue gun. |
| Newspaper or scrap paper | To protect your work surface. |
| Gloves | Optional, but recommended to protect your hands. |
| Heat-resistant surface | To place your glue gun on while it heats up and while you work. |
| Scissors | To trim the glue stick if necessary. |
Pro tip: If you’re unsure of what glue gun sticks to use, check your glue gun’s packaging for the recommended stick sizes. If you’re interested in what glue is best to use for rhinestones on tumblers, follow the link to our guide.
Step 2: Prepare Your Glue Gun
Preparing your glue gun before changing the glue stick is an important step in ensuring a safe and successful process. Neglecting this step can cause harm and result in poor adhesion. It is crucial to pay attention to a few things before proceeding to the next step. Firstly, make sure your glue gun is unplugged, then remove any remaining glue from the gun. By doing so, you will avoid any problems that could arise from residual glue being reheated. If you need help with selecting the right glue to use on your project, check out what glue to use in glue gun article for detailed information.
Unplug Your Glue Gun
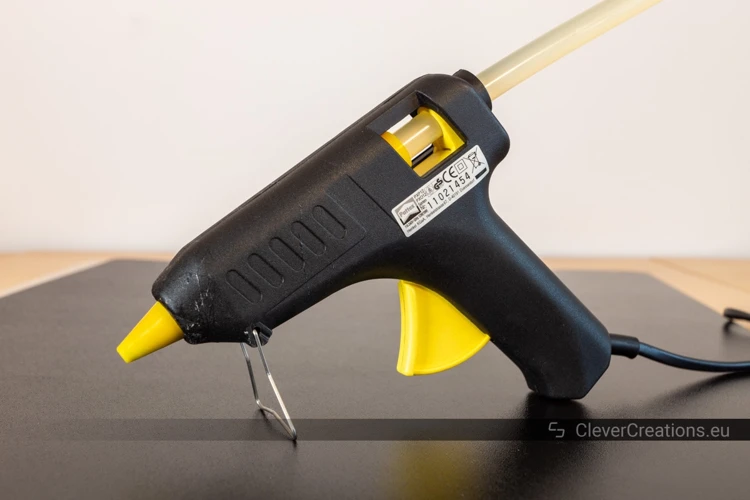
When it comes to changing the glue stick in your glue gun, you want to start the process by unplugging your glue gun. This important step ensures your safety and prevents any accidents from occurring. Once your glue gun is unplugged and cooled down, place it on a heat-resistant surface such as a silicone mat or aluminum foil. This will prevent any damage to your work surface.
In addition to unplugging your glue gun, it’s also important to keep your hands away from the nozzle during the glue changing process, as the nozzle may still be hot. You can use pliers to remove any remaining glue if needed, which will also help prevent any accidental burns.
It’s important to follow these safety precautions because glue guns can reach high temperatures and can cause burns or other accidents when not handled properly. By unplugging your glue gun and handling it with caution, you can ensure that your glue changing process goes smoothly and safely.
For more information on glue guns, check out our article on cold glue guns.
Remove Any Remaining Glue
After unplugging your glue gun, it’s important to ensure that there is no remaining glue in the chamber. This step is crucial to prevent any blockages or malfunctions during your next use. To remove any remaining glue, you can use a metal tool such as a screwdriver. Be sure to use caution and not damage the interior of the gun. If you encounter any difficulties or resistance, do not force the tool as it can cause permanent damage to your glue gun.
Here is an overview of the steps to remove glue from your glue gun:
| Materials: | Instructions: |
|---|---|
| Heat-resistant gloves | Wear heat-resistant gloves to protect your hands from the hot glue gun |
| Metal tool (e.g. screwdriver) | Use a metal tool like a screwdriver to carefully remove any remaining glue. Be careful not to damage the interior of the glue gun. |
| Heat gun or hair dryer (optional) | If you’re having difficulty removing the glue, you can use a heat gun or hair dryer to gently melt the glue and make it easier to remove. |
By warming up the remaining glue with a heat gun or hair dryer, it will melt and make cleaning easier. This step can help to ensure that your glue gun stays in good condition. Once you have completed this step, you can move on to the next part of the process – inserting the new glue stick.
Step 3: Insert the New Glue Stick
Inserting the New Glue Stick into Your Glue Gun: The Essential Steps
After gathering your supplies and preparing your glue gun, it’s time to insert the new glue stick. This may seem like a simple task, but there are a few important steps to keep in mind to ensure that the glue gun works properly. It’s essential to choose the right size of glue stick and insert it correctly into the mounting chamber. Once the stick is inserted, you’ll need to heat up the glue gun before testing the new stick. Let’s dive into the details of how to correctly insert a new glue stick into your glue gun.
Choose the Right Size Stick for Your Gun
To ensure a successful glue gun stick change, it is important to choose the right size stick for your gun. Using the wrong size stick can lead to difficulties in inserting the glue and even damage the gun altogether. Different glue gun models require different sizes of glue sticks, so it is important to check your glue gun’s manual or website to see which size is recommended.
Using a glue stick that is too small for your gun can result in glue leakage, error messages, and decreased performance. On the other hand, using a glue stick that is too large can damage your gun and lead to safety hazards. Always check the packaging of your glue sticks to ensure that they are compatible with your glue gun.
Here is a helpful table to ensure that you choose the right size stick for your glue gun:
| Glue Gun Model | Recommended Stick Size |
|---|---|
| Mini Glue Gun | 5/16 inch (0.31 inch) diameter |
| Standard Glue Gun | 7/16 inch (0.44 inch) diameter |
| Industrial Glue Gun | 1/2 inch (0.5 inch) diameter |
It is important to note that some glue guns may require different sizes of glue sticks. Always refer to your glue gun’s manual or website to ensure that you are using the right size. Choosing the right size glue gun stick can save you time and effort in the long run and make your crafting experience more enjoyable.
If you’re looking for more information on glue gun projects, check out our article on what glue to use on Redneck Wine Glasses or how to make hot glue snowflakes.
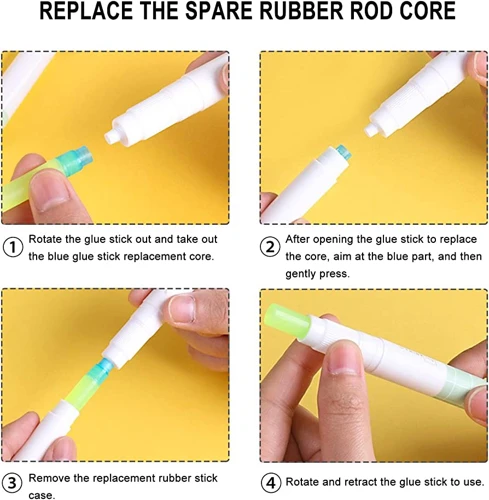
Insert the Stick into the Mounting Chamber
Inserting the new glue stick is the next step in changing your glue gun stick. This step is fairly easy and straightforward. First off, ensure you have the right size of the new glue stick. Once you have it, locate the mounting chamber for the glue stick which is usually found at the back of the glue gun. Open the chamber by pulling the trigger and then insert the glue stick into the opening. Ensure the stick is pushed all the way into the chamber. If it seems difficult to insert, you may need to trim the end of the stick with scissors so it fits more easily.
It’s important to note that you should only insert the amount of glue you need. Do not overfill the chamber, as the excess glue may spill over and cause a mess as it heats up. Additionally, be careful not to burn yourself while inserting the stick into the chamber, as it can get hot.
Now that you have inserted the new glue stick securely into the mounting chamber, you’re ready for the next step in the process. But first, ensure that the glue gun is properly heated up before you start gluing to avoid any mishaps. This could take 3-5 minutes depending on the type of glue gun you have. If you’re unsure of how long it takes for your glue gun to heat up, check the manufacturer’s instructions or refer to our article on ‘How Long Can You Leave a Hot Glue Gun On?‘.
Step 4: Heat Up Your Glue Gun
As we move on to the next step of changing your glue gun stick, it’s important to make sure that your glue gun is sufficiently heated up. This step is crucial as without the right temperature, your glue may not flow easily and can cause a lot of frustration. So, let’s dive into the details of how to heat up your glue gun properly. And if you’re curious about other creative projects that you can do with a glue gun, check out how to make icicles with hot glue – a fun and easy way to decorate for winter!
Plug in Your Glue Gun and Wait for it to Heat Up
To ensure that your glue gun stick is properly heated and ready to use, you’ll need to plug it in and wait for it to heat up. This usually takes just a few minutes, but it can vary based on the type and model of your glue gun. While you’re waiting, it’s a good idea to prepare your work area and gather any additional supplies that you may need.
Step 4: Plug in Your Glue Gun and Wait for it to Heat Up
Before plugging in your glue gun, make sure that the mounting chamber is empty and free of any leftover glue from the last stick. Once the chamber is clean, you can insert the new stick and plug in your glue gun.
Here are some tips for safely heating up your glue gun:
| TIP | DETAILS |
|---|---|
| Use a heat-resistant surface | Choose a work surface that can withstand the heat of your glue gun, such as a silicone mat or metal tray. Avoid using plastic or other materials that could melt or catch fire. |
| Be patient | Don’t rush the heating process by turning up the temperature or touching the nozzle of your glue gun before it’s fully heated. This can result in uneven melting and potential burns. |
| Keep the gun upright | While you’re waiting for your glue gun to heat up, keep it upright in a safe and stable position. Avoid tilting it or laying it on its side, as this can cause the glue to leak out before it’s fully melted. |
Once your glue gun is fully heated, you’ll be able to see the melted glue start to appear at the nozzle. To test your new stick, gently squeeze the trigger to ensure that the glue is flowing smoothly and evenly. If the glue seems too thick or thin, you can adjust the temperature of your glue gun or try a different type of glue stick.
Pro Tip: If you’re using a glue gun for the first time or are unsure about the best type of glue stick to use for your project, it’s always a good idea to do a test run on a scrap piece of material before starting your actual project. This will help you get a feel for the glue gun’s temperature and flow rate, and may even inspire new ideas for your project.
Remember to always unplug your glue gun when you’re finished using it and allow it to cool completely before storing it away. With a little practice and patience, changing your glue gun stick can be a quick and easy process that opens up a world of creative possibilities.
Step 5: Test Your New Stick
After inserting the new glue stick to your glue gun, it’s important to check if it’s working properly before you start using it. This will save you from any frustration later on, especially when you’re in the middle of a project and the glue suddenly stops flowing. To test your new stick, squeeze the trigger to ensure the glue is flowing smoothly. If you notice any issues or the glue is not coming out evenly, double-check the insertion of the glue stick and make sure it’s heated up properly. Once you’ve tested it and you’re satisfied with the flow of the glue, you can continue with your project. Remember, a functional glue gun and proper technique ensure a successful outcome.
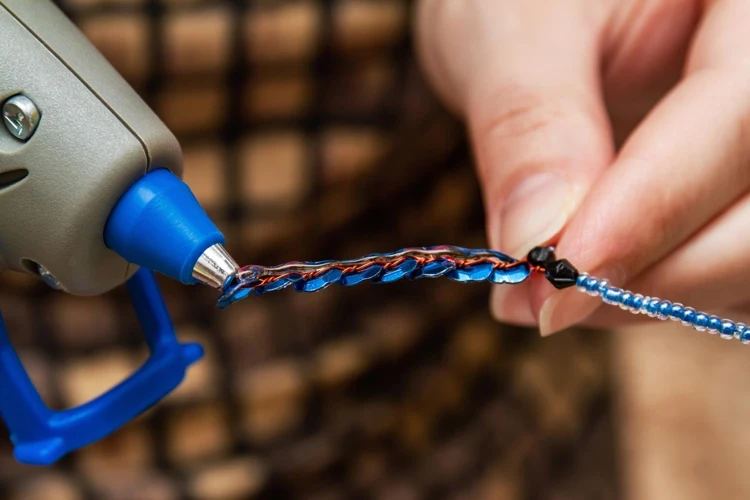
Squeeze the Trigger to Ensure the Glue is Flowing
After inserting the new glue stick into the mounting chamber and heating up your glue gun, it’s important to test your new stick before you start crafting. This step might seem unnecessary, but it’s crucial for ensuring that the glue is flowing correctly, and you won’t end up ruining your project due to a lack of glue.
To test the glue stick, squeeze the trigger of your glue gun several times. Apply gentle pressure to make sure that the glue is flowing smoothly and evenly. If the glue doesn’t come out quickly or evenly, it may be because the glue gun hasn’t heated up enough, or the glue stick may not be inserted all the way.
If you encounter any issues with the flow of your glue, don’t panic. You can try drying your glue faster or experimenting with different temperature settings on your gun to find the optimal heat.
It’s also important to note that different glue guns require different glue stick sizes and types. Make sure that you choose the proper size stick for your gun to ensure the smooth flow of glue. If you’re unsure which size to use, refer to your glue gun’s manual or research the best adhesives for your particular crafting project.
Testing your new glue stick by squeezing the trigger before starting a crafting project can save you time and frustration in the long run. Properly testing the glue flow can help ensure that your project turns out as planned. Remember to use the correct glue stick size, and if you happen to encounter any issues with the glue flow, don’t hesitate to experiment to find the optimal temperature and methods, or check out some fun crafting projects to practice your new skills.
Tips and Tricks for Changing Your Glue Gun Stick
Are you tired of dealing with a messy glue gun stick replacement process? Do you wish you could make the process easier and more efficient? Well, you’re in luck! We’ve gathered some top-notch tips and tricks to help you change your glue gun stick like a pro. By following these special techniques, you’ll be able to make the process a breeze and reduce the frustration that often comes with it. So, let’s dive in and discover the secrets to better, more seamless glue gun stick replacement.
Use a Heat-Resistant Surface
It’s important to observe safety precautions when handling hot glue guns, and one such precaution is to use a heat-resistant surface. This surface should be able to withstand the high temperature of the hot glue without melting or catching fire. Here are a few options for heat-resistant surfaces:
- Silicone Mat: A silicone mat is a popular choice for a heat-resistant surface. Not only can it withstand high temperatures, but the silicone material also keeps the glue from sticking to the surface. Plus, a silicone mat is easy to clean.
- Baking Sheet: A baking sheet is another option for a heat-resistant surface. It can easily withstand the necessary temperature and is likely already in your kitchen. However, it’s important to note that the glue may stick to the baking sheet, so it’s crucial to clean it immediately after use.
- Metal Tray: A metal tray such as a cookie sheet or an oven pan can also work as a heat-resistant surface. However, like with a baking sheet, there is a risk of glue sticking to the surface. So, it’s essential to clean it soon after use.
Using a heat-resistant surface is necessary because hot glue guns can get incredibly hot, and if you put your glue gun down on a surface that isn’t heat-resistant, you run the risk of melting or burning that surface. Not only that, but it can also pose a safety hazard. So, always be sure to place your glue gun on a heat-resistant surface when not in use to protect both your workspace and yourself.
Only Insert What You Need
When changing your glue gun stick, it’s important to only insert what you need. Inserting too much glue can cause it to spill out or create a mess. Here are some tips to avoid over-insertion:
- Cut the Stick to the Proper Length: Before inserting the glue stick, cut it to the appropriate length. This ensures that you’re not inserting more glue than you need.
- Use the Right Size Stick: Ensure that you’re using a glue stick that is the correct size for your glue gun. Inserting a stick that is too large can cause it to jam or create a mess.
- Slowly Insert the Stick: Gently and slowly insert the stick into the mounting chamber. This allows you to observe how much glue is being inserted and avoid over-insertion.
- Remove Any Excess Glue: If you accidentally insert too much glue, use a tool such as pliers or tweezers to remove the excess. Be careful not to touch the glue as it may be hot.
By following these tips, you can ensure that you only insert the necessary amount of glue and avoid creating a mess. Remember, it’s always better to insert too little glue than too much!
When to Change Your Glue Gun Stick
As with any tool, it’s important to know when it’s time to replace certain components to keep it working effectively. The same rule applies to your glue gun. Knowing when to change your glue gun stick ensures that your projects continue without interruption and that the glue is applied in the right consistency. In this section, we’ll discuss the signs to look out for that indicate it’s time to change your glue stick. So, keep reading to make sure you’re on top of things.
The Glue Runs Out
One common reason why you may need to change your glue gun stick is when the glue runs out. It’s important to keep an eye on the amount of glue left in your glue gun, as running out of glue mid-project can be frustrating and inconvenient.
To identify when the glue is running low, keep an eye on the amount of glue left in the glue stick. Check the packaging to see how long the glue stick typically lasts and get a sense of how quickly you go through glue sticks while crafting.
Here are some signs that your glue gun stick is running out:
- Less glue is coming out of your gun with each squeeze of the trigger.
- You can see that the glue stick is visibly shorter than it was when you first inserted it.
- The glue is taking longer to heat up or flow out of the gun.
If you notice any of these signs, it’s time to change your glue gun stick. It’s better to replace the stick proactively rather than waiting until it’s completely empty.
Remember, using an empty glue gun can cause:
- Uneven application of glue
- Difficulty in adhering things together
- Overheating of the gun due to lack of the heat-absorbing properties the stick provides
Keep in mind that using an empty glue stick can also damage the glue gun itself, so it’s better to change the glue stick as soon as you observe the signs that the glue is running low. Always make sure to have extra glue sticks on hand so you can easily replace them when needed.
The Stick Becomes Hard or Brittle
As you continue to use your glue gun over time, you may notice that the stick inside the mounting chamber becomes hard and brittle. This can happen for a variety of reasons, but it generally means that it’s time to replace the stick.
One common cause of this issue is leaving the glue gun plugged in for too long without using it. When the glue stick is exposed to high heat for an extended period of time, it can dry out and become brittle. Another possibility is that the stick has been exposed to air for too long, which can also cause it to harden.
It’s important to replace a hard or brittle stick, as it can negatively impact the performance of your glue gun. When a glue stick is too dry and brittle, it may not melt evenly or flow smoothly through the gun. This can cause it to stick or clump in the mounting chamber, or even clog the nozzle.
To avoid this issue, try to use your glue gun regularly and only heat it up when you’re ready to use it. If you need to step away for a few minutes, unplug the gun to prevent the stick from overheating. Additionally, be sure to store your glue sticks in a cool, dry place to prevent them from drying out.
If you do notice that your glue stick has become hard or brittle, don’t try to use it. Instead, remove the stick as described in this article and replace it with a fresh one. By keeping an eye on the condition of your glue sticks and replacing them as needed, you can ensure that your glue gun works as effectively as possible.
| Causes | Symptoms | Solutions |
|---|---|---|
| Leaving glue gun plugged in for too long without using it | Stick becomes hard and brittle | Replace the stick with a fresh one |
| Stick has been exposed to air for too long | Stick becomes hard and brittle | Replace the stick with a fresh one |
| Stick overheats and dries out | Stick becomes hard and brittle | Replace the stick with a fresh one |
Conclusion
In conclusion, changing the glue stick in your glue gun is a simple process that can be done in just a few steps. Whether you are a DIY enthusiast or a professional crafter, having a good understanding of how to change a glue gun stick will save you time and money in the long run.
Remember to gather all the necessary supplies ahead of time, including the appropriate size of glue stick for your gun. When preparing your glue gun, be sure to unplug it and remove any remaining glue to ensure the new stick adheres properly.
When inserting the new glue stick, take care to only insert what you need and avoid overfilling the mounting chamber. Heat up your glue gun and test your new stick to ensure a consistent flow of glue.
In addition, using a heat-resistant surface and being mindful of when to change your glue stick can help ensure its longevity and high performance. If you find that the glue runs out or the stick becomes hard or brittle, it may be time to change it.
Overall, mastering the process of changing your glue gun stick will give you greater confidence in your crafting and DIY projects. So, gather your supplies and get started on changing your glue stick today!
Frequently Asked Questions
1. Can I use any size glue stick for my glue gun?
No, you must use the correct size glue stick that matches your glue gun. Using the wrong size stick could damage your gun or cause it to malfunction.
2. Can I reuse leftover glue from a glue stick?
No, once a glue stick is used, the glue cannot be reused. It’s best to use a new stick for each project.
3. How long does it take for the glue gun to heat up?
Typically, it takes a glue gun about 5 minutes to heat up. However, some guns may take longer depending on their size and wattage.
4. Can I use different types of glue sticks in my glue gun?
No, it’s essential to use the same type of glue stick as your glue gun. Different types of adhesives may have different melting points, causing damage to the gun or affecting the quality of your project.
5. Can I change the glue stick while the gun is still hot?
No, you must unplug the glue gun and let it cool down before changing the glue stick.
6. Can I touch the hot glue as it comes out of the glue gun?
No, avoid touching the hot glue as it comes out of the glue gun, as it can cause severe burns. Use caution and wear protective gloves if necessary.
7. How do I clean my glue gun after use?
Allow the glue gun to cool completely. Then use a clean, damp cloth to wipe away any glue residue.
8. How do I dispose of used glue sticks?
Used glue sticks should be thrown in the trash, as they cannot be recycled. Always be sure that the glue is completely cooled before disposal.
9. Can I use glue sticks on all surfaces?
No, some surfaces may not be suitable for glue sticks. Always refer to the manufacturer’s guidelines for the best use of your chosen glue stick.
10. How long will a glue stick last?
It depends on the size of your glue gun and the frequency of use. On average, a glue stick can last for several projects before needing to be replaced.