Have you ever found yourself in the midst of an important project, only to realize that you’ve run out of liquid glue? The frustration is real, and surely, you’ve wondered if there is a solution to this common problem. Well, wonder no more! In this article, we’ll explore step-by-step instructions on how to turn your regular glue stick into a handy liquid form using only a few simple ingredients. You’ll be pleasantly surprised at how easy and cost-effective this hack truly is. So, let’s dive right in and discover how to make your own DIY liquid glue!
Why Should You Convert Your Glue Stick into Liquid Glue?
When it comes to crafting and DIY projects, having the right type of glue can make a big difference in the success of your project. While glue sticks may be the go-to adhesive choice for many, there are a variety of reasons why converting them into liquid glue may be beneficial. Whether you need a stronger bond for certain materials or want a different consistency for your projects, making your own liquid glue can be a great solution. In the following sections, we’ll explore the advantages of using liquid glue and walk through a step-by-step guide on how to make it yourself. Plus, we’ll share tips on adjusting the consistency and storing your glue for future use. So, let’s dive in!
Reasons to Consider
There are several reasons why you should consider converting your glue stick into liquid glue.
1. More versatility: Liquid glue can be used for a wider range of projects than a traditional glue stick. It can be used for anything from attaching paper to fabric, to sticking wood to plastic.
2. Better coverage: Liquid glue provides better coverage than glue sticks. It can be applied more evenly and in larger quantities, making it a better option for larger projects.
3. Stronger hold: Liquid glue has a stronger hold than glue sticks, making it the better choice for projects that require a firm bond.
4. Cost-effective: Making liquid glue from glue sticks is a cost-effective way to obtain liquid glue without having to purchase it.
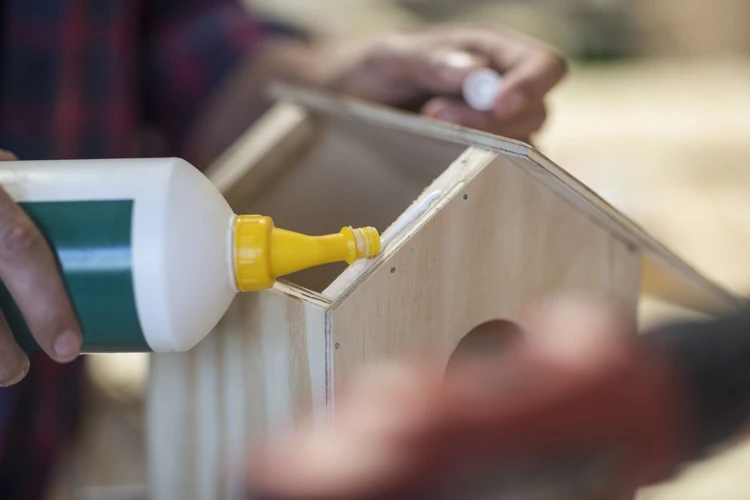
Whether you are working on an art project, DIY home improvement, or everyday household use, liquid glue can be a great resource. For example, when using glue to attach foam core to a display board, liquid glue provides a stronger hold than glue sticks and ensures the project stays in place. Additionally, if you need to attach upholstery foam to wood when repairing furniture, liquid glue is the best option for a secure hold. Knowing how to convert your glue stick into liquid glue is a valuable skill to have for any project.
Benefits of Using Liquid Glue
Liquid glue is a versatile adhesive that has several benefits over other types of glue. Here are some of the benefits of using liquid glue:
- Easy Application: Liquid glue can be easily applied to a wide range of surfaces with precision, making it an ideal adhesive for intricate projects.
- No Mess: Unlike other types of glue that can be messy and difficult to clean up, liquid glue is easy to apply and dries quickly without leaving residue or a sticky residue behind.
- Strong Bond: Liquid glue creates a strong and durable bond between surfaces, making it ideal for a wide range of projects from crafting to DIY home repairs.
- Cost-effective: Liquid glue is an affordable adhesive that can be purchased in large quantities without breaking the bank.
- Can be Colored: Some liquid glues can be colored to match the color of the surfaces being glued, which can be helpful for projects where appearance matters. (Learn How to Color Hot Glue here)
The benefits of using liquid glue make it a popular choice for a wide range of projects. Whether you’re looking to glue upholstery foam to wood (Learn How to Glue Upholstery Foam to Wood here) or make a picture frame (Learn How to Glue Picture Frame Corners here), liquid glue provides a strong and reliable bond that won’t let you down.
What You Will Need to Make Liquid Glue
Are you ready to turn that glue stick into a liquid form? Before getting started, you’ll need to gather a few materials and tools to make the process smooth sailing. Don’t worry though, you won’t need anything too fancy or expensive! With just a few common household items, you can have your very own liquid glue in no time. So, let’s see what you’ll need to get started.
Materials Required: Glue sticks, water or vinegar
Tools Needed: Pot, stirring utensil, container for the liquid glue
If you need a refresher on how to use hot glue, check out our article on how to make hot glue stick to glass.
Materials Required
For making liquid glue from a glue stick, you will need a few materials. Here is a list of materials that you should have:
- Glue Sticks: Choose the type of glue stick you prefer. Most glue sticks are suitable for this, but ensure that they are not quick-drying types.
- Water or Vinegar: Either water or vinegar can be used to mix with the glue. Water is the best choice if you want your glue to dry clear. Vinegar can result in a stronger bond, but it might leave behind some color.
- Container: Use a heat-resistant container to pour the glue mixture into. A glass or metal container would work best for this.
Apart from materials, you also need to have some tools at hand to make the process easier. Here is a list of the tools that you will need:
- Pot: Use a pot to heat up the glue mixture. Preferably choose a non-stick pot, so that you won’t have a hard time cleaning it after use.
- Stirring Spoon: You will require a spoon to stir the glue mixture gently. Use a spoon made with a non-stick material, so that it doesn’t stick while you stir.
- Knife: You will need a knife to cut the glue sticks into small pieces. Use a sharp knife to make it easier to cut the glue sticks.
Make sure you have all the materials and tools mentioned above before you begin the process of making liquid glue from a glue stick. If you don’t have any of these items, you can find them at any craft stores or order them online.
Tools Needed
When it comes to converting your glue stick into liquid glue, you’ll need a few tools to get the job done right. Here are the essential tools required to make liquid glue:
- Pot or Saucepan: You’ll need a saucepan or pot that’s big enough to hold the amount of glue sticks you’re converting into liquid glue.
- Water or Vinegar: You’ll need either distilled water or white vinegar. Distilled water is the best option, but white vinegar can be used if you don’t have distilled water on hand.
- Knife or Scissors: You’ll need a knife or scissors to cut the glue sticks into small pieces that’ll melt easily.
- Stirring Utensil: A spoon or wooden stick will work well for stirring the glue mixture.
- Container: You’ll also need a container to pour the liquid glue into once it’s ready.
Using a pot or saucepan that’s specifically for crafting is ideal, so you don’t run the risk of having glue residue on your cooking equipment. Remember to choose a pot or saucepan that is easy to handle and clean, but also big enough to fit the glue sticks and enough water or vinegar. Avoid using a hot glue gun for this process, as the temperature is too high and excessive heat can scorch the glue. If you need to learn how to use a glue gun, you can check out our guide on how to turn on a hot glue gun.
One other consideration is that cutting glue sticks with scissors can be difficult, so using a sharp knife with a serrated or non-serrated edge can be useful. If you’re looking to glue foam core, you’ll need a specific type of glue and technique, so make sure to check out our guide on how to glue foam core.
Once you have all the necessary tools, you’re ready to start the process of converting your glue stick into liquid glue. With the right tools and a little bit of patience, you can make high-quality liquid glue that will work for all your crafting and household needs.
Step-by-Step Guide to Making Liquid Glue
So, you’ve decided to try your hand at making your very own liquid glue from a glue stick. With just a few materials and tools, you’ll be amazed at how simple it is to create a versatile adhesive that can be used for all sorts of projects. In this section, we’ll walk you through the step-by-step process of transforming a glue stick into liquid glue. So put on your crafting gloves and let’s get started!
Step 1: Cut the Glue Sticks into Small Pieces
The first step in turning a glue stick into liquid glue is to cut the sticks into small pieces. This is important to help the glue melt quickly and evenly. You can use a sharp knife or scissors to cut the glue sticks into small, manageable pieces. It is recommended that the pieces are approximately the size of a pea.
Make sure to take proper safety measures when cutting the glue sticks. Because the glue sticks are made of plastic, they can be a bit tough to cut through. Be careful not to cut your fingers while doing this.
If you’re not sure how many glue sticks you should use, it will depend on the amount of glue you need. A good rule of thumb is to use one glue stick for every 1/2 cup of liquid glue that you want to make.
Tip: If you are planning to do a project that requires more glue, be sure to have enough glue sticks on hand. You don’t want to have to stop in the middle of your project to cut more glue sticks.
Now that the glue sticks are cut into small pieces, it’s time to move on to the next step and prepare the pot with water and vinegar.
Step 2: Add Water or Vinegar to a Pot
Step 2: To make liquid glue from glue sticks, you need to add water or vinegar to a pot. The amount of water or vinegar you need will depend on the number of glue sticks you’re using. You can add either vinegar or water to the pot. Vinegar is mildly acidic and can help preserve the glue for longer periods of time, but it may also alter the color of the glue slightly. Water is a neutral option that won’t affect the color of the glue.
| Materials Required | Tools Needed |
|---|---|
| – Glue sticks – Water or Vinegar |
– Pot – Spoon – Measuring cup – Container for storage |
Before adding water or vinegar, measure how much liquid you’ll be adding for each glue stick. A good rule of thumb is to add 1 tablespoon of liquid for every glue stick. For example, if you’re melting three glue sticks, you’ll need to add 3 tablespoons of water or vinegar to the pot.
Pro Tip: It’s essential not to add too much water or vinegar, as this can make the glue too watery and reduce its adhesive strength.
Now that you’ve added the liquid to the pot, it’s time to move onto the next step, which is to put the glue pieces into the pot. Click here to learn more about gluing foam core.
Step 3: Put the Glue Pieces into the Pot
After cutting the glue stick into small pieces, the next step in making liquid glue is putting the pieces into a pot. This can be any pot that is safe to use on a stove or hot plate. You don’t need to buy a special pot, just use one that you already have in your kitchen.
Proper handling: Be careful when handling the glue pieces to avoid getting them stuck to your fingers. You can use a spoon or a small plastic bag to transfer the pieces from the cutting board to the pot.
Quantity of glue in the pot: The amount of glue pieces to place into the pot should correspond to how much liquid glue you want to make. Generally, two or three glue sticks will be enough to make a small amount of liquid glue.
Choosing the right pot: When choosing a pot, make sure it’s deep enough to prevent overflowing. It’s important to have enough space in the pot to accommodate the glue and water or vinegar as it boils.
Once you have transferred the glue pieces to the pot, it’s time to add water or vinegar. You can use either of these substances to turn the glue into liquid form.
If you prefer a stronger adhesive, it is best to use vinegar instead of water. Vinegar will create a stronger bond when using the liquid glue. However, if you don’t like the strong smell of vinegar, you can use water instead.
Materials to add to the pot: Depending on your preference, you may use water or vinegar in equal ratio to the amount of glue sticks you have. For 2-3 glue sticks, you can add about 1 cup of water or vinegar.
Tips: Make sure there are no lumps of glue left. Stir the mixture well to make sure the glue pieces dissolve completely.
After adding water or vinegar and glue pieces into the pot, it’s important to stir for even distribution. Once stirred, turn the stove on to low heat and gently boil the mixture.
You will soon begin to notice the glue pieces melting in the pot. The water or vinegar will also start to vaporize. This will turn the glue into a thick liquid substance.
It’s important to stir the mixture regularly to prevent the glue from sticking to the bottom and burning. Refer to our article on /hot-glue-burn-what-to-do/ if you accidentally burn yourself.
It’s important to continue heating and stirring the mixture until it turns into a uniform liquid. This will take around 10-15 minutes.
Final outcome: At the end of this process, all the glue should have melted, and you will be left with glue liquid in the pot. You can now proceed to the next step of pouring the liquid into a container.
Refer to the next section on Tips for Making the Perfect Consistency of Liquid Glue to learn how to achieve the right consistency of your liquid glue.
Step 4: Heat the Pot and Stir Gently
After putting the glue pieces into the pot, it’s time to move on to the next stage. To create a smooth consistency, heat the pot over low to medium heat. This will slowly melt the glue sticks and allow you to stir the mixture smoothly. Stirring is essential during this process as it ensures that the mixture is well combined and prevents the glue from burning.
Be sure to stir gently as you don’t want to create any air bubbles in the mixture. Bubbles can cause problems when using the liquid glue, and it can impact the quality of your work. As you continue to stir, you will start to see a more uniform consistency throughout the mixture. Keep stirring until the glue has melted completely and has reached the desired thickness.
It’s important to note that the temperature of the pot should not be too high. If the pot gets too hot, the mixture will start to burn, and the consistency will be compromised. For more information on temperature control when working with glue, check out our helpful guide on how hot is a glue gun.
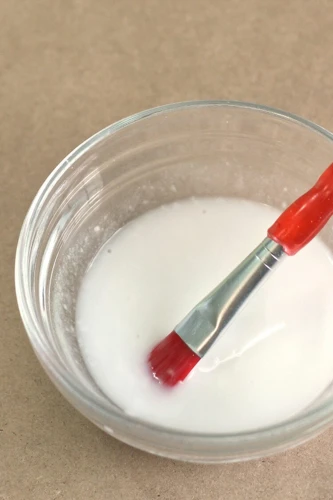
Step 5: Pour the Glue into a Container
Once the glue reaches the desired consistency, it’s time to pour it into a container. You can use any container that you have available, as long as it’s sealable and will not leak. A mason jar is a great option because it has a tight-fitting lid, is reusable, and you can easily see how much glue you have left.
It is important to pour the glue carefully to avoid any spills and messes. One way to do this is by using a funnel to pour the glue directly into the container. If you don’t have a funnel available, you can also use a small ladle or spoon to transfer the glue from the pot to the container.
Be sure to label the container with the date and contents so that you can easily identify it in the future. Before you seal the container, make sure that the glue has cooled down completely. This will prevent the container from getting damaged or melted.
Once the glue is in the container, you can begin using it for various projects. It is important to note that the glue may dry out if it is left unused for an extended period of time. To avoid this, keep the container sealed tightly when not in use, and store it in a cool, dry place.
If you need to use the glue again and find that it has become too thick, you can add a small amount of water or vinegar to thin it out. Before using the glue again, stir it well to combine the added liquid.
If you are new to working with glue, check out these helpful resources:
Now that you have your own liquid glue, it’s time to get creative and start using it for all kinds of projects!
Tips for Making the Perfect Consistency of Liquid Glue

Now that you’ve learned how to make liquid glue from a glue stick, it’s important to ensure that you achieve the perfect consistency. This will ensure that your liquid glue is effective and easy to use for various projects and applications. To help you achieve this, here are some useful tips for achieving the perfect consistency of your liquid glue. By following these tips, you can create a high-quality adhesive that will make your DIY projects and everyday tasks much easier.
How Much Water/Vinegar to Use
One of the most important aspects of making liquid glue from a glue stick is getting the consistency just right. Without the right amount of water or vinegar, the glue may be too thick or too thin, making it difficult to work with. Here are some tips for how much water or vinegar to use:
- Water: If you’re using water, start with a 2:1 ratio of water to glue stick pieces. This means 2 cups of water for every 1 cup of glue stick pieces. You can adjust this ratio as needed to achieve your desired consistency. Remember that the more water you add, the thinner and less strong the glue will be.
- Vinegar: If you’re using vinegar, start with a 1:1 ratio of vinegar to water. This means equal parts vinegar and water. Again, you can adjust this ratio as needed to achieve your desired consistency. Vinegar can help to make the glue stronger and can also help to prevent mold and bacteria growth.
- Experiment: The amount of water or vinegar you use will depend on the brand and type of glue stick you are using, as well as your personal preference for consistency. It may take some trial and error to find the perfect ratio for your needs. Start with a small batch and adjust as needed.
Remember that the glue will thicken as it cools, so it’s better to err on the side of slightly thinner glue. You can always add more glue stick pieces later to thicken it up if needed. With the right amount of water or vinegar, you’ll be able to make high-quality liquid glue that can be used for a variety of purposes.
How to Adjust Consistency
When making liquid glue, getting the right consistency is crucial for it to function effectively. Here are some steps on how to adjust the consistency of your glue:
- Add more water or vinegar: If the glue is too thick, slowly add more water or vinegar until it reaches the consistency desired. Be careful not to add too much at once, as this can cause the glue to become too runny.
- Add more glue: If the glue is too runny, gradually add more glue to the mixture. This will help thicken the glue and get it to the consistency you require.
- Stir in small amounts of cornstarch: Cornstarch can help thicken liquid glue without disrupting its adhesive properties. Mix small amounts into the glue mixture until the desired consistency is achieved.
- Let it simmer: If the glue is too thin, allow it to simmer on low heat until some of the liquid evaporates. This will help thicken the glue and give it a better consistency.
Remember, adjustments should be made gradually until the perfect consistency is achieved. Don’t rush the process or try to make too many changes at once. By following these steps, you can ensure that your liquid glue is the right consistency for whatever project you have in mind.
How to Test Your Liquid Glue
After making your own liquid glue, it’s important to test its effectiveness before using it on any important projects. Here are some simple steps to test the quality of your homemade liquid glue:
- Perform a bond test: Apply a small amount of glue to two surfaces and press them together. Wait for the glue to dry and then try to separate the surfaces. If the bond is strong, the surfaces should not come apart easily. If they do, the glue may need to be adjusted for consistency.
- Check for flexibility: Once the glue has dried on the surfaces, check to see if it remains flexible. If it becomes brittle, it may not be suitable for certain projects that require flexibility, such as attaching fabric to other materials.
- Test with different materials: Apply the glue to different materials such as paper, wood, and plastic to test its effectiveness on a variety of surfaces. This will help determine if the glue has a wide range of applications or if it works better on certain materials.
- Try different temperatures: Finally, try testing the glue in different temperatures to see if it still maintains its strength. Apply the glue to a surface and leave it in a room with high heat or humidity for a few hours. If the glue holds up, it’s a good sign that it will remain effective under different conditions.
By following these simple tests, you can ensure that your homemade glue is up to the task for all of your DIY projects.
How to Store Your Liquid Glue
You’ve made your own liquid glue using glue sticks and water or vinegar and now you’re wondering how to store it properly. It’s important to ensure that your homemade glue stays usable for as long as possible, especially if you’ve made a large batch. In this section, we’ll provide some useful tips for storing your liquid glue and preventing bacterial growth. Read on to learn more.
How to Prevent Bacterial Growth
When making liquid glue, it is important to take steps to prevent bacterial growth in order to extend its shelf life and ensure its effectiveness when using it. Here are some tips to prevent bacterial growth when making and storing your liquid glue:
- Cleanliness is key: Before making your liquid glue, make sure your pot, stirring utensil, and container for storing the liquid glue are thoroughly cleaned and sanitized. Use a solution of water and vinegar to clean them, and make sure you dry them properly before using them.
- Use distilled water: When adding water to the glue sticks, use distilled water instead of tap water. Distilled water has fewer contaminants that can cause bacterial growth.
- Add vinegar: Add a teaspoon of vinegar to the pot when heating the glue mixture. The vinegar acts as a natural preservative, preventing bacterial growth.
- Store in an airtight container: After making the liquid glue, store it in an airtight, sterile container to prevent bacteria from entering the mixture.
- Keep in a cool, dry place: Store the liquid glue in a cool, dry place, away from sunlight and moisture. This will help prevent bacterial growth and prolong the shelf life of the liquid glue.
By taking the above preventive steps, you can ensure that your homemade liquid glue stays fresh and effective for a longer period of time, making it a valuable and cost-effective tool in your DIY arsenal.
How to Keep Your Glue Liquid
Keeping your liquid glue in good condition is important to ensure its effectiveness whenever you need it. Here are some tips to help keep your glue liquid:
- Airtight Container: Store your liquid glue in an airtight container to prevent it from drying out. This will help preserve the glue’s effectiveness and maintain its adhesive power.
- Avoid Extreme Temperature: Exposing your glue to extreme temperatures can cause it to change consistency or dry out. Store it somewhere where the temperature is stable, without any extreme fluctuations.
- Do Not Shake: Shaking the container of liquid glue can cause its components to separate. This can affect the glue’s effectiveness, so it is better to avoid unnecessary movement of the container.
- Store Upside Down: To prevent the glue from drying out or thickening, store the container upside down. By doing this, the glue will settle on the cap, preventing air from entering the container. This will also make it easier to dispense the glue evenly.
- Keep it Clean: Always make sure that the tip of the glue bottle or container is clean and free from dried glue. This will prevent the glue from clogging the nozzle, which can make it difficult to dispense or cause the glue to dry out.
By following these tips, you can ensure that your liquid glue remains effective and in good condition for future use.
Uses of Liquid Glue and Creative Ideas
Are you wondering what to do with your newly made liquid glue? The possibilities are endless! Liquid glue can be used for a variety of DIY projects, from simple household repairs to creative art projects. Let’s explore some unique and creative ways you can use your newly made liquid glue. Whether you are an artist or a DIY enthusiast, you will surely find some inspiration in the following ideas. So, let’s get started!
DIY Crafts and Art Projects
If you’re someone who loves DIY crafts and art projects, then you will love the idea of making your own liquid glue. Not only is it an inexpensive alternative to store-bought liquid glue, but it’s also versatile and can be used for a variety of projects. Here are some creative ideas for using your homemade liquid glue:
1. Paper Crafts: Liquid glue is a perfect adhesive for paper crafts, such as scrapbooking, card making, or origami. It adheres paper smoothly and dries clear, making it perfect for intricate projects where the glue needs to be hidden.
2. Fabric Art: Do you love creating fabric art, such as quilting or applique? Liquid glue can be used to hold fabric pieces together while you sew them, making your project more manageable and precise.
3. Jewelry Making: Liquid glue is also useful for jewelry making. It can be used to attach beads, sequins, and other embellishments to your jewelry pieces. Plus, it dries clear, so you don’t have to worry about any unsightly glue spots.
4. Home Décor: You can use your homemade liquid glue to make home décor items, such as flower vases, picture frames, or decorative boxes. It is an excellent adhesive for attaching items to surfaces, such as wood, plastic, or glass.
5. Kids Crafts: Making liquid glue can be a fun activity for kids, and it’s safe and non-toxic. Once the glue is ready, kids can use it to create all kinds of crafts, such as paper mache, slime, or even homemade stickers.
As you can see, homemade liquid glue is a versatile material that can be used for a variety of DIY crafts and art projects. With your new liquid glue, you can unleash your creativity and start making beautiful and functional pieces.
Everyday Household Uses
Liquid glue is a versatile adhesive that can be used for a variety of purposes around the home. Here are some everyday household uses for liquid glue:
| Use | Description |
|---|---|
| Repairing broken items | Got a broken plate, vase, or figurine gathering dust in the attic? Use liquid glue to mend the pieces back together. Liquid glue is strong and will hold the pieces together tightly for a long-lasting repair. |
| Sealing envelopes and packages | Forgot to buy mailing labels or tape? Use a small amount of liquid glue to seal your envelopes and packages shut. This can be especially useful if you are sending important documents that you don’t want to risk coming open during shipping. |
| Creating paper mache objects | Want to make a piñata, mask, or sculpture? Use liquid glue mixed with water to create a papier mache paste. Dip strips of newspaper in the paste and lay them over a mold or form to create your desired shape. Once the paste dries, you can paint or decorate your creation however you like. |
| Labeling household items | Want to keep your kitchen, office, or craft room organized? Use liquid glue to affix labels to jars, boxes, and drawers. Liquid glue is a strong adhesive and will keep your labels firmly in place. |
| Creating a glitter or confetti effect | Want to add some sparkle to your party decorations or greeting cards? Use liquid glue to create a glitter or confetti effect. Apply the glue to your item in the shape or design you desire, and then sprinkle glitter or confetti over the glue. Allow the glue to dry completely before shaking off any excess glitter. |
These are just a few examples of the many ways you can use liquid glue around your home. Get creative and see what other uses you can come up with!
Cleaning Up After Making Liquid Glue
After making liquid glue, it is important to clean up the area where the process was carried out. This will help to avoid any accidents or incidents involving the glue that may occur in the future.
Wipe any Excess Glue
When you are done with the process of making liquid glue, ensure that you remove any residual glue left behind. Use a damp cloth or paper towel to wipe any excess glue that may have spilled over the surface. You can also use a scraper to remove any stubborn glue residue.
Clean the Pot and Tools Used
The pot and tools used in the process of making liquid glue should also be cleaned. Fill the pot with clean water and add some soap. Let it soak for a while and then scrub the pot and tools with a brush. Rinse everything with clean water and let them dry before storing them.
Dispose of Glue Pieces and Cleaning Materials Properly
The glue pieces and any cleaning materials used during the process should be disposed of properly. Do not dispose of them in the sink or trash can as they could cause clogs or contaminate the environment. Instead, dispose of them in a recycling bin or other appropriate disposal method.
Wash Your Hands and Work Area
Finally, wash your hands and the work area with soap and water to prevent any residual glue from getting onto other surfaces or materials. This will also help to prevent any bacterial growth from occurring.
By following these simple cleaning steps, you can ensure that you avoid any potential hazards associated with making liquid glue. It is important to maintain cleanliness and proper storage to prevent any accidents or incidents from happening in the future.
Conclusion
After following the steps outlined in this article, you should now be able to easily turn your glue sticks into liquid glue. Not only is it a cheaper alternative to buying ready-made liquid glue, but it’s also a fun DIY project that can yield great results.
Remember to use caution when heating up the pot of water or vinegar and stirring the glue pieces. It’s important to maintain a gentle heat and avoid overheating, which can cause the glue to burn and lose its consistency.
Once you’ve made your liquid glue, store it in a clean and airtight container to prevent bacterial growth. You can also adjust the consistency of your glue by adding more or less water/vinegar depending on your needs.
The uses of liquid glue are endless – from DIY crafts and art projects to everyday household tasks. You can even get creative and mix in food coloring or glitter to make your glue more unique.
Overall, converting your glue stick into liquid glue is a simple and rewarding process that can save you money and give you a sense of satisfaction. Give it a try and see what creative projects you can come up with using your homemade liquid glue.
Frequently Asked Questions
1. Can I use any type of glue stick for making liquid glue?
It’s best to use non-toxic glue sticks for safety reasons. Some glue sticks may also contain ingredients that do not dissolve well in water or vinegar, making it difficult to achieve the right consistency of liquid glue.
2. How much water or vinegar should I use?
A good rule of thumb is to use equal parts of glue and water/vinegar, but you can adjust the ratio depending on the thickness and consistency you desire.
3. What tools do I need to make liquid glue?
You will need a pot, a stirring spoon, and a container to pour the liquid glue into. Optional tools include a thermometer and a fine-mesh sieve to remove any impurities.
4. Can I add food coloring to liquid glue?
Yes, you can add a few drops of food coloring to the mixture before heating it up. Be careful not to add too much, as it may affect the consistency and adhesive properties of the glue.
5. How long does it take to make liquid glue?
The entire process of making liquid glue can take about 20 to 30 minutes, including prep time and heating up the glue mixture.
6. Can I use liquid glue instead of glue sticks for my projects?
Yes, liquid glue can be a versatile alternative to glue sticks depending on the project. However, keep in mind that liquid glue may take longer to dry and can be messier to apply in some cases.
7. How do I prevent bacterial growth in my liquid glue?
You can prevent bacterial growth by adding a small amount of white vinegar to the mixture before heating it up. This can also help extend the shelf life of your liquid glue.
8. Is it safe to use liquid glue for young children?
Yes, as long as you use non-toxic glue sticks and supervise young children while they use the glue. However, keep in mind that liquid glue can be messier to use and may take longer to dry than glue sticks.
9. Can I use liquid glue for outdoor projects?
It depends on the type of liquid glue and the outdoor conditions. Some liquid glues may not be waterproof or weather-resistant, so be sure to read the label and test it before using it for outdoor projects.
10. How long can I store liquid glue?
You can store liquid glue for several weeks to a few months if you keep it in an airtight container and store it in a cool, dry place. However, keep in mind that the adhesive properties may weaken over time.