Have you ever tried to glue foam to cardboard, only to have it come apart shortly after? Maybe you’re working on an art project, or creating custom packaging. Whatever the reason, getting these two materials to bond can be a frustrating process. But don’t worry, with the right materials, tools, and techniques, you can successfully glue foam to cardboard and have it stay in place. In this comprehensive guide, we’ll walk you through the steps to achieve a strong bond and give you tips and tricks to make the process smooth and easy. So, let’s dive in and make this perplexing task a thing of the past.
Materials You’ll Need
Before starting to glue foam to cardboard, you should gather all necessary materials. To ensure the best results, you’ll need foam and cardboard as well as appropriate adhesive and application tools. It’s important to choose the right type of adhesive and prepare both surfaces for bonding. To learn more about bonding various materials creatively, check out our article on how to glue paper to wood letters.
Foam and Cardboard
Foam and cardboard are two essential materials required for many DIY projects and crafting activities. Foam is a versatile material that can be utilized to make a variety of items such as costumes, props, and even cosplay outfits. It is a lightweight, flexible, and durable material that can be easily shaped into different forms.
Cardboard, on the other hand, is a sturdy, readily available material that can be used for various purposes, including making boxes, models, and displays. When these two materials are combined, they can create a strong and durable structure that can be used for a variety of applications.
Foam comes in different varieties such as open-cell foam, closed-cell foam, and memory foam. Open-cell foam is soft and spongy, while closed-cell foam is stiffer and more rigid. Memory foam, on the other hand, is a special type of foam that can mold itself to the shape of the body.
Cardboard also comes in different forms such as corrugated cardboard, cardboard sheets, and cardboard tubes. Corrugated cardboard is the most common type of cardboard and is made up of multiple layers that make it stronger and more durable.
Before starting the gluing process, it is essential to choose the right type of foam and cardboard for your project. If you are unsure which type to use, it is best to consult with an expert or refer to online resources.
Pro Tip: If you accidentally break or damage your foam while handling it, do not worry. You can easily fix it using a hot glue gun. Here is our guide on how to fix a glue gun that will help you repair your foam in no time.
Adhesive and Application Tools
When it comes to gluing foam to cardboard, having the right adhesive and application tools is crucial for achieving a strong bond. Here are some adhesive and application tools options that you can consider:
- Spray Adhesive: Sprays are fast-drying and come in various formulas suited for different materials and surfaces. They are easy to use, but the overspray can be messy and require proper ventilation. For example, you can use spray adhesive ArtSkills brand if you need a strong bonding.
- Hot Glue Guns: Hot glue guns are quick, versatile, and offer an instant bond. They are ideal for small, detailed projects and can be used on foam and cardboard. For best results, use a low-temperature gun and choose glue sticks according to the foam thickness.
- White Glue: White glue is a budget-friendly, water-based adhesive that is easy to clean and non-toxic. It works well for lightweight foam attachments to cardboard and other porous surfaces. However, it’s not recommended for long-term outdoor use or heavy-duty projects.
As for the application tools, here are some options:
- Brushes: Use a foam or bristle brush to apply white glue evenly onto the foam and cardboard surfaces, ensuring that there are no clumps or gaps.
- Spatula: A spatula or trowel is ideal for applying spray adhesive or a hot glue stick onto large foam surfaces. Use it to spread the adhesive in thin, consistent layers.
- Tape: For smaller foam pieces, you can use tape to hold them in place while you apply the adhesive. This will help prevent the foam from shifting or sliding around.
Knowing what adhesive and application tools to use will simplify the foam to cardboard bonding process and ensure that you achieve a durable and secure bond.
Prepping the Surfaces
Before gluing foam to cardboard, it’s important to properly prepare the surfaces for maximum adhesion. Even the best adhesive won’t stick well if the surfaces are dirty or slick. This is why prepping the surfaces is a crucial step in the process. In this section, we’ll cover some tips and techniques for prepping both the foam and cardboard surfaces. By following these steps, you’ll ensure a strong bond that will last. And if you’re interested in other glue-related DIY projects, you may want to check out how to make glue gun sticks at home for a fun and practical activity.
Clean and Dry
Clean and Dry
Before gluing the foam to cardboard, it’s essential to have a clean and dry surface to achieve a secure bond. Any dirt or moisture can cause the adhesive to weaken, leading to the foam falling off the cardboard prematurely.
To prepare the surfaces for gluing, follow these steps:
- Clean the foam and cardboard: Use a soft cloth or paper towel to remove any dust, dirt, or debris from the foam and cardboard surfaces. You can also use a vacuum cleaner with a soft-bristled brush attachment to suck away any loose particles.
- Dry the surfaces: Make sure that the foam and cardboard are completely dry or else the adhesive won’t stick. Use a hairdryer or let them air dry for several hours before proceeding with the gluing process. If there are any stubborn stains or moisture spots, you can use a clean cloth or paper towel to dry them.
By cleaning and drying the foam and cardboard before applying the adhesive, you’ll ensure a strong bond that will last a long time. Now that the surfaces are prepped and ready, it’s time to choose the right adhesive for the job.
Sand and Rough Up
When gluing foam to cardboard, it is important to sand and rough up the surfaces to ensure a stronger bond between the materials. Sanding the surfaces will create a rough texture that allows the adhesive to grip onto the surfaces better.
To sand the foam and cardboard, you will need sandpaper with a medium grit. Sandpaper with a grit of 80-120 is ideal as it is not too fine or coarse. You can use a sanding block to ensure that the sandpaper covers the surface evenly and to avoid uneven sanding.
Begin by sanding the foam by rubbing the sandpaper gently in circular motions over the surface. Make sure to sand all areas of the foam that will come into contact with the cardboard. Once you have finished sanding the foam, brush away any debris or dust with a soft-bristled brush or cloth.
Next, use the sandpaper to rough up the surface of the cardboard. Take care not to sand too hard as this can damage the cardboard. Sand the cardboard in the same circular motion as the foam and make sure to cover all areas that will come into contact with the foam. Brush away any dust or debris with a soft-bristled brush or cloth.
It is important to note that if you are working with delicate foam or cardboard, sanding may not be necessary or appropriate. In such cases, skip this step and proceed to the next.
By sanding and roughing up the surfaces, you create a better environment for the adhesive to bond with the foam and cardboard. This step can significantly improve the strength and durability of the bond.
Now that you have prepped the surfaces, it is time to choose the right adhesive. Continue reading the article to learn about the different adhesives available for this project.
Anchor text: how to glue photos to wood
Choosing the Right Adhesive
When it comes to gluing foam to cardboard, choosing the right type of adhesive can make all the difference in achieving a secure and long-lasting bond. Different adhesives have varying degrees of flexibility, strength, and dry time, so it’s important to select the one that suits your specific project needs. In this section, we will explore some of the most commonly used adhesives for foam and cardboard bonding, such as spray adhesives, hot glue guns, and white glue. We’ll also discuss the pros and cons of each option, so you can make an informed decision on which one to use.
Spray Adhesives
When it comes to gluing foam to cardboard, spray adhesives can be a quick and easy option. These adhesives typically come in aerosol cans and create a fine mist when sprayed onto surfaces. They can be a good choice for larger pieces of foam, or for when you need to cover a large area of cardboard.
To use spray adhesives, follow these steps:
- Step 1: Work in a well-ventilated area to avoid inhaling fumes from the aerosol spray.
- Step 2: Shake the can well before use.
- Step 3: Spray a light, even coating of adhesive onto the back of the foam. Be careful not to oversaturate the foam, as this can cause it to warp or become misshapen.
- Step 4: Wait a few seconds for the adhesive to become tacky.
- Step 5: Carefully place the foam onto the cardboard and press down firmly.
- Step 6: Smooth out any wrinkles or bubbles in the foam.
Keep in mind that spray adhesives can be difficult to control, so it’s important to use them carefully and avoid spraying too much adhesive onto the surfaces. If you accidentally spray too much, you can try wiping away the excess with a clean, dry cloth.
While spray adhesives can be a convenient choice, they may not be the best option for securing very small pieces of foam or for creating a very strong bond. For these situations, you may want to consider using a different type of adhesive, such as a hot glue gun or white glue.
If you want to learn how to make a pipe out of a glue stick, you can check out our article on “How to Make a Pipe out of a Glue Stick”.
Hot Glue Guns
Using Hot Glue Guns for Foam to Cardboard Bonding
Hot glue guns offer a quick and easy solution to bonding foam to cardboard. Hot glue bond is strong and dries quickly. However, there are some things to consider when using a hot glue gun.
Firstly, hot glue guns can cause burns to the skin. It is important to use the glue gun with caution and keep it away from children. Secondly, be careful when using a hot glue gun as it can produce a lot of heat and create a mess.
When using a hot glue gun for bonding foam to cardboard, it is important to choose the right type of glue stick. Look for “low temperature” or “multi-temperature” sticks to prevent the foam from melting or deforming.
Advantages
– Quick and easy bonding solution
– Strong bond
– Dries quickly
Disadvantages
– Can cause burns
– Messy and requires some level of skill
– Can produce a lot of heat and melt foam if the wrong type of glue stick is used
To use a hot glue gun for foam to cardboard bonding, follow these steps:
| Step 1: | Insert the appropriate glue stick into the glue gun following the manufacturer’s instructions. |
| Step 2: | Plug in the glue gun and let it heat up. |
| Step 3: | Hold the glue gun at an angle and apply a small amount of glue to the foam in a zigzag pattern. |
| Step 4: | Quickly and gently press the foam onto the cardboard in the desired location. |
| Step 5: | Hold the foam in place for a few seconds to allow the glue to dry and bond. |
| Step 6: | Repeat steps 3-5 until all the foam is bonded to the cardboard. |
| Step 7: | Unplug the glue gun and let it cool down before storing it away. |
Fun Fact: Hot glue can be used for a variety of crafts and projects. You can even make fake water with hot glue! Check out this article to learn how.
Hot glue guns are a great option for bonding foam to cardboard quickly and easily. Just remember to use caution and choose the right type of glue stick.
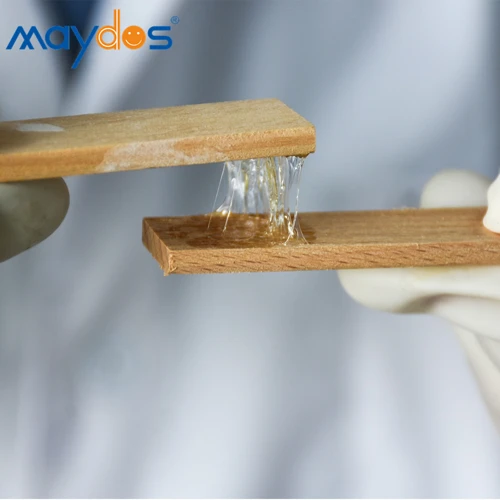
White Glue
White glue, also known as school glue or craft glue, is another option for gluing foam to cardboard. This type of glue dries clear and is easily accessible at any craft or office supply store. Plus, because it’s water-based, it’s easy to clean up if you make a mistake.
When using white glue, follow these steps:
- Apply the glue to the foam and cardboard using a small brush or a toothpick.
- Spread the glue evenly across the surface of both the foam and cardboard, making sure to cover the edges and corners well.
- Place the foam on the cardboard and press it down firmly to ensure a good bond.
- Use masking tape or clips to keep the foam and cardboard in place while the glue dries.
- Be patient and allow the glue to dry completely before moving or manipulating your project.
While white glue can be an effective option, it may not be the best choice for larger or heavier foam objects, as it may not provide enough stability or support. In such cases, a stronger adhesive like a spray adhesive or hot glue gun may be more appropriate.
If you’re looking for another creative use for your white glue, check out our article on how to use a glue gun for crafts.
Applying the Glue
When it comes to applying the right adhesive to glue foam to cardboard, there are several things to consider. You must first choose the appropriate glue, based on the materials you’re working with and the application method. In this section, we’ll go over the three most popular types of glue for foam and cardboard, and how to apply them. Once you’ve read this section, you’ll be ready to bond the foam to the cardboard. Let’s dive in!
Using Tape to Hold the Foam in Place
Using tape to hold the foam in place can be a helpful technique when trying to glue foam to cardboard. This is especially relevant if you’re dealing with a larger piece of foam and want to ensure it stays in place before the glue sets. Double-sided tape is ideal for this purpose, as it can easily hold the foam in place while you apply the adhesive.
To use this technique, first, apply a strip of double-sided tape along the edge of the foam. Then, press the foam onto the cardboard in the desired location. The tape will hold the foam securely in place, allowing you to focus on applying the adhesive without worrying about the foam shifting.
Once your foam is in place, you can then begin to apply your chosen adhesive. Just remember to follow the manufacturer’s instructions for the specific adhesive that you’re using.
Note: If you don’t have any double-sided tape on hand, you can also use regular masking tape or painter’s tape. While not as strong as double-sided tape, these options can still provide some holding power while you apply the adhesive.
To learn how to make your own glue gun sticks at home, check out our article on how to make glue gun sticks at home. Alternatively, if you need to fix a bike tube with super glue, check out our article on how to fix a bike tube with super glue.
Applying Adhesive to the Foam
When it comes to applying adhesive to the foam, you have a few options. It’s important to choose the right adhesive based on the type of foam you’re using and the type of surface it will be adhered to. One popular option is spray adhesive, which can be found at most craft or hardware stores. Another option is hot glue, which is great for a quick-drying and secure hold.
To use spray adhesive on the foam, start by placing the foam on a protected and stable surface. Shake the can of adhesive well, then spray an even layer onto the foam. Be sure to hold the can at least 6 inches away from the foam to prevent oversaturation. Then, use a spreader or your fingers to even out the layer of adhesive.
If using a glue gun, wait for it to heat up fully before applying adhesive to the foam. Apply a line of glue along the edge or surface of the foam, being careful not to use too much as it can cause the foam to warp or shrink. You can also use a craft stick or a popsicle stick to spread the glue out evenly.
It’s important to note that white glue is not recommended for gluing foam to cardboard. It does not have a strong enough hold and can cause the foam to wrinkle or buckle. If you’re unsure which adhesive to use, consider testing each one on a small, inconspicuous area of the foam before proceeding.
Once you’ve applied the adhesive to the foam, let it dry for a few seconds or as indicated on the product label. Be sure to read the label for other drying instructions and precautions.
After you’ve applied the adhesive to the foam, move on and refill your glue gun if necessary or check how to glue foam rubber to wood in our other article.
Applying Adhesive to the Cardboard
When applying adhesive to the cardboard, it is best to use a notched trowel or a paintbrush for even and controlled application.
| Adhesive Type | Application Tool |
|---|---|
| Spray Adhesive | Notched Trowel |
| Hot Glue Gun | Notched Trowel or Paintbrush |
| White Glue | Paintbrush |
Be sure to apply the adhesive onto the cardboard surface in a thin layer to avoid seepage and excess glue. You don’t want the glue to saturate the cardboard and potentially weaken its structure.
If you’re using a spray adhesive, hold the can approximately 6 inches away from the cardboard surface and spray the adhesive in a back and forth motion, ensuring an even coating.
If using a hot glue gun or white glue, apply adhesive in thin and even lines across the surface of the cardboard. The notched trowel can also be used for hot glue application.
Once the glue is applied, wait a few moments to let it become tacky before adhering the foam onto the cardboard. This will ensure the best possible bond between the two surfaces. If you’re uncertain about what glue to use, take a look at the article “How to Glue Foam Rubber to Wood” for a more in-depth look at different adhesives and their uses.
Bonding the Foam to the Cardboard
One of the most important steps in gluing foam to cardboard is the actual bonding process. This is where you will see your hard work pay off as the foam starts to adhere to the cardboard. But as with any step in this process, there are tips and techniques that will help you achieve the best results. In this section, we’ll guide you through the various steps involved in bonding the foam to the cardboard, from placing the foam on the cardboard to pressing it down and allowing it to dry properly. So let’s dive in and explore the best ways to achieve a strong bond between foam and cardboard!
Placing the Foam on the Cardboard
Placing the Foam on the Cardboard
After preparing and applying the adhesive, it’s time to carefully place the foam onto the cardboard. This step requires patience and precision to achieve the desired results. Follow these steps:
| Step 1 | Align the foam and cardboard together. Be careful not to let the adhesive touch the wrong surface before you are ready to bond. |
| Step 2 | Using the tape you applied earlier, hold the foam in place while you adjust and reposition as necessary to achieve perfect alignment. |
| Step 3 | Once you are satisfied with the alignment, slowly remove one section of tape at a time, while carefully pressing the foam onto the cardboard. |
| Step 4 | Take extra care with any curves or edges, making sure the foam is conforming correctly to the shape of the cardboard. |
Remember, making a mistake at this stage can be costly, so take your time and double-check every angle, crease and corner. Patience is key when placing the foam on the cardboard surface and taking the time to ensure everything is correctly aligned will save you time and frustration later on.
Pressing the Foam Down
Once the foam is in place on the cardboard and adhesive has been applied to both surfaces, it is time to press the foam down to bond it to the cardboard. This step is crucial for ensuring that the foam adheres well to the cardboard and does not come loose over time.
To press the foam down, you’ll need a tool that provides even pressure across the surface of the foam. A large book or wooden board can do the trick, but a foam roller is the ideal tool for this step.
To use a foam roller, start at one end of the foam and apply firm, even pressure as you roll the tool over the surface of the foam towards the other end. Repeat this motion, applying firm pressure, until you have rolled over the entire surface of the foam.
Tip: Make sure to check that the edges and corners of the foam are fully pressed down to avoid any lifting or peeling.
Using a foam roller helps to evenly distribute pressure, which ensures that the adhesive is evenly spread across the foam and cardboard. This also minimizes any potential air bubbles that could form under the foam, creating a more secure bond.
Note: Be careful not to press too hard or apply too much pressure while rolling the foam, as this may cause the foam to deform or compress, resulting in an uneven surface.
Once you have pressed the foam down thoroughly, set it aside to dry according to the adhesive’s instructions. It is crucial to let the adhesive fully dry before moving or manipulating the foam to avoid any potential damage to the bond.
In the meantime, you can use a clean, damp cloth to wipe away any excess adhesive that may have seeped out around the edges of the foam. This will help to create a clean and finished look to your project.
Pressing the foam down is a critical final step to ensure that the bond between the foam and cardboard is strong and long-lasting. Using a foam roller or other tool to apply even pressure can make all the difference in creating a secure and professional-looking finished product.
Drying Time
Once you have bonded the foam to the cardboard, it is important to allow sufficient drying time before you can move or use the object. Not allowing enough drying time can cause the foam to shift or detach from the cardboard, rendering your efforts useless.
Here are some general drying-time guidelines depending on the type of adhesive you used for your project:
- Spray Adhesive: Check the manufacturer’s instructions, but most spray adhesives require at least 15-30 minutes of drying time before the bond is secure enough to handle.
- Hot Glue Gun: Hot glue dries very quickly, usually within a minute or two. However, for a stronger bond, it’s recommended to wait at least 24 hours before handling the object.
- White Glue: White glue can take 1-2 hours to dry completely. For thicker layers of glue or larger surfaces, allow 24 hours drying time.
Factors that can affect drying time:
- Temperature and humidity: A warm, dry environment will speed up drying time, while cold and humid conditions will slow it down.
- Thickness of the layer of adhesive used: The thicker the layer of adhesive, the longer it will take to dry completely.
- Type and porosity of materials: Materials with poreless surfaces will dry faster than those with porous surfaces, as the adhesive will seep into the pores and take longer to dry completely.
Keep these factors in mind as you determine how long it will take for your foam and cardboard object to dry. Once it has dried completely, you can move on to trimming any excess foam and adding any finishing touches to your project.
Cleanup and Finishing Touches
After successfully bonding your foam to cardboard, it’s important to give your project a final touch that makes it look clean and professional. This step involves both cleaning up any excess adhesive and trimming any excess foam. Neglecting these steps can make your finished project look messy and unrefined. In this section, we’ll explore effective ways to clean up excess adhesive and trim your foam for that perfect finish.
Cleaning Up Excess Adhesive
Once the foam is securely glued to the cardboard, it’s important to clean up any excess adhesive to ensure a polished finished product. Leaving excess adhesive can create a messy look and potentially ruin any art or project.
Materials You’ll Need:
- Hot water
- Soap
- Paper towels
Steps to Clean Up Excess Adhesive:
| Step | Description |
|---|---|
| 1 | Fill a bucket or container with hot water and add soap to create suds. |
| 2 | Use a paper towel to gently dab and wipe away any excess adhesive on the foam and cardboard surfaces. |
| 3 | If the adhesive is stubborn, use a soft-bristled brush dipped in the soapy water to scrub the affected area until the adhesive comes off. |
| 4 | Rinse the brush in clean water after each use to prevent any adhesive from drying on the bristles. |
| 5 | Once the excess adhesive is removed, use a dry paper towel to absorb any remaining moisture on the foam and cardboard surfaces. |
It’s important to note that if the adhesive has already dried and hardened, it can be more difficult to remove. In this case, a scraper or razor blade may be necessary to carefully scrape away the excess adhesive. However, it’s important to use caution to avoid damaging the foam or cardboard surfaces.
Trimming the Foam
After bonding the foam to the cardboard, you may notice that some edges may not align perfectly. This is where trimming the foam comes in handy. Trimming the excess foam will give your project a neat and professional look. Here are a few steps to follow:
| Step | Action |
|---|---|
| Step 1 | Take a ruler or measuring tape and measure the areas where the foam extends beyond the cardboard. |
| Step 2 | Using a sharp pair of scissors or a craft knife, carefully trim the excess foam using the measurement you took from step 1 as a guide. |
| Step 3 | Be sure to cut straight lines to ensure that your project looks clean and professional. |
| Step 4 | For curved edges, use a pair of curved scissors, which are specially designed for these types of cuts. |
| Step 5 | Use sandpaper to smooth out any rough edges or bumps, creating a sleek and polished finish. |
It’s important to be precise when trimming the foam, and take your time. Rushing through this step could result in uneven edges or worse, accidentally cutting off too much foam. Take it slow and steady, and you’ll end up with a project that looks professional and well-crafted.
Conclusion
In conclusion, gluing foam to cardboard can be a bit tricky, but with the right materials and techniques, it can be a successful endeavor. It’s important to thoroughly clean and prep the surfaces before applying any adhesive. Choosing the right type of adhesive is also key, as some may not work well with certain types of foam or cardboard. Additionally, being patient and allowing sufficient drying time can ensure a strong bond between the foam and cardboard.
Overall, the process involves applying adhesive to both the foam and cardboard and pressing them together firmly. It’s also important to clean up any excess adhesive and trim the foam to achieve a neat and professional-looking result.
By following the tips and techniques outlined in this article, you can confidently glue foam to cardboard for a variety of DIY projects and crafts. Whether you’re creating props, costumes, or packaging materials, a strong bond can ensure a successful outcome. So go ahead and experiment with different types of foam and cardboard, and see where your creativity can take you!
Frequently Asked Questions
1. Can I glue foam to cardboard without sanding or roughing up the surfaces?
It’s not recommended. Sanding and roughing up the surfaces can create a better bond between the foam and cardboard.
2. Is there a specific type of spray adhesive that’s best for gluing foam to cardboard?
Yes, look for a spray adhesive that’s meant for foam materials and cardboard surfaces. Many options are available at your local hardware or craft store.
3. Can I use white glue to glue foam to cardboard?
Yes, but it may not be the strongest option for a long-lasting bond. It’s recommended to use a stronger adhesive like a spray adhesive or hot glue gun.
4. How do I make sure the foam stays in place while the adhesive dries?
You can use tape or something to hold the foam in place while the adhesive dries. Be sure to use a low-tack tape that won’t damage the surfaces.
5. Is hot glue better than spray adhesive?
It depends on the project and personal preference. Hot glue may be better for a stronger bond, while spray adhesive can be quicker and easier to apply.
6. How long should I wait for the adhesive to dry before removing any tape?
It’s best to wait at least a few hours to ensure the adhesive has fully dried and the bond is strong.
7. Can I trim the foam after I’ve bonded it to the cardboard?
Yes, you can use scissors or a utility knife to trim the foam once the adhesive has fully dried.
8. Is it necessary to clean up excess adhesive immediately?
No, you can wait until the adhesive has fully dried and then peel or scrape off any excess adhesive.
9. Can I reuse any leftover adhesive?
It’s not recommended as the adhesive will likely have dried out and won’t be as effective for the next use.
10. Can I glue foam to cardboard if the cardboard is slightly curved or bent?
Yes, as long as the surfaces are prepped and the adhesive is applied evenly, the foam should be able to conform to different shapes and curves in the cardboard.