Have you ever seen a movie or a theatrical production where the characters had to wade through water on stage? If you have, you may have marveled at how realistic the water looked. But did you know that you can make fake water yourself at home, using just a few materials? In fact, one of the key ingredients is hot glue! While it may sound a bit unusual, hot glue can actually create some pretty impressive water effects, whether you’re making a prop for a play or you just want something cool to add to a diorama or aquarium. Follow this step-by-step guide to learn how to make fake water with hot glue that looks so realistic, even your audience won’t believe it’s fake!
Materials Needed
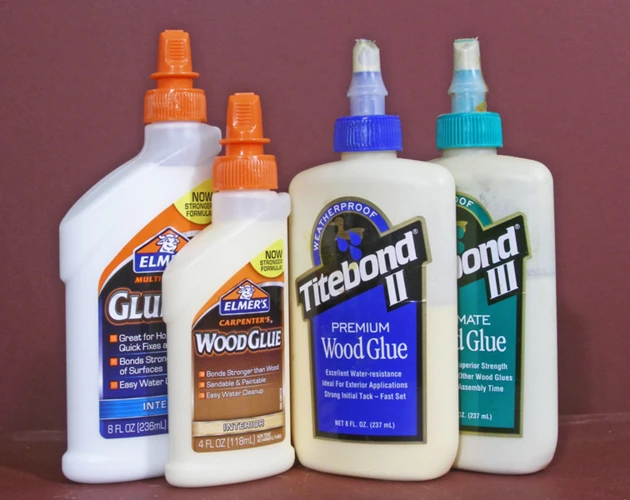
Before we dive into the step-by-step process of making fake water with hot glue, it’s important to have the right materials on hand. Fortunately, these materials are easy to come by and won’t break the bank. Here are some of the essential materials you’ll need: a hot glue gun, clear plastic sheet, paint, brush, and optional materials like glitter or beads to add some extra flair to your creation. If you’re unsure how to use a hot glue gun, you can find some helpful tips here.
Hot Glue Gun
When it comes to making fake water with hot glue, the most important material you will need is a hot glue gun. It is easier to use than other adhesives and dries quickly. Also, hot glue can create a three-dimensional effect due to its thickness. Here are some details about hot glue guns:
| Types of Hot Glue Guns | Features |
| Low-Temperature Hot Glue Gun | Has a temperature range of 170°C to 190°C, suitable for delicate or heat-sensitive materials |
| High-Temperature Hot Glue Gun | Has a temperature range of 190°C to 230°C, suitable for heavy-duty materials and larger projects |
| Dual-Temperature Hot Glue Gun | Has both low and high settings, allowing for flexibility depending on the project |
It is important to choose the right type of hot glue gun for your project. If you are working with delicate materials such as foam or paper, a low-temperature hot glue gun would be appropriate to prevent damage. On the other hand, if you are working on a larger project with materials such as wood or metal, a high-temperature hot glue gun would be more efficient.
Additionally, safety should always be taken into consideration when using a hot glue gun. Do not touch the nozzle or molten glue with your bare hands as it can cause burns. It is recommended to work in a well-ventilated area and wear gloves to protect your hands.
If you experience any difficulties using a hot glue gun, there are various resources available online to provide guidance. For example, if you need to know how hot is a low-temp glue gun, you can read an article on this topic by clicking on this link.
Clear Plastic Sheet
One of the essential materials needed for making fake water with hot glue is a clear plastic sheet. This will serve as the base for the fake water, giving it a realistic look. The plastic sheet can be purchased from an art supply store or online.
Here are some tips when choosing a clear plastic sheet:
- Choose a high-quality plastic sheet that is clear and has a smooth surface. This will make it easier to apply the hot glue and shape the water.
- Make sure the plastic sheet is flexible enough to bend and shape the water. You can test this by gently bending the sheet to see if it cracks or breaks.
- Consider the size of the plastic sheet based on the size of your project. If you plan on making a large water feature, you’ll need a larger sheet, whereas smaller projects will require smaller sheets.
Once you have your clear plastic sheet, make sure to clean it thoroughly before starting the project. Dust and fingerprints can affect the final look of the fake water.
Quick tip: If you’re having trouble finding a clear plastic sheet, you can also use a clear plastic bag. Just make sure to cut it open and lay it flat before starting the project.
In the next section, we’ll cover how to prepare the surface before applying the hot glue. If you want to know how to glue chipboard together, you can check out our article on how to glue chipboard together.
Paint
When it comes to adding color to your fake water made with hot glue, paint can be a great option. You’ll want to choose a paint color that complements the overall look you’re trying to achieve. A dark blue or green works well for a deeper, more realistic water effect, while lighter blues and greens can give the appearance of crystal-clear water.
Pro tip: If you want to add some texture along with your color, consider using a sponge to dab on the paint. This will create a more natural look.
Here are some paints that work well for this project:
| Paint Type | Pros | Cons |
|---|---|---|
| Acrylic paint | Dries quickly, easy to find, can be mixed for custom colors | Can be more expensive than other types of paint |
| Spray paint | Quick and easy to apply, can cover large areas | Can be messy and difficult to control |
| Oil paint | Provides a glossy finish, can blend well | Drying time can be lengthy, requires more cleanup |
Remember: Whatever paint you choose to use, it’s important to let it dry completely before moving on to the next step. This can help prevent smudging or unwanted blending of colors.
For those who want to add some additional sparkle, glitter can be mixed in with the paint prior to application. Some may even want to add small beads to give the water a bubbly appearance.
As you can see, there are many ways to customize your fake water to make it fit your desired look. Whether you choose to use paint or not, the finished product is sure to impress. If you’re in need of some other hot glue tips and tricks, check out this article for some more fun project ideas.
Brush
When it comes to creating fake water with hot glue, having a brush is an essential tool in giving your project a realistic finish. A small paintbrush that can easily maneuver around the glue is preferred. The brush helps to blend the colors for a smooth and seamless transition between the glue and the plastic surface. Additionally, it helps to create ripples in the water, giving the piece a more realistic appearance.
It is recommended to use a brush with soft bristles, which can easily spread out the paint on the glue veins. The size of the brush should be a perfect fit for the size of your project, not too big or too small. When selecting a brush, be sure to choose a high-quality one to avoid shedding hairs.
For those who don’t have a brush, a sponge can also be used with equal effectiveness. Simply dip the sponge into the paint and carefully dab it over the glue veins.
Whether using a brush or a sponge, the finishing touches on your fake water will be essential for creating a realistic look. For more information about hot glue techniques, you can follow this link to learn how to repair broken headphones with hot glue.
Optional: Glitter, Beads, etc.
You can also add a bit of sparkle to your fake water by including glitter, beads, or other small embellishments. This is completely optional, but it can add an extra level of visual interest to your project.
To add glitter or beads to your fake water, simply sprinkle them onto the surface of the hot glue before it cools. You can also embed them into the glue by gently pressing them in with a toothpick or other small tool.
Tip: If you’re using glitter, be sure to use fine glitter rather than chunky glitter. Chunky glitter can have a tendency to sink rather than float, which could detract from the realistic look you’re trying to achieve.
Another fun option is to use small pebbles or faux sea glass to create the look of a pebble-filled stream or riverbed. You can even experiment with different colors and sizes to create a truly unique look.
Remember: When adding any extra elements to your fake water, be careful not to overdo it. Too much glitter, for example, could end up looking tacky rather than realistic.
If you prefer a more subtle look, try using a small amount of white or clear paint to add highlights and dimension to your fake water.
P.S. If you’re interested in other creative crafts you can do with hot glue, check out our article on how to make resin charms with hot glue.
Step-by-Step Guide
Now that we have all the materials we need, it’s time to start creating our fake water using hot glue. This step-by-step guide will walk you through the process, making it easy for you to follow along and create a realistic water effect for your project. Follow each step carefully to ensure the best results. And if you want to get even more creative, check out our other articles on making a volcano out of newspaper and glue, gluing foam to cardboard, gluing cork board to cardboard, or even melting hot glue sticks in the microwave for more fun projects and ideas. Let’s get started on making your fake water with hot glue!
Step 1: Prepare the Surface
Before starting to create your fake water with hot glue, make sure to prepare the surface properly. This will ensure that the final result looks realistic and smooth. Follow these steps to prepare the surface:
- Clean the surface: Remove any dirt or debris from the surface where you want to create the fake water. Use a damp cloth to wipe away any dust, dirt, or fingerprints. Allow the surface to dry completely before moving on to the next step.
- Apply a layer of clear paint: Use a clear paint or varnish to create a base for the hot glue to adhere to. This will also give your fake water a glossy finish. Make sure to use a smooth brush to apply the paint evenly.
- Let the paint dry: Allow the paint to dry completely before moving on to the next step. This usually takes a few hours, but you can speed up the process by using a fan or a hairdryer on the cool setting.
By properly preparing the surface, you will ensure that your fake water will look realistic and professional. So take your time to complete this step before moving on to the next one.
Step 2: Apply Hot Glue
Now that you have prepared the surface, it is time to apply the hot glue. Hot glue is the main component in making fake water with hot glue. To apply hot glue, you will need a hot glue gun. Make sure you have a good quality hot glue gun, as it will make your job easier and give you better results.
| Steps | Instructions |
|---|---|
| Step 1 | Turn on the hot glue gun and let it heat up. Make sure to turn on the gun 5-10 minutes before you start applying the hot glue to avoid any delays during the process. |
| Step 2 | Grab the clear plastic sheet and place it on your workspace. Hold it down and start applying the hot glue on the plastic sheet in a snake-like pattern. Start from one corner and work your way towards the other end of the sheet. |
| Step 3 | Make sure you apply enough hot glue to have a good build-up. This will create the illusion of depth and make the final result more realistic. Depending on the size of your project, you may need to use multiple sheets of plastic. |
| Step 4 | When applying the hot glue, try to avoid creating air pockets or bubbles. These can ruin the final result and make it look unrealistic. Use a toothpick or a small needle to pop any air bubbles that may appear. |
| Step 5 | Let the hot glue cool down for a few minutes before moving on to the next step. Hot glue cools down very quickly, so you shouldn’t have to wait too long. |
Remember that this step is crucial in the process of creating fake water with hot glue. Always make sure to take your time and apply the hot glue correctly. Rushing through this step can result in poor-quality fake water that won’t look realistic.
Step 3: Shape the Water
After allowing the hot glue to dry completely, it’s time to shape the water. This step is all about molding and manipulating the glue to look like real water.
1. Create Movement
Water is rarely still, so make sure to add some movement to your fake water. Use your fingers, a toothpick, or any other tool to create ripples or waves in the glue.
2. Add Depth and Texture
Real water has an uneven surface with dips and bumps. Recreate this by adding layers of glue in varying thicknesses. You can also add texture by lightly dragging a comb or fork through the wet glue.
3. Mimic Reflections
The surface of water reflects light and objects around it. Create this effect by adding thin strips of clear plastic or silver paint to represent the reflections. Be sure to add them sparingly as too many can make the water look unrealistic.
4. Fix Mistakes
If you make a mistake while shaping the water, don’t panic! Simply use a heat gun or hair dryer on low to melt and reshape the glue. Remember to be patient and gentle in your movements to avoid ruining the entire piece.
5. Let it Dry
After shaping the water to your liking, let it dry completely before moving on to the next step. This will ensure that your final product looks as realistic as possible.
By following these steps, you’ll be able to shape your hot glue into a convincing water effect. Don’t be afraid to experiment with different techniques to find the perfect look for your project.
Step 4: Add Color and Texture
Once you have shaped your hot glue into the desired water form, it’s time to add color and texture. There are different ways to achieve the look of water, depending on the project. Here are some options:
- Option 1: Paint
- Option 2: Inks and Dyes
- Option 3: Glitter and Beads
If you want to keep it simple, you can use acrylic paint to color your fake water. Mix a small amount of paint with water until you get the desired shade. Then, use a brush to apply the paint to the hot glue.
If you want a more transparent effect, you can use inks or dyes. Mix a small amount of the ink or dye with water, similar to using paint. Then, apply it to the hot glue using a brush, eyedropper or spray bottle. Inks and dyes provide a more delicate finish and work well for smaller projects.
If you want to add texture to your fake water, you can add some glitter, beads, sequins or plastic confetti. These elements mimic the reflection and refraction of the sunlight on water and give your project an extra sparkle. Paint or dye the hot glue first, then add glitter or beads while the paint is still wet. Pat the glitter or beads gently with your fingers so they stick to the hot glue.
No matter which option you choose, remember to be patient. Let the paint or dye dry completely before touching it. If you need to add multiple layers of paint or dye, wait until the previous layer is dry before applying the next one. This will prevent the colors from smearing and blending together.
Step 5: Add Finishing Touches
Once you are happy with the shape and texture of your fake water, it’s time to add some finishing touches to make it look even more realistic. Here are some options to consider:
- Add glitter: To give your fake water a sparkling effect, sprinkle some glitter on top of the hot glue while it’s still wet. Use a toothpick or a small paintbrush to spread out the glitter evenly.
- Add beads or other embellishments: If you’re creating a scene with fake water, you may want to add some beads or other decorative items to suggest movement. Choose beads or other materials that complement the colors and textures of your fake water.
- Smooth out bubbles: If you notice any large air bubbles or bumps on the surface of your fake water, you can use a heat gun or a hair dryer on low heat to smooth them out. Gently wave the heat source back and forth over the surface of the hot glue until the bubbles disappear.
- Experiment with lighting: Set up your fake water in a location where you can play with lighting. Different angles and strengths of light can make your creation look more or less realistic, so take the time to experiment and find the perfect lighting for your purposes.
By adding these finishing touches to your fake water, you can take it from a basic craft project to a realistic-looking scene or display.
Tips and Tricks
Now that you know how to create realistic-looking fake water using hot glue, allow us to share some tips and tricks that will help you elevate your water crafting game. These pointers will allow you to create even more impressive and visually striking results that are sure to wow your friends and family. So, let’s dive deeper into some useful techniques that will make your fake water look even better.
Use a Heat Gun for Smoother Results
One helpful tip to achieve a smoother finish when making fake water with hot glue is to use a heat gun. The heat gun can assist in melting the hot glue and transforming it into a more fluid consistency, without causing any overheating. Here are some specific ways to use a heat gun for smoother results:
- Keep the heat gun at a safe distance: To avoid overheating or burning the hot glue, keep the heat gun about six inches away from the glued surface.
- Melt the hot glue gradually: Hold the heat gun over the glue and move it from side to side slowly. It’s important to melt the hot glue gradually so as not to create any air pockets or bubbles.
- Work in small sections: Focusing on small areas at a time, rather than trying to tackle a large surface, can help achieve a smoother finish. Use the heat gun on one section at a time and let it cool before moving on to the next.
- Be patient: Using a heat gun does take some time and patience, but the effort is worth it for achieving a more realistic result.
By following these tips, you can achieve a more professional and polished fake water effect with your hot glue creation.
Experiment with Different Colors and Textures
One of the best things about this fake water technique is that it allows for endless creativity and experimentation with colors and textures. You can add a variety of pigments to the hot glue, creating a spectrum of shades. To make your water look more realistic, consider mixing in different shades of blue or adding a drop or two of green or yellow to mimic sunlight shining on the water’s surface.
Additionally, you can also play with different textures by adding in various materials. Glass beads can create the look of bubbles, while small pieces of plastic can create a more choppy, rough surface. If you want a more glittery water effect, add in glitter flakes or fine glitter dust to your hot glue mixture.
Remember to experiment with different combinations of colors and textures to achieve your desired result. A good tip is to test your mixture on a separate surface before applying it to your final project. Not only will this help you achieve the desired effect, but it can also save you from wasting materials.
By playing around with different colors and textures, you can create a unique and personalized faux water effect that suits your needs. Don’t be afraid to let your creativity run wild!
Conclusion
After following this step-by-step guide, you should now know how to make fake water with hot glue. With just a few materials and a little creativity, you can create a realistic looking water effect for your art projects, dioramas, or even Halloween decorations.
Using a hot glue gun and clear plastic sheet, you can add depth and texture to your fake water by shaping it to your desired form. Adding color and texture with paint and other materials such as glitter or beads can further enhance the water effect and make it look even more realistic.
Remembering to experiment with different colors and textures, as well as using a heat gun for smoother results, can also help you achieve your desired effect. With these tips and tricks in mind, you can create outstanding water effects that will impress your friends and family.
Now that you know how to make fake water with hot glue, sky’s the limit for your creativity. Don’t be afraid to try different techniques and materials to add your own unique touch to your projects. Making fake water can be a fun and rewarding experience that will allow you to bring your ideas to life in ways you never thought possible.
Frequently Asked Questions
Can I use any type of hot glue for this project?
It’s recommended to use a clear hot glue that dries transparent for a more realistic look.
Do I need a specific type of clear plastic sheet?
A thin and flexible plastic sheet, like acetate, works best for this project.
What type of paint works best for this project?
Acrylic paint is a great option because it dries quickly and adheres to the hot glue well.
Can I add glitter to the hot glue?
Yes, adding glitter to the hot glue can give it a shimmering effect. Just be sure to add it before the hot glue dries.
Can I add beads or other embellishments to the fake water?
Yes, adding beads or other small items can add texture and depth to the fake water.
How do I make sure the hot glue won’t stick to my work surface?
You can use a non-stick surface, like a piece of wax paper or parchment paper, to prevent the hot glue from sticking to your work surface.
How long does it take for the hot glue to dry?
The drying time can vary depending on the amount of hot glue applied, but it usually takes around 10-15 minutes.
Do I need to wait for the hot glue to cool before shaping it?
It’s best to wait a few seconds for the hot glue to cool and become less tacky before shaping it.
Can I make larger or smaller fake water pieces using this method?
Yes, you can adjust the size by using a larger or smaller area of clear plastic sheet and adjusting the amount of hot glue applied.
Is this project messy?
Using a non-stick surface and being careful with the hot glue can help minimize mess, but it may still be a bit messy due to the nature of the materials used. So, it’s recommended to work in a well-ventilated and easy-to-clean area.