Crafting enthusiasts often find themselves in a position where they want to combine different materials for their projects. One such common task is gluing paper to wood, which can transform ordinary wooden letters into personalized, decorative pieces. Whether for scrapbooking, home decor, or even commercial signage, understanding how to glue paper to wood effectively is essential for a clean and durable finish.
Choosing the Right Adhesive

The key to a successful adhesion between paper and wood is selecting the proper glue. Not all adhesives are created equal, and some may either damage your materials or fail to hold them together over time. Let’s explore some of the most reliable options.
Understanding Mod Podge
Mod Podge is a versatile adhesive, sealer, and finish that is perfect for gluing paper to wood. It’s a water-based product that dries clear and can be easily cleaned up with soap and water, making it a favorite among crafters.
Exploring Spray Adhesive Options
Spray adhesives offer a quick and even application, which is ideal for larger projects. They are available in permanent and repositionable types, giving you flexibility depending on your project’s needs.
The Benefits of Tacky Glue
Tacky Glue is thicker than regular white glue and less likely to seep through the paper, causing wrinkles. It grabs fast and dries clear, making it another excellent choice for paper-wood projects.
Best Way to Glue Paper to Wood
Once you’ve chosen your adhesive, there are a few steps to follow to ensure a smooth application. The following pointers serve as a general guideline to help you achieve the best way to glue paper to wood.
Preparing the Wood Surface
Clean the wood surface thoroughly, removing any dust or grease. Lightly sanding the wood can help create a better bond.
Selecting and Preparing Your Paper
Choose your paper and, if necessary, trim it to size. Ensure it’s free from creases and ready for application.
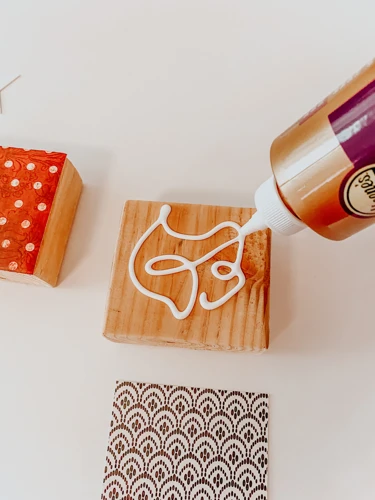
Applying the Glue
Apply your chosen adhesive to the wood, starting from the center and moving outwards to avoid excess glue along the edges.
Smoothing Out Bubbles and Wrinkles
Once the paper is placed onto the wood, use a flat tool like a brayer or a plastic card to smooth out any air bubbles or wrinkles.
Step-by-Step Guide for Gluing Paper to Wood
For those who appreciate clear instructions, here’s a step-by-step guide to mastering the art of gluing paper to wood.
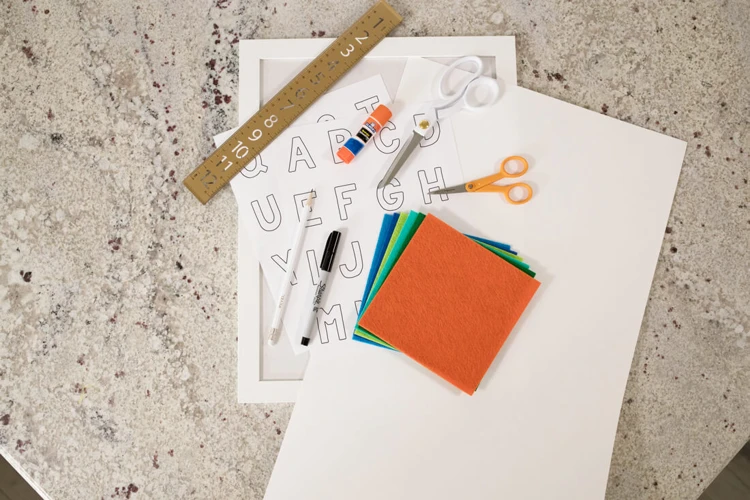
Step 1: Gather Your Materials
- Wooden letters
- Adhesive (Mod Podge, spray adhesive, or Tacky Glue)
- Paper
- Sanding block or sandpaper
- Brayer or plastic card
Step 2: Preparing the Wood Letters
Prepare the wood by sanding the surface lightly with fine-grit sandpaper. Wipe it down to remove any dust.
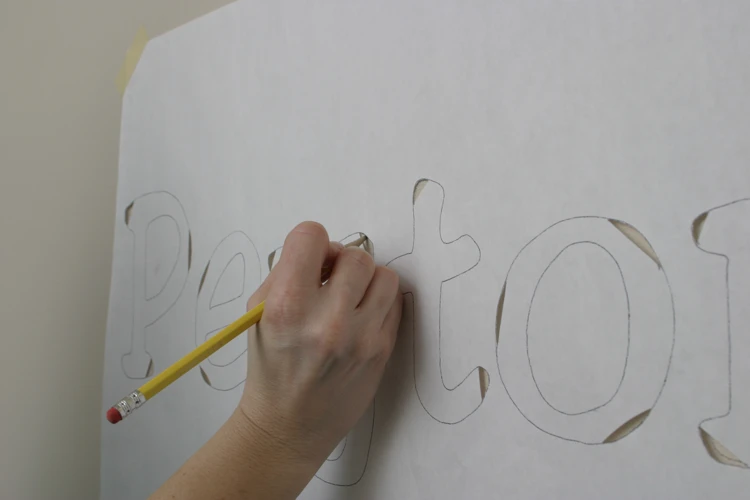
Step 3: Cutting and Prepping the Paper
Cut your paper to the exact shape of the wood letters. Check for fit and make any necessary adjustments.
Step 4: Gluing the Paper to Wood
Apply an even layer of adhesive to the wood, place the paper carefully, and press down. Use a brayer to smooth it out.
Step 5: Sealing and Finishing
Once dry, apply another coat of Mod Podge over the paper to seal it. Allow it to dry completely before handling.
Tips for a Perfect Finish
For a flawless finish, ensure your workspace is clean, and avoid applying too much glue, which can cause the paper to warp or bubble.
Common Mistakes to Avoid
Avoid rushing the drying process with heat tools, as this can cause the paper to bubble or peel. Also, refrain from using too much pressure when smoothing out the paper, as it can tear.
FAQs on Gluing Paper to Wood

Many crafters have questions about this process. One common inquiry is about the drying time, which depends on the adhesive used but generally ranges from 20 minutes to an hour.
Comparing Different Gluing Techniques

Each gluing technique has its pros and cons, and understanding these can help you choose the right one for your project.
Mod Podging vs. Tacky Glue
Mod Podge offers a dual function as an adhesive and sealer but can be more time-consuming. Tacky Glue, on the other hand, is thicker and sets quickly, which is great for quick projects.
Spray Adhesive vs. Traditional Glues
Spray adhesives provide an even coat and are great for large pieces, but they can be messier and require a well-ventilated space. Traditional glues, like Tacky Glue, provide more control but require more precision during application.
Conclusion: Mastering the Art of Gluing Paper to Wood

With the right techniques and adhesives, gluing paper to wood can be a straightforward and satisfying process. The key is to be patient and precise.
Supplies List for Gluing Paper to Wood
Essential Materials
- Adhesive (Mod Podge, spray adhesive, Tacky Glue)
- Wooden letters
- Paper
- Brayer or plastic card
- Sandpaper
Optional Tools for Enhanced Results
- Paintbrushes for applying glue
- Craft knife for precise cutting
- Protective gloves to keep hands clean
If you’re embarking on a DIY project that involves combining different materials, you might be wondering about the best adhesive techniques. For those looking to attach paper to wood, our detailed guide on how to glue paper to wood letters will provide you with step-by-step instructions to achieve a seamless finish. If your project extends beyond wood, and you’re curious about how to adhere fabric or paper to other surfaces, our tutorials on how to glue fabric to wood letters, how to glue paper to metal, and how to glue paper to plastic offer valuable tips to help you navigate these tricky combinations with ease.
Additional Resources and References

For further information, crafters can consult online tutorials, crafting forums, and manufacturer instructions for specific adhesives. Books on crafting techniques can also provide valuable insights into the practice of gluing paper to wood.