Introduction
When it comes to DIY projects, hot melt glue is a versatile and effective adhesive that can make your life so much easier. From home repairs to craft projects, hot melt glue is a go-to solution for quickly bonding materials together. But before you dive into using hot melt glue, there are some important tips and techniques to keep in mind to ensure a professional-grade result. In this article, we will cover everything you need to know about using hot melt glue, from selecting the right glue gun to cleaning up after you’re done.
What is hot melt glue?
Hot melt glue, also known as thermoplastic adhesive, is a type of adhesive that is applied in a molten state and solidifies as it cools. This makes it a versatile and convenient choice for bonding a wide variety of materials, including wood, plastic, metal, and fabric.
Hot melt glue offers several advantages over traditional adhesives:
| Advantages | Explanation |
| Fast-setting | The speed of bonding is a major advantage of hot melt glue. After applying the glue it sets in seconds, reducing the need for clamping or waiting for the glue to dry. |
| Strong bond | Hot melt glue creates a strong bond that can withstand heavy loads and high temperatures. |
| Versatile | This type of glue can be used for a variety of materials, including wood, metal, plastic, and fabric. |
| Cost-effective | Hot melt glue is an affordable option that can be used for a wide range of applications. |
| Easy to use | The glue is applied through a glue gun, which makes it easy to apply and control the amount of glue being used. |
| Minimal mess | Unlike traditional adhesives, hot melt glue doesn’t create a lot of mess or residue. It also dries clear. |
However, hot melt glue is not without its drawbacks. It may not be suitable for applications where a highly flexible bond is required, and it can become brittle over time. Additionally, it may not be ideal for use in high-stress or high-impact environments, as the bond may break under pressure.
If you want to know how to make hot melt glue look like honey, check out our article on “How to Make Hot Glue Look Like Honey“.
Choosing the Right Hot Melt Glue Gun
Selecting the right hot melt glue gun can make all the difference in your project’s success. With a wide variety of options available, the choice can seem overwhelming at first [internal link: how-to-make-hot-glue]. However, taking into account factors such as the type of glue gun and recommended brands, as well as your personal needs, can help you choose the perfect tool for the job. In this section, we’ll explore the factors to consider when selecting a hot melt glue gun and provide recommendations to make your decision-making process a little easier.
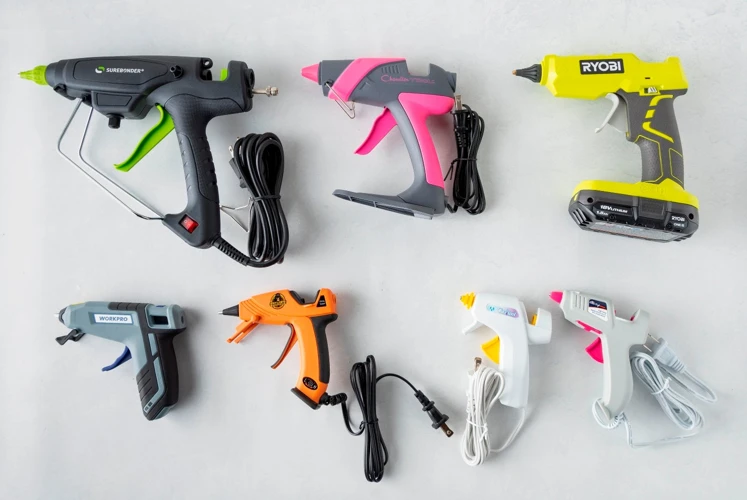
Types of glue guns
There are several types of hot melt glue guns available on the market to suit different projects and applications. The table below outlines the different types of glue guns and their recommended uses:
| Type of Glue Gun | Description | Recommended Use |
|---|---|---|
| Pistol Grip | A basic glue gun with a simple trigger mechanism | General crafts and home repairs |
| High-Temperature | A gun with a higher wattage that can melt glue at a hotter temperature and produce a stronger bond | Industrial applications and heavy-duty projects |
| Low-Temperature | A gun with a lower wattage that can melt glue at a cooler temperature, making it safer to use on delicate materials | Use with temperature-sensitive materials such as foam, lace, and ribbon |
| Cordless | A glue gun that runs on battery power, allowing for greater mobility and ease of use | Outdoor or on-the-go projects with no access to a power outlet |
| Trigger Feed | A glue gun with a smooth trigger mechanism that provides better control over the amount of glue dispensed | Precision tasks such as decorating or attaching small embellishments |
When selecting a glue gun, consider the specific needs of your project (such as materials being used, project size, and desired finish) before choosing the appropriate type of glue gun. It is also important to choose a quality glue gun from a reputable brand to ensure safety and effectiveness.
Factors to consider
When choosing the right hot melt glue gun, there are several factors to consider to ensure that you are using the correct equipment for your project.
Size and Type of Project: The size and type of project will determine the type of hot melt glue gun you will need. For smaller, detailed projects, a mini glue gun may be more appropriate, while larger projects may require a standard or industrial-sized glue gun.
Temperature: Some hot melt glue guns operate at higher temperatures than others, which can affect the types of materials you can use the glue on. For example, lower temperature glue guns are best used on delicate materials, while higher temperature glue guns may be needed for heavy-duty materials.
Frequency of Use: If you plan to use your hot melt glue gun frequently, you may want to invest in a higher-quality gun that can withstand regular use. Conversely, if you only plan to use your glue gun occasionally, a less expensive option may suffice.
Cost: The cost of the glue gun is also an important factor to consider. Keep in mind that higher quality glue guns may have a higher initial cost, but may save you money in the long run if they last longer or perform better.
Brand: There are many different brands of hot melt glue guns available, each with their own strengths and weaknesses. Some popular brands include Surebonder, Arrow, and Stanley. Do some research or ask for recommendations from others who have used glue guns to find the best brand for your needs.
Anchors: Interested in making your own hot glue? Check out our guide on how to make hot glue. Or, if you are working on a craft project that involves Legos, learn how to glue Lego base plates to wood. Additionally, if you want to add a unique touch to a picture frame, we have a guide on how to glue bottle caps to a picture frame.
Recommended brands
Choosing the right brand of hot glue gun can make all the difference in the quality and durability of your project. Here are a few recommended brands:
| Brand Name | Type of Glue Gun | Price Range |
|---|---|---|
| Stanley | Trigger-fed | $15-$30 |
| Surebonder | Hot melt mini | $10-$15 |
| AdTech | Low-temp mini | $5-$10 |
| Arrow Fastener | Dual-Temp | $20-$40 |
Each of these brands offers reliable and durable glue guns that will get the job done. Stanley is a popular choice among professionals due to its sturdy construction and reliable trigger feed mechanism, while Surebonder’s mini hot melt gun is great for smaller projects and easy to handle. AdTech’s low-temp mini glue gun is also a good choice for smaller jobs, and is a budget-friendly option. Arrow Fastener’s dual-temp gun is perfect for projects that require both high and low temperatures.
No matter which brand you choose, make sure to read the instructions carefully and follow all safety precautions when using your hot glue gun. It’s also important to note that while hot glue is generally safe when dry, it’s still a good idea to take precautions. If you’re using hot glue on a project that will be frequently handled or exposed to heat, consider wearing gloves or using a sealant to protect yourself and your project. For more information on the safety of hot glue, check out our article on is hot glue toxic when dry?.
Preparing Materials for Gluing
Getting your materials ready before gluing is a crucial step for a successful outcome. You don’t want to rush this step as it can make or break your project. From cleaning and drying surfaces to fitting pieces together, there are several things you need to do to set yourself up for success. Let’s explore some tips on how to prepare your materials for gluing that will ensure your project is completed with ease and precision. If you’re interested in making a stress ball with glue after gluing your materials, check out our step-by-step guide on how to make a stress ball with glue.
Cleaning and drying surfaces
Before using hot melt glue, it is important to clean and dry the surfaces to be glued properly. This will ensure that the glue properly adheres to the surfaces and creates a strong bond.
Table: Steps for Cleaning and Drying Surfaces Before Gluing
| Step | Description |
|---|---|
| 1 | Wipe surfaces with a clean, dry cloth to remove any debris. |
| 2 | For stubborn dirt, use a gentle cleaning solution such as rubbing alcohol or white vinegar. Apply the solution to a cloth and wipe the surfaces clean. |
| 3 | Ensure that surfaces are completely dry before gluing. You can use a clean, dry cloth to wipe away any moisture, or let the surfaces air dry for a few minutes. |
By properly cleaning and drying the surfaces before gluing, you can ensure that the bond created by the hot melt glue is strong and lasting. This will also prevent any dirt or debris from interfering with the glue’s ability to stick properly.
If you’re interested in learning more about using hot melt glue, check out our article on how to use hot glue and E6000 together or learn how to stop glue gun from dripping for some useful tips. You can even get creative and make fake water with hot glue or learn how to turn on a hot glue gun.
Fitting pieces together
When preparing materials for gluing with hot melt glue, it’s important to ensure that the pieces fit together properly. This will help to ensure a strong bond between the materials. Here are some tips for fitting pieces together:
| Tip | Explanation |
|---|---|
| Make sure pieces are clean and dry | Before fitting pieces together, make sure they are clean and dry. Any dust, dirt, or moisture can prevent the glue from adhering properly. |
| Dry fit the pieces | Before applying any glue, dry fit the pieces to ensure they fit together properly. This will also help you determine where to apply the glue. |
| Apply pressure | After you apply the glue and fit the pieces together, apply pressure to ensure the pieces are securely bonded. You can use clamps or weights to help hold the pieces together while the glue sets. |
| Check for gaps | After the glue has set, check for any gaps between the pieces. If there are any gaps, you can use a hot melt glue gun to fill them in. |
| Trim excess glue | If any excess glue has squeezed out during the fitting process, use a craft knife or scissors to trim it away. |
By taking the time to properly fit the pieces together before applying the hot melt glue, you can ensure a strong bond and a successful project outcome.
Securing with clamps or weights
Before applying hot melt glue to materials, it’s important to ensure that they are properly secured and aligned to minimize any movement during the gluing process. One effective way to do this is by using clamps or weights.
Clamps: Clamps come in various shapes and sizes and are used to hold two objects together tightly, allowing the glue to bond the surfaces as they are pressed together. When using clamps, it is important to make sure that the pressure is evenly distributed and that the pieces being glued are in the correct position. Use the appropriate number of clamps based on the size and weight of the materials being glued.
Weights: Weights can also be used to secure materials together until the glue dries. This is especially useful when working with irregularly shaped objects or surfaces that cannot be effectively clamped. Simply place heavy objects on top of the materials being glued, taking care not to shift them during the process.
It is important to note that excessive pressure can cause the glue to squeeze out of the joint and affect the bond strength. Be careful not to over-tighten the clamps or use weights that are too heavy.
Securing materials with clamps or weights is an effective way to ensure that they remain aligned and in place while hot melt glue is applied. Take care to use appropriate pressure and check the positioning before applying the glue.
Using Hot Melt Glue
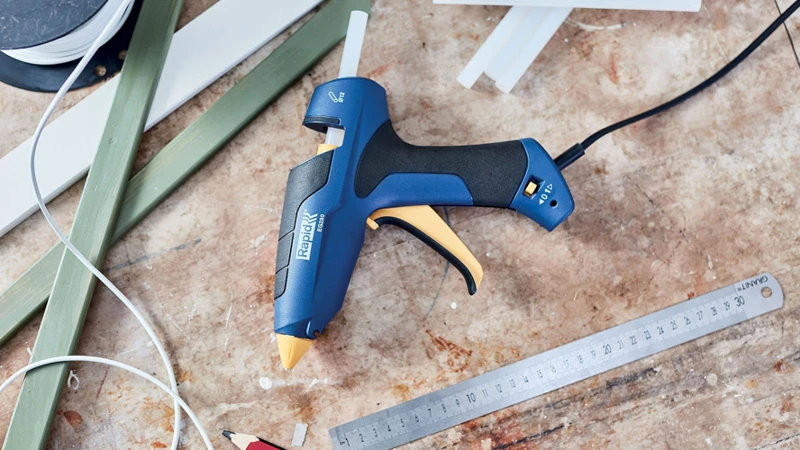
As you venture into actually using hot melt glue, it’s important to know the proper techniques that will ensure a successful bond. Using this powerful adhesive requires a bit of finesse and skill, but with the right tools and approach, you can master the art of applying hot melt glue. Let’s dive into the step-by-step process of using hot melt glue, from loading the glue gun to making sure you don’t risk injury during the application process.
Loading the glue gun
Before you can start using your hot melt glue gun, you need to load it with the proper adhesive. Here’s a step-by-step guide on how to load your glue gun:
| Step 1: | Choose the right size of glue stick that fits your glue gun and insert it into the back of the gun. Make sure that you push the glue stick firmly all the way into the chamber to prevent it from jamming. |
| Step 2: | Plug in your glue gun and turn it on, allowing it to heat up for a few minutes. Check the manufacturer’s instructions for the specific amount of time required. |
| Step 3: | Once the glue gun has heated up, squeeze the trigger a few times to allow the melted glue to flow smoothly. Insert a test piece of material into the glue stream to ensure that the adhesive is flowing correctly. |
| Step 4: | Once you’re satisfied that the glue is flowing correctly, you can start using your glue gun to bond materials together. |
Remember that hot melt glue is extremely hot and can cause burns and injuries, so always use caution when loading your glue gun and using it. Follow safety precautions and use protective equipment, such as gloves, to prevent any accidents.
Applying glue to materials
When it’s time to apply hot melt glue to your materials, follow these steps for best results:
- Hold the gun at the right angle: Hold the glue gun at a 45-degree angle, pointing the nozzle where you need the glue to go. Keep the nozzle in contact with the surface of your material while you squeeze the trigger, to avoid any air bubbles or gaps that might weaken the bond.
- Use the right amount of glue: Use the trigger gently to apply a steady stream of glue to your material, releasing the trigger when you’re finished with each section. Don’t apply too much glue, as excess glue can squeeze out and make a mess or create bumps under thin materials.
- Work in small areas: Work on small sections of your project at a time, so the glue stays workable and doesn’t begin to cool and stiffen while you work. If the glue hardens before you’re done, heat it back up to re-activate it and keep working.
- Press the materials together: Once you’ve applied the glue to one piece, press it firmly against the other piece to create a strong bond. Be careful not to move the pieces around too much while the glue sets, as that can cause the bond to weaken. You can also use clamps or weights to hold the pieces together while the glue dries, for added security.
- Allow the glue to cool and dry: Finally, allow the glue to cool and dry completely before moving or using your project. Don’t try to touch the glue or move the pieces until the glue is fully set, as that can weaken or break the bond.
By following these tips and techniques, you’ll be able to apply hot melt glue to your materials with confidence and create strong, long-lasting bonds between your project pieces.
Working quickly and carefully
When using hot melt glue, it’s important to work quickly and carefully to ensure a strong and durable bond. Here are some tips to keep in mind:
| TIP | DESCRIPTION |
|---|---|
| Plan ahead: | Before applying glue, plan out where you will need to apply it and in what order. This will help you work more efficiently and prevent the glue from drying out or becoming too thick. |
| Apply a small amount: | When applying hot melt glue, less is often more. Apply a small amount to one surface, then press the surfaces together firmly to create the bond. Adding too much glue can make the bond weaker and also create a mess. |
| Work quickly: | Hot melt glue sets quickly, so it’s important to work efficiently to ensure a strong bond. Don’t hesitate or pause for too long while applying the glue, as this can cause it to cool and thicken too much, making it harder to stick together. |
| Be careful: | Hot melt glue is extremely hot and can cause serious burns if not handled properly. Always wear gloves and avoid touching the hot glue or nozzle of the glue gun. It’s also a good idea to have a bowl of cool water nearby in case of accidental burns. |
| Practice: | As with any skill, practice makes perfect when it comes to using hot melt glue. Don’t be discouraged if your first attempts aren’t perfect. Keep practicing and adjusting your technique until you find what works best for you. |
By following these tips, you can effectively and safely use hot melt glue for all of your crafting and DIY projects. Just remember to work quickly and carefully, and always take precautions to prevent burns and injuries.
Preventing burns and injuries
When using a hot melt glue gun, it’s important to take precautions to prevent burns and injuries. Here are some tips to help keep you safe:
- Wear protective gear: To prevent burns and injuries, it’s recommended that you wear protective gloves, eye goggles, and clothing that covers your skin.
- Keep the glue gun away from children: Hot melt glue guns should be kept out of reach of children, as the hot glue can cause burns and can be dangerous if ingested.
- Be mindful of the nozzle: The nozzle of the glue gun can get extremely hot, so be careful not to touch it or allow it to come into contact with any other objects when in use.
- Use a stand or holder: To prevent accidental burns or fires, it’s a good idea to place the glue gun in a stand or holder when not in use.
- Avoid touching the glue: Hot glue can stick to your skin and cause burns, so be sure to avoid touching newly-applied glue until it has cooled and hardened.
- Work in a well-ventilated area: Hot melt glue can release fumes when heated, so it’s important to work in a well-ventilated area or to use a mask or respirator if necessary.
- Unplug the glue gun: When finished using your glue gun, unplug it from the power source and allow it to cool completely before storing it away or cleaning it.
By following these safety tips, you can reduce the risk of burns and injuries when using hot melt glue. Remember to always be mindful of the potential dangers and take necessary precautions to stay safe.
Finishing and Clean-Up
After your project has been successfully glued together, it’s important to properly finish and clean up. This step ensures that your creation looks tidy and professional. However, it can be daunting to figure out the best way to finish and clean up hot melt glue. Don’t worry, we’ve got you covered! Below are some essential tips and techniques to help you successfully finish and clean up hot melt glue like a pro.
Allowing glue to cool and dry
Once you have finished applying the hot melt glue onto your materials, the next step is to allow it to cool and dry. This process is very important in ensuring that the bond is strong and long-lasting. Here are some essential tips to follow when allowing the glue to cool and dry:
- Be patient: Avoid touching or moving the glued surface until it has fully cooled down. The cooling time can differ depending on the size of the project and the type of glue you are using. As a general rule of thumb, wait for at least 10 to 15 minutes before handling the glued object.
- Allow proper ventilation: Ensure that the area where you are allowing the glue to cool and dry is well-ventilated. The fumes from the hot melt glue can be harmful if inhaled. So, keep the windows open or turn on a fan to increase air circulation in the room.
- Place the object on a flat surface: To avoid any damage to the glued object, place it on a flat and level surface while it cools and dries. Tilting or moving the surface can cause the glue to shift or the pieces to separate.
- Check for uniformity: After the glue has cooled, inspect the glued area to ensure that the bond is even and uniform. In case of any gaps or unevenness, you can reapply the glue and wait for it to dry again.
By following these tips, you can ensure that the hot melt glue cools and dries effectively, resulting in a strong and durable bond.
Removing excess or unwanted glue
Once your hot melt glue project is complete, you may notice that there is excess or unwanted glue on your materials. Removing this glue is important to ensure a clean and professional-looking finished product. Follow these steps to safely and effectively remove excess or unwanted hot melt glue:
- Cool the glue: Before attempting to remove the glue, make sure it has cooled completely. Trying to remove hot glue can result in burns or damage to your materials.
- Peel or scrape away: If the glue is on a surface that can be peeled or scraped, use a plastic scraper or your fingers to gently peel away the glue. Be careful not to damage any underlying surfaces or materials.
- Apply heat: If the glue is particularly stubborn, use a heat gun or hair dryer to soften it. Once the glue has softened, use a plastic scraper or your fingers to gently peel it away.
- Use a solvent: You can also apply a solvent such as rubbing alcohol or acetone to the glue to dissolve it. Apply the solvent to a cotton swab or cloth and gently rub the glue until it dissolves. Avoid using solvents on delicate materials that may be damaged by the chemicals.
- Clean the area: Once all the excess glue has been removed, clean the area with a damp cloth or rubbing alcohol. This will ensure that no residual glue or solvent is left behind.
By following these steps, you can effectively remove excess or unwanted hot melt glue from your materials without causing damage or leaving behind unsightly residue. Remember to always work carefully and safely to avoid burns and injuries.
Cleaning the glue gun and work area
After finishing your hot melt glue projects, it’s essential to clean your glue gun and work area to ensure they remain functional and free of adhesive residue. Here are some tips on how to properly clean your hot melt glue gun and work area:
- Wait for the gun to cool down: After completing your project, turn off and unplug the glue gun and wait for it to cool down. This may take up to 15 minutes.
- Remove excess glue: Use a scraper or spatula to remove any remaining glue from the glue gun’s nozzle and holder. Be careful not to damage the gun’s components.
- Wipe down the glue gun: Using a clean cloth or paper towel, wipe down the glue gun’s exterior to remove any dirt, dust or residual glue. Special attention should be paid to the nozzle and holder.
- Clean the work area: Once you’ve cleaned the glue gun, it’s time to move on to the work area. Use a warm, soapy cloth or sponge to wipe down your work area, removing any glue drips or residue that may have accumulated during your project.
- Dispose of glue and debris: Proper disposal of excess glue, glue sticks, and debris is essential to maintain a clean work area. Dispose of any leftover hot melt glue and residue in a trash bin.
By taking the time to properly clean your hot melt glue gun and work area, you’re extending the life of your tools and ensuring that your future projects go as smoothly as possible. Remember to always prioritize safety when working with hot melt glue, and don’t hesitate to ask for assistance if you’re unsure about any step of the process.
Conclusion
After reading this article, you should now have a better understanding of how to use hot melt glue effectively. Whether you’re a DIY enthusiast or a professional crafter, hot melt glue can be a versatile and reliable adhesive for a wide range of projects.
Remember to choose the right glue gun for your needs, taking into account factors such as temperature, material, and application. It’s also important to prepare your materials properly before gluing, ensuring clean and dry surfaces and a secure fit.
When using the glue gun, be sure to work quickly and carefully, applying the glue evenly and avoiding burns or injuries. And once the project is complete, take the time to allow the glue to cool and dry completely before finishing and cleaning up.
With these tips and techniques in mind, you can confidently incorporate hot melt glue into your projects, from simple repairs to intricate designs. Happy crafting!
Frequently Asked Questions
1. Can hot melt glue be used on all materials?
No, hot melt glue is not recommended for use on materials such as glass, metal, or ceramic surfaces because it may not adhere properly.
2. Is it safe to use hot melt glue?
Yes, as long as proper safety precautions are taken such as wearing protective gloves and avoiding contact with hot glue.
3. How long does hot melt glue take to dry?
Hot melt glue typically dries within 30 seconds to one minute, depending on the thickness of the glue and environmental conditions.
4. Can hot melt glue be removed once it’s applied?
Yes, hot melt glue can be removed by heating it up with a hot air gun or using a solvent such as rubbing alcohol.
5. What is the maximum temperature hot melt glue can withstand?
Hot melt glue can typically withstand temperatures up to 150-180 degrees Celsius.
6. Can hot melt glue be used for outdoor projects?
Yes, there are hot melt glue formulations available that can withstand outdoor conditions and moisture.
7. How often do I need to change the glue stick in my glue gun?
This depends on the size of the glue stick and the frequency of use. As a general rule, the glue stick should be changed when it runs out or becomes less viscous.
8. Can I use different types of glue sticks with the same glue gun?
It is important to use glue sticks that are compatible with the glue gun’s size and temperature range. Using the wrong type of glue stick can damage the gun or result in poor bonding.
9. How do I store hot melt glue and glue guns?
Hot melt glue should be stored in a cool, dry place away from moisture and direct sunlight. Glue guns should be unplugged and allowed to cool before storing.
10. What should I do if hot melt glue gets on my skin or clothes?
Immediately rinse the affected area with cold water and seek medical attention if necessary. Hot melt glue can cause burns and skin irritation.