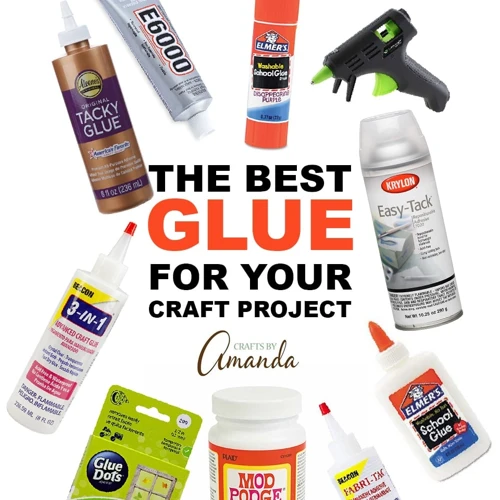
Crafting and DIY projects are becoming increasingly popular nowadays, and hot glue and E6000 are two adhesives that are commonly used in these projects. But have you ever wondered what would happen if you combined them? Would it create a stronger bond? What are the advantages and disadvantages? If these questions have been boggling your mind, then you have come to the right place. In this article, we will detail the tips and tricks for using hot glue and E6000 together, including a step-by-step guide, projects to try, and differences between the two adhesives. Whether you’re a novice or experienced crafter, this article will provide you with the knowledge to create high-quality and long-lasting projects.
Advantages of Hot Glue and E6000 Together
When it comes to crafting and DIY projects, having the right tools and materials can make all the difference. Hot glue and E6000 are two adhesives that are commonly used in various projects, but have you ever considered using them together? Combining these two adhesives can offer several advantages such as better bonding, faster drying time, and water resistance. In this section, we will explore the benefits of using Hot Glue and E6000 together and how they can elevate your crafting game. For tips on how to use a glue gun without making a mess, check out our article here.
Better Bonding
When using hot glue and E6000 together, one of the advantages is better bonding compared to using either adhesive alone. By combining the two, the bond created is much stronger and can even be permanent in some cases, depending on the materials being glued together.
Hot glue on its own is known for its quick bonding capability, but it can be brittle and may struggle to hold up over time. E6000, on the other hand, is known for its strong and flexible hold but can take a longer time to dry and cure.
Using both adhesives together creates a more secure and long-lasting bond. The hot glue provides a quick initial bond, allowing you to stabilize the materials being glued together, while the E6000 provides a more permanent bond and increased strength as it cures. The combination of the two also results in improved shock resistance and can protect against surface damage.
It is important to note that not all materials are compatible with both adhesives, and proper preparation and application techniques must be used to achieve the best results. Check the manufacturer’s instructions and do a test application before beginning the project.
So, when you need stronger and more resilient bonding for your crafting and DIY projects, try using hot glue and E6000 together. This combination will provide a better bonding solution that will last longer and be more reliable.
If you want to know more about using hot glue, check out our article on how to use hot melt glue.
Faster Drying Time
Combining Hot glue and E6000 yields faster drying time than either adhesive used alone due to their unique compositions. While hot glue dries quickly, it reaches its full strength in less than a minute, which is ideal for projects that require fast bonding to set-up, such as fixing a broken vase or attaching rhinestones onto a dress. In contrast, E6000 takes 24 hours to cure completely, but achieves a strong and flexible bond. However, by pairing these two adhesives together, the hot glue can provide an initial hold while the E6000 has time to cure and set for a long-lasting bond. It is important to note that the drying time of the combined glue depends on the amount of glue used, the surface materials and the environmental factors.
If you want to learn how to smooth hot glue for quicker drying time, check out this article on our site. Another great project using hot glue is making fake water for your crafts. To learn more, read our article on how to make fake water with hot glue.
Water Resistance
When it comes to glue, water resistance is often a crucial factor to consider, especially for projects that may be exposed to moisture or humidity. Hot glue and E6000 used together are a great combination for achieving strong water-resistant bonding.
E6000 is particularly resistant to water and can form a strong bond with a variety of surfaces, including porous materials such as fabric or wood. However, it is important to note that E6000 is not recommended for continuous exposure to water or for use underwater. It can resist water, but it will eventually break down and deteriorate over time.
Hot glue, on the other hand, is not always waterproof, but it can be made to be more resistant to water by using a formulated hot glue such as a high-performance hot melt adhesive or a waterproof hot glue. These highly durable hot glues have the ability to resist water and are great for outdoor projects such as repairing patio furniture or crafting garden decor.
Another option is to use a hybrid hot glue, which combines the strength of E6000 and the convenience of hot glue. These hybrid hot glues often have great water resistance properties and set quickly like hot glue, while also offering some flexibility and strength like E6000.
Combining hot glue and E6000 offer many advantages, including strong water resistance, faster drying time, and better bonding. When working on waterproof projects, it is important to choose the right type of glue and to follow proper application techniques. Consider using the following tips for achieving strong water-resistant bonding using hot glue and E6000:
- Choose a hybrid hot glue for maximum water resistance
- Ensure the surface is clean and dry before applying glue
- Apply the glue evenly and in the right amount
- Allow the glue to dry completely before exposing it to water
By following these tips and techniques and using the right glue for your project, you can achieve strong, water-resistant bonds that will stand the test of time.
If you’re looking for project ideas that require water-resistant bonding, try creating a hot glue snowflake or upcycling home decor with E6000 and hot glue. For more information, check out our guides on how to glue bottle caps to a picture frame, how to make hot glue snowflakes, and how to use balloon glue.
Key Factors to Consider
When it comes to using hot glue and E6000 together, it’s important to keep in mind certain factors that can affect the bonding process. Whether you are using these adhesives for a DIY project or repairing a broken item around the house, understanding these key factors can make all the difference in achieving a strong and long-lasting bond. In this section, we will explore two important considerations to keep in mind: surface material compatibility and application tools and techniques. By following these tips, you can ensure that your hot glue and E6000 bonds are strong and reliable.
Surface Material Compatibility
When using hot glue and E6000 together, it is important to consider the surface material compatibility. Some materials may not bond well with one or both of the adhesives, which can result in a weak bond or no bond at all. To ensure a successful bond, it is important to select the right adhesive for the surface material.
The following table shows the compatibility of hot glue and E6000 with commonly used materials:
| Material | Hot Glue | E6000 |
|---|---|---|
| Wood | Good | Excellent |
| Fabric | Good | Excellent |
| Glass | Poor | Excellent |
| Ceramic | Poor | Excellent |
| Metal | Good | Excellent |
| Plastic | Good | Excellent |
| Rubber | Poor | Excellent |
As shown in the table, E6000 is generally more compatible with most surfaces than hot glue. However, hot glue can still be effective for certain materials such as wood and fabric. It is important to note that the condition and cleanliness of the surface can also affect the adhesive bond. For example, a dusty or oily surface may not bond as well as a clean surface.
If you encounter a surface material that is not compatible with either hot glue or E6000, you may need to consider another adhesive option or surface treatment to improve the bond.
For more information on hot glue, check out our article on why is super glue hot. If you are interested in making a mold out of hot glue, read our guide on how to make a mold out of hot glue. To learn how to properly load a glue gun, visit our article on how to load a glue gun.
Application Tools and Techniques
When it comes to using hot glue and E6000 together, the right tools and techniques can make all the difference. Here are some key tools and techniques to keep in mind:
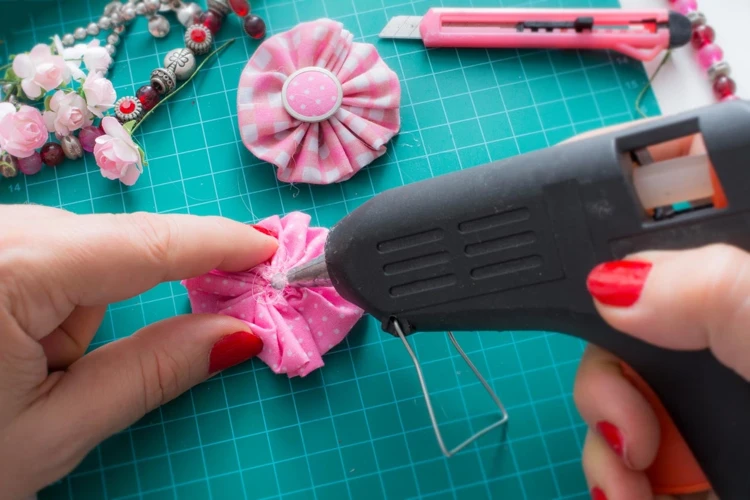
1. Applicators: Depending on the project, different types of applicators may be needed. For smaller projects, a hot glue gun with a fine tip is recommended for precise application. E6000 can be applied with a toothpick or a small brush for intricate areas.
2. Workspace: When working with hot glue, it’s important to have a clean and flat workspace. A silicone mat or aluminum foil can be used to protect the surface from glue drips. E6000 should be used in a well-ventilated area, as the fumes can be strong.
3. Temperature: For hot glue, it’s important to use the right temperature setting on your glue gun. High-temperature glue guns are best for bonding materials that require a strong bond, while low-temperature glue guns are ideal for delicate materials that may be damaged by high heat. E6000 should be used at room temperature.
4. Mixing: When using hot glue and E6000 together, it’s important to mix them thoroughly for the best results. To do this, apply a small amount of E6000 to the surface, then apply hot glue on top and press the materials together firmly. Let the two glues set for a few minutes before continuing with the project.
5. Cleanup: To prevent buildup of glue on your applicators, clean them after each use. For hot glue guns, use a piece of aluminum foil to remove any excess glue from the nozzle. For E6000, use rubbing alcohol to clean off any residual glue.
Using the right tools and techniques when applying hot glue and E6000 can make a huge difference in the success of your project. Remember to work in a well-ventilated area, mix the two glues thoroughly, and clean your tools after each use. With practice and patience, you can achieve a strong bond and professional-looking results.
Using Hot Glue and E6000 Together
When it comes to crafting and DIY projects, using both hot glue and E6000 together can be a game-changer. However, it’s important to know the proper techniques and steps to ensure the best outcome. In this section, we will dive into the process of using hot glue and E6000 together, including prepping your materials and applying the adhesive. By following these steps, you can achieve a strong and long-lasting bond for your project. Let’s get started!
Step-by-step Guide to Prepping Your Materials
Before you start using hot glue and E6000 together, it’s important to prepare your materials properly. This includes cleaning and roughening up the surfaces, choosing the right applicator, and ensuring a proper working environment. Here is a step-by-step guide to prepping your materials for hot glue and E6000:
| Step 1: Clean the surfaces | Use a clean cloth and rubbing alcohol to remove any dirt, grease, or oil from the surfaces that will be bonded. This will help ensure a strong bond. |
| Step 2: Roughen up the surfaces | Use sandpaper or a roughing tool to gently roughen up the surfaces that will be bonded. This will help the adhesive stick better. |
| Step 3: Choose the right applicator | Depending on the size and intricacy of your project, you may need a different type of applicator for each adhesive. A hot glue gun is ideal for larger surfaces, while E6000 is better suited for smaller, more precise applications. |
| Step 4: Work in a well-ventilated area | Both hot glue and E6000 emit fumes when they are being used, so it’s important to work in a well-ventilated area. You may want to wear a mask to protect yourself from the fumes. |
| Step 5: Heat up the hot glue gun | If you’re using a hot glue gun, plug it in and let it heat up for a few minutes before you start working. This will ensure that the glue is melted and ready to use. |
| Step 6: Lay out your materials | Make sure you have all the materials you need for your project laid out in front of you before you start gluing. This will help you work more efficiently and avoid mistakes. |
| Step 7: Practice on a scrap surface | If you’re new to working with hot glue and E6000, it’s a good idea to practice on a scrap surface first. This will help you get a feel for the adhesives and how they work. |
By following these simple steps, you can ensure that your materials are properly prepped for hot glue and E6000. This will help you achieve a strong, long-lasting bond and avoid any mishaps during the application process.
Application Techniques for Hot Glue and E6000
When it comes to application techniques for hot glue and E6000, it’s important to consider the characteristics and composition of each adhesive. Here are some tips for using each adhesive effectively:
| Adhesive | Application Techniques |
|---|---|
| Hot Glue |
|
| E6000 |
|
By following these techniques, you can ensure a strong and lasting bond for your projects using hot glue and E6000.
How to Remove Hot Glue and E6000 Residue
No matter how carefully you work, there may come a time when you need to remove hot glue or E6000 residue from a surface. Whether you’re a beginner or an experienced crafter, removing glue residue can be frustrating, especially if it leaves behind stubborn marks or stains. Thankfully, there are several tools and techniques you can use to get rid of the excess glue without damaging your project. In this section, we’ll explore some effective methods for removing glue residue, as well as some precautions to keep in mind. So let’s dive in!
Tools and Techniques for Removal
Removing hot glue and E6000 residue can be a bit tricky but with the right tools and techniques, it can be done quickly and effectively. Here are some common tools and techniques that can help you in removing the glue residue:
- Heat gun: Using a heat gun to melt the glue residue can make removal easier. However, be careful not to use too much heat as it can damage the surface or material underneath.
- Solvents: Some solvents like nail polish remover or rubbing alcohol can dissolve the glue residue. Apply the solvent on a cloth and gently rub the residue until it loosens up.
- Blunt scraper: A blunt scraper like a spoon or a plastic spatula can help you remove the hard glue residue layer by layer. Be careful with the edges while scraping to avoid damaging the surface underneath.
- Hot water: Hot water can also help in softening the glue residue. Soak the affected area in hot water and then wipe off the softened residue with a cloth.
- Sandpaper: In case of a rough surface, sandpaper can be used to smoothen out the residue. However, use it with care and gently rub only the affected area avoiding the surrounding areas.
It is important to note that while using any of these tools and techniques for glue residue removal, always follow the manufacturer’s instructions and try them out on a small, inconspicuous area before proceeding with the entire area. Proper use of the right tools and techniques can help avoid any damage to the surface underneath during the removal process.
Project Ideas Using Hot Glue and E6000
If you are a DIY enthusiast, the possibilities are endless when it comes to using hot glue and E6000 together. From making unique and personalized jewelry to upcycling home decor items to crafting holiday decorations, you can use these versatile adhesives to bring your imagination to life. In this section, we will discuss some exciting project ideas using hot glue and E6000 and explore the endless creativity you can unleash with these adhesives. So, let’s dive in and get inspired!
DIY Jewelry Making
Creating jewelry is a popular use for hot glue and E6000. Here are some project ideas for DIY jewelry making using these adhesives.
| Jewelry Type | Materials Needed | Application Techniques |
|---|---|---|
| Beaded Bracelets | Assorted beads, stretch cord, crimp beads, hot glue | Thread the beads onto the stretch cord and knot the ends. Add crimp beads to secure the knot. Apply a small amount of hot glue to the knots and crimp beads for extra security. |
| Fabric and Ribbon Necklaces | Fabric or ribbon, hot glue, chain or cord, jump rings, charms | Cut a length of fabric or ribbon and fold in half. Apply hot glue to the ends and attach jump rings. String the chain or cord through the jump rings. Add charms with jump rings and secure with hot glue. |
| Statement Earrings | Earring hooks, large beads or pendants, jump rings, hot glue | Attach a jump ring to the loop of the earring hook. Apply hot glue to the loop and attach a large bead or pendant. Hold in place until glue dries. |
It’s important to note that both hot glue and E6000 can be used for a variety of jewelry-making techniques. However, E6000 is typically preferred for projects requiring a stronger bond, such as metal and glass jewelry. Meanwhile, hot glue is ideal for lightweight materials and for filling small gaps or holes in jewelry components. Always follow the application and safety guidelines for each adhesive when working on jewelry projects to ensure a secure and long-lasting bond.
Upcycling Home Decor
When it comes to upcycling, hot glue and E6000 are versatile tools that can be used to transform old or outdated home decor items. Here are some ideas on how to upcycle with hot glue and E6000:
1. Turn Old Picture Frames into Jewelry Organizers
Transform old picture frames into functional and stylish jewelry organizers with hot glue and E6000. Use E6000 to adhere small hooks or knobs onto the bottom of the picture frame. Then, use hot glue to attach decorative mesh or fabric onto the back of the frame, creating a place to hang your necklaces and bracelets.
2. Create Unique Lampshades
Customize old or plain lampshades with hot glue and E6000. Use hot glue to attach fabric, ribbon, or lace onto the lampshade for a new, textured look. You can also use E6000 to attach beads or decorative trims onto the lampshade for added detail.
3. Update Old Vases
Give old vases a modern and trendy update with hot glue and E6000. Use hot glue to attach decorative gems or buttons onto the vase for added texture and dimension. You can also use E6000 to attach a new base or stand to the vase, giving it a unique and updated look.
4. Create Custom Coasters
Make your own custom coasters with hot glue and E6000. Use hot glue to attach fabric, decorative paper, or cork onto a plain coaster base. Then, use E6000 to attach decorative elements such as beads or charms onto the coaster for added personality.
5. Add Detail to Mirrors
Upgrade plain or outdated mirrors with hot glue and E6000. Use hot glue to attach decorative elements such as buttons or gems onto the frame of the mirror. You can also use E6000 to attach new frames or borders onto the mirror, giving it a new and updated look.
By using hot glue and E6000 to upcycle home decor items, you can create unique and personalized pieces that are both stylish and functional. The possibilities are endless, so let your creativity run wild!
Crafting Holiday Decorations
The holiday season is the perfect time to unleash your creativity and make some unique and beautiful decorations for your home. Combine the bonding power of hot glue and the durability of E6000 to create stunning holiday decorations that will stand the test of time. Here are some project ideas to get you started:
- Wreaths: Create a festive and welcoming atmosphere before guests even step foot in your home by crafting a wreath for your front door. Use hot glue to secure your chosen holiday ornamentation, such as pine cones or ornaments, to the wreath base. For extra durability, use E6000 to attach heavier pieces or items that will be subjected to the elements.
- Ornaments: Instead of buying generic ornaments for your Christmas tree, make your own unique decorations using hot glue and E6000. Secure ribbon, beads, and other embellishments to your chosen ornament base with hot glue, and use E6000 for heavier additions like figurines or wooden pieces. Personalize your ornaments with names or phrases using hot glue or try using E6000 to add glitter or metallic accents.
- Garlands: Add a festive touch to your fireplace mantle or staircase railing with a homemade garland. String together decorative elements like felt balls, paper cutouts, or even candy canes using hot glue. For extra durability, use E6000 to secure heavier or hard-to-bond elements like clips or hooks.
- Candle Holders: Create a warm and cozy atmosphere in your home by crafting your own candle holders. Use hot glue to secure holiday-themed elements like holly leaves or mistletoe sprigs to plain glass candle holders. For extra durability, use E6000 to attach heavier objects or add a clear sealant over the finished product to protect it from heat damage.
- Table Centerpieces: Make a statement at your holiday dinner with a unique and eye-catching centerpiece using hot glue and E6000. Secure festive elements like pine branches, pine cones, and ornaments to a base like a wooden tray or glass bowl using hot glue. Use E6000 to attach heavier elements like ceramic figurines or metal candle stands, or to reinforce the hot glue bonds for extra durability.
As always, remember to work in a well-ventilated area when using these adhesives, and to practice proper safety measures to prevent burns or other injuries. With these project ideas, you can add a personal touch to your holiday decor and create lasting memories with friends and family.
Understanding the Differences Between Hot Glue and E6000
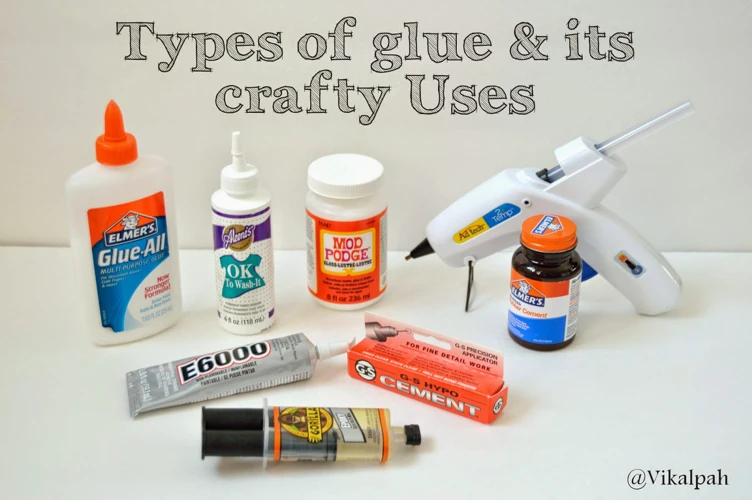
As you embark on your crafting journey, it’s important to understand the differences between hot glue and E6000. Both adhesives have their unique advantages and disadvantages, and choosing the right one for your project can mean the difference between success and failure. In this section, we will explore the composition, material compatibility, and working characteristics of these two popular adhesives, so you can make informed decisions and achieve the best possible results.
Composition and Material Compatibility
When it comes to using hot glue and E6000 together, understanding the composition and material compatibility of both adhesives is crucial. While both adhesives are versatile and can bond to a variety of materials, their chemical composition differs.
Hot glue is made from thermoplastic glue, which is melted and applied in a liquid state. Once the hot glue cools, it solidifies and creates a strong bond. It is commonly used for materials such as paper, cardboard, fabric, and foam.
E6000, on the other hand, is a type of industrial strength adhesive that is made from an elastic polymer. It works by chemically bonding to materials, creating a permanent bond that is incredibly strong. E6000 is best used for bonding materials such as metal, glass, plastic, and wood.
When it comes to material compatibility, hot glue tends to work best with porous materials that can absorb the adhesive, such as fabric and paper. E6000 works best with non-porous materials that do not absorb the adhesive, such as metal and glass. However, both adhesives can be used on a variety of surfaces, so it is important to test the bond strength on a small area before applying it to the entire project.
To help determine the compatibility between materials and adhesives, here is a table outlining the characteristics of both:
| Material Type | Hot Glue Compatibility | E6000 Compatibility |
|---|---|---|
| Cardboard | Good | Poor |
| Fabric | Good | Poor |
| Glass | Poor | Good |
| Metal | Poor | Good |
| Plastic | Fair | Good |
| Wood | Good | Fair |
Using this table, you can determine which adhesive would work best for your specific project based on the materials you will be bonding together. It is important to note that while hot glue and E6000 can be used together, it is best to use them in combination with materials that are compatible with each adhesive separately.
Working Characteristics
When it comes to working characteristics, hot glue and E6000 have some notable differences. Here are some of the differences you should be aware of before using them together:
- Viscosity: Hot glue has a honey-like consistency, while E6000 has a thicker, more viscous consistency similar to honey at room temperature. Hot glue is more fluid and can be applied quickly, while E6000 requires more time and care when applying.
- Drying Time: Hot glue dries quickly within seconds, making it ideal for fast projects. In contrast, E6000 takes at least 24 hours to dry completely, depending on the temperature and humidity in your workspace, which can affect the bonding strength.
- Bonding Strength: E6000 is known for having a very strong bond, especially when used on non-porous surfaces like metal and glass. On the other hand, hot glue has a less strong bond and may not be suitable for heavy-duty projects.
- Temperature Sensitivity: Hot glue is highly sensitive to temperature and can liquefy at high temperatures, whereas E6000 can withstand higher temperatures without losing its bond strength.
- Shelf Life: Hot glue has a shorter shelf life than E6000, as it can dry out and lose its adhesive properties over time. E6000, on the other hand, can be stored for a long time if properly sealed and stored in a cool, dry place.
Understanding the differences between hot glue and E6000’s working characteristics is essential to using them together effectively. By leveraging the strengths of each adhesive, you can create lasting, high-quality projects that adhere well to a variety of surfaces.
Tips and Tricks for Effective Use
When it comes to using hot glue and E6000 together, there are several tips and tricks that can help you achieve the best results. These small variations in technique and storage can make a significant difference in the outcome of your project. To help you get the most out of your adhesive combination, we have compiled a list of important tips and tricks to consider. From shelf life to bonding strength, read on to learn more about how to effectively use hot glue and E6000 together.
Storing and Shelf Life
When it comes to storing and shelf life, it’s important to follow certain precautions to keep your hot glue and E6000 in good condition. Here are some tips:
- Store at Room Temperature: Both hot glue and E6000 should be stored in a cool, dry place, away from direct sunlight. Exposure to heat and extreme temperatures can damage the adhesive properties of both products.
- Seal Tightly: To prevent air from reaching the adhesive, keep both hot glue and E6000 in their original packaging or airtight containers. This will help to prolong the shelf life and prevent the glue from drying out or losing its effectiveness.
- Check Expiration Dates: Like any other adhesive, hot glue and E6000 have a limited shelf life. Before using either product, check the expiration date to ensure that it is still safe to use. Using an expired glue can result in poor bonding, which can be frustrating and negatively impact your project.
- Avoid Freezing: Do not allow hot glue or E6000 to freeze, as this can impact its bonding strength and consistency. Make sure to store them in a location that will not experience freezing temperatures.
- Keep Out of Reach of Children: Because hot glue and E6000 can be dangerous if not handled properly, it’s important to keep them out of reach of children. Store them in a high, secure location where children cannot access them. Additionally, always use caution and protective gear when working with these adhesives.
By taking these precautions, you can ensure that your hot glue and E6000 remain in good condition and produce effective bonding for your projects.
Preventing Burn Injuries
When using hot glue, safety should always be a top priority. Hot glue guns can reach temperatures between 375- 400°F, which can cause severe burns if proper precautions are not taken. Here are some tips to prevent burn injuries while using hot glue:
| Tips for Preventing Burn Injuries | Description |
|---|---|
| Always read the instructions: | Before using a hot glue gun, make sure to read the manufacturer’s instructions. This will provide you with important safety information and precautions. |
| Wear protective gear: | It is essential to wear protective gear, such as gloves, when using a hot glue gun. This will provide an extra layer of protection for your hands and fingers. |
| Keep the hot glue gun away from children: | Never leave the hot glue gun unattended and keep it out of reach of children and pets. Accidents can happen, and younger individuals may not understand the risks involved with hot glue guns. |
| Be mindful of the glue’s temperature: | Hot glue can be extremely hot when it initially comes out of the gun. Use caution and avoid touching the glue until it has had time to cool down. |
| Practice good glue gun etiquette: | After using the glue gun, be sure to turn it off and unplug it from the electrical outlet. This will prevent potential accidents and burns. |
By following these simple precautions, you can significantly reduce the risk of sustaining a burn injury while using a hot glue gun. Remember, safety is essential when working with any craft or DIY project.
Controlling Glue Flow and Bonding Strength
When it comes to using hot glue and E6000 together, controlling the glue flow and bonding strength is essential for achieving the desired results. Here are some tips:
- For hot glue: Controlling the glue flow can be achieved by adjusting the temperature of the glue gun. A higher temperature will result in a thinner and more fluid glue flow, while a lower temperature will make the glue thicker and slower to flow. To adjust bonding strength, experiment with the amount and frequency of glue application.
- For E6000: The glue flow can be controlled by squeezing the tube gently and applying consistent pressure. Use a toothpick or similar tool to spread the glue evenly over the surface to be bonded. For bonding strength, keep in mind that a thin layer will result in a weaker strength, while a thick layer will result in a stronger bond.
- For both glues: Applying a zigzag pattern of glue can help distribute the glue evenly and ensure a strong bond. It’s also important to apply the glue quickly and work in small sections to avoid the glue drying before it can be applied properly. Additionally, a clamp or weight can be used to hold the materials in place while the glue dries.
By following these tips, you can control the glue flow and bonding strength to achieve the desired results and create high-quality projects using hot glue and E6000 together.
Maintenance and Storage
Keeping your adhesive supplies properly maintained and stored is key to ensuring their effectiveness and longevity. Here are some tips to help you maintain your hot glue and E6000 adhesives:
Cleanliness: Make sure to keep the nozzles of your glue guns and E6000 tubes clean to prevent buildup and clogs. Use a clean cloth or paper towel to wipe away any excess glue or adhesive residue.
Temperature: Hot glue and E6000 should be stored at room temperature or slightly below to prevent drying out or melting. Avoid storing them in areas that are exposed to direct sunlight or extreme temperatures.
Air Tight: It is best to store both hot glue and E6000 in airtight containers to prevent moisture from getting in and causing the adhesive to lose its properties.
Labeling: Label your hot glue and E6000 containers with the date of purchase and the expiration date to keep track of their shelf life.
Proper Disposal: If you have expired or unusable hot glue or E6000, make sure to dispose of them properly. Do not throw them in the regular trash, as they can be harmful to the environment. Check with your local waste management facility for proper disposal instructions.
By following these maintenance and storage tips, you can ensure that your hot glue and E6000 adhesives remain effective and ready to use for all of your crafting and DIY projects.
Conclusion
In conclusion, using hot glue and E6000 together can offer a multitude of advantages, including enhanced bonding, faster drying times, and improved water resistance. However, it is important to consider key factors such as surface material compatibility and application techniques in order to achieve the best results.
By following the step-by-step guide to prepping materials and applying the glue, you can successfully use hot glue and E6000 together for a wide range of projects, from DIY jewelry making to crafting holiday decorations. And with the right tools and techniques for removal, any leftover residue can be easily removed.
It is also important to understand the differences between hot glue and E6000 and their respective working characteristics, in order to make informed decisions about which glue to use for specific projects and surface materials.
Finally, to ensure effective use of these glues, it is important to store them properly and take precautions to prevent burn injuries. By implementing these tips and tricks, you can use hot glue and E6000 together with confidence and achieve professional-level results in your crafting and DIY projects.
Frequently Asked Questions
Can hot glue and E6000 be used together?
Yes, combining hot glue and E6000 can provide a better bonding strength along with a faster drying time.
What materials can be bonded with hot glue and E6000?
Hot glue works well with porous materials such as fabric, paper, and wood, while E6000 is better for non-porous materials like metal, glass, and plastic. Combined, they can bond both types of materials effectively.
How do I prep my materials before using hot glue and E6000?
Ensure surfaces are clean and free of debris or oils. Roughen non-porous surfaces with sandpaper or a file to increase the bonding strength. For fabrics, consider washing and drying them before application.
Can hot glue and E6000 hold up against water?
Yes, they are both water-resistant adhesives. However, E6000 is more resistant to water than hot glue.
What is the best application technique for hot glue and E6000?
For hot glue, apply a small amount of glue to one surface and quickly press the two surfaces together. For E6000, apply a thin layer to both surfaces, wait a few minutes for it to become tacky, then press the surfaces together.
How do I remove residue left behind by hot glue and E6000?
For hot glue, use a hairdryer to heat up the glue and then peel it off. For E6000, use a solvent such as acetone or rubbing alcohol and scrape off the softened adhesive.
What are some project ideas that utilize hot glue and E6000?
You can use them for DIY jewelry making, upcycling home decor, and crafting holiday decorations.
How long do hot glue and E6000 adhesives last?
When stored properly in a dry, cool place, the shelf life of hot glue and E6000 can be up to two years.
Is it safe to use hot glue and E6000?
Yes, but be cautious of potential burn injuries from hot glue. It is also recommended to use these adhesives in well-ventilated areas.
What is the difference between hot glue and E6000?
Hot glue is a fast-drying adhesive that works well with porous materials, while E6000 is a slower-drying, industrial strength adhesive that is better for non-porous materials.