Introduction
Are you looking for a cost-effective way to create molds for your DIY projects? Look no further than hot glue! With just a few simple steps, you can make a mold out of hot glue that is perfect for a variety of casting materials, including resin, soap, and more. In this step-by-step guide, we will walk you through the process of creating your own hot glue mold, from preparing your workspace to casting your final product. So, roll up your sleeves and get ready to unleash your creativity with hot glue molds!
What is Hot Glue?
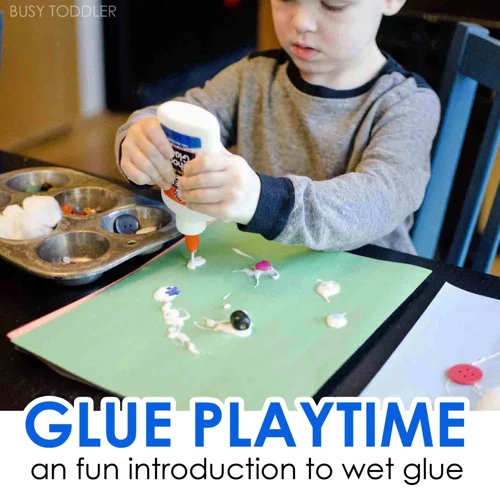
Hot glue, also known as thermoform plastic adhesive, is a type of glue that is melted in a hot glue gun and then applied to surfaces that need to be stuck together. It is a popular adhesive because it is easy to use, fast-drying, and can stick to a variety of surfaces. Hot glue is made from thermoplastic materials that melt when heated, and solidify when cooled. This makes it an ideal adhesive for a wide range of applications, from crafting to home repairs.
Benefits of hot glue include:
- Strong adhesive properties: Hot glue holds objects together firmly and dries quickly.
- Water-resistant: Hot glue is resistant to water, making it ideal for use in damp or humid environments.
- Easy to use: Hot glue can be easily melted and applied with a hot glue gun.
- Can be used on a variety of surfaces: Hot glue can be used on surfaces such as wood, fabric, and plastic.
- Versatile: Hot glue can be used for a variety of applications, from art and crafts to home repairs.
Hot glue is often used in crafting projects, such as creating hot glue snowflakes or gluing pencils together. It can also be used for practical purposes, such as fixing an air mattress, or gluing cork board to cardboard. If you’re looking to glue something in your car, you might find our guide on how to glue your dashboard in your car helpful.
To make your own hot glue molds, you’ll need a hot glue gun and glue sticks, among other materials. One unique use for hot glue is to make sticky tack with liquid glue – a hack you can check out in our article on how to make sticky tack with liquid glue.
Hot glue is a versatile and useful adhesive that can be used in a variety of applications. Knowing how to load your glue gun and understanding how hot your glue gun gets are important safety considerations to keep in mind when working with hot glue.
Benefits of Making Molds Out of Hot Glue
Using hot glue to make molds has several benefits that make it a popular choice among hobbyists and DIY enthusiasts. Here are some of the reasons why making molds out of hot glue is a great option:
| Benefits of Making Molds Out of Hot Glue |
| 1. Cost-effective: Hot glue is an affordable option for making molds, especially when compared to more expensive silicone molds. |
| 2. Easy to make: Molds made out of hot glue are simple to create, requiring only a handful of tools and materials. |
| 3. Quick: Hot glue molds set and dry quickly, allowing you to create multiple molds in a short period of time. |
| 4. Reusable: Hot glue molds can be used multiple times, making them a sustainable and environmentally friendly option. |
| 5. Customizable: Because hot glue molds are easy to make, they allow for a great deal of customization. You can create molds in a variety of shapes and sizes to fit your specific needs. |
| 6. Versatile: Hot glue molds can be used for a variety of projects, from casting resin to making soaps, candles, and more. |
These are just a few of the benefits of making molds out of hot glue. From cost-effective and customizable to quick and versatile, hot glue molds offer a great option for DIYers and hobbyists looking to create unique and custom-made designs. While some projects may require a more specific type of mold, hot glue molds provide a simple and practical alternative for many different types of projects. So, why not give it a try and see what you can create with a hot glue gun and some glue sticks?
Materials You Will Need
To make a mold out of hot glue, you will need a few essential materials. Here’s what you’ll need to get started:
1. Hot Glue Gun: Of course, you will need a hot glue gun for this project. Make sure that the gun is in good working condition and has enough glue sticks before starting.
2. Hot Glue Sticks: To make the mold, you will need several hot glue sticks. Choose a high-quality hot glue stick that will melt smoothly and create a strong mold.
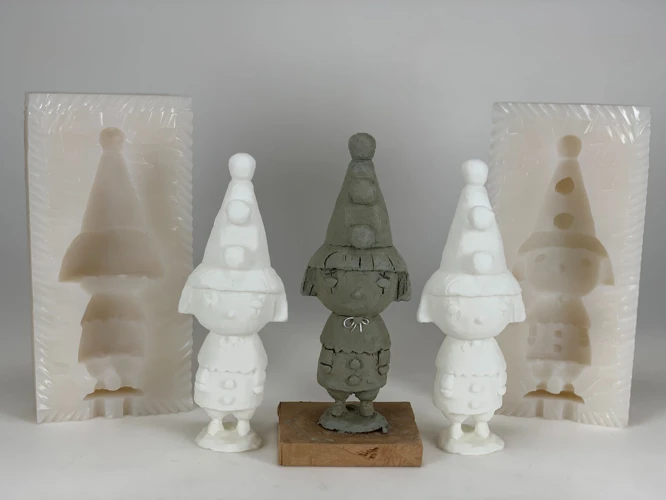
3. Positive Model: A positive model is the object you wish to make a mold of. You can use just about anything that you’d like to create this positive model. Some ideas include small toys, figurines, or decorative items.
4. Release Agent: You will need a release agent to help the mold release from the positive model. There are many different options for release agents such as cooking spray, petroleum jelly, or even bar soap.
5. Knife or Scissors: You will need a sharp tool such as a knife or scissors to cut any excess hot glue from the finished mold.
6. Mold Release Spray (Optional): If you plan on making several molds, a mold release spray can be very helpful. This spray will help the mold release from the hot glue easier and faster.
7. Protective Gear (Optional): While not necessary, protective gear such as gloves and safety glasses can be worn to prevent burns or accidents.
These materials are essential to making a mold out of hot glue. Before starting, make sure that you have all the materials in place. If you need to stock up on hot glue sticks or a release agent, head to your local crafts store or check out online retailers for a wide variety of options.
Step 1: Prepare Your Workspace
Before we start creating our hot glue mold, it’s important to prepare our workspace properly. This will help ensure that our project goes smoothly and we avoid any mistakes or accidents. Preparing your workspace involves two main steps: cleaning your work surface and gathering all the necessary materials. So let’s get started!
Clean Your Work Surface
Keeping a clean work surface is essential when using hot glue to make molds because any debris or dirt can affect the outcome of your mold. Before beginning the process, take some time to clean your work surface. Here are the steps to follow:
| Step 1: | Gather all the loose supplies on your table, including any lunch plates, coffee mugs, or anything else that does not pertain to your project. Anything you won’t be using should be removed from your work surface to make a clean space. |
| Step 2: | Wipe the surface down. Dust and debris can get in the way of the hot glue. Avoid using harsh chemicals as they can react with the materials you are using for your mold or object and cause problems later. |
| Step 3: | Organize your materials. Keep all of your materials in an organized pile or within reaching distance so your workspace doesn’t get cluttered. |
| Step 4: | Set up a trash can near your workspace. You want to keep your work environment clean and reduce the number of times you have to step away to dump out used materials or scraps. |
Once your workspace is clean, you can start the molding process with precision and care. Note that if you need help understanding how to glue together certain objects or materials before using a hot glue gun, you can consult a resource like “How to Glue: A Guide for Beginners”.
Gather Your Materials
When gathering your materials for making a mold out of hot glue, it’s important to have everything you need within reach to avoid any unnecessary delays or interruptions in the process. Below is a table of the essential materials you will need for making a hot glue mold:
| Materials | Description |
|---|---|
| Hot glue gun | A hot glue gun is essential for this project as it is the primary tool that you will use to create the mold. |
| Hot glue sticks | You’ll need several hot glue sticks, depending on the size of the mold you plan to make. |
| Positive model | The positive model is the object that you want to create a mold of. |
| Non-stick spray | A non-stick spray such as cooking oil or hair spray can be used to help release the mold from the positive model. |
| Utility knife | A utility knife will be useful for trimming any excess glue off the mold once it’s complete. |
| Cardboard or plastic sheet | A cardboard or plastic sheet can be used to create a base or container for the mold. |
It’s worth noting that using a non-stick spray isn’t always necessary, but it can make removing the mold much easier. Additionally, a cardboard or plastic sheet can be used as a base or container for the mold, depending on the size and shape of the positive model.
If you need any of these materials, they can typically be found at a hardware store or craft store. Make sure to check that your hot glue gun and glue sticks are compatible to avoid any performance issues or accidents.
Now that you have everything needed, you can move on to creating the mold. If you’re unsure how to use a hot glue gun, check this guide on how to change a hot glue gun stick.
Step 2: Create Your Object
Now that you have prepared your workspace, it’s time to start creating the object that you want to make a mold of. This can be any object that you want to replicate, whether it’s a small figurine or a larger piece of decor. If you need inspiration, there are many tutorials online that can guide you through creating different objects using hot glue. Once you have your object in mind, it’s time to start the creation process. Be sure to follow the steps carefully to ensure the best results possible. If you need help with some specific materials, for example, fixing an air mattress with a hot glue gun, check out this tutorial.
Make a Positive Model
To make a positive model for your hot glue mold, you must first have an idea of the object or shape you want to create. This can be anything from a small figurine to a larger object like a toy car. Once you have your idea in mind, you can begin gathering the materials you need to create your model.
Materials you will need:
- Clay or sculpting material
- Reusable molding material
- Cork board (optional)
- Cardboard (optional)
Begin by shaping your clay or sculpting material into the desired shape of your object. This will act as your positive model. Take your time to ensure that the shape is as close to the final product as possible. Any imperfections in your positive model will be replicated in your final mold.
If you are making a more complex shape, you may need to create a base or armature to support your clay. This can be made from wire or other materials that will provide support to your model.
Once your model is complete, you can create a reusable molding material to create the negative of your object. To do this, follow the instructions on your molding material and apply it to your positive model.
If you are creating a larger model, you may want to use cork board or cardboard to create a base for your model. This will help keep your model stable while you work on it.
Creating a positive model can take time and patience, but it is an important step in creating a successful hot glue mold. With the right materials and attention to detail, you can create a model that will serve as the basis for your mold. If you need more inspiration, check out our article on how to make hot glue snowflakes or how to glue cork board to cardboard for more creative hot glue projects.
Prepare the Positive Model for Molding
Before creating the mold, it is important to prepare the positive model for molding. This will ensure that the mold comes out clean and without any imperfections. Here are the steps to prepare the positive model:
Step 1: Clean the positive model: Make sure to remove any dust or debris from the surface of the positive model. This will ensure that the mold comes out clean and without any imperfections.
Step 2: Apply a release agent: A release agent will prevent the hot glue from sticking to the positive model. You can use petroleum jelly or cooking spray as a release agent.
Step 3: Seal any porous surfaces: If the positive model is made of a porous material such as wood or plaster, it is important to seal it before molding. Use a sealant such as varnish or a mixture of glue and water to seal the surface.
Step 4: Add registration marks: Registration marks are important for aligning the mold halves. Use a marker to add marks to the positive model.
Step 5: Add mold release tabs: Mold release tabs will make it easier to remove the mold from the positive model. Use a strip of cardboard or plastic and apply it to the positive model, leaving a tab sticking out.
By following these steps, you can ensure that your positive model is properly prepared for molding. Now you can proceed with creating the mold. If you haven’t created the positive model yet, check out our article How to Glue Pencils Together for some creative ideas.
Step 3: Create the Mold
Now that you have prepared the positive model for molding, it’s time to move on to the next step: creating the mold. This is where hot glue really shines as a mold-making material. Its pliability when heated allows it to conform to the details of the model, creating an accurate and reusable mold. In this step, you will be heating up your glue gun and applying hot glue to your prepared model. Follow these simple and easy-to-follow steps to create a hot glue mold that will give you great results every time.
Heat the Glue Gun
One of the important steps in creating a mold out of hot glue is heating the glue gun. Proper heating of the glue gun is crucial because it affects how well the glue flows from the gun. Here is a step-by-step guide on how to heat the glue gun:
| Step 1: | Insert a hot glue stick into the glue gun. |
| Step 2: | Plug in the glue gun and turn it on. |
| Step 3: | Allow the glue gun to heat up for at least 5 minutes. |
| Step 4: | Check the glue gun to see if the glue has melted and is ready to use. |
| Step 5: | If the glue is not melted, allow the gun to heat up for a few more minutes. |
| Step 6: | Once the glue is melted, test it on a disposable surface to make sure it is flowing smoothly. |
It is important to be patient and allow the glue gun to heat up properly before using it. Rushing this step can cause the glue to be too thick or not flow properly, which can affect the quality of the mold. Once the glue gun is heated up and the glue is flowing smoothly, you can move on to the next step of applying the glue onto the positive model.
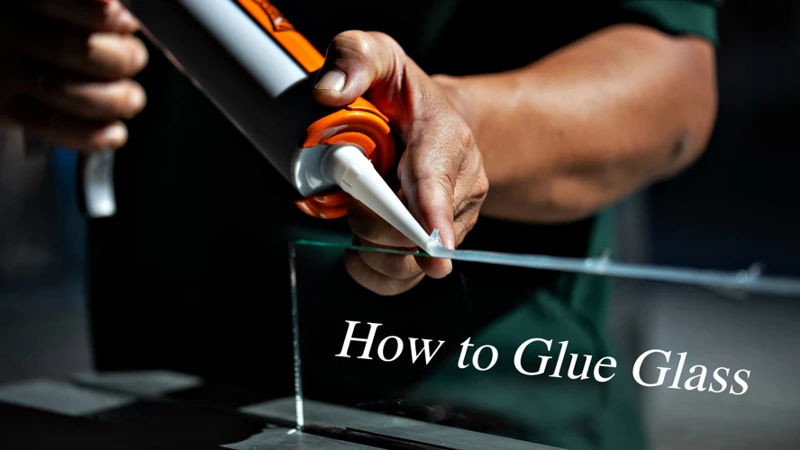
Apply Glue to the Positive Model
Before applying the hot glue to your positive model, ensure that the glue gun has reached the desired temperature. To avoid accidental burns, handle the glue gun with care.
Once the glue gun is ready, apply the hot glue to your positive model. Make sure to apply the glue in thin and even layers to achieve a smooth finish on your final mold. It is crucial to apply enough hot glue to ensure the strength and durability of your mold. However, be careful not to apply too much glue, as this will make it challenging to separate the mold from the positive model later on.
One tip is to start applying the hot glue to the edges of your positive model and slowly work your way to the center. Make sure to apply pressure on the glue gun trigger consistently, and keep the glue gun at a steady angle to prevent any air bubbles from forming in the glue.
After completing one layer of hot glue, allow it to cool and set before applying the next layer. Building up the layers of hot glue in stages will help you achieve a better and more accurate mold.
Remember to add extra glue around any critical details or undercuts in your model to ensure a proper mold. Be sure to take your time and be patient throughout the process to achieve the best results.
Tip: If you notice any air bubbles forming in your glue, poke them with a toothpick or pin to release the trapped air and create a smoother surface.
Important: Avoid touching the hot glue while it is still hot as this can cause serious burns. Always work with caution and safety in mind.
Allow the Glue to Cool and Set
After applying the hot glue to the positive model, the next step is to let the glue cool and set completely. This is an important step in the molding process as it ensures that the hot glue mold is sturdy and durable enough to withstand the casting process.
Here’s what you need to do:
- Set your positive model aside and leave it undisturbed until the hot glue has completely cooled and set. The cooling process usually takes about 10-15 minutes, depending on the size of the mold and the amount of glue used.
- Avoid touching the hot glue mold while it’s still hot, as this can cause deformation or damage to the mold. Let it cool down naturally to ensure optimal shape and integrity.
- Once the hot glue mold has cooled and set, gently remove any excess glue that may have seeped out of the mold’s seams using a craft knife or scissors. Be careful not to cut into the mold itself!
- If you notice any areas where the hot glue is too thin or fragile, you can add an additional layer of glue to reinforce those sections. Simply heat up your glue gun again and apply another layer of glue on top of the existing mold.
- Once you’re satisfied with the thickness and durability of your hot glue mold, you’re ready to move on to the next step in the process. Congratulations, you have now successfully created a mold out of hot glue!
Remember that patience is key when allowing hot glue to cool and set. Rushing this step can result in a subpar mold that won’t hold up to casting materials or will easily deform. Take your time and let the hot glue do its job of solidifying into a strong and durable mold.
Step 4: Remove the Mold from the Positive Model
As exciting as it is to see your mold come together, removing it from the positive model can be a delicate process. But don’t worry! With some patience and careful technique, you’ll be able to successfully separate the two. In this step, we’ll guide you through the process of removing the hot glue mold from the positive model. Let’s get started!
Carefully Remove the Mold from the Positive Model
When removing the mold from the positive model, it’s crucial to handle the mold with care to avoid any damage or deformation. Here are some steps to follow:
- Inspect the Mold: Before removing the mold, gently examine it to ensure that it has completely cooled and set. Hot glue molds should pop off easily when they’re ready to be removed from the positive model. Look for any areas that might be sticking or stubborn.
- Loosen the Mold: If the mold appears to be stuck in certain areas, try gently prying it loose with a craft knife or a small spatula. Be careful not to damage the mold or the positive model during this process. If you’re having trouble removing the mold, wait a few more minutes for it to cool further.
- Slow and Steady: When you’re ready to remove the mold, do it slowly and carefully. Start by gently pulling the mold away from the positive model at one corner or edge. Slowly work your way around the mold, pulling it away bit by bit. Avoid sudden movements or jerking the mold, as this can cause it to break or become deformed.
- Trimming: Once you’ve successfully removed the mold from the positive model, use a pair of scissors or a craft knife to trim any excess glue that might be sticking out. Be careful not to cut into the mold itself or cause any damage to its shape.
- Store the Mold: After you’ve removed any excess glue, store your mold in a safe place. It’s recommended to store hot glue molds in a cool, dry place away from direct sunlight or heat sources. This will help to prolong the life of your mold and prevent it from becoming damaged or deformed.
With these tips, you should be able to carefully remove your hot glue mold from the positive model without any hassle. Remember to take your time and handle the mold with care to ensure that it retains its shape and usability.
Remove Any Excess Glue
After carefully removing the mold from the positive model, you may notice that there are some excess glue drips or blobs on the mold that need to be removed. This step is important because excess glue can affect the quality of your final product.
To remove any excess glue, follow these steps:
- Inspect the mold: Take a close look at the mold and identify the areas where there is excess glue. You can use a magnifying glass to get a better view.
- Trim excess glue: Use a pair of sharp scissors or a craft blade to carefully trim away any excess glue. Be sure to work slowly and carefully to avoid accidentally cutting into the mold.
- Sand the mold: After trimming away the excess glue, use a fine-grit sandpaper to gently sand the surface of the mold. This will help to remove any remaining bumps or imperfections caused by the excess glue.
Keep in mind that removing excess glue can be a delicate process. It’s important to take your time and be patient to avoid damaging the mold. With a steady hand and some careful attention, you can achieve a smooth, professional finish on your hot glue mold.
Step 5: Use Your Hot Glue Mold
Now that you have a beautiful hot glue mold, it’s time to put it to use! Depending on your creative needs, there are endless possibilities for what you can do with your new mold. In this section, we will go over some key tips and tricks for how to use your hot glue mold effectively and how to care for it properly. So, grab your casting materials and let’s get started!
Tips for Casting Your Mold
When it comes to casting your hot glue mold, there are a few tips that can make the process go more smoothly. Here are some helpful tips to consider:
| Tip | Description |
|---|---|
| Choose the Right Casting Material | Not all casting materials work well with hot glue molds. Materials like resin, plaster, and low-melt metal alloys are good options to consider. |
| Apply a Release Agent | To release your casting material from the mold, it may be helpful to apply a release agent, such as petroleum jelly, before pouring in your casting material. |
| Fill the Mold Slowly | When pouring your casting material into the mold, pour slowly to prevent air bubbles from forming. Air bubbles may cause imperfections in your final casting. |
| Allow the Casting to Set Completely | Don’t rush the process of letting your casting material set. Wait until it is completely dry and cool to the touch before removing it from the mold. |
| Handle Your Mold Carefully | Once your mold is filled with casting material, handle it carefully to avoid damaging the mold. Removing too much material from the mold or applying too much pressure may cause the mold to break or deform. |
Keep in mind that different casting materials may have specific tips and techniques for use. Always refer to the manufacturer’s instructions for best results. Additionally, practice and experimentation may be necessary to perfect your casting technique.
By following these tips, you can successfully cast your hot glue mold and create unique and intricate designs with ease. Remember to take your time and enjoy the creative process!
Care and Maintenance of Your Mold
Maintaining your hot glue mold is essential to ensure that it lasts a long time and produces consistent results. Here are some tips on how to take care of your mold properly:
| Tip | Description |
|---|---|
| Clean your mold after each use | After each use, clean your mold with a damp cloth or running water. Use a soft-bristled brush to scrub off any residue. |
| Store your mold in a safe place | When not in use, store your mold in a dry and cool place, away from direct sunlight or extreme temperatures. This will prevent any warping or damage to the mold. |
| Avoid using sharp objects | Avoid using sharp objects like scissors or knives to remove your casting from the mold. The mold can easily get damaged, resulting in a shorter lifespan. |
| Apply a release agent | If you plan to use your mold multiple times, consider applying a release agent like cooking spray or petroleum jelly. This will prevent the casting from sticking to the mold, making it easier to remove. |
| Monitor for wear and tear | Over time, your mold may begin to show signs of wear and tear. This can lead to inconsistencies in your castings. Monitor your mold and replace it when necessary. |
By taking proper care of your hot glue mold, you can continue to produce high-quality castings for years to come. Remember to clean your mold after each use, store it in a safe place, avoid using sharp objects, apply a release agent, and monitor for wear and tear. These simple steps will help ensure your mold’s longevity and consistent performance.
Conclusion
As we come to the end of this article, it’s clear that making molds out of hot glue is not only a cost-effective way to create custom molds, but also a fun and creative process. By following the step-by-step guide outlined above, you can create molds that will perfectly fit your unique objects and creations. But before we wrap up, let’s take a closer look at some of the benefits of using hot glue molds and how you can continue to get creative with this versatile technique.
Benefits of Hot Glue Molds
Hot glue molds offer several benefits that make them a popular choice for DIYers and crafters alike. Here are some of the key benefits of hot glue molds:
- Cost-effective: Hot glue molds are an inexpensive alternative to purchasing pre-made molds. With just a few basic materials, you can create a custom mold.
- Customizable: Hot glue molds can be easily customized to fit your specific project needs. You can create molds in any shape or size you need.
- Durable: Hot glue molds are made from a durable material that can withstand multiple uses. With proper care, your mold can last for a long time.
- Versatile: Hot glue molds can be used with a variety of casting materials, such as resin, plaster, and clay. This gives you the flexibility to choose the material that is best suited for your project.
- Easy to Make: Making a hot glue mold is a straightforward process that requires minimal time and effort. With just a few simple steps, you can create a mold that is ready to use in no time.
Hot glue molds are an excellent choice for anyone looking to create custom molds for their projects. They are cost-effective, easy to make, and can be customized to fit your specific project needs. Plus, they are durable and versatile, making them a great investment for anyone who enjoys crafting or DIY projects.
Get Creative with Your Molds!
After making molds out of hot glue, the possibilities for creative expression are endless. Here are some inspiring ideas for using your newly created hot glue molds:
- Decorative Pieces: Use your hot glue molds to create decorative pieces for your home or office. The flexibility of hot glue allows you to mold intricate designs, making it perfect for creating ornamental pieces for picture frames, vases, and more.
- Jewelry: You can use your hot glue molds to make unique pieces of jewelry. After creating a mold of the desired shape, simply pour in some resin and add glitter or other decorative elements before letting the resin set and removing the mold. You can then add hooks or chains to create earrings, necklaces, and bracelets.
- Candles: Create custom-shaped candles by using your hot glue molds. After making the mold, you can pour melted wax directly into it and add your desired scent and color. Once the wax cools and hardens, you can simply remove the mold and enjoy your decorative and personalized candle.
- Soap: Similar to candle-making, you can use your hot glue molds to make custom soap shapes. Simply melt some soap base, add your desired scent and color, and pour the mixture into your hot glue mold. After it sets and cools, remove the mold and enjoy your unique soap bars.
- Chocolate and Candy: You can use your hot glue molds to create custom-shaped chocolates and candies. Simply melt some chocolate or candy melts, pour into your hot glue mold, and let it set in the fridge or freezer. Once it hardens, remove the mold and enjoy your delicious and decorative treats.
As you can see, creating molds out of hot glue can lead to a wide range of creative possibilities. Experiment with different materials and techniques to create unique and personalized items for yourself or your loved ones. The only limit is your imagination!
Frequently Asked Questions
1. Can hot glue molds be used for food items?
No, hot glue molds should not be used for food items as the glue is not food-safe and can contaminate the food.
2. What type of hot glue should I use for making molds?
It is recommended to use high-temperature hot glue for making molds as it sets quickly and creates a strong mold.
3. Can hot glue molds be reused?
Yes, hot glue molds can be reused multiple times as long as they are cleaned and maintained properly.
4. Are hot glue molds suitable for casting metals?
No, hot glue molds are not suitable for casting metals as the heat from the molten metal can melt the glue and damage the mold.
5. How do I prevent air bubbles in my hot glue mold?
To prevent air bubbles in your hot glue mold, try tapping the mold gently on a flat surface after applying the glue to release any trapped air bubbles.
6. How long does it take for hot glue molds to cool and set?
It usually takes around 10-15 minutes for hot glue molds to cool and set completely.
7. Can I add color to my hot glue mold?
Yes, you can add color to your hot glue mold by mixing in some acrylic paint or food coloring to the melted glue before applying it to the positive model.
8. How do I store my hot glue mold?
Store your hot glue mold in a cool, dry place, away from direct sunlight and heat sources, to prevent it from melting or warping.
9. Can I cast resin in my hot glue mold?
Yes, hot glue molds are suitable for casting resin as long as the mold is cleaned and dried properly before use.
10. How do I clean my hot glue mold?
You can clean your hot glue mold by gently washing it with warm soapy water, wiping it dry with a soft cloth, and storing it in a dry place.