Have you ever needed to attach pieces of plastic together but didn’t know how to go about it? Don’t worry, using a glue gun is a simple and effective solution. However, it’s important to choose the right glue gun, glue sticks, and prepare the plastic surface properly to ensure a strong bond. In this guide, we’ll take you through the steps of how to use a glue gun on plastic, including tips and tricks for a successful adhesive. So, let’s dive into the world of crafting and DIY with plastic and glue guns!
Choosing the Right Glue Gun and Glue Sticks
Choosing the Right Glue Gun and Glue Sticks – Factors to Consider
Before jumping into the process of using a glue gun on plastic, it is important to choose the right glue gun and glue sticks for the job. This will ensure that your project turns out well and the glue bond is strong enough to hold the plastic together. Here are some factors you need to consider.
Consider Temperature
When using a glue gun on plastic, one of the most important factors to consider is temperature. Choosing the wrong temperature can result in a weak bond that may even damage the plastic. It’s necessary to choose the right glue gun that provides a temperature that is suitable for the plastic you’re working on. Here are some things to consider when it comes to temperature:
- High or Low Temperature: Depending on the type of plastic you’re working with, you may need a high or low temperature glue gun. High-temperature glue guns reach temperatures between 380-400°F, while low-temperature glue guns reach temperatures between 250-280°F.
- Plastic Melting Temperature: It’s important to determine the melting temperature of the plastic in order to choose the right temperature for the glue gun. Some plastics, such as PVC, polycarbonate, and ABS, have a high melting point and require a high-temperature glue gun. On the other hand, plastics such as Styrofoam, which melt at lower temperatures, need a low-temperature glue gun.
- Glue Gun Wattage: The wattage of the glue gun also affects the temperature. Guns with higher wattage heat up faster and maintain temperature better than those with lower wattage.
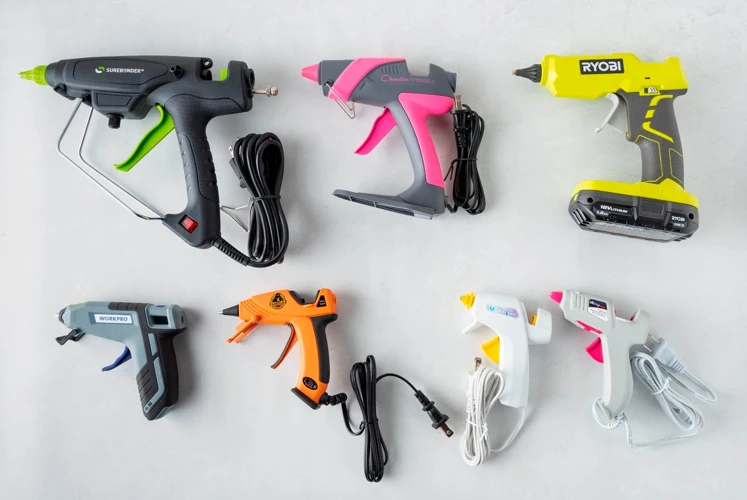
By taking these factors into consideration, you’ll be able to choose the right temperature for your glue gun and plastic. If you’re not sure which temperature to use, test a small area of the plastic first or consult the manufacturer’s instructions. Make sure to also choose the right glue stick for the job. Need more information about glue guns? Check out our guide on which glue gun is best to learn more.
Choose the Right Glue Stick
When it comes to choosing the right glue stick for plastic, there are a few things to consider that can make a big difference in the effectiveness of your bond. Firstly, it is important to choose a glue stick that is specifically formulated for use on plastic. Using the wrong type of glue stick can lead to weak bonds that easily break apart.
One of the best options for bonding plastic is a high-temperature glue stick. These sticks are designed to be used with glue guns that operate at a higher temperature, and they provide a stronger, more durable bond. They’re also ideal for use on harder plastics, as they can be more difficult to bond with a lower-temperature glue stick.
It’s important to check the label when choosing your glue stick to make sure that it specifically lists plastic as one of the materials it is intended to bond. This will help ensure that you get the best possible results.
If you’re not sure which glue stick to use, it’s always a good idea to check the manufacturer’s website or product packaging for recommendations. You can also check out online forums or tutorials for advice from other DIY enthusiasts who have experience bonding plastic.
Pro Tip: Once you’ve chosen the right glue stick, make sure you have enough of it for your project. It’s always a good idea to have extra sticks on hand, just in case you run out mid-project. If you need to refill your glue gun during your project, be sure to check out our guide on how to refill a glue gun.
Consider the Glue Gun Tip
When considering the glue gun tip, you need to take note of the size and shape of the tip as it can affect the accuracy and precision of the glue application. The [size and shape of the glue gun tip] can also affect the flow of the glue and the amount of glue released.
Size of the Glue Gun Tip
The size of the glue gun tip you need for your plastic project depends on the size of the surface area you are gluing. If the surface area is small, consider a narrow tip. Narrow tips allow for more precision in applying the glue. On the other hand, if the surface area is large, you may need a wider glue gun tip that will allow for more glue to be released at a time. This can speed up the gluing process considerably.
Shape of the Glue Gun Tip
Glue gun tips come in various shapes. The most common glue gun tips are flat and round. Flat tips are more suitable for surfaces that require a larger surface area to be covered with glue. Round tips are better for circular surfaces and intricate designs. They allow for more control and precision in applying the glue.
Ensure that the tip is clean before using it on your plastic. Any debris stuck on the tip can interfere with the flow of the glue. If you are having trouble finding the right glue gun tip, check out this guide on [how to use a glue gun on wood].
| Glue Gun Tip Size | Best For |
|---|---|
| Narrow Tip | Small surface area |
| Wide Tip | Large surface area |
| Glue Gun Tip Shape | Best For |
|---|---|
| Flat Tip | Larger surface area |
| Round Tip | Circular surfaces and intricate designs |
Preparing the Plastic Surface
Before using a glue gun on plastic, it’s essential to prepare the surface to ensure that the adhesive forms a strong bond. Taking a few simple steps can make all the difference in the success of your project. In this section, we will discuss how to prepare the plastic surface before using a glue gun. Whether you’re repairing a plastic item or creating something new, these instructions will help you achieve the best results. So, let’s get started! And if you’re interested in learning about using a glue gun on wood, check out our article on how to use a glue gun on wood for more information.
Clean the Surface
When working with plastic, it is crucial to have a clean surface before adding glue. Dirt or oil residue can affect the adhesion and bond strength of the glue. To clean the plastic surface, follow these steps:
- Prepare a cleaning solution: Mix warm water and dish soap in a bowl or bucket.
- Dip a cloth or sponge: Soak a clean cloth or sponge in the cleaning solution and wring out excess water.
- Wipe the surface: Gently wipe the plastic surface with the damp cloth to remove any dirt, dust, or oil. Be careful not to damage or scratch the surface.
- Rinse: Rinse the surface with clean water to remove any soap residue.
- Dry: Use a clean and dry cloth or towel to dry the plastic surface thoroughly.
It is important to note that not all plastics are the same, and some may require additional cleaning steps or special treatment. For example, if the plastic surface has wax or silicone, it may need to be sanded or wiped with rubbing alcohol to improve adhesion. Pool noodles, for instance, are made of a type of plastic that repels water, so it is important to sand them before gluing to improve adhesion.
Taking the time to properly clean the plastic surface will ensure that the glue adheres properly and provides a strong bond. It is an essential step that should not be skipped.
Scuff the Surface
Scuffing the surface is a crucial step in preparing plastic for glue. Scuffing creates a rough surface that the glue can grip tightly to. It helps to increase the bond between the plastic and glue, making it stronger and more durable.
To scuff the surface of plastic, follow these simple steps:
| Step | Action |
|---|---|
| Step 1 | Clean the surface of the plastic. Use a clean, dry cloth to remove any dirt, dust, or oil from the surface. If there are any stubborn marks or stains, use rubbing alcohol to clean the area. |
| Step 2 | Choose an abrasive material or sandpaper. You can use a fine-grit sandpaper or abrasive pad to scuff the surface. Make sure the abrasive material is not too rough or it will damage the plastic surface. |
| Step 3 | Hold the abrasive material against the plastic. Firmly rub the abrasive material or sandpaper against the plastic surface in a circular motion. Apply enough pressure to create a rough surface, but not too much that it scratches the plastic. |
| Step 4 | Clean the surface again. After scuffing the surface, use a clean, dry cloth to remove any debris or dust from the plastic. It is important to have a clean surface before applying glue. |
By scuffing the surface of the plastic, you will ensure a stronger and long-lasting bond with the glue. This will prevent your project from falling apart and ensure a professional finish. For more information on working with glue guns, check out our article on how to change glue gun sticks.
Using the Glue Gun on Plastic
Getting ready to use the glue gun on plastic is important for successful bonding. Before you start, make sure that you have prepared the surface of the plastic and have the right glue gun and glue sticks for the job. By this stage, you should have cleaned and scuffed the plastic surface. Also, remember that the glue gun temperature must be suitable for the type of plastic you are bonding. Finally, a suitable type of glue stick should have been chosen. If you have not completed the earlier steps, return to the previous sections before proceeding. Once you are ready, you can start working on your project with confidence.
Preheat the Glue Gun
Before using the glue gun on plastic, it is essential to preheat it. Preheating ensures that the glue is melted well enough to stick to the plastic surface. To preheat your glue gun, plug it in and switch it on. Give it some time to heat up, usually a few minutes. While waiting for the glue gun to heat up, prepare your workspace. Cover the area with old newspapers or any disposable materials to avoid any mess.
Once the glue gun is preheated, insert the glue stick into the back of the gun and gently push it in until it fits snugly. Allow the glue to reach the tip of the gun by squeezing the trigger. It may take a few seconds before the hot glue oozes out of the gun’s nozzle, so be patient.
It is essential to ensure that the glue flows through the gun nozzle before applying it to the plastic. If there is no glue coming out of the nozzle, continue gently pressing the trigger until it emerges.
Preheating the glue gun is critical to making sure that the plastic sticks together properly. The glue won’t be as effective if the gun has not been preheated to the desired temperature. If you’re not sure how to set the temperature, check the instruction manual that comes with your glue gun.
Proper preheating of the glue gun can prevent stringing, which is a common problem associated with hot glue guns. Stringing occurs when the glue cools down and hardens before reaching the plastic surface.
Once the glue gun is preheated, you can start applying the glue to the plastic surface. Be careful not to burn yourself while using the glue gun, as the hot glue can cause severe burns. If you’re unsure about how to use a glue gun without strings, consider checking out our article on how to use a hot glue gun without strings.
Apply the Glue
When it comes to applying glue to plastic, it’s important to apply just the right amount of glue to ensure the bond is strong enough to hold the plastic together. Start by preheating the glue gun as mentioned previously. Once the glue gun is heated up, insert the glue stick into the gun and hold it vertically.
Squeeze the trigger of the glue gun gently to get the glue to start flowing. Be careful not to squeeze too hard, as this can result in too much glue being dispensed. A good rule of thumb is to apply glue in a zig-zag pattern, starting from one end of the area you need to glue to the other. This ensures that there is enough glue to create a strong bond.
Remember that hot glue dries quickly, so it’s important to work fast. If you have a large area to cover, you might need to work in small sections to ensure that the glue doesn’t dry before you have a chance to join the pieces. Make sure to apply the glue as evenly as possible, keeping the gun at a steady distance from the plastic surface.
It’s also important to avoid touching the glue with your bare hands, as it can be very hot and cause burns. If you accidentally get hot glue on your skin, run it under cold water immediately to cool it down.
Once you have applied the glue to one piece of plastic, quickly join it with the other piece, pressing down firmly to ensure a strong bond. Be sure to line up the pieces carefully, as the glue will dry quickly and won’t be easy to adjust once it has hardened.
If glue seeps out of the join, don’t panic. You can easily cut or sand away the excess glue once it has hardened. This will give your project a clean and professional finish.
In case you want to learn more about glue, check out our guide on how to make glue stick or our tutorial on how to glue up a box. Also, check out our article on how to make hot glue look like honey for a fun crafting idea.
Join the Plastic
Once you have applied the glue to the plastic surfaces, it’s time to join them together. Make sure you align the edges of the plastic pieces perfectly so that they fit together seamlessly. Use gentle pressure to press the pieces together.
Avoid moving the pieces around too much as this can cause the glue to smudge or shift, leading to a weak bond. Once the pieces are pressed together, hold them in place for a few minutes until the glue cools and sets.
To help keep the pieces in place while the glue dries, you may consider using clamps or rubber bands. Just be sure not to clamp too tightly as this can cause the plastic to bend or warp.
If you are working with a larger project, it may be helpful to join the plastic in sections instead of all at once. For example, if you are gluing together a large plastic box, join one side at a time instead of trying to join all sides simultaneously.
Be patient and allow the glue to fully dry and cure before moving or using the plastic item. It’s also important to note that glue gun bonds may not be strong enough for heavy-duty use so keep that in mind when choosing this method for your plastic project.
If you want to know more about how to make glue for a piñata, check out our guide on how to make piñata glue.
Hold in Place
One of the most crucial steps when using a glue gun on plastic is to hold the pieces in place until the glue has completely dried. Depending on the type of plastic and the type of glue being used, this could take anywhere from a few seconds to several minutes. Here are some tips on how to hold the plastic in place while the glue is drying.
| Tip | Description |
|---|---|
| Use Clamps or Clothespins | If you are working with larger pieces of plastic, use clamps or clothespins to hold the pieces in place. Be sure to use enough clamps to hold the plastic securely without bending or warping it. |
| Prop the Plastic Up | If you are working with smaller pieces of plastic, prop them up against a wall or another object to hold them in place while the glue dries. |
| Apply Pressure | Use your fingers or a tool to apply pressure to the plastic until the glue has dried. This will help the pieces bond together better. |
| Let Gravity Do the Work | If you are working with pieces that can be positioned vertically, such as a vase or a cup, let gravity do the work for you. Apply the glue as needed and then position the pieces vertically so that the glue dries and sets in the correct position. |
Remember, it is important to hold the plastic pieces in place while the glue dries to ensure that the bond is strong and long-lasting. However, be careful not to apply too much pressure, as this could cause the plastic to warp or bend out of shape. With the right techniques and a little bit of patience, you can successfully use a glue gun on plastic and create strong bonds that will last for years to come.
Finishing Up
Now that you’ve successfully joined your plastic materials with your trusty glue gun, it’s time to wrap things up and give your project a polished finish. In this final stage, you’ll need to take a few additional steps to ensure that everything looks smooth and professional. From cutting and sanding excess glue to adding a personal touch with paint or decorations, these finishing touches are crucial to the overall success of your project. So grab your tools and let’s get started!
Cut or Sand Excess Glue
After you’ve completed joining the plastic surfaces, and the glue has dried, it’s time to deal with any excess glue that may be present. This step is essential as it helps improve the overall appearance of the final project.
Cutting: The first step to removing excess glue is to cut away any visible excess glue using a pair of scissors or a sharp utility knife. When cutting the glue, be sure to hold the blade at an angle, parallel to the surface, to avoid cutting into the plastic. This will help create a clean cut and prevent damage to the project.
Sanding: Once the excess glue has been cut away, it’s time to sand the surface to remove any remaining glue residue. You can use fine-grit sandpaper for this step, and sand lightly to avoid scratching or damaging the plastic surface. Move the sandpaper in a circular motion to create a smooth and even surface.
Cleaning: Finally, after sanding away any excess glue, it’s important to clean the surface thoroughly to remove any remaining glue particles. Use a damp cloth or sponge to wipe the surface down, and be sure to use a mild soap if necessary.
By taking the time to remove excess glue, you’re ensuring that your project will look neat and professional. Plus, you’ll be creating a more durable bond by removing any unnecessary glue, ensuring that your project will stay together for years to come.
Paint or Decorate as Desired
Now that you’ve successfully glued your plastic pieces together, it’s time to add some personality to your project. Painting or decorating your plastic can add a fun and unique touch. Here are some tips for painting or decorating as desired:
| Clean the Surface | Before adding any paint or decorations, make sure the glued surface is clean and free of any dust or debris. Wipe it down with a clean, dry cloth. |
| Choose the Right Paint | Not all paints will adhere well to plastic. Look for a paint specifically designed for plastic surfaces. Spray paint tends to work well, but make sure to use it in a well-ventilated area. |
| Sand the Surface | If you want the paint to adhere better, consider lightly sanding the surface with fine-grit sandpaper. This will help create tiny scratches that the paint can cling to. |
| Prime the Surface | For the best results, consider using a plastic primer before painting. This will help the paint adhere even better to the plastic surface. |
| Add Your Decoration | Once you’ve primed the surface, you can add any decorations you desire. Stickers, stencils, and even hand-painted designs all work well. Just make sure to let the paint dry completely before adding any new layers or decorations. |
| Protect Your Work | Once your decoration is complete, consider adding a clear topcoat to protect your work from scratches and other damage. This will also give your project a shiny finish. |
With these tips, you can turn an ordinary plastic project into something truly unique and personalized. Let your creativity run wild and see what designs you can come up with!
Conclusion
In conclusion, using a glue gun on plastic can seem like a daunting task, but with the right tools, preparation, and technique, it can be a simple and effective solution for various DIY projects. Remember to choose the right glue gun with the appropriate temperature and tip, as well as selecting the correct glue stick for the job.
Preparing the plastic surface is also crucial for a successful bond, so make sure to thoroughly clean and scuff the surface before applying the glue. When using the glue gun, preheat it and work quickly, applying the glue and joining the plastic while it is still hot.
After the plastic is joined, hold it in place until the glue cools and sets. Finally, finish up by removing any excess glue with cutting or sanding and decorating as desired. With these tips and tricks, using a glue gun on plastic can be a stress-free experience and a great way to tackle various DIY projects.
Frequently Asked Questions
What is a glue gun?
A glue gun is a tool that melts and dispenses solid adhesive sticks. It can be used for various applications ranging from hobbies to home repairs.
Can I use any glue gun for plastic?
No. Not all glue guns are designed for plastic. When choosing a glue gun for plastic, you need to consider its temperature capability and the type of glue stick to use.
What temperature should I use for plastic?
It depends on the type of plastic. Low-temperature glue guns can be used for delicate plastic materials, while high-temperature glue guns are best for thicker plastic surfaces.
What type of glue stick should I use for plastic?
You should use a glue stick that is specifically formulated for plastics. Some examples are polyethylene and polypropylene glue sticks.
Do I need to prepare the plastic surface before gluing?
Yes. Preparing the plastic surface is crucial for ensuring a strong bond. Cleaning and scuffing the surface will help the glue adhere better.
How do I clean the plastic surface?
You can clean the plastic surface with rubbing alcohol or a mixture of soap and water. Make sure to dry the surface thoroughly before applying the glue.
What is scuffing, and how do I do it?
Scuffing is the process of roughening the plastic surface to make it easier for the glue to adhere. You can use sandpaper or a scouring pad to scuff the surface lightly.
How soon can I handle the plastic after gluing?
You should wait for the glue to dry completely before handling the plastic. This can take anywhere from a few minutes to several hours, depending on the type of glue and temperature used.
Can I remove excess glue after it dries?
Yes. You can remove excess glue by cutting or sanding it away carefully. Avoid damaging the plastic surface while removing the excess glue.
What can I do to decorate the glued plastic surface?
After gluing the plastic surface, you can paint or decorate it as desired once the glue dries completely. Make sure to use paints and markers that are suitable for plastics.