Have you ever stumbled upon a beautiful piece of furniture or decor item that looks like it’s covered in intricate designs but upon closer inspection, you realize it’s just layers of paper? That is the wonder of decoupage art. However, before you can create decoupage masterpieces, you first need the right decoupage glue. With store-bought options often being expensive and filled with unnecessary chemicals, why not try making your own at home? Not only is it easy, inexpensive, and customizable to your project needs, but it can also be a fun activity to do with your friends and family. In this article, we’ll guide you through the steps of creating your very own decoupage glue from scratch. Let’s get started!
What is Decoupage Glue?
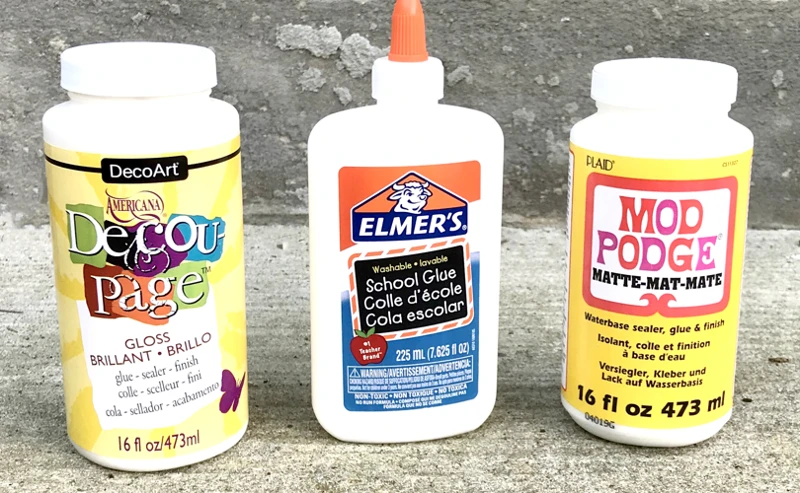
Decoupage glue is an essential component of decoupage, a crafting technique which involves decorating an object by gluing pieces of paper or fabric onto it. If you’re new to crafting, you may wonder what makes decoupage glue different from other types of glue. While some of the properties of decoupage glue are similar to regular white glue or Mod Podge, it has a unique formulation that makes it ideal for this specific craft. In this section, we’ll explore the characteristics of decoupage glue that make it the perfect choice for this artistic technique. If you’re interested in other types of glue, you may want to check out what is the mass of a glue stick or what super glue dries clear.
What is Decoupage?
Decoupage is a popular crafting technique that involves decorating objects with paper cutouts or other flat materials. The word “decoupage” comes from the French word “decouper,” which means “to cut out.” Using this technique, one can transform ordinary objects into personalized pieces of art that fit their style and decor. This art form has been around for centuries, but it gained popularity during the Renaissance in Europe. In fact, many of the Italian and French artists would create pieces of furniture for the wealthy families with this technique, making each piece unique with intricate designs. The art of decoupage allows you to take your creativity to a whole new level by turning a blank canvas into a masterpiece.
To begin with, choose a surface to decorate, such as a wooden box or a picture frame. Then, choose your design by selecting papers with patterns, textures, or pictures that you like. It could be an old magazine page, a piece of a map, or even wrapping paper. You can cut out these papers in different shapes and sizes, depending on what you want your final design to look like. Once you have your papers ready, you can start applying decoupage glue to the surface. This glue will act as a binding agent for all the different paper pieces you will apply.
Interesting fact: The type of glue you use for decoupage plays a crucial role in the end result. Not all glues work the same and choosing the right glue is important for a good outcome.
Once you have the glue applied, you can start arranging the paper pieces on the surface however you desire. Overlapping designs allow you to create depth and texture to your piece. Adding multiple layers of paper and glue will create a more durable finish. Once you have your design the way you want it, let it dry completely before applying another coat of decoupage glue on top. This will seal your design and give it a beautiful finished look.
Internal link: If you want to learn more about the different types of glue that can be used for crafting, check out our article on which glue is the strongest.
What is Decoupage Glue?
Decoupage glue is a special type of glue that is used in the art of decoupage. Decoupage is the art of decorating surfaces by applying paper cutouts or other flat objects to a surface and then covering them with a layer of transparent glue or varnish.
Decoupage Glue is:
| Type of glue | Water-based |
| Transparency | Transparent when dry |
| Adhesive qualities | Creates a strong bond |
| Texture | Smooth and even |
| Usage | Used to apply and seal decoupage paper on a surface |
Decoupage glue is very versatile and can be used on a variety of surfaces including wood, glass, metal, and ceramics. It is also commonly used in paper crafts, such as scrapbooking.
When applied to the surface, decoupage glue dries clear and creates a strong, smooth and even bond. It is also water-resistant, making it a great choice for items that may be exposed to moisture.
If you’re looking for other types of glue for different projects, you may be interested in reading our articles on how to make paper glue, what kind of glue to use on dryer seal, or what glue to use on wax candle.
Materials You Will Need
To make decoupage glue at home, there are some essential materials you will need. These materials can be easily found in your kitchen or local store. Here are the materials you will need to make decoupage glue:
1. Flour: The main ingredient in making decoupage glue is flour. You can use any type of flour like wheat, corn, or rice flour.
2. Water: Water is needed to mix with flour to make a paste. It is recommended to use warm water to make the mixture smooth.
3. Vinegar: Vinegar is added to the mixture to prevent mold growth on the glue. It acts as a natural preservative.
4. Saucepan: A saucepan is used to boil the mixture.
5. Wooden spoon: You will need a wooden spoon to stir the mixture.
6. Airtight container: An airtight container is needed to store the glue after it has cooled down.
These materials are readily available in most households. Before starting, it is advisable to gather all the materials in one place to make the process of making the decoupage glue easier.
Now that you know what materials you need, it’s time to move on to the next step of the process which is making the decoupage glue.
How to Make Decoupage Glue

If you are an arts and crafts enthusiast, decoupage is a fun and creative way to decorate and personalize a wide range of items. But to get the desired effect, you need a good quality decoupage glue that adheres well and dries clear. While you can buy decoupage glue at most craft supply stores, making your own is not only cost-effective but also easy and fun. In this section, we will show you how to make decoupage glue at home using simple materials that you probably already have in your pantry. So put on an apron, grab your mixing bowl, and let’s get started! And if you want to learn more about the properties of different types of glue, check out our article on how long leather glue takes to dry.
Step 1: Mix the flour and water
To make decoupage glue at home, you will first need to mix flour and water together in a ratio of one part flour to two parts water in a saucepan. This mixture will create a base for the glue that will hold your paper or fabric in place. Make sure that you mix the flour and water well. You wouldn’t want any lumps in your glue that might ruin your project’s finish.
To help prevent any lumps, it’s a good idea to use a whisk or a hand blender to create a smooth mixture. Once mixed, let the mixture sit for 30 minutes to an hour so the flour has time to absorb the water and thicken the mixture. This will create the perfect consistency for the glue to adhere your materials together.
During this time, you can prepare the papers or fabrics you want to decoupage by cutting them to the appropriate size and smoothing out any wrinkles. It’s important to have everything ready so you can easily apply the glue once it’s done.
If you are having any trouble with hard slime, you can check out our helpful article on “How to fix hard slime without glue” for tips and tricks. However, in this recipe, we will not be using any slime. We will only be using flour and water to create our homemade decoupage glue.
Step 2: Add vinegar and stir
After mixing the flour and water, the next step in making your own decoupage glue is adding vinegar and stirring the mixture. Vinegar acts as a preservative and prevents the glue from spoiling. It also helps in achieving a glossy finish once the glue dries.
Pro tip: If you’re using a large amount of flour and water, add the vinegar gradually while stirring. This will ensure that the vinegar is evenly distributed throughout the mixture.
Once the vinegar is added, continue stirring until the mixture is smooth and free from lumps. This may take a few minutes, but it’s important to make sure that the mixture is well-combined before moving on to the next step.
Internal link: If you’re looking for another DIY project to try, check out our article on how to fix hard slime without glue for some helpful tips.
Adding vinegar to the flour and water mixture is a crucial step in making decoupage glue at home. It acts as a preservative and helps achieve a glossy finish, making it the perfect adhesive for all your decoupage projects.
Step 3: Boil the mixture
After adding vinegar to the mixture, it’s time to boil it. This is where the decoupage glue will start to thicken up. Here’s how to do it:
- Transfer the mixture to a pot: Carefully pour the mixture into a pot. Make sure to use a pot with plenty of room for the mixture to boil without overflowing.
- Heat the mixture: Place the pot on the stove over medium-high heat. Stir the mixture frequently as it heats up to prevent clumping.
- Boil the mixture: Once the mixture comes to a boil, reduce the heat to medium and let it simmer for about 2-3 minutes. You’ll notice the mixture starting to thicken up and turn into a glue-like consistency.
It’s important to keep a close eye on the mixture as it boils. If it boils too long, it can become too thick and hard to work with. If it doesn’t boil long enough, it may not thicken up properly. Once it reaches the right consistency, remove the pot from the heat and move on to the next step.
Note: If you’re looking for other DIY projects using glue, check out our article on how to make dish soap slime without glue. Or, if you’re wondering how to stick glass to wood without glue, we’ve got you covered in our article on how to attach glass to wood without glue.
Step 4: Cool the mixture
After boiling the mixture, it’s important to let it cool down before using it as decoupage glue. Cooling down the mixture will help it to thicken and reach the desired consistency. Follow these steps to cool the mixture:
| Step | Instructions |
|---|---|
| 1. | Remove the mixture from heat and let it sit for about 10-15 minutes. |
| 2. | After the mixture has cooled down slightly, give it a stir to help it thicken evenly. |
| 3. | Let the mixture sit until it cools down completely. You’ll notice that the mixture has thickened and has a gel-like consistency. If you feel it’s too thick, you can add a little more water to thin it out to your desired consistency. |
It’s important to remember that the consistency of the decoupage glue is key to creating a successful decoupage project. So, be patient and let the mixture cool completely before using it. Once it has reached your desired consistency, you can start using it to decoupage your favorite surfaces!
How to Use Decoupage Glue
Once you have made your decoupage glue, you will need to know how to use it properly to get the best results. Here are the steps to follow:
Clean the surface: First, ensure that the surface you want to decoupage is clean and free from dust and debris. You can wipe it down with a damp cloth and let it dry completely before proceeding.
Cut out your designs: Next, cut out the designs you want to decoupage from your chosen paper or fabric. You can use scissors or a craft knife for this, depending on the intricacy of your design.
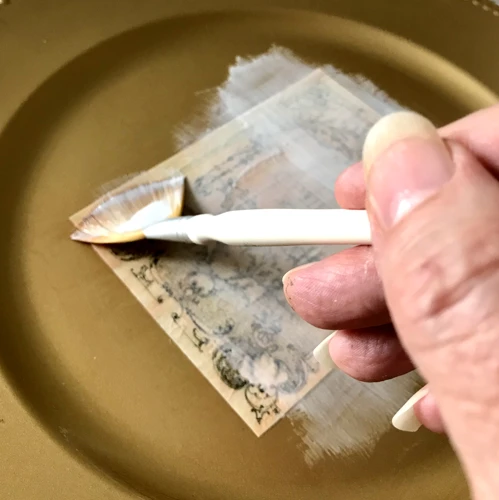
Apply the glue: Using a brush, apply a thin layer of the decoupage glue onto the surface where you want to place your design. Be sure to apply evenly and completely, paying special attention to the edges.
Place the design: Carefully place your cut-out design onto the glued surface. Smooth out any bubbles or wrinkles using your fingers or a clean brush.
Repeat: Repeat these steps for each design or piece you want to decoupage. You can overlap designs for a layered effect, or use different sizes and shapes for a more random look.
Seal the project: Once you have finished decoupaging, let the project dry completely. Then, apply another layer of the decoupage glue as a sealant to protect your design and give it a glossy finish.
Clean up: Clean your brushes and tools with warm soapy water immediately after use to prevent the glue from drying and hardening on them.
Remember, practice makes perfect! Don’t get discouraged if your first attempts at decoupaging don’t turn out exactly as you imagined – with a little patience and practice, you’ll be creating beautiful and unique designs in no time.
Tips and Tricks
When it comes to using decoupage glue, there are a few tips and tricks that can make the process easier and more enjoyable. Here are some tips you can try out:
Tip 1: Use a sponge brush to apply the decoupage glue. This will help you apply a thin, even layer and prevent clumping or streaking on your project.
Tip 2: Be sure to completely cover your project with the decoupage glue, including the edges. This will help protect it from wear and tear.
Tip 3: If you’re working with delicate paper or fabric, try applying a coat of white glue to protect it before decoupaging. This will help prevent tears or rips.
Tip 4: If you’re having trouble with air bubbles or wrinkles on your project, try using a credit card or spatula to smooth them out before proceeding.
Tip 5: When applying multiple layers of decoupage glue, be sure to fully dry each layer before adding the next. This will help prevent any bubbling or warping.
Tip 6: Store your decoupage glue in an airtight container to prevent it from drying out or becoming clumpy.
Tip 7: Experiment with different types of paper or fabric to achieve different effects. Some materials may be easier or harder to work with, so don’t be afraid to try something new!
With these tips and tricks in mind, you’ll be able to create beautiful and long-lasting decoupage projects with ease. Happy crafting!
Conclusion
In conclusion, making your own decoupage glue at home is a cost-effective and easy way to enhance your crafting projects. With just a few simple ingredients and steps, you can create a high-quality glue that works just as well as store-bought options. Plus, by making your own glue, you have the ability to customize the consistency and finish of the glue to fit your needs.
The flour and water mixture paired with vinegar creates a strong adhesive that is perfect for decoupage projects. Boiling the mixture helps to activate the binding agents in the flour and create a smooth, consistent texture. The cooling process allows the glue to thicken, making it easier to apply and creating a durable finish.
When using decoupage glue, it’s important to remember to apply it in thin, even layers to avoid excess moisture and wrinkling. It’s also helpful to apply a coat of the glue to both the surface you are sticking the paper to and the back of the paper itself for a secure hold.
As with any crafting project, experimentation and practice can lead to improved results. Don’t be afraid to try different techniques and materials to find what works best for you.
So next time you’re looking for a budget-friendly way to add a special touch to your art or home decor projects, try making your own decoupage glue. You might be surprised at the professional-quality results you can achieve with just a few simple steps.
Frequently Asked Questions
Can I use any type of flour to make decoupage glue?
For best results, we recommend using all-purpose flour. However, you can experiment with other types of flour such as wheat or rice flour.
Is decoupage glue waterproof?
No, decoupage glue is water-resistant but not waterproof. It is best to keep your decoupaged items away from water to prevent any damage.
Can I use decoupage glue on any surface?
Yes, you can use decoupage glue on a variety of surfaces such as wood, glass, metal, and plastic. Just make sure to prepare the surface properly before applying the glue.
How long does it take for decoupage glue to dry?
It usually takes about 24 hours for decoupage glue to fully dry and set. However, it may take longer depending on the thickness of the glue and humidity levels.
Can I add food coloring to decoupage glue?
Yes, you can add food coloring to decoupage glue to create a different tint. Just add a few drops at a time, mix well, and test it on a small area before applying it to your project.
How do I clean up decoupage glue?
Use warm soapy water to clean up any excess decoupage glue while it’s still wet. If the glue has already dried, it can be removed with rubbing alcohol or vinegar.
Can I use decoupage glue as a sealant?
Yes, decoupage glue can be used as a sealant to protect your projects from wear and tear. Just make sure to apply a thin layer and let it fully dry before using your item.
Is decoupage glue safe to use on children’s crafts?
Yes, decoupage glue is generally considered safe for children’s crafts. However, it’s always important to supervise children when using any type of craft glue.
Can I use decoupage glue to cover a photo?
Yes, decoupage glue can be used to cover and protect a photo. Just make sure to use a thin layer and let it fully dry before handling.
How long can I store homemade decoupage glue?
Homemade decoupage glue can be stored in an airtight container in the fridge for up to a week. Just give it a good stir before using it again.