When it comes to repairing or crafting leather goods, using the right adhesive is crucial. However, it’s not just about choosing the right type of glue but also knowing how long it takes to dry. Waiting too little or too much time can result in a weak bond or even damaged material. With so many factors involved in leather glue drying time, it’s normal to feel perplexed. But fear not, this article will guide you through everything you need to know about how long leather glue takes to dry and which factors affect its drying time. So, let’s dive in and learn how to ensure a strong and durable bond for your leather projects.
Factors Affecting Leather Glue Drying Time
Leather glue is an essential material for repairing or creating leather items. However, the drying time of the glue can vary depending on several factors, which can affect the overall quality and strength of the bond. It is crucial to understand these factors and how they can impact the drying time of leather glue. Let’s dive into some of the crucial factors that affect leather glue’s drying time.
Type of Leather Glue
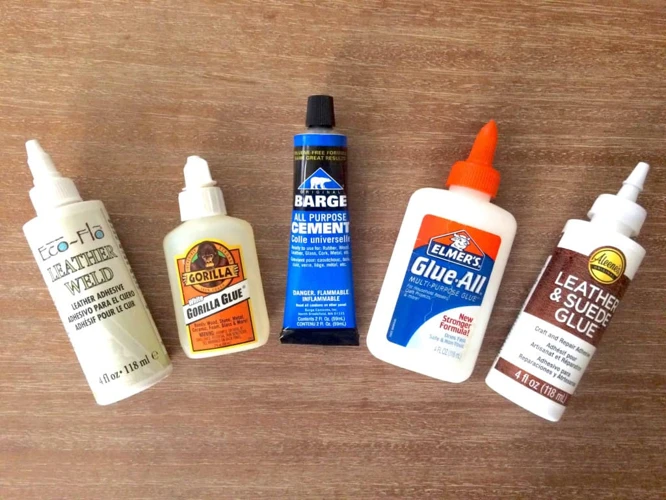
Different types of leather glue have varying drying times depending on their chemical composition and application. Water-based leather glue typically dries much faster than solvent-based leather glue due to their water content. However, solvent-based glue can penetrate the leather’s surface deeper, resulting in a stronger bond but also a longer drying time.
Epoxy leather glue forms a very strong bond and is often used for heavy-duty leather applications. Epoxy typically takes a bit longer to dry than other types of glue, but the extra drying time is worth it for the added strength it provides. PVA leather glue, on the other hand, is water-resistant when dry and commonly used for bookbinding and paper-to-leather bonding.
Another popular type of leather glue is contact cement, which typically provides an almost immediate bond. However, it’s essential to make sure the pieces are aligned correctly before applying contact cement since there’s no time for adjustments once the pieces are joined.
The type of leather glue used will significantly affect the drying time, and it’s vital to choose the right type of glue for the intended application.
Humidity
One of the most important factors that affects the drying time of leather glue is the humidity level in the environment. High humidity levels tend to slow down the drying time, while low humidity levels speed it up. This is because when there is more moisture in the air, it slows down the evaporation process that is needed for the glue to dry.
Here are some tips to keep in mind when working with leather glue in relation to humidity:
- Try to work in an area with low humidity. If this is not possible, use a dehumidifier to lower the humidity level in the room.
- Avoid working in areas with high humidity, such as a bathroom or near a humidifier.
- If you must work in a high humidity environment, allow for extra drying time and consider using a fan or other device to help circulate air.
- Always check the manufacturer’s instructions for recommended humidity levels when working with specific types of leather glue.
By taking into account the humidity level in the environment and following these tips, you can help ensure that your leather glue dries properly for a strong and lasting bond.
Temperature
When it comes to leather glue, the temperature can have a significant impact on the drying time. Higher temperatures can speed up the drying process, while cooler temperatures can slow it down. It is important to note, however, that excessively high temperatures can cause the glue to dry too quickly and not form a strong bond. The ideal range for temperature when using leather glue is between 68-77°F (20-25°C).
Below is a table outlining how different temperatures can affect the drying time of leather glue:
| Temperature | Drying Time |
|---|---|
| Below 60°F (16°C) | Glue will not dry or cure properly |
| Between 60-68°F (16-20°C) | Drying time will be significantly longer |
| Between 68-77°F (20-25°C) | Ideal temperature range for drying |
| Above 77°F (25°C) | Drying time may be shortened, but excess heat can cause the glue to dry too quickly and not form a strong bond |
It is important to keep the temperature consistent throughout the drying process. Avoid moving the leather or exposing it to temperature fluctuations while the glue is still wet. This can cause the bond to break and weaken.
Maintaining the proper temperature is just one of several factors that can affect the drying time and strength of leather glue. Be sure to follow the manufacturer’s instructions and take all necessary precautions to ensure a strong and lasting bond.
Size of Bond Area
The size of the bond area is another factor that affects leather glue drying time. As a rule of thumb, larger bond areas will take longer to dry than smaller ones. This is because the adhesive needs to penetrate deeper into the leather and dry completely.
Table 1: Bond Area and Drying Time for Different Leather Glue Types
| Leather Glue Type | Ideal Bond Area Size | Approximate Drying Time |
|---|---|---|
| Water-Based | Small (less than 1 square inch) | 1-2 hours |
| Solvent-Based | Medium (1-5 square inches) | 2-4 hours |
| Epoxy | Large (5-10 square inches) | 4-6 hours |
| PVA | Small-Medium (less than 5 square inches) | 1-2 hours |
| Contact Cement | Large (5-10+ square inches) | 6-8 hours |
It’s important to note that the drying time for larger bond areas is an approximation and can vary depending on other factors like temperature and humidity. Additionally, some leather glues may require multiple coats for larger bond areas or may require longer drying times between coats.
If you’re working with a larger bond area, it’s a good idea to break it up into smaller sections and work on one section at a time. This will help ensure that each section gets the necessary amount of adhesive and has enough time to dry properly.
By keeping in mind the ideal bond area size and approximate drying time for your specific leather glue type, you can ensure a strong bond and avoid any potential issues like the glue not drying completely or the bond weakening over time.
Leather Type and Thickness
The type and thickness of leather can significantly impact the drying time of leather glue. Different types of leather require different adhesives and drying times as well. For instance, some leathers may be more porous, while others are not. As such, the type and thickness of leather can affect bonding time.
Table: Leather Type and Thickness vs. Drying Time
| Leather Type | Leather Thickness | Drying Time |
|---|---|---|
| Veg-tan leather | 1-2 oz. | 10-12 hours |
| Latigo leather | 6-8 oz. | 4-6 hours |
| Saddle leather | 9-12 oz. | 6-8 hours |
| Exotic leather (such as alligator or snake) | N/A | Varies depending on type and thickness of exotic leather |
It is important to note that the drying times listed in the table above are general estimates and may vary depending on the specific adhesive used and ambient conditions. For example, a high humidity environment may cause glue to dry more slowly than it would in a dry environment.
It is always recommended to refer to the manufacturer’s instructions for the recommended drying time for your specific leather type and thickness. Additionally, testing the adhesive on a small, inconspicuous area of the leather before attempting a full bond can help determine the appropriate drying time and ensure a strong bond.
Understanding the type and thickness of leather you are working with is crucial in determining the appropriate drying time for your leather glue.
How Long Leather Glue Takes to Dry
Factors such as type of leather glue, humidity, temperature, size of bond area, and leather type and thickness can impact the drying time of leather glue. Understanding how long it takes for leather glue to dry is important in order to avoid accidentally breaking the bond and ensuring that the leather item is properly secured. In this section, we will explore the different drying times of various types of leather glue and provide some tips to ensure a strong bond. But first, let’s take a closer look at the factors that can affect the drying time of leather glue.
Water-Based Leather Glue
Water-based leather glue is a popular choice amongst crafters and DIY enthusiasts because it is easy to clean up and doesn’t give off toxic fumes. However, it can take longer to dry than other types of leather glue. This is because water evaporates slower than solvents. But with patience and the right conditions, a strong bond can be achieved.
| Water-based Leather Glue | Drying Time |
|---|---|
| Thin application | 10-15 minutes |
| Thick application | 1-2 hours |
| Full cure | 24 hours |
Thin application: A thin layer of water-based leather glue will dry in just 10-15 minutes. This is because there is less moisture to evaporate.
Thick application: If you apply a thick layer of water-based leather glue, it can take 1-2 hours to dry. However, you can speed up the drying time by using glue accelerators or blowing cool air over the glued area using a fan.
Full cure: While water-based leather glue may seem dry to the touch after a few hours, it is important to note that it is not fully cured until 24 hours later. Additionally, this type of glue is not waterproof when dry, so it may not be the best choice for projects that will be exposed to water.
It is also important to note that the drying time of water-based leather glue can be affected by factors such as humidity, temperature, leather type, and size of the bond area. By taking these factors into consideration and following proper application techniques, you can ensure a strong bond with water-based leather glue.
Solvent-Based Leather Glue
Solvent-based leather glue is one of the most commonly used types of leather glue. It is known for its strong adhesive properties and quick drying time compared to other types of glue. The adhesive contains a solvent as the main ingredient, which helps the glue to dry rapidly.
Advantages of Solvent-Based Leather Glue:
- It creates a strong bond that is suitable for high-stress areas such as seams.
- It dries quickly, usually within 15-30 minutes of application.
- It creates a waterproof bond that is suitable for outdoor use.
- It can be used on a variety of leather types including suede, nubuck, and smooth leather.
Disadvantages of Solvent-Based Leather Glue:
- The glue contains harmful chemicals that emit strong fumes. Use in a well-ventilated area.
- The glue can cause damage to certain types of leather if not applied correctly.
- It is not suitable for use on delicate leather products.
- It can be difficult to remove if applied to the wrong area.
- It is not as flexible as other types of leather glue and can crack over time.
To ensure a strong bond with solvent-based leather glue, it is important to properly prepare the leather surface. Clean the area with a leather cleaner, then roughen the surface slightly with sandpaper. Apply the glue evenly and press the surfaces together firmly. Allow the glue to dry completely before handling the item.
If you want to know how to glue jewelry, check out our step-by-step guide.
Epoxy Leather Glue
Epoxy leather glue is a two-part adhesive consisting of a resin and a hardener. When these two parts are mixed together, the chemical reaction creates a strong bond that is resistant to water, heat, and chemicals.
Advantages of Epoxy Leather Glue
Epoxy leather glue is known for its strength and durability. It is also highly versatile as it can bond a variety of materials together. This type of glue is ideal for bonding leather to metal or plastic, as well as for making repairs to leather items such as shoes, bags, and belts.
Drying Time of Epoxy Leather Glue
The drying time for epoxy leather glue can vary depending on the brand and the ambient temperature and humidity. Generally, epoxy glue will begin to set within 5-10 minutes of application and will fully cure within 24 hours.
To help speed up the drying process, it is recommended to keep the glued leather item in a warm and dry place. However, avoid exposing the item to excessive heat or moisture as this can weaken the bond.
It is important to follow the manufacturer’s instructions carefully when using epoxy leather glue. Mixing the resin and hardener in the correct ratios and applying the glue evenly and thinly on the surface of the leather will help ensure a strong bond.
Epoxy leather glue is an excellent choice for high-stress applications that require a strong and permanent bond. If you prefer to make your own glue, you can learn how to make super glue at home without petrol.
PVA Leather Glue
PVA leather glue is a popular choice for bonding leather due to its ease of use and affordability. It is a type of adhesive that has polyvinyl acetate as its main component and is water-based which makes it easy to clean up. PVA leather glue is great for bonding different types of leather, including suede and faux leather.
When using PVA leather glue, it’s important to take into account the drying time. Typically, PVA glue can take anywhere from 20 minutes to an hour to dry, depending on the humidity and temperature of the surroundings. If the environment is too cold or too humid, the drying process may take longer.
To ensure a strong bond, the surface of the leather should be properly prepared. This includes cleaning it thoroughly and ensuring that it is free from any debris or dirt. The glue should then be applied using a brush or roller, spreading it evenly over the surface of the leather.
One great advantage of PVA leather glue is that it can be mixed with other materials to create a stronger bond. For instance, mixing it with baking soda will create a hard glue that is great for bonding leather to other surfaces like wood or metal. Another option is to mix it with water to make it thinner, allowing for a smoother and more even application.
Once the glue has been applied, it’s important to clamp the leather together to ensure that it dries evenly and creates a strong bond. Let the glue dry for at least 24 hours in a dry and well-ventilated area. Avoid exposing the glued area to excessive heat or moisture during this time. This can cause the glue to weaken and result in a weak bond.
If you’re looking to save some money, it is possible to make PVA glue at home using white glue and water. Simply mix equal parts white glue and water, stirring until the consistency is smooth. This homemade PVA glue can then be used in the same way as store-bought PVA leather glue.
PVA leather glue is a popular adhesive for bonding leather due to its affordability and ease of use. It can take anywhere from 20 minutes to an hour to dry, depending on the humidity and temperature. Preparing the leather surface, applying the right amount of glue, proper clamping, and allowing enough drying time are key to ensuring a strong bond. Mixing PVA glue with other materials can create an even stronger bond.
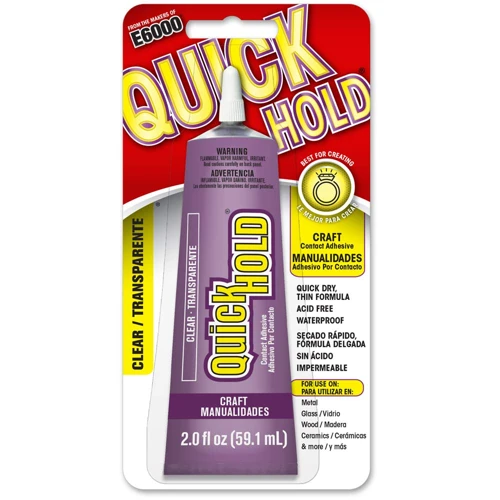
Contact Cement Leather Glue
Contact Cement Leather Glue: Contact cement leather glue is known for its strong and long-lasting bond. This type of glue is ideal for leather items that experience frequent wear and tear. One of the unique features of contact cement is that you have to apply it on both surfaces and allow it to dry for a certain period before bringing them together. This drying time may vary based on several factors such as humidity, temperature, and the size of the bond area.
To ensure a strong bond with contact cement leather glue, prepare the surfaces to be bonded with a sandpaper or knife to remove any dirt or old glue. Apply a thin layer of glue on both surfaces, and wait for about 10-15 minutes for the glue to dry. The glue will feel dry to the touch and won’t stick to your fingers once it’s ready. Then, carefully align both surfaces and press them firmly together.
It’s important to note that the bond created with contact cement leather glue is irreversible, so make sure to double-check the alignment before bringing the surfaces together. If you’re making a new leather item, you may want to cut out a cardboard template of the item to practice aligning the surfaces before applying the glue.
Tips:
- Use gloves or wash your hands thoroughly after applying contact cement leather glue to avoid getting it on your skin.
- Ensure proper ventilation when working with contact cement leather glue as it may produce toxic fumes.
- Avoid applying too much glue, as it may take longer to dry and result in a weaker bond.
- Clamp the surfaces together for at least 24 hours to allow the bond to fully cure.
If you want to learn about making white glue at home, check out our article on How to Make White Glue.
Tips for Ensuring a Strong Bond with Leather Glue
When it comes to working with leather, using the right type of glue is important to ensure a secure and long-lasting bond. However, even with the right glue, there are several important tips to keep in mind to guarantee that the bond is as strong as possible. From preparing the leather surface to allowing enough drying time, there are various steps you can take to achieve a solid bond. Let’s take a closer look at these tips for ensuring a strong bond with leather glue. By following these tips, you’ll be able to create high-quality leather products that will stand the test of time. No flubber, slime, nose studs or super glue recipes here, just pure leather bond information!
Prepare the Leather Surface
Properly preparing the leather surface is crucial for ensuring a strong bond with leather glue. Here are some steps to follow when preparing the leather surface:
- Clean the surface: The leather surface must be clean and free of any dirt, dust, or oil. Use a clean cloth and leather cleaner to remove any dirt or grime.
- Sand the leather: Sand the leather surface gently to remove the shiny coating and create a rough surface for better glue adhesion. Use a fine-grit sandpaper or sanding sponge.
- Apply leather conditioner: Applying leather conditioner will help the leather remain supple and prevent it from becoming brittle over time.
- Use leather prep solution: Apply a leather prep solution to the surface to remove any coatings or waxes that may prevent glue adhesion.
- Avoid using water: Do not use water to clean the leather surface, as this can damage the leather and affect the glue adhesion.
By following these steps, you can ensure that the leather surface is clean, rough, and ready for gluing, which will help create a strong bond between the leather pieces.
Apply the Right Amount of Glue
Applying the right amount of glue is crucial for achieving a strong bond between the leather pieces. Applying too little glue will result in weak bonding, whereas applying too much glue will create a mess and may cause the glue to seep out of the bond area.
To apply the right amount of glue, use a thin, even layer on both the surfaces to be bonded. A good rule of thumb is to use approximately 1 ounce of glue per square foot of the bond area. Be sure to spread the glue evenly with a brush or roller, paying extra attention to the edges of the surface.
It’s also essential to maintain the bond area size to prevent wastage of the glue. You don’t need to apply glue outside of the bond area, as it may interfere with the bonding process and leave ugly stains on the leather surface.
In summary, applying the right amount of glue for your leather project is important for creating a strong bond and a neat finish. Don’t forget to maintain the appropriate bond area and spread the glue evenly with a brush or roller. By following these tips, you can avoid a gluey mess and achieve great results.
Ensure Proper Clamping
When using leather glue, ensuring proper clamping is crucial for creating a strong and lasting bond. Here are some tips to keep in mind:
- Use Enough Pressure: Apply sufficient pressure to the bond area using a clamp or heavy object. This helps to spread the glue evenly and ensures that it penetrates the leather fibers.
- Choose the Right Clamping Tool: Different types of leathers require different clamping tools. For soft leathers, use light-weight clamps, whereas rigid leathers need stronger, firmer clamping tools. Choose a clamp that is appropriate for the size and shape of your project.
- Remove Excess Glue: It is essential to remove the excess glue that might squeeze out during the clamping process. Use a damp cloth or cotton swab to remove the glue and prevent it from sticking to the clamp and spoiling the leather surface.
- Avoid Movement: Be careful not to move or disturb the clamped leather piece until the glue has dried completely. This ensures that the bond will not weaken or break.
By following these clamping tips, you can ensure that your leather project has a strong and durable bond. For more information on how to work with different types of adhesives, check out our article on how to make super glue stronger.
Allow Enough Drying Time
When using leather glue, allowing enough drying time is crucial in ensuring that a strong and long-lasting bond is achieved. The drying time of leather glue varies depending on several factors, such as the type of glue used, humidity, temperature, size of bond area, and leather type and thickness.
Water-based leather glue typically dries within 1 to 2 hours, depending on the conditions. It is important to keep the glue area at room temperature with low humidity to achieve the best results.
Solvent-based leather glue, on the other hand, dries faster compared to water-based glue. It can take between 20 to 60 minutes to dry completely, depending on the drying conditions.
Epoxy leather glue usually requires a longer drying time, which can range from 4 to 24 hours depending on the conditions.
PVA leather glue can dry within 15 to 30 minutes, but it is recommended to give it a minimum of 24 hours to set and cure completely.
Contact cement leather glue takes approximately 15 to 25 minutes to dry but requires at least an hour before clamping for it to set properly.
It is important to note that the recommended drying time may vary based on the brand or type of glue used, and it is always best to check the manufacturer’s instructions for specific guidelines.
Allowing enough drying time as per the instructions on the glue packaging is crucial in ensuring that the bond is strong and durable. Rushing the process may result in a weak bond that may not last long. Leaving the glue to dry for a longer time than the recommended duration could also cause damage to the leather item, so it is important to follow the instructions closely.
Patience is key when working with leather glue. Allow enough time for the glue to dry properly based on the specific type of glue used, the drying conditions, and the manufacturer’s instructions. This will ensure that the bond is strong and long-lasting, and the leather item will stand the test of time.
Avoid Excessive Moisture or Heat
When using leather glue, it is important to avoid excessive moisture or heat during the drying process. Both of these factors can have a negative impact on the strength and durability of the bond. Excessive moisture can weaken the glue and cause it to break down, while excessive heat can cause the glue to dry too quickly and result in a weaker bond.
Moisture: Leather glue should be applied to a dry surface, free from any moisture or oil. If the leather is damp or has any moisture on it, the glue may not set properly and could weaken the bond. It is important to ensure that the leather surface is completely dry before applying any glue.
Heat: Exposure to heat can cause leather glue to dry too quickly, which can result in a weaker bond. If the glue dries too quickly, the bond may not have enough time to set properly, which can lead to the glue breaking down over time.
To avoid these issues, it is important to apply leather glue in a dry environment with minimal fluctuations in temperature or humidity. A cool, dry area with good ventilation is ideal for ensuring that the glue dries properly. Additionally, keeping the leather and the bond area away from direct sunlight or other heat sources can help prevent the glue from drying too quickly.
One way to ensure that leather glue does not dry too quickly is to use a clamp to hold the bond area in place while the glue dries. This will help keep the bond area steady and prevent any movement that could cause the glue to break down.
Avoiding excessive moisture or heat is crucial for ensuring a strong and durable bond when using leather glue. By keeping the leather surface dry and cool, and providing adequate time for the glue to dry, you can create a long-lasting bond that will stand up to wear and tear.
Conclusion
Conclusion:
Leather glue is a versatile adhesive that can bond different types of leather quickly and effectively. Its drying time, however, varies depending on different factors such as the type of glue, humidity, temperature, size of bond area, and leather type and thickness.
To achieve a strong and durable bond with leather glue, it is crucial to prepare the leather surface properly, apply the right amount of glue, ensure proper clamping, allow enough drying time, and avoid excessive moisture or heat.
Overall, understanding how long leather glue takes to dry and the different types of leather glue available in the market can help you make an informed decision when selecting a glue for your leather bonding needs. With patience, proper technique, and a little bit of practice, you can master the art of using leather glue and achieve professional-looking results every time.
If you’re interested in learning how to make other types of glue, check out our article on how to make super glue at home without petrol.
Frequently Asked Questions
1. Can leather glue be used on all types of leather?
It depends on the type of leather glue and the type of leather you are working with. Some glues are designed specifically for certain types of leather, while others are more versatile. Always check the label to ensure that the glue is compatible with your leather.
2. Does humidity impact leather glue drying time?
Yes, humidity can impact the drying time of leather glue. Higher humidity levels can slow down the drying time, while lower humidity levels can speed it up. It’s best to work in a climate-controlled environment to ensure the best results.
3. Can I speed up leather glue drying time with heat?
No, it’s not recommended to speed up the drying time of leather glue with heat. This can cause the glue to dry unevenly and may weaken the bond. It’s best to stick to the recommended drying time and conditions to ensure a strong bond.
4. How do I prepare the leather surface for gluing?
Start by cleaning the leather with a leather cleaner and allowing it to dry completely. Sanding the surface lightly can also help improve adhesion. If the leather is particularly smooth or coated, you may need to use a leather deglazer to remove the coating.
5. Is it necessary to use clamps when gluing leather?
Yes, using clamps is highly recommended when gluing leather. This helps to ensure even pressure across the bond area and encourages a strong bond. Be sure to use the appropriate number and type of clamps for the size of the bond area.
6. How long does it take for contact cement leather glue to dry?
Contact cement leather glue typically takes around 15 to 20 minutes to dry. However, this can vary depending on the humidity and temperature of the environment.
7. Can I use leather glue to repair tears in leather upholstery?
Yes, leather glue can be used to repair tears in leather upholstery. Using a patch and glue method can help to create a stronger, long-lasting repair.
8. Will leather glue damage my leather?
When used properly and with the appropriate glue for your leather, leather glue should not damage your leather. However, always test a small, inconspicuous area before applying glue to ensure there will be no adverse effects on the leather.
9. Can I use leather glue to bond two pieces of leather together?
Yes, leather glue can be used to bond two pieces of leather together. However, it’s important to ensure that the glue is compatible with both types of leather and that the bond area is clean and properly prepared.
10. Can I remove excess leather glue after it dries?
Yes, excess leather glue can be removed with a sharp blade or knife once it has fully dried. Be careful not to gouge or damage the leather surface while removing the glue.