Have you ever found yourself in a situation where your favorite wax candle is too delicate to use, or it has been accidentally broken? Fret not, as there are various types of glue that can be used to repair your precious candle. However, with so many types of glue available, it can be challenging to determine which one is best suited for your candle. Do you need a strong adhesive bond, or do you prioritize visual clarity? Should you use hot glue or epoxy? In this comprehensive guide, we will explore the various types of glue for wax candles and the factors to consider when selecting a glue. Additionally, we will provide a step-by-step guide on how to use the glue and some tips and tricks to make the process easier for you.
Types of Glue for Wax Candles
When it comes to making DIY candles, choosing the right adhesive is crucial for a successful project. There are various types of glue that you can use to bond wax candles together or attach embellishments. In this section, we’ll explore some of the most commonly used types of glue for wax candles. Whether you’re a beginner or an experienced crafter, knowing which adhesive to use will help you achieve a clean and durable finish for your candle-making project.
1. Hot Glue
When it comes to bonding wax candles, hot glue is a popular choice. Hot glue, also known as hot melt adhesive, is a thermoplastic adhesive that is melted in a hot glue gun and then applied to the surface to be bonded. It cools and solidifies quickly, creating a strong and durable bond.
Advantages of Hot Glue:
- Hot glue is very strong and creates a permanent bond.
- It dries quickly, allowing for fast project completion.
- It is easy to use, especially with a glue gun, which ensures precise application.
- Hot glue is suitable for use on most surfaces, including wax candles.
Disadvantages of Hot Glue:
- Hot glue is not suitable for high-temperature applications.
- It can become brittle over time and may not be suitable for long-term bonding.
- It may not be suitable for larger or heavier candles that require a stronger bond.
- It may leave behind adhesive residue if not applied correctly.
If you decide to use hot glue for bonding your wax candles, follow these steps:
- Clean the surfaces to be bonded by wiping them with a clean, dry cloth.
- Heat up your hot glue gun according to the manufacturer’s instructions.
- Apply a small amount of hot glue to one surface of the candle.
- Quickly press the two surfaces together, taking care to line them up properly.
- Hold the two surfaces together until the glue has hardened and cooled down completely.
It’s important to remember that hot glue can be messy, so use it sparingly and avoid getting it on the wick or the flame. If you’re new to using hot glue, consider practicing on a scrap piece of wax candle first before applying it to your actual candle.
Internal link: If you’re interested in learning more about using glue in other DIY projects, check out our article on How to Glue Binding on a Guitar.
2. Super Glue
Super glue is a popular choice for bonding wax candles due to its strong and long-lasting hold. This adhesive can easily bond different surfaces together and is ideal for small repairs. It is also known as cyanoacrylate and has a fast drying time of just a few seconds.
Advantages:
- Provides a very strong bond.
- Dries in seconds, making it perfect for quick repairs.
- Can be used on different surfaces like plastic, metal, and ceramic.
- It is waterproof, ensuring that your candle will not fall apart when it comes in contact with liquids.
Disadvantages:
- It can be brittle, which means that it may break if the candle is moved around too much.
- This glue is not a good choice for large projects because it dries too quickly.
- It can be difficult to remove super glue from surfaces if it comes in contact with your skin or other materials.
When to use: Super glue works best when you need to bond small items together quickly. If you need to make a quick fix on your candle, this adhesive is a good option. However, it is not recommended for large projects or for surfaces that need to be moved around frequently.
It’s essential to read the instructions carefully before applying super glue as it can be harmful if it comes in contact with your skin or eyes. If you accidentally glue your fingers together, use acetone to dissolve the adhesive.
In terms of safety hazard, super glue can cause skin irritation and release fumes that can cause respiratory tract irritation. It is important to read the label for safety instructions and make sure to use it in a well-ventilated area.
Fun fact: Did you know that super glue can be used in other creative ways? It is commonly used in the DIY community to create slime without glue. Check out our article on how to make slime with foam soap and no glue to learn more about this fun DIY project!
3. Epoxy
Epoxy is a two-part adhesive that consists of a hardener and a resin, which when mixed together creates a strong and durable bond that is resistant to water, heat, and chemicals. It is an excellent choice for attaching embellishments to candles or repairing broken candles.
Advantages:
- Epoxy can bond various surfaces, including metal, wood, and plastic.
- It creates a very strong bond that is resistant to water, heat, chemicals, and impact.
- It sets quickly and can be sanded or painted after drying.
Disadvantages:
- Epoxy can be tricky to work with due to its two-part mixture.
- It is not flexible and can break if the surfaces being bonded are subject to movement or stress.
- It can be difficult to remove once it hardens.
When using epoxy on candles, it is important to consider the safety precautions. The fumes emitted from the epoxy can be toxic, so it should be used in a well-ventilated area and protective gloves should be worn. Mixing the two parts of the epoxy together should also be done carefully, and according to the manufacturer’s instructions.
An important note is that epoxy should not be ingested as it can be harmful to one’s health.
To use epoxy on a candle, mix the hardener and resin together according to the manufacturer’s instructions. Then apply a small amount onto one surface and press the surfaces together. Hold in place until the epoxy dries completely.
Epoxy is a versatile adhesive that can provide a very strong and long-lasting bond to various surfaces. However, it should be used with caution and with proper safety measures.
4. PVA Glue
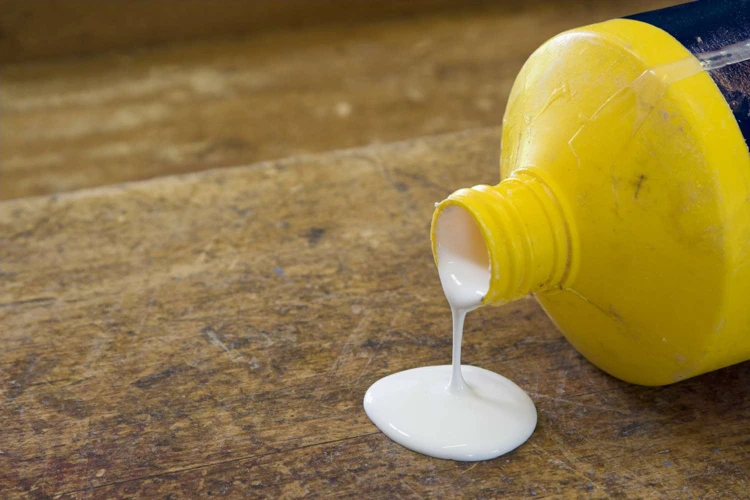
PVA glue, also known as white glue or school glue, is a water-based adhesive that is often used for crafting and woodworking projects. It is also a popular glue option for candle making due to its clarity and bonding strength.
One major advantage of PVA glue is that it dries clear, making it an ideal choice for candles with transparent or translucent materials. It also creates a strong bond between surfaces and has a relatively short drying time, usually between 15 to 30 minutes. However, it is important to note that PVA glue may not be as heat resistant as other glue types on this list.
Here is a summary of the main pros and cons of using PVA glue for wax candles:
| Pros | Cons |
|---|---|
| Clear drying | May not be as heat resistant as other options |
| Strong bonding strength | |
| Relatively short drying time | |
| Easy to find and purchase |
If you decide to use PVA glue for your candle making project, remember to follow the step-by-step guide mentioned earlier in this article. Also, be sure to consider the factors that are important to you, such as clarity and bonding strength, as well as the other glue options available.
5. Silicone Adhesive
Silicone adhesive is a type of glue that is highly versatile and has many applications. It is ideal for bonding wax candles because of its excellent bonding strength and flexibility. Silicone adhesive is a flexible, waterproof sealant that can withstand high temperatures, making it ideal for use on candles that will be exposed to heat and flames. It is also highly resistant to chemicals and UV radiation and can be used for both indoor and outdoor applications.
One of the best features of silicone adhesive is its ease of use. It is usually supplied in a tube and can be easily applied using a caulking gun. It can be used for both vertical and horizontal applications without the risk of it running or dripping.
Here is a table summarizing the key factors to consider when using silicone adhesive for wax candles:
| Factor | Description |
|---|---|
| Clarity | Most silicone adhesives dry clear, ensuring that there are no visible marks once it has been applied. |
| Bonding Strength | Silicone adhesive has a very strong bond that can last for years. It can bond to a variety of surfaces, including glass, metal, ceramics, and plastics. |
| Drying Time | The drying time for silicone adhesive is long compared to other types of glue, but it can vary depending on the humidity and temperature of the room. It can take anywhere from 24 hours to a few days to fully cure. |
| Temperature Resistance | Silicone adhesive can withstand high temperatures, making it ideal for use on candles that will be exposed to heat and flames. However, it is not suitable for use in extremely high-temperature environments, such as a stove or oven. |
| Flexibility | Silicone adhesive is highly flexible, which means it can move with the wax and prevent the bond from breaking due to expansion and contraction. |
| Safety | Silicone adhesive is safe to use and does not contain harmful chemicals. However, it is best to wear gloves and work in a well-ventilated area. |
If you are using silicone adhesive for the first time, it is important to follow the manufacturer’s instructions carefully. This will ensure that you achieve the best results and that your candle bond will last for years to come. Additionally, it is best to avoid getting the glue on the wick or the flame as it can cause smoke and odor.
For more information on how to use glue on bails or other helpful glue-related tips and articles, be sure to check out our website for more.
6. Double-Sided Tape
Double-sided tape is another type of glue that can be used on wax candles. The main advantage of using double-sided tape is its simplicity. You don’t need to apply or spread any adhesive. All you have to do is to cut the tape to the desired size and stick it onto the candle. This can be useful if you want to attach small decorations onto the candle or for wrapping a ribbon around it.
However, it’s important to note that double-sided tape may not be able to handle the weight of larger decorations, so it’s important to choose the right size for your needs. Additionally, double-sided tape may not work well on surfaces that are oily or dirty, so make sure to clean the surface of the candle before using it.
To use double-sided tape, follow these simple steps:
- Step 1: Cut the tape to the desired size.
- Step 2: Peel off one side of the protective backing.
- Step 3: Apply the exposed adhesive side to the back of your decoration or ribbon.
- Step 4: Peel off the other side of the protective backing to expose the second adhesive side.
- Step 5: Carefully stick the decoration or ribbon onto the candle, applying pressure to ensure that it adheres properly.
Unlike other types of glue, double-sided tape doesn’t require any drying time or curing, which can be convenient if you’re short on time. However, it’s important to remember that the tape’s adhesive may not provide a strong enough bond for heavy decorations or in environments with high temperatures. In these cases, it might be better to use a different type of glue that provides more bonding strength.
Double-sided tape is a quick and easy option for attaching small decorations or ribbons onto your candles, but it may not be ideal for heavier objects or dirty surfaces. Consider your specific needs and choose the right option to ensure that your decorations stay securely attached to your candles.
Factors to Consider
When it comes to choosing the right glue for your wax candle, there are several factors you need to consider to ensure a successful outcome. Each type of glue has its unique properties that can affect the clarity, bonding strength, and temperature resistance of the candle after it has dried. It’s essential to know these factors to select the best glue that will suit your needs. The safety of the glue is another aspect worth considering, especially if you plan to use it for a project involving children. Let’s explore some critical factors to keep in mind when selecting glue for your candle.
1. Clarity
When choosing a glue for wax candles, clarity is an essential factor to consider. The glue’s clarity will impact the overall appearance of the candle after it has been repaired or decorated. Some glues dry clear, making them ideal for use on colored candles or those with intricate designs. Meanwhile, others dry with a yellowish tint, which may not look appealing on a white or lightly colored candle.
To help you choose the best glue for your needs, we’ve compiled a table of clarity ratings for each of the glues mentioned in this article.
| Glue Type | Clarity |
|---|---|
| Hot Glue | Dries cloudy, may be visible on light colored candles |
| Super Glue | Dries clear, but may leave a residue on the surface |
| Epoxy | Dries clear or opaque, depending on the type |
| PVA Glue | Dries clear, but may require multiple coats |
| Silicone Adhesive | Dries clear |
| Double-Sided Tape | Clear, but may be visible on the surface if not cut to size |
It’s important to choose a glue that will dry clear and won’t leave a residue or discoloration on your candle. If you’re unsure about the clarity of a certain glue, you can test it on a small, inconspicuous area of the candle before applying it to a larger section.
If you want to learn more about a glue that can be used in gravekeeper, you can read our article on how to make glue in Graveyard Keeper.
2. Bonding Strength
Bonding strength is one of the most important factors to consider when choosing the right glue for your wax candle. You want to make sure that the bond is strong enough to hold the candle together even after being exposed to different conditions such as heat, cold, and humidity.
Different types of glues offer different levels of bonding strength. Here’s a table to compare the bonding strength of the six types of glue we mentioned earlier:
| Type of Glue | Bonding Strength |
|---|---|
| Hot Glue | Strong |
| Super Glue | Very Strong |
| Epoxy | Very Strong |
| PVA Glue | Medium |
| Silicone Adhesive | Medium |
| Double-Sided Tape | Medium |
As you can see, hot glue, super glue, and epoxy offer the highest bonding strength. However, they may not be suitable for all surfaces or conditions. PVA glue, silicone adhesive, and double-sided tape provide a medium level of bonding strength. They may be more suitable for delicate or flexible surfaces.
Remember: When using any type of glue, it’s important to follow the manufacturer’s instructions and safety guidelines. Always use glue in a well-ventilated area and avoid inhaling the fumes.
If you’re looking for a glue alternative, there are some creative solutions to fix things without glue. For example, if you want to fix a rubber bracelet without glue, you can use a rubber band to wrap around it. Check out our article on how to fix a rubber bracelet without glue for more details.
3. Drying Time
When it comes to drying time in choosing the right glue for your wax candle, it’s always best to consider the type of project you’re working on. Some glues can dry in seconds, while others can take hours or even a full day to completely dry. Hot glue is a great choice for those who are looking for a quick-drying option, as it can dry in just a matter of seconds. However, epoxy and PVA glue can take up to 24 hours to fully dry. The drying time for super glue and silicone adhesive can vary depending on the brand and type, so it’s important to read the label carefully.
It’s imperative to take note of the drying time, especially if you’re working with a delicate material. For example, if you’re using double-sided tape to attach embellishments to your candle, keep in mind that some tapes can take a few minutes to set, while others can take several hours. Similarly, if you’re using super glue or epoxy to bond two parts of a candle, be patient and let it dry completely for maximum bonding strength.
If you’re in a hurry and need a quick-drying option, go for hot glue or use a hairdryer to speed up the drying process. Alternatively, you can try using tacky glue, which is a type of PVA glue that dries faster than regular PVA glue. If you want to learn more about how to make tacky glue dry faster, check out our article on how to make tacky glue dry faster.
Remember that the drying time of the glue can also be affected by the temperature and humidity of the room. A room with high humidity can slow down the drying time, while a room with low humidity can speed it up. It’s always best to work in a well-ventilated room with moderate temperature and humidity.
To summarize, the drying time is an essential factor to consider when choosing the right glue for your wax candle project. Always take note of the drying time indicated on the label and plan your project accordingly. If you need a quick-drying option, consider using hot glue or tacky glue. And if you want some tips on how to speed up the drying process, check out our articles on how to reseal an envelope without glue and how to glue styrofoam to cardboard.
4. Temperature Resistance
When it comes to temperature resistance, it is important to select a glue that can withstand heat without losing its bonding strength. Here are some of the glues that have good temperature resistance:
- Epoxy: This glue has excellent temperature resistance, with some variants being able to withstand temperatures up to 300°F (149°C).
- Silicone Adhesive: This type of glue is known for its ability to withstand extreme temperatures. Some variants can handle temperatures up to 500°F (260°C).
- Hot Glue: Hot glue has decent temperature resistance, but it can soften or melt if exposed to high temperatures (above 100°F/38°C).
It is important to note that even though a glue may have good temperature resistance, it is still important to avoid exposing your candle to high temperatures. Additionally, if you plan on using your candle outdoors or in a warm environment, make sure to choose a glue with higher temperature resistance to ensure that the bond remains strong and the candle doesn’t fall apart.
5. Flexibility
When selecting a glue for your wax candle, it’s important to consider flexibility. The flexibility of the glue will determine if your candle will bend or crack after it’s glued.
Here are some types of glue that are flexible enough to use on your wax candles:
- Silicone Adhesive: This type of glue is known for its flexibility. It’s perfect for candles that need to flex or bend without breaking. Silicone adhesive is also waterproof, making it ideal for outdoor candles that need to withstand harsh weather conditions.
- Epoxy: Epoxy is another type of glue that is known for its flexibility. It’s perfect for candles that might flex or bend a little. Epoxy is also heat resistant, so it can hold up in a variety of temperatures.
- PVA Glue: PVA glue is a flexible glue that is perfect for a variety of applications. It dries clear and is easy to work with. It’s also non-toxic, making it a safe choice for candles that will be burned indoors.
Here are some things to keep in mind when considering flexibility:
- While a flexible glue is important, you don’t want it to be too flexible. If the glue is too flexible, it won’t hold the candle together properly and it could fall apart.
- It’s important to follow the manufacturer’s instructions when using any glue. This will ensure that you’re using the right amount and that it’s applied correctly.
- If you’re unsure about the flexibility of a glue, test it out on a small area of the candle first. This will help you determine if it’s the right glue for your project.
Choosing a flexible glue is essential to ensuring that your candle holds together properly. Consider the type of candle you’re making and the conditions it will be exposed to when selecting your glue. With the right glue, you’ll be able to create a beautiful candle that will stand the test of time.
6. Safety
When it comes to using glue on wax candles, safety is a crucial aspect that should not be overlooked. Different types of glue have varying degrees of safety concerns, and it is important to consider them before using any of them. Here are some safety factors to consider:
| Glue | Safety Concerns |
|---|---|
| Hot Glue |
|
| Super Glue |
|
| Epoxy |
|
| PVA Glue |
|
| Silicone Adhesive |
|
| Double-Sided Tape |
|
It is important to always follow the manufacturer’s instructions when using any type of glue, and to wear protective gear, such as gloves and eye protection, when handling them. Proper ventilation and a well-ventilated area can also reduce the risks of inhaling toxic fumes. Additionally, it is important to keep all glue and adhesive materials out of reach of children and pets to prevent accidental ingestion or injury. By taking these safety precautions, you can safely use the right glue for your wax candle project.
Step-by-Step Guide
Now that you have a better understanding of the different types of glue suitable for wax candles and important factors to consider, it is time to learn how to apply the glue properly. Following these step-by-step instructions will help ensure a successful bond for your candle project. With a little practice and patience, you will be able to create beautiful and unique candles that will bring warmth and ambiance to any setting. Let’s get started!
1. Clean the surfaces to be bonded
Before bonding your wax candle with glue, it is essential to clean the surfaces that will be bonded to ensure a strong and long-lasting bond. Here are the steps for cleaning the surfaces to be bonded:
- Remove any dirt or dust: Use a clean cloth or a soft-bristled brush to remove any dirt or dust particles that may affect the bond.
- De-grease the surfaces: Use a degreaser or rubbing alcohol to remove any grease or oil that may be present on the surfaces to be bonded. This step is important because the presence of grease or oil can weaken the bond.
- Dry the surfaces: After cleaning the surfaces, make sure that they are completely dry before applying the glue. Moisture can affect the bond, so it is important to ensure that the surfaces are completely dry.
Once you have cleaned the surfaces, you are ready to apply the glue. Remember to choose the right glue for your needs and to consider the factors that affect the bond.
2. Apply glue on one surface
One of the most crucial steps in bonding wax candles is applying glue on one of the surfaces to be bonded. It’s essential to use the right glue for the intended purpose, and to apply it correctly to achieve a strong and durable bond.
Before applying any glue, it’s important to clean the surfaces to be bonded properly. The surfaces should be free of dirt, wax residue, or any other oils that may affect the bond strength. Once the surfaces are clean, follow these steps for applying the glue:
| Step | Action |
|---|---|
| Step 1 | Prepare the glue according to the instructions provided by the manufacturer. Some glues may require stirring or shaking before use, while others may need to be heated or mixed with a hardener. |
| Step 2 | Apply the glue on one surface to be bonded. Use a small amount of glue and ensure that it’s evenly spread over the surface. A toothpick or a small brush can be used to apply glue in tight spaces or hard-to-reach areas. |
| Step 3 | Leave small gaps at the corner or the edge of the surfaces to avoid the glue from oozing out when the surfaces are pressed together. |
| Step 4 | Wait for a few seconds to allow the glue to set a bit, but not too long as it may affect the bond strength. The time required for the glue to set may vary depending on the type of glue used. |
Tip: It’s important to use the right amount of glue, not too much or too little. Using too much glue can cause a mess, while too little glue may result in a weak bond. Practice first before applying glue on the actual candle to avoid mistakes.
By following these simple steps, you can achieve a strong and durable bond between the wax candle surfaces. Remember to choose the right glue based on your specific needs and consider all the factors involved in determining the best glue for the job.
3. Press the surfaces together
After applying the chosen glue to one of the surfaces, it’s time to press the two surfaces together. Make sure to align the surfaces properly, as once the glue sets, it may be difficult to adjust the position.
To ensure a strong bond between the two surfaces, you can apply pressure using your hands or with the help of a clamp. Apply even pressure all over the surface to make sure the glue is distributed evenly and there are no air pockets between the surfaces.
Leave the surfaces pressed together for the recommended time by the glue manufacturer. Do not disturb the surfaces until the drying time is complete, otherwise, the bond may be weakened or even broken.
If you’re using a hot glue gun, the bond will set quite quickly. But if you’re using an epoxy or PVA glue, it may take several hours to dry completely. Make sure to follow the recommended drying time to ensure a strong, long-lasting bond.
4. Let the glue dry completely
Once you have pressed the surfaces together with glue, it is important to let it dry completely before handling or using the candle. The drying time of the glue largely depends on the type of glue you use, as well as the temperature and humidity of your workspace.
Here are some general tips to keep in mind when letting glue dry:
- Refer to the instructions on the glue packaging for a general idea of drying time
- Avoid moving or touching the surfaces while the glue is drying to ensure a strong bond
- If possible, leave the candle untouched for at least 24 hours to ensure complete drying and bonding
- Higher temperatures and lower humidity can speed up drying time
- Lower temperatures and higher humidity can prolong drying time
It is also important to note that different types of glue may have different drying characteristics:
- Hot glue dries quickly but may need a few minutes to cool and harden completely
- Super glue can dry in seconds, but full bonding strength may take up to 24 hours
- Epoxy can take several hours to dry and harden
- PVA glue can take up to 12 hours to dry completely
- Silicone adhesive may need 24 to 48 hours to completely cure and dry
- Double-sided tape does not require drying time but may need to be pressed firmly for a strong bond
Remember to be patient and wait for the glue to dry completely to ensure a strong and lasting bond.
Tips and Tricks
As with any crafting project, there are always tips and tricks that can make the task easier and the end result more successful. When it comes to using glue on wax candles, there are several things you can do to ensure that your candle making process goes smoothly and that your finished product looks great. Below are some helpful tips and tricks to keep in mind when working with glue and wax candles. So let’s dive in!
1. Use a glue gun for easy application
Using a glue gun for your wax candle is known to be one of the easiest and most efficient ways of bonding. With its easy-to-squeeze trigger and quick-drying properties, it’s perfect for quick and hassle-free bonding. Here are some benefits of using a glue gun:
| Benefits | Details |
| Easy-to-squeeze trigger | The trigger on a glue gun allows for easy and precise application. |
| Quick-drying | Glue guns can dry within seconds of application, making them ideal for those who don’t want to wait for long periods of time for their candles to be ready. |
| Compatible with most types of glue sticks | A glue gun is capable of using a variety of glue stick types including hot glue sticks and silicone adhesive sticks; so you get a wide range of options for choosing the perfect glue for your need. |
| Versatility | Glue guns can be used on a variety of surfaces as well as intricate shapes and corners, making it highly versatile for most wax candles. |
Bear in mind, however, that glue guns can be dangerous when not handled properly. So, it is necessary to take precautions such as wearing protective gloves to prevent burns, particularly when dealing with hot glue.
2. Practice first before applying glue on your actual candle
One important tip to keep in mind when it comes to using glue on wax candles is to practice first before applying it on your actual candle. This will not only help you get a feel for how the glue works, but it can also help you avoid any mistakes or mishaps that could damage your candle.
The following table outlines some simple steps to follow when practicing with glue:
| Step | Description |
|---|---|
| 1 | Select a small, unimportant object to practice on, such as a spare piece of wax or a disposable cup. |
| 2 | Choose the type of glue you plan to use for your candle and follow the manufacturer’s instructions for proper application. |
| 3 | Apply a small amount of glue to the object and practice bonding it to another object or surface. |
| 4 | Observe how the glue reacts to the surface and how it dries. Take note of the drying time and the bonding strength. |
| 5 | Repeat the process with different types of glue, if necessary, to find which one works best for your needs. |
By following these steps and practicing with glue beforehand, you can ensure that you apply the glue correctly and achieve the desired outcome when you apply it to your actual wax candle. This can also help you avoid any potential damage to your candle and ensure that it remains in its original state. Remember, practice makes perfect, so take your time and experiment to find the perfect glue for your candle-making needs.
3. Use a small amount of glue to avoid messiness
When it comes to gluing wax candles, using too much glue can actually cause more harm than good. Not only can it look messy, but excess glue can also drip and create a potential fire hazard. That’s why it’s important to use a small amount of glue to avoid messiness.
Here are some tips to keep in mind when using glue on your candle:
- Start with a small amount: You can always add more glue if necessary, but it’s harder to remove excess glue once it’s already applied.
- Apply the glue sparingly: Use just enough glue to create a strong bond between the surfaces, but not so much that it oozes out and creates a mess.
- Be patient: It may be tempting to apply more glue to speed up the bonding process, but it’s important to let the glue dry fully before handling the candle. This will prevent any excess glue from smudging or sticking to your hands.
- Use a toothpick or cotton swab: If you’re having trouble applying a small amount of glue, try using a toothpick or cotton swab to control the amount of glue you’re applying.
Remember, less is more when it comes to gluing wax candles. So use a small amount of glue and avoid messiness for a clean and professional-looking final result.
4. Avoid getting the glue on the wick or the flame
When using any type of glue on a wax candle, it is important to take necessary precautions to avoid getting the glue on the wick or the flame. This will ensure that your candle will burn properly and safely.
Why is it important to avoid getting glue on the wick or the flame?
The wick is the most important part of a candle as it is responsible for carrying the flame. Any obstruction on the wick can affect the way the candle burns and could potentially create safety hazards. Additionally, if glue gets on the flame, it can cause the flame to become unstable and can result in dangerous situations.
How to avoid getting glue on the wick or the flame?
Below are some tips to follow to ensure that you avoid getting glue on the wick or the flame:
| Tip | Description |
|---|---|
| 1. | Apply glue on areas away from the wick and flame. When applying glue to your candle, make sure to avoid the wick and areas surrounding it. Try to apply the glue on the sides or the base of the candle where the wick is not present. |
| 2. | Use a small amount of glue. Using a small amount of glue can help prevent it from spreading to unwanted areas. It also helps in avoiding a mess. |
| 3. | Allow the glue to dry completely. Once you’ve applied the glue, let it dry completely before lighting the candle. This will ensure that the glue has completely hardened and won’t interfere with the wick or flame. |
| 4. | Practice caution. When handling candles with glue, always be cautious and careful. Avoid touching the glue or the wick or flame, and be sure to keep the candle in a safe area away from any flammable materials. |
By following these simple tips, you can avoid any potential safety hazards and ensure that your candle burns properly.
Conclusion
In conclusion, choosing the right glue for your wax candle depends on various factors such as clarity, bonding strength, drying time, temperature resistance, flexibility, and safety. Each type of glue has its own advantages and disadvantages. Hot glue, for example, is easy to apply and dries quickly but may not be transparent. Super glue is great for bonding small parts but may become brittle over time. Epoxy is strong and durable but takes longer to dry. PVA glue is easy to find and is safe for children to use but may not hold up well in humid conditions.
When choosing a glue, it’s important to consider the specific needs of your project. If you need a strong bond, for example, epoxy or silicone adhesive may be the best option. If you need a transparent bond, on the other hand, hot glue or double-sided tape may not work.
When applying glue, it’s important to follow the step-by-step guide mentioned in this article and take the necessary safety precautions. Clean the surfaces, apply the glue in a small amount, and avoid getting it on the wick or flame. Using a glue gun can make application easier and more precise.
Overall, with the right glue and proper application technique, you can bond your wax candle securely and create stunning DIY projects. Happy crafting!
Frequently Asked Questions
1. Can hot glue be used on wax candles?
Yes, hot glue can be used on wax candles for bonding certain materials. However, it may not be the most suitable option for all situations.
2. How strong is epoxy glue for holding wax candles together?
Epoxy glue is known for its exceptional bonding strength and is suitable for holding wax candles together. It forms a tough, durable bond that can withstand stress and impact.
3. Is PVA glue safe to use on wax candles?
PVA glue, also known as white glue, is safe to use on wax candles. It dries clear and has good bonding strength, making it a popular choice for bonding paper products to candle surfaces.
4. What is the drying time for silicone adhesive on wax candles?
Silicone adhesive typically takes a longer time to dry compared to other types of glue. It can take up to 24 hours to completely cure, depending on the temperature and humidity levels in the environment.
5. Can I use double-sided tape to attach decorative elements to my wax candle?
Yes, double-sided tape can be used to attach small decorative elements to your wax candle. However, it may not be the best option for heavy or bulky decorations.
6. Is it safe to burn a wax candle with glue on it?
Glue should not be applied directly to the flame or wick of a wax candle, as it can cause a fire hazard. However, if the glue is applied away from the flame and allowed to dry completely, it should be safe to burn the candle.
7. Can I use super glue on wax candles?
Super glue can be used on wax candles, but it may not be the best option for all situations. It is recommended to use it only for small repairs or bonding lightweight materials to the candle surface.
8. Is it important to clean the surfaces before gluing them together?
Yes, it is important to clean the surfaces to be bonded before applying glue. Any dirt, oil, or wax on the surface can prevent the glue from adhering properly.
9. How can I avoid getting glue on the wick or flame of my candle?
To avoid getting glue on the wick or flame of your candle, apply it away from those areas and allow it to dry completely before lighting the candle.
10. What should I do if I accidentally get glue on my wax candle?
If you accidentally get glue on your wax candle, try to remove it as soon as possible using a gentle solvent, such as rubbing alcohol, before the glue dries. Be careful not to damage the candle surface in the process.