Whether you’re a seasoned luthier or a guitar enthusiast looking to tackle DIY guitar repair, understanding how to fix guitar binding is essential. The binding on a guitar not only contributes to the instrument’s aesthetic appeal but also plays a crucial role in its structural integrity. This comprehensive guide will walk you through the process of gluing guitar binding, ensuring that your instrument looks great and stays in top condition.
Understanding Guitar Binding and Common Issues
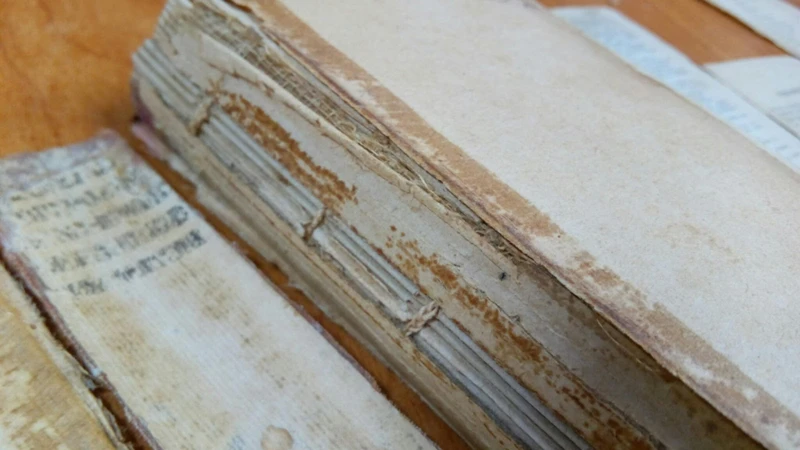
Guitar binding serves as a protective border between the wood of the body and the outside world. It is often made from plastic, wood, or other materials, designed to prevent dings and chips on the guitar’s edges. Common issues with binding include separation, cracks, and shrinkage, which can affect playability and overall sound quality. Identifying these problems early is key to a successful guitar binding repair.
DIY Guitar Repair: Prepping for Binding Work
Before you start the repair, it’s crucial to gather the right tools and prepare your workspace. You’ll need a clean, flat surface and tools such as clamps, a small brush, sandpaper, and a razor blade. Ensure the guitar is stable and the affected area is accessible. Prepping the binding location by cleaning and lightly sanding will create a better surface for the adhesive to bond.
Gluing Guitar Binding: Step-by-Step Tutorial

With the guitar ready and your tools at hand, it’s time to dive into the step-by-step process of gluing guitar binding. The key to a seamless repair is patience and meticulous attention to detail throughout each stage.
Choosing the Right Adhesive for Guitar Binding
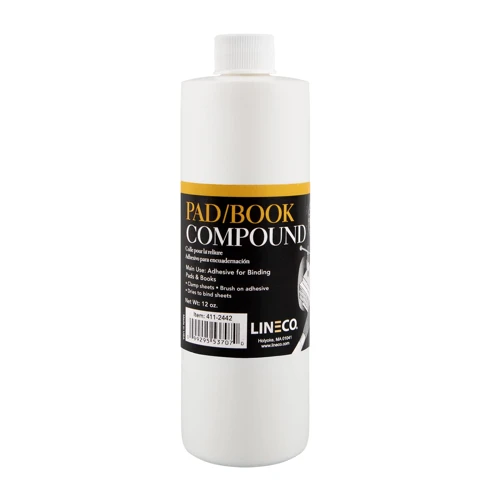
The adhesive for guitar binding must be strong yet flexible to withstand the rigors of playing and temperature changes. Cyanoacrylate (super glue) and specific binding glues available on the market are popular choices. Ensure the adhesive you select is suitable for the material of your guitar’s binding.
Preparation Steps for a Successful Guitar Binding Glue-Up
- Clean the area thoroughly to remove any old glue or debris.
- Lightly sand the edge of the guitar body and the binding strip to create a rough surface for better adhesion.
- Test-fit the binding strip to ensure it conforms to the guitar’s shape.
- Prepare your clamps and any cauls you’ll need to apply even pressure.
Applying the Glue and Clamping: Techniques and Tips
Apply a thin, even layer of glue to the binding or the guitar body’s edge, depending on your adhesive’s instructions. Carefully place the binding onto the guitar, starting at one end and working your way to the other. Use clamps or binding tape to secure the binding in place, ensuring even pressure is applied throughout to avoid gaps or raised areas. Wipe away any excess glue immediately to avoid a messy finish.
Curing Time and Post-Glue Cleanup
Adhesive cure times vary, so refer to the product’s instructions for the appropriate duration. Once cured, carefully remove any clamping apparatus and inspect the bond. Use a razor blade to trim excess glue and sand lightly for a smooth finish. Patience during the curing phase is vital to a solid and durable bond.
Acoustic Guitar Binding: Special Considerations
Acoustic guitar binding presents unique challenges due to its complex curves and the acoustic properties it can affect. The following considerations will help ensure a successful repair without compromising the instrument’s sound or aesthetic.
Dealing with Curved Surfaces and Tight Corners
Acoustic guitars often feature tighter curves and more intricate binding paths. Employ flexible strips and a heat gun or hair dryer to gently warm the binding, making it more pliable for these challenging areas. Extra care should be taken not to overheat the wood or the binding material.
Finishing Touches for Acoustic Guitar Binding Repair
Once the binding is securely glued and the adhesive has cured, it’s time to focus on the finishing touches. This may involve scraping the binding flush with the guitar body, sanding for smoothness, and applying a finish to seal and protect the repair. Each step should be carried out with a gentle hand to preserve the integrity of both the binding and the wood.
Fix Guitar Binding Like a Pro: Advanced Techniques

To elevate your repair skills and ensure lasting results, let’s delve into some advanced techniques employed by professional luthiers.
Addressing Loose Ends and Preventing Future Issues
Inspect the entire binding for any loose sections that may need additional adhesive. It’s also wise to check for potential weak spots that could lead to future issues. Reinforcing these areas now can save you from repetitive repairs down the line.
Luthier Guide to Binding: Expert Advice
Professional luthiers often recommend using specialty tools for precise cuts and custom cauls for even clamping pressure. They also emphasize the importance of a dry run before the actual glue-up to anticipate and address any problems that might arise during the process.
Guitar Repair Tips: Maintenance and Care Post-Repair

After successfully repairing the binding, it’s important to focus on maintenance and care to protect your work and the guitar as a whole.
Regular Maintenance to Preserve Guitar Binding
Regular cleaning with a soft cloth and avoiding extreme temperatures or humidity levels can significantly extend the life of the binding. It’s also beneficial to periodically inspect the binding for signs of wear or damage and address them promptly.
Long-Term Guitar Care and Prevention Strategies
To prevent future binding issues, store the guitar in a hard case and maintain proper humidity levels. Using a humidifier during dry months and a dehumidifier when it’s too damp can help prevent the wood and binding from shrinking or expanding excessively.
Guitar Binding Tutorial: Recap and Additional Resources
This guide has covered the fundamental steps for repairing the binding on your guitar. With the right tools, patience, and attention to detail, you can achieve professional-level results at home.
Recap of Key Steps in Guitar Binding Repair
Remember to choose the appropriate adhesive, prepare the binding and guitar body, apply even pressure during clamping, and allow sufficient curing time. Paying attention to finishing touches will ensure a seamless repair.
If you’re a DIY enthusiast with a passion for music, you might be interested in exploring various adhesive applications. While you’re learning about how to glue bind a book, why not also discover the art of attaching patches with our guide on how to glue on a patch? And for the guitarists out there looking to tackle repairs, our tutorial on how to sand super glue on a guitar could be the perfect resource to help you with your guitar binding project.
Further Reading and Learning for DIY Luthiers
If you’re keen on expanding your luthier skills, plenty of resources are available. Books, online forums, and instructional videos can provide deeper insights into the art of guitar repair and maintenance. Joining a community of DIY guitar repair enthusiasts can also offer support and advice as you hone your craft.
With practice and perseverance, you’ll be well on your way to mastering the art of guitar binding repair and other aspects of guitar maintenance, contributing to the longevity and beauty of your cherished instrument.