For book enthusiasts and DIY crafters, the art of bookbinding opens a world of creativity and personalized book creation. Among the various techniques available, glue binding stands out as a popular and accessible method for assembling homemade journals, novels, and more. In this comprehensive guide, we’ll embark on the journey of how to glue bind a book, ensuring your pages stay intact with a professional finish.
Understanding Book Glue Binding

What is Glue Binding?
Glue binding, also known as perfect binding or thermal binding, is the process of securing the pages of a book using a durable adhesive. This method is widely used for paperback books, catalogs, and magazines, offering a clean and sleek appearance with a flat spine that can be printed upon.
Types of Book Binding Glue
There are several types of book binding glue, each suited to different binding projects. Polyvinyl acetate (PVA) glue is a popular choice for its flexibility and strength. Hot melt adhesives provide quick setting times, while epoxy and polyurethane glues are known for their durability. Selecting the correct adhesive is crucial for the longevity of your bound book.
How to Glue Bind A Book: A Step-by-Step Guide
Preparing Your Workspace
Begin by ensuring your workspace is clean, well-lit, and free of dust or debris. A flat, stable surface is necessary to keep your materials organized and to prevent any mishaps during the binding process.
Supplies Needed for Glue Binding
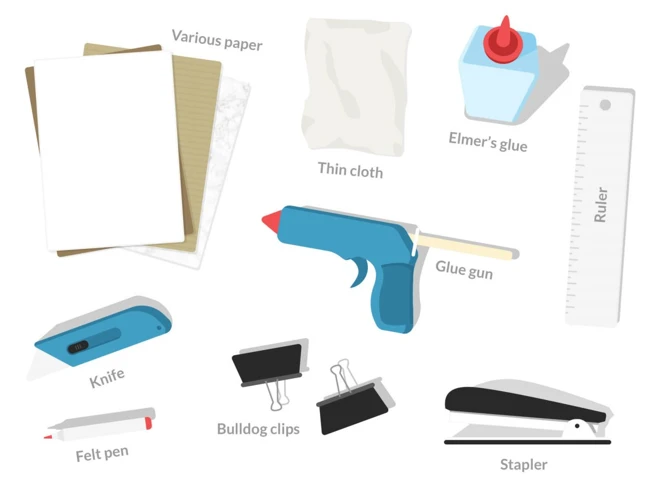
Assemble the following supplies before starting:
- Text block (group of printed sheets)
- Bookbinding glue
- Brush or glue applicator
- Book cover
- Clamps or heavy books for pressing
- Wax paper
- Utility knife or bone folder
Step 1: Creating the Text Block
Compile your printed pages into a neat stack, ensuring all edges are perfectly aligned. Clamp the pages together or use heavy weights to keep them in place. This forms the text block, the core component of your book.
Step 2: Applying Book Binding Glue
Apply a thin, even layer of book binding glue along the spine of the text block using a brush or applicator. Ensure the adhesive reaches into the gaps between the pages for a secure hold, but avoid over-gluing as it may seep into the pages and cause them to stick together.
Step 3: Side Gluing of Book Blocks
For additional strength, apply a thin line of glue along the edges of the text block. Side gluing of book blocks reinforces the binding and helps maintain the shape of the book.
Step 4: Attaching the Cover
Once the spine glue is tacky but not completely dry, carefully align the cover with the text block and press it onto the spine. Smooth out any air pockets or wrinkles and wipe away excess glue with a damp cloth. Then, place the book under a weight or use clamps to keep everything tightly pressed while the glue sets.
Step 5: Curing the Glue
Allow the glue to cure for the time specified by the manufacturer, usually a few hours to overnight. The curing process is essential for the glue to reach its full strength and ensure the longevity of the binding.
Tips and Tricks for Successful Glue Binding

Choosing the Right Glue
To achieve a strong and flexible bond, choose a glue that is specifically formulated for bookbinding. PVA glue is often recommended for its ease of use and excellent bonding properties.
How to Make Book Binding Glue
If you prefer a homemade adhesive, how to make book binding glue is straightforward. A simple mixture of flour, water, and a pinch of sugar can create a usable paste. However, for a more durable bond, purchasing commercially available glue is advisable.
Preventing Common Glue Binding Mistakes
Avoid common mistakes by ensuring your spine is evenly coated with glue, the pages are clamped firmly while drying, and any excess glue is cleaned off immediately to prevent pages from sticking together.
Advanced Techniques in Glue Binding

How to Bind Paper with Glue for Professional Results
For professional results, consider investing in a thermal binding machine, which uses heat to melt a pre-applied glue strip along the spine. This method provides a strong, factory-style bind that is difficult to achieve manually.
How to Glue a Book Together Without Bubbles or Wrinkles
To prevent bubbles or wrinkles, apply glue in a consistent layer and attach the cover starting from the spine, gradually smoothing towards the edges. Using a bone folder can assist in pushing out any trapped air as you affix the cover.
Maintaining Your Glue Bound Book
Maintain your glue bound book by storing it in a cool, dry place away from direct sunlight. Handle your book with clean hands and avoid pulling on the cover or spine when removing it from a shelf.
Conclusion: The Benefits of DIY Book Binding
The process of how to glue bind a book can be immensely satisfying, giving you creative control over the final product. Whether for personal projects or small-scale publishing, mastering glue binding enriches your crafting skills and enhances the presentation of your work.
If you’re interested in DIY bookbinding, you might be considering different methods for assembling your pages. For a traditional approach, our tutorial on how to glue bind a book can provide step-by-step guidance, ensuring a strong and lasting hold. If you prefer a non-adhesive option, check out our resource on how to bind a book without glue, which explores alternative binding techniques. And for those of you who are crafty and looking to make your own adhesive, our article on how to make envelope glue could also be applied to bookbinding projects for a homemade touch. Each of these resources offers valuable tips to help you create beautifully bound books at home.
FAQs on Glue Book Binding
Do you have further questions on glue binding? This section aims to address common inquiries and provide additional insights to help you perfect your bookbinding craft.