Have you ever tried gluing carbonless forms only to have them fall apart after a short time? It can be frustrating, but fear not, with the right materials and techniques, your carbonless forms can be glued perfectly to last. In this comprehensive guide, we’ll go through all the necessary materials needed for the job, as well as a step-by-step process including tips and tricks to ensure your carbonless forms stay intact. Don’t let the perplexity of gluing carbonless forms get in the way of your work, let’s dive in!
Materials Needed

When it comes to gluing carbonless forms, having the right materials is essential to ensure a successful outcome. You will need several items, including carbonless forms, glue, and a brush or roller. While some may think that any type of glue will do, it’s crucial to use a high-quality, strong adhesive that’s suitable for the type of paper you’re gluing. If you’re uncertain about which type of glue to use, check out some of our other articles, such as How to Make Bird Seed Blocks Glue, How to Use Edible Glue, or How to Stick Paper Without Glue.
Carbonless Forms
Carbonless forms are also known as NCR (No Carbon Required) forms, and they are a type of paper used to create duplicate or triplicate copies of a document without the need for carbon paper. These forms are commonly used for invoices, receipts, contracts, and purchase orders. Before gluing carbonless forms, it is essential to ensure that they are clean, flat, and aligned correctly. Here are some tips for preparing your carbonless forms:
- Cleanliness: Ensure that the carbonless forms are free of dust, dirt, or debris. Wipe them down with a clean, dry cloth before gluing.
- Flatness: Ensure that the carbonless forms are laying flat before applying glue. Place them under a heavy book or similar object if necessary to press out any wrinkles or curls.
- Alignment: Ensure that the lines and text on the carbonless forms are aligned correctly. You don’t want to glue together forms with offset text, which would create unusable duplicates.
In addition to preparing the carbonless forms, it is important to use the correct type of glue. There are many different types of glue to choose from, but not all of them will work well with carbonless forms. To learn about the types of glue you can use, check out our article on how to make rolling paper glue.
Glue
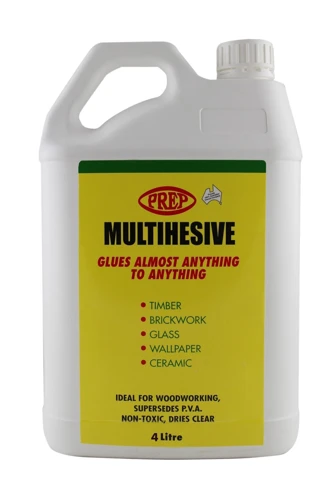
Glue is an essential component in the process of gluing carbonless forms. To ensure a secure bond, it is crucial to choose the right type of glue. It is recommended to use a high-quality adhesive that is suitable for carbonless forms. The most commonly used adhesive for this purpose is PVA (Polyvinyl Acetate) glue, as it provides a strong and reliable bond.
PVA glue is readily available in most craft stores and online retailers. It is also water-soluble, which makes it easy to clean up any spills or excess glue. Another option for gluing carbonless forms is using a spray adhesive. It is faster and easier to use than traditional glue, but it can be messy and difficult to control.
| Type of glue | Pros | Cons |
|---|---|---|
| PVA glue | Provides a strong and reliable bond; water-soluble and easy to clean up | Takes longer to dry; may cause wrinkles on the paper |
| Spray adhesive | Faster and easier to use than traditional glue | Can be messy and difficult to control, may cause over-saturation and difficulty in separating carbonless forms |
Different types of glue may have different drying times, so it’s essential to follow the manufacturer’s instructions for the particular glue being used. Using too much glue or applying it unevenly can also result in issues such as wrinkling and poor adhesion.
If you’re looking for alternative types of glue, you may be interested in learning how to make glue out of plants or dextrin glue. And if you’d like to experiment with PVA glue for different projects, you can try paper mache with PVA glue or learn how to glue wallpaper with PVA glue. However, it is essential to remember that using a different type of glue for gluing carbonless forms may not result in a secure bond.
Internal link: How to Make Glue Out of Plants.
Brush or Roller
When it comes to gluing carbonless forms, one of the most important materials you will need is a brush or roller to apply the glue evenly and efficiently. Using a brush or roller will ensure that the glue is spread over the entire surface of the sheet, leaving no spots or areas uncovered.
Brush: Using a brush is a great option if you want a more precise application of glue. A brush allows you to apply the glue to specific areas that may require more attention, such as the edges of the sheet. You can use any type of brush, but a foam or synthetic bristle brush may be the best choice as they don’t leave hairs behind and leave an even layer of glue.
Roller: A roller is a great option if you want to apply glue to large areas quickly. It is also ideal for ensuring that the sheets are pressed together evenly. A rubber or silicone roller is the best choice for carbonless forms, which will prevent the sheet from sticking to the roller. Rollers can also be cleaned easily with soap and water.
It’s important to note that the type of glue you use may determine whether a brush or roller is the best option. Some glues, like dextrin glue, work better with a brush as it allows for more precise application, while others like PVA glue, are best applied with a roller for even spreading. Use a small amount of glue and apply it lightly to avoid saturating the paper and causing it to wrinkle or bubble.
Whether you use a brush or roller for gluing carbonless forms, make sure to apply the glue evenly and use the appropriate amount. If you want to learn more about other types of gluing techniques or materials, check out these helpful articles:
- How to make a paper kunai without tape or glue
- How to make dextrin glue
- How to paper mache with PVA glue
- How to glue wallpaper
- How to cure UV glue without lamp
Preparation
Preparing the workspace and materials before gluing carbonless forms is crucial to achieving a polished and professional-looking finished product. Taking the time to properly prepare ensures that the glue binds the sheets properly, and there are no air bubbles or other blemishes. In this section, we’ll discuss the steps you need to take to prepare for the gluing process, including the materials you’ll need and how to set up your workspace. By following these tips, you’ll be well on your way to achieving stunning carbonless forms that meet your needs.
Workspace
The workspace plays a significant role in ensuring that your gluing process is successful. Before starting, clear your workspace of any dirt, dust, or debris that can dirty your carbonless forms or contaminate your adhesive. Make sure the workspace is well ventilated and ensure that there are no open flames or heat sources in the vicinity that can cause accidents.
Here are some essential items to make your workspace more conducive for gluing carbonless forms:
| Items to Prepare | Description |
|---|---|
| Covering | Cover your work surface with a clean cloth, butcher paper, or old newspaper to prevent glue and ink from damaging it. |
| Cleaning Supplies | Have a stash of cleaning supplies within reach to clean up spills and glue drips. Common examples include wet wipes, paper towels, a cleaning solution, and water. |
| Tools and Equipment | Prepare all the necessary tools and equipment you need before you start gluing. This includes brushes, rollers, glue spreaders, and scissors. Having them nearby will save you time and effort while ensuring that everything is within reach when you need it. |
By preparing your workspace properly and having everything you need within reach, you can ensure that your carbonless forms are glued perfectly.
Carbonless Forms
When it comes to gluing carbonless forms, it is important to consider the type of forms you have as well as their condition. Carbonless forms are paper-based products that are commonly used for invoices, purchase orders, receipts, and other similar documents. They are designed to create multiple copies of a document without the need for a photocopier or other reproduction device.
Types of Carbonless Forms
There are two main types of carbonless forms: coated and uncoated. Coated forms are typically glossy and have a slick surface that can resist smudging and moisture. These types of forms are commonly used for applications where durability is important, such as shipping labels and inventory tags. Uncoated forms, on the other hand, are typically matte and have a more absorbent surface that can better accept ink and other marking materials. They are commonly used for applications where appearance is less important, such as internal memos or draft documents.
Condition of Carbonless Forms
The condition of your carbonless forms is also an important factor to consider when gluing them. If your forms are old or have been exposed to moisture, they may become brittle or begin to disintegrate when exposed to adhesive. It is important to inspect your forms before gluing them and discard any that show signs of damage or decay.
To summarize, it is important to know the type and condition of your carbonless forms when gluing them. Coated forms are typically more durable and resistant to moisture, while uncoated forms are more absorbent. It is equally important to ensure that your forms are in good condition and free of damage before gluing them. This will ensure that your forms remain intact and legible throughout their use.
| Type of Carbonless Forms | Usage |
|---|---|
| Coated | Glossy surface, resistant to smudging and moisture, ideal for applications where durability is important such as shipping labels and inventory tags |
| Uncoated | Matte surface, absorbent, ideal for applications where appearance is less important such as internal memos or draft documents |
Glue
When it comes to gluing carbonless forms, it’s crucial to use a high-quality glue that will provide a strong hold without damaging the paper. There are various types of glue available in the market, but not all of them are suitable for this task. Here are the factors to consider when choosing the right glue:
| Type of Glue | Pros | Cons |
|---|---|---|
| PVA Glue | Bonds quickly, dries clearly, and is easy to clean up with water. | May not be ideal for carbonless forms with a glossy finish as it may cause the ink to smudge. |
| Rubber Cement | Dries quickly, creates a strong bond, and can be removed easily if needed. | Fumes can be harmful if inhaled, and it may wrinkle or damage the paper if not applied correctly. |
| Spray Adhesive | Provides a strong bond, dries quickly, and is easy to apply evenly. | May be challenging to clean up if it gets on other surfaces, and is not ideal for use in a small workspace due to fumes. |
| Hot Glue | Dries quickly and forms an incredibly strong bond that can last a long time. | May be difficult to remove if needed, and the heat emitted during application may damage the paper. |
It’s important to note that each type of glue has its own advantages and disadvantages, so it’s essential to choose a glue that best suits your needs and preferences. Additionally, it’s important to read and follow the manufacturer’s instructions for safe and effective use. Choosing the right glue is a crucial factor in achieving a professional-looking and long-lasting carbonless form.
Gluing Process
Now that you have prepared all the necessary materials, it’s time to start the gluing process. This is the most crucial part of making carbonless forms, as the sheets need to be perfectly aligned to ensure a clear copy transfer. Don’t worry, though. With the right technique and a little patience, you’ll be able to create professional-looking carbonless forms in no time. So, let’s get started!
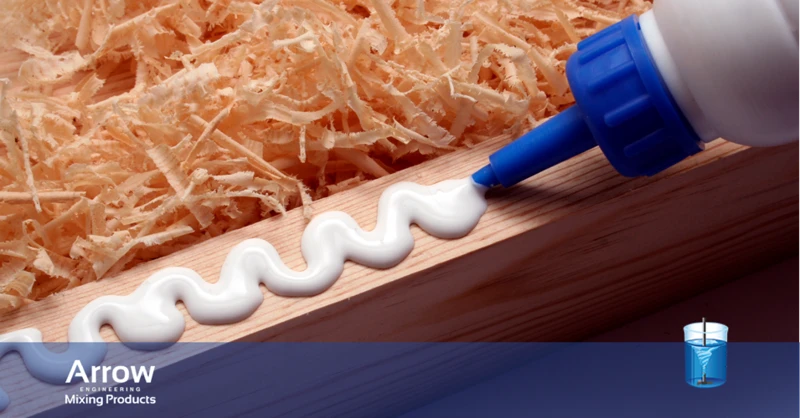
Step 1. Apply Glue to the First Sheet
To begin gluing the carbonless forms, you must first apply glue to the first sheet. This step is crucial in ensuring that all layers bond together correctly, and will ultimately determine the success of your project. Here are the detailed steps for this stage:
| Step 1 | Start by laying the first sheet flat on your workspace. |
| Step 2 | Use a brush or roller to evenly apply a thin layer of glue to the entire surface of the sheet. Be sure to use the proper amount of glue for the size of your sheet. |
| Step 3 | Pay attention to the edges and corners of the sheet, ensuring that they are coated with glue. These areas tend to be more prone to lifting later on if not properly glued down. |
| Step 4 | Once you have applied the glue, allow the sheet to sit for a few seconds to let the glue partially dry. This will help prevent the glue from smearing when you apply the second sheet. |
Properly applying glue to the first sheet is an essential step in ensuring your carbonless forms will be cohesive and effective. Remember to take your time and apply an even layer of glue to avoid any issues down the line.
Step 2. Apply Glue to the Second Sheet
When you’re ready to move on to the second sheet of your carbonless form, take your brush or roller and apply a thin layer of glue evenly across the entire sheet. It’s important not to apply too much glue or it will cause the sheets to stick together in an undesirable way. Use a small amount of glue and spread it out smoothly using your brush or roller.
Note: Make sure to hold the second sheet in a way that doesn’t allow the glue to transfer to the back of the next sheet. This can cause multiple sheets to stick together, ruining the entire form.
After you’ve applied the glue, set the second sheet aside and move on to the final step in the gluing process.
Step 3. Match the Sheets
After applying glue to both carbonless forms, it is time to match them together. Here are the steps to properly match the sheets:
- Align the sheets: Place the second carbonless form on top of the first one, ensuring that all the edges, corners, and sides are perfectly aligned. It is essential to keep the sheets straight during the matching process to avoid creases or misalignments.
- Press down: Use your hands to press down gently on the sheets to ensure they are well-matched and aligned. Apply more pressure along the edges and corners to create a firm bond.
- Smooth out: Grab a brayer or any similar tool to roll out any air pockets or bubbles that may have formed between the carbonless forms. This step is crucial as it prevents air pockets from forming, which can cause the carbonless forms to separate or detach over time.
By matching and bonding the carbonless forms correctly, you ensure that there are no gaps or spaces left between them. This step is critical since gaps or spaces will hinder the copying process, leading to incomplete or illegible copies. Take your time during the matching process and ensure that everything is completely aligned and flattened out before moving on to the next step.
Step 4. Roll Out Air Bubbles
After matching the carbonless forms, air bubbles may form between the sheets. To avoid unwanted marks or smudges, it is crucial to roll out the air bubbles. Though it may seem easy, it requires precision and control.
To perform this step, you will need a rolling tool such as a brayer or a hard roller. It is ideal to use a brayer for small forms, and a hard roller for larger forms.
First, start at one corner of the sheet and roll the tool firmly over the carbonless forms, moving towards the opposite corner. Repeat this process until you roll out all the air bubbles. Be careful not to over-roll as it may cause the carbonless forms to stick or tear.
Note: It is better to under-roll than over-roll.
It is essential to roll out all the air bubbles to ensure that the glue dries evenly and without any blemishes. Properly rolled carbonless forms will give you a professional-looking result.
Summary of Step 4. ‘Roll Out Air Bubbles’:
| Step | Roll Out Air Bubbles |
| Materials Needed | Rolling tool (brayer or hard roller) |
| Process | Roll the tool firmly from one corner to the opposite corner Repeat the process until all air bubbles are removed Be careful not to over-roll. |
| Importance | Ensures even glue drying and professional-looking results |
Drying Time

Once you have completed the gluing process, it’s important to give the carbonless forms enough time to dry. This process is crucial to ensuring that the glue has properly bonded the sheets together. The drying time for carbonless forms varies depending on the type and brand of glue used, as well as the humidity and temperature of the workspace.
Tip 1: Check the drying time instructions on the glue bottle before you start the gluing process. This information is usually included on the label or in the instructions.
Tip 2: In general, most types of glue used for carbonless forms dry within 24 hours, but it’s best to check the specific drying time for the glue you’re using.
Tip 3: The best way to ensure that the carbonless forms are completely dry is to leave them to dry overnight. This gives the glue enough time to properly bond the sheets together and ensures that the bond is strong enough to withstand handling.
Tip 4: If you’re working in a high humidity environment, it may take longer for the glue to dry. You can speed up the drying process by using a fan or dehumidifier to lower the humidity in the workspace.
Tip 5: Don’t touch or handle the carbonless forms until they are completely dry. Touching them while the glue is still wet can cause the sheets to shift or separate, which can ruin the final product.
Tip 6: Once the carbonless forms are completely dry, you can stack them and store them as needed. Make sure to keep them in a dry and cool environment to prevent humidity or temperature changes from affecting the glue bond.
By following these tips, you can ensure that the glue on your carbonless forms has properly bonded the sheets together and that the final product is stable, durable and ready to use.
Additional Tips
As with any task, there are always additional tips and tricks that can make the process easier and more effective. Gluing carbonless forms is no exception. Here are some key pieces of advice to keep in mind as you work:
Use Proper Amount of Glue
One of the most crucial aspects of gluing carbonless forms is to use the proper amount of glue. Applying too much glue may cause the forms to warp or the text to smudge, while too little glue may result in the forms coming apart. You need to make sure you’re using just the right amount.
To provide guidance on how much glue to use for gluing carbonless forms, we’ve put together the following table:
| Size of Form | Amount of Glue |
|---|---|
| 8.5″ x 11″ | 1/4 to 1/3 cup |
| 8.5″ x 5.5″ | 3 to 4 tablespoons |
| 5.5″ x 4.25″ | 1 to 2 tablespoons |
It’s important to note that the amount of glue is largely dependent on the size of the form. Using too little or too much glue can lead to mistakes and poor results. You want to ensure that the glue is evenly distributed throughout the form.
Following this table and using the right amount of glue for your specific form will help ensure a consistent and professional outcome.
Don’t Rush
When gluing carbonless forms, it’s important not to rush the process. Rushing can lead to mistakes that can ruin the entire batch of forms. Here are some tips to keep in mind:
- Take your time: Rushing can cause the carbonless forms to shift, resulting in misaligned pages. This can make it difficult to read the information and can result in errors that could cost your business money.
- Apply glue evenly: If you rush while applying glue, it can cause uneven application and result in spots where the glue is too thin or too thick. This can also result in misalignment or poor transfer of information between pages.
- Double-check everything: If you rush through the process, you might not notice that the sheets have shifted or that there are air bubbles present. Double-checking everything can help you catch mistakes and fix them before it’s too late.
- Allow sufficient drying time: Rushing the drying time can lead to sheets sticking together which can cause damage to your documents and printer. Always follow the recommended drying time for the glue used.
Remember, the carbonless forms you create are an important aspect of your business. Don’t rush the process and risk making mistakes that can cost you time and money. Take your time and pay attention to details to ensure that your final product is professional and reliable.
Keep a Spare Sheet
One of the best ways to ensure that your carbonless forms remain in tip-top condition is to keep a spare sheet handy. This can come in handy if you accidentally mess up during the gluing process or if you notice any mistakes on the top sheet after the glue has dried.
Here are some reasons why keeping a spare sheet is a good idea:
- It can serve as a backup in case you make a mistake with the top sheet while gluing. This way, you won’t have to start the process all over again.
- If there are any smudges, tears, or marks on the top sheet after the glue has dried, you can easily replace it with the spare sheet. This way, you’ll still have a complete set of carbonless forms.
- You’ll also have a spare sheet in case you need to make additional copies of the form at a later time.
One thing to keep in mind is that the spare sheet should be kept in the same condition as the rest of the set. This means that it should be stored in a dry, cool place and away from direct sunlight to prevent it from yellowing or fading.
In conclusion: having a spare sheet can save you time and frustration in case you make a mistake during the gluing process or need to make additional copies of the form. Make sure to keep your spare sheet in good condition and store it properly to ensure that it performs as intended.
Conclusion
In conclusion, gluing carbonless forms can be an easy and straightforward process if you follow the steps outlined in this guide. By preparing your workspace, using the proper amount of glue, and taking your time, you can ensure that your carbonless forms are securely glued together and will not come apart. Remember to keep a spare sheet handy in case any mistakes are made, and don’t rush through the process to avoid making any errors. With a little bit of patience and practice, anyone can learn how to glue carbonless forms properly. So go ahead and give it a try, and you’ll see just how easy it can be!
Frequently Asked Questions
How long does it take for the glue to dry?
The drying time for carbonless form glue can vary depending on the brand and the amount of glue used, but it typically takes around 10-15 minutes.
What type of glue should I use for carbonless forms?
You should use a specialized carbonless form glue to ensure a strong and long-lasting bond between the sheets.
Can I use any type of brush or roller to apply the glue?
It is recommended to use a brush or roller specifically designed for applying glue to prevent streaking or uneven coverage.
How should I prepare my workspace before gluing the carbonless forms?
Make sure that your workspace is clean and dry to prevent any debris or moisture from sticking to the forms and affecting the adhesion of the glue.
What is the recommended amount of glue to use on each sheet?
The recommended amount of glue is a thin and even layer that covers the entire surface of each sheet.
Can I reuse any leftover glue for future projects?
It is not recommended to reuse leftover glue as it may have already started to dry and lose its effectiveness.
Do I need to apply glue to every sheet in the carbonless form set?
No, you only need to apply glue to the top sheet and the bottom sheet of the set.
How should I store the carbonless form set after gluing?
Store the set in a dry and flat position to prevent any shifting or misalignment of the sheets.
What happens if I accidentally apply too much glue?
If you apply too much glue, it may cause the sheets to stick together and tear when trying to separate them. Use caution and try to avoid applying too much.
What should I do if the glue doesn’t seem to be sticking?
If the glue doesn’t seem to be sticking, make sure that you have applied a sufficient amount to both sheets and press down firmly while rolling out any air bubbles. If the issue persists, you may need to try a stronger adhesive or consult with a professional.