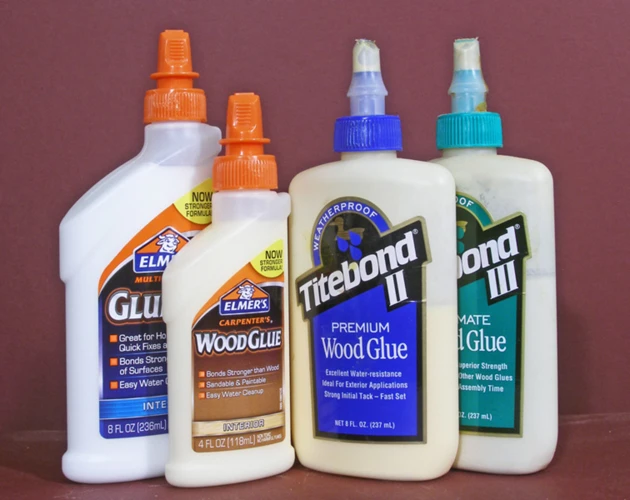
As bird enthusiasts, we always look for ways to keep feathered friends happy and well-fed in our backyards. One innovative approach is to make bird seed blocks using bird seed and glue. It sounds simple enough, but with a plethora of glue options available, it can be daunting to decide on the right one. In this comprehensive guide, we’ll take you through the process step-by-step and help you make your own bird seed blocks glue with ease. You’ll also find some tips and tricks to make the process even more enjoyable. So, let’s get started!
Materials Needed
Here is a list of materials required to make bird seed blocks glue: Whether you’re preparing this fun and easy DIY activity for your kids or as a homemade treat for birds in your garden, you will need a few items. Some of these items are used to make the glue that will hold the birdseed mixture together, while others are needed to make the bird seed blocks themselves. In order to make the process smooth and hassle-free, ensure that you have all the ingredients and tools listed below:
– Gelatin or Corn Syrup
– Water
– Flour
– Birdseed Mix
– Mixing Bowl
– Whisk
– Saucepan
– Cooking Spray
– Molds
– Twine
If you’re wondering how to make glue without glue or what is glue ear, check out our guide on making glue without glue.
For the Glue
To make the glue for the bird seed blocks, you will need three ingredients: water, corn syrup, and gelatin. The gelatin acts as a binding agent to hold the birdseed together, while the corn syrup adds a bit of stickiness to ensure the seed mixture will adhere to the molds.
Here’s a breakdown of the ingredients:
| Ingredients | Amount |
|---|---|
| Water | 1 1/2 cups |
| Corn syrup | 1 cup |
| Gelatin | 1 1/2 tablespoons |
To ensure the glue mixture sets properly, you will need to stir it frequently and allow it to cool before mixing it with the birdseed.
Tip: If you find the glue is too thick, try adding a bit of warm water to thin it out.
Now that you have your glue mixture ready, it’s time to move on to the steps for making the bird seed blocks. But before that, let’s quickly touch upon tips and tricks to make this process even smoother.
Tip: For an eco-friendly option, you can try making cardboard chairs without glue. Check out our article on How to Make Cardboard Chairs Without Glue for more information.
For the Bird Seed Blocks
Making bird seed blocks requires several materials, including birdseed, gelatin, and corn syrup. Here are the details on what you will need for this step of the process:
| Birdseed | A mix of birdseed varieties can be used to attract different species of birds. Some popular types of birdseed include black oil sunflower seeds, millet, and safflower seeds. |
|---|---|
| Gelatin | Unflavored gelatin is needed as a binding agent to hold the birdseed block together. |
| Corn Syrup | Corn syrup is added to the mixture to make it sticky, and to add sweetness to the birdseed blocks. It is a natural sweetener that is often used in baking recipes. |
Note: For additional variations, you can add peanut butter, honey, or melted suet to the mixture. These ingredients can increase the nutritional value of the birdseed blocks and attract different types of birds.
To learn more about how to make glue for birdseed blocks, check out our guide on how to make glue page.
Steps to Make the Glue
Making the glue for the bird seed blocks is a crucial step in the process. Without it, the bird seeds won’t stick together and the blocks won’t form properly. In this section, we’ll guide you through the steps to make homemade glue using natural ingredients. By making your own glue, you can ensure that the bird seed blocks will be safe for the birds to eat. So, grab the ingredients and let’s get started!
Step 1: Heat Water
In order to make the glue for the bird seed blocks, the first step is to heat water. This is a relatively simple process, but it is important to get it right so the glue will properly adhere to the bird seed. Here are the detailed steps to follow:
- Fill a medium-sized pot with water.
- Place the pot on a stovetop burner set to medium-high heat.
- Wait for the water to come to a boil.
- Once the water is boiling, reduce the heat to low to keep the water hot but not boiling.
It is important to note that the amount of water needed will depend on the size of the bird seed block production. If you are making a large batch, then you will need more water.
There are a few things to keep in mind when heating the water. Firstly, make sure to use a pot that is large enough to hold the water and the additional ingredients. Secondly, be patient when waiting for the water to come to a boil and do not turn up the heat to try to speed up the process. Thirdly, once the water is boiling, do not let it continue to boil as this can lead to the mixture becoming too thick.
Now that the water is heated, it’s time to move on to the next step in making the glue for the bird seed blocks.
Step 2: Add Ingredients
To make the bird seed block glue, you will need a few simple ingredients. In this step, we will go over the ingredients required and how to properly add them. Below is a table with a list of all the ingredients needed for the glue.
| Ingredients | Amount |
|---|---|
| Corn Syrup | 1/2 cup |
| Unflavored Gelatin | 3 tbsp |
| Water | 1/2 cup |
Corn Syrup: For the best results, it is recommended to use light corn syrup. Corn syrup acts as a binding agent for the mixture, helping it stick together.
Unflavored Gelatin: Gelatin acts as a thickener to give the mixture its desired consistency.
Water: Water is used to dissolve the gelatin and corn syrup, making it easier to mix the ingredients together.
To add the ingredients, start by combining the corn syrup and water in a saucepan on medium heat. Once heated, add the unflavored gelatin to the mixture and stir constantly until the gelatin has completely dissolved. This should take around 5 minutes.
Once all the ingredients have been added and dissolved, remove the mixture from the heat and let it cool for a few minutes before using it to create your bird seed blocks. If you want to learn more about creating unique and useful items with glue, check out our article on how to make glue.
Step 3: Stir and Cool
After adding the ingredients, stir the mixture gently but thoroughly, making sure all the ingredients are well-combined. You don’t want any lumps or unevenness in the mixture. Stirring also helps to activate the glue, making it sticky and ready to bind the bird seed together.
Once the mixture is stirred, let it cool to room temperature. Avoid using the mixture when it’s still hot, as it can be dangerous and may not work as well as it should. If you’re in a hurry, you may be able to speed up the cooling process by placing the mixture in an ice bath or refrigerating it for a short period.
It’s important to note that the glue should be used quickly once it has cooled. It may start to thicken and harden if left sitting too long. If this happens, you may need to reheat it slightly to loosen it up again.
Reactivating glue that has hardened is a common problem and something to keep in mind as you work. But by following the instructions carefully and working efficiently, you can avoid this issue and create effective bird seed blocks that your feathered friends will love.
Steps to Make the Bird Seed Blocks
The bird seed blocks are a fun and easy DIY project that you can make to feed the birds in your garden. Not only are they a great way to attract birds to your yard, but they are also an excellent way to teach your kids about nature and wildlife. Making bird seed blocks requires a few simple ingredients and can be done in just a few easy steps. In the following section, we will guide you through the process of making bird seed blocks, from preparing the mold to drying the blocks. So grab your materials and let’s get started!
Step 1: Prepare Mold
To start making the bird seed blocks, the first step is to prepare the mold. You can use a variety of materials as molds such as muffin tins, silicone molds, and cookie cutters. It is important to prepare the mold beforehand to avoid any inconvenience when it comes to shaping the bird seed block mixture.
Table 1: Comparison of Different Mold Materials
| Mold Material | Advantages | Disadvantages |
|---|---|---|
| Muffin tins | Durable, easy to clean | May be challenging to remove bird seed blocks from the tin |
| Silicone molds | Flexible, easy to remove blocks | May not be as durable as metal molds |
| Cookie cutters | Various shapes and sizes available | Need to be placed on a flat surface to avoid mixture spillage |
No matter what material you choose, it is important to lightly coat it with vegetable oil or cooking spray to prevent the mixture from sticking. This coating will also make it easier to remove the bird seed blocks once they have dried.
If you are using cookie cutters, it is best to place them on a flat surface such as a baking sheet to avoid any mixture spillage. On the other hand, if you are using silicone molds or muffin tins, be sure to clean them thoroughly before use so that the bird seed blocks don’t stick.
Preparing the mold is a necessary first step that will ensure that the bird seed blocks come out in the desired shape and size without difficulty. With the mold material chosen and coated with oil, we can now move onto the next step of making the bird seed mixture.
Step 2: Mix Ingredients
When it comes to making the bird seed blocks, mixing the ingredients is a crucial step to ensure the blocks stay together. Here is a table outlining the ingredients you will need and their quantities:
| Ingredients | Quantity |
|---|---|
| Bird Seed | 3 to 4 cups |
| Corn Syrup | 1 cup |
| Gelatin | 1 pack (0.25 oz) |
| Water | 1 cup |
| Cooking Spray | As needed |
To begin, mix the corn syrup and gelatin in a bowl until well combined. Then, add one cup of water and mix again.
Next, slowly add the bird seed to the mixture, making sure to stir thoroughly to ensure all of the seeds are coated.
It’s important to work quickly with the bird seed mixture as it can begin to harden and become difficult to work with if left sitting for too long. Once all of the bird seed is mixed in, it’s time to move on to the next step and start pressing the mixture into the molds.
If you need more information about a specific type of glue, you can find a lot of helpful articles on various types of glue on our website. For example, if you want to learn how to glue the binding on a guitar, check out this article for step-by-step instructions.
Step 3: Press Mixture into Molds
To press the bird seed mixture into the molds, you will need a spoon and your hands. Make sure to spray the molds with cooking spray or vegetable oil beforehand to prevent the mixture from sticking.
Step 3: Grab a small handful of the bird seed mixture and press it into the mold, making sure to pack it tightly and evenly. Continue to add more mixture and pack it in until the mold is full. You can use the back of the spoon to press the mixture down and make sure there are no air pockets.
If you are having trouble getting the mixture to stick together, you can add more honey or corn syrup to the mixture until it feels more cohesive.
Once all the molds are filled, let them dry for several hours or overnight. To speed up the drying process, you can place the molds in the sun or use a fan to circulate air around them. Avoid touching the blocks until they are completely dry.
Table: Tips for Pressing Mixture into Molds
| Tips |
|---|
| Use a spoon to pack the mixture in tightly and evenly |
| Apply vegetable oil or cooking spray to the molds to prevent sticking |
| Avoid air pockets by pressing the mixture down with the back of a spoon |
| If the mixture is too dry, add more honey or corn syrup |
If you have never used molds before, it may take some practice to get the bird seed blocks looking perfect. You can also use cookie cutters to create different shapes and sizes for a fun variety. You can experiment with different bird seed mixtures to attract specific types of birds to your yard.
Internal link: What is a Glue Stick?
Step 4: Dry the Molds
After pressing the bird seed mixture into the molds, the final step is to dry them. Drying is a crucial step to solidify the bird seed blocks and allow them to be removed from the molds easily.
To dry the molds, follow these simple steps:
- Allow the bird seed blocks to dry at least overnight or up to 24 hours to ensure they are completely dry.
- Place the molds in a cool, dry place that is not in direct sunlight to avoid melting or warping the molds.
- After the allotted time has passed, carefully remove the bird seed blocks from the molds. If the blocks don’t release easily, try running a knife around the edges to loosen them.
Some additional tips to ensure successful drying of the bird seed blocks are:
- Check that the blocks are completely dry before removing them from the mold to avoid any breakages.
- If the bird seed blocks appear to be taking longer than expected to dry, try placing them in a low-heat oven for a short period or placing them in a dry location.
It’s important to remember that the drying time will vary depending on humidity levels in your area, so checking the bird seed blocks frequently is recommended. Once the bird seed blocks are dry and ready to use, store them in an airtight container until needed.
Now that you’ve made your bird seed blocks, it’s time to hang them up and watch the birds flock to your yard! If you’re interested in learning more about the uses and benefits of glue, check out our guide on what is glue ear or find out if tacky glue is waterproof when dry. Or, if you’re looking to experiment with different types of slime, check out our guide on how to make cloud slime without glue. Finally, if you’re working with fondant, learn how to glue it properly with our guide on how to glue fondant.
Tips and Tricks
As with any DIY project, making bird seed blocks can be a fun and rewarding experience. However, there are a few tips and tricks that can make the process even more enjoyable and successful. From using vegetable oil to utilizing cookie cutters, these small touches can elevate your bird seed blocks from average to exceptional. Let’s take a look at some of the best tips and tricks for making bird seed blocks glue.
Use Vegetable Oil
One useful tip for making bird seed blocks is to use vegetable oil. Vegetable oil can be added to the mixture to help prevent it from sticking to the mold and to make it easier to remove the blocks once they have dried.
Here are a few different ways that you can use vegetable oil when making bird seed blocks:
| Add to Mixture | You can add a tablespoon or two of vegetable oil to the bird seed mixture before pressing it into the mold. This will help ensure that it’s easier to remove the blocks once they’ve dried, and it can also make them more attractive to birds. |
| Grease Mold | Another option is to lightly grease the inside of the mold with vegetable oil before pressing the bird seed mixture in. This will help prevent the mixture from sticking to the mold, and will make it easier to remove the blocks once they have dried. |
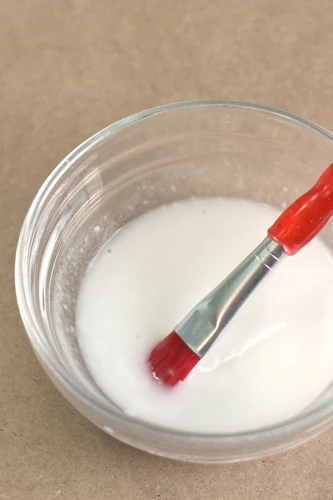
| Coat Blocks | You can also brush a light coating of vegetable oil onto the outside of the bird seed blocks after they have dried. This can help protect them from moisture and make them even more attractive to birds. |
Be sure not to use too much vegetable oil, as this can make the bird seed blocks greasy and unappealing to birds. A light coating or a small amount added to the mixture should be enough to ensure that they come out of the mold easily and are attractive to birds.
Using vegetable oil is just one of many tips and tricks you can use to make the perfect bird seed blocks. By experimenting with different ingredients and techniques, you can create a variety of custom bird seed blocks that are sure to attract a wide range of bird species to your yard.
Use Cookie Cutters
One of the best ways to make your bird seed blocks unique and aesthetically pleasing is to use cookie cutters. Cookie cutters come in a wide variety of shapes and sizes, so you can choose the ones that best suit your style and personality. Plus, they make it much easier to shape your bird seed blocks compared to doing it by hand!
Here are some tips for using cookie cutters:
- Choose the Right Size: Make sure to select cookie cutters that are the appropriate size for your molds. They should not be so small that the bird seed mixture will crumble after cutting or so large that it won’t fit inside the mold. Consider using a variety of sizes to add visual interest to your seed blocks.
- Coat with Cooking Spray: To help the mixture release from the cookie cutters easily, spray them with cooking spray before pressing the mixture inside. This will also help prevent the mixture from sticking to the cutter.
- Press Firmly: Use firm pressure when pressing the bird seed mixture into the cookie cutters. Make sure that the mixture is distributed evenly throughout the cutter for consistent results.
- Remove Carefully: Once you have pressed the bird seed mixture into the cookie cutter, remove it gently by tapping it on a flat surface. This will help the mixture release from the cutter in one piece.
- Allow to Set: Leave the bird seed mixture in the cookie cutter for a few minutes to allow it to set before removing. This will help it keep its shape and prevent it from breaking apart.
By using cookie cutters, you can create beautiful and unique bird seed blocks that are sure to attract a variety of feathered friends to your yard. With a little creativity and the right tools, you can make bird seed blocks that are as fun to look at as they are to make!
Conclusion
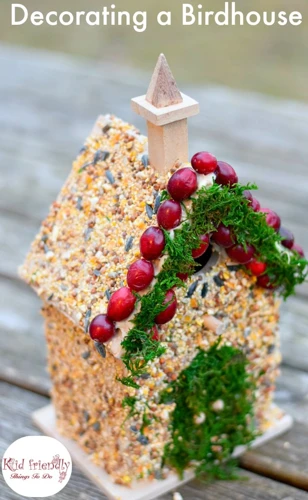
After following the steps outlined in this guide, you should have a batch of homemade bird seed blocks that are ready to be hung up in your yard to attract a variety of birds. Making your own bird seed blocks can be a fun and rewarding activity that not only helps support local bird populations, but also allows you to customize the seed blend to your liking.
Creating the glue for the bird seed blocks is a crucial step in the process, as it is what holds the ingredients together to form the blocks. By using a combination of gelatin, corn syrup, and flour, you can create a durable glue that will keep the bird seed mixture together long enough to solidify.
Once you have made the glue and prepared your molds, it’s time to mix the bird seed with other ingredients like peanut butter or honey to create a tasty treat for the birds. Using cookie cutters or vegetable oil can help make the process easier and more enjoyable.
While making bird seed blocks may seem like a simple activity, it serves a larger purpose in providing a vital food source for birds, especially during the colder months when food may be scarce. By taking the time to make your own bird seed blocks, not only are you helping your feathered friends, but you are also creating a sustainable and environmentally friendly approach to bird feeding.
So go ahead, gather your materials and get started on making your own bird seed blocks! Your local bird population will thank you.
Frequently Asked Questions
How long will the bird seed blocks last?
The shelf life of bird seed blocks varies depending on the humidity and temperature of the storage area, but they typically last up to a month.
Can I use any type of birdseed?
Yes, you can use any type of birdseed for your block mixture as long as it is free of pesticides and insecticides.
What type of mold should I use?
You can use any type of mold that you have on hand, such as a muffin tin or cookie cutter, as long as it is non-stick and will release the bird seed block easily.
Can I add other ingredients to the bird seed mixture?
Yes, you can add other ingredients such as dried fruits, nuts, or mealworms to the bird seed mixture to make it more appealing to the birds.
What type of flour should I use for the glue?
You can use any type of flour for the glue mixture, but all-purpose flour is the most commonly used.
Can I add food coloring to the glue or birdseed mixture?
It is not recommended to add food coloring to either the glue or birdseed mixture, as birds have sensitive respiratory systems and the dye could cause harm.
How long do the bird seed blocks take to dry?
The drying time of the bird seed blocks can vary based on humidity and temperature, but typically takes 12-24 hours.
Can I use something other than gelatin for the glue?
Yes, you can use other types of binders such as cornstarch or agar-agar in place of gelatin.
What kind of oil should I use to grease my molds?
Any type of vegetable cooking oil works well to grease your molds.
Do all birds like bird seed blocks?
No, not all birds are attracted to bird seed blocks. However, many species such as sparrows, finches, and chickadees enjoy them.