Introduction
Crafters and DIY enthusiasts know all too well the struggle of running out of glue in the middle of a project. Rather than making a trip to the store, why not try making your own glue at home? Not only is it an effective solution for when you’re in a bind, but it can also be a fun and creative activity. In this article, we’ll explore different types of glue and their uses, as well as step-by-step recipes for making your own glue using simple and natural ingredients. Don’t get stuck without glue again, let’s dive in and learn how to make it ourselves.
What is Glue?
Glue is a popular viscous substance used to bond different materials together. It can be made from natural or synthetic sources and comes in several varieties depending on its intended use. Glue can be found in a variety of forms including liquid, paste, or solid, and it comes in a range of colors and strengths. Some glues dry clear while others leave a visible residue, making it a versatile adhesive option across a wide range of applications.
There are many different types of glue with various qualities, and the type of glue to be used depends on the material to be bonded. Additionally, glues can be created from a range of common household items or materials. Some of the most popular DIY glue options include flour and water glue, cornstarch glue, and milk glue. By following simple recipes, you can easily create your own glue at home.
Knowing how to make your own glue can be incredibly useful in a variety of situations, ranging from arts and crafts to home repairs. For instance, if you need to repair a torn page in a book or reattach a binding on a guitar, knowing how to make paper glue or how to glue binding on a guitar without damaging the materials can be a valuable skill. Making your own glue is often more cost-effective than buying pre-made options. Whether you need to stick wood together without glue or are wondering how to make glue from styrofoam, there are plenty of DIY glue options that you can use.
Why Make Your Own Glue?
| Cost-effective: | When making your own glue at home, you are using materials that are easily accessible and affordable. This can save you money in the long run as opposed to constantly buying store-bought glue. |
| Control What Goes in Your Glue: | By making your own glue, you have complete control over the ingredients, allowing you to create a glue that meets your specific needs. You can also avoid harmful chemicals that may be present in store-bought glue. |
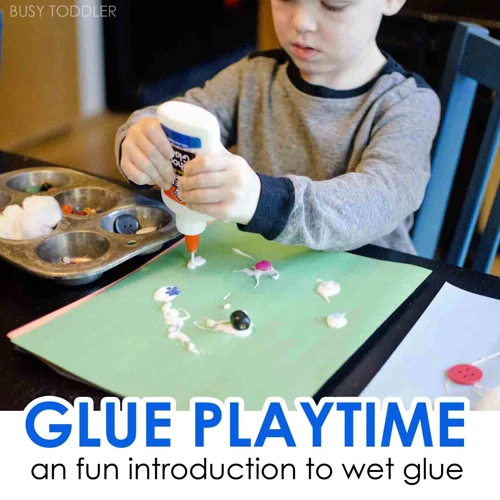
| Fun DIY Activity: | Making your own glue at home can be a fun activity to do with family or friends, providing a sense of accomplishment and creativity. |
| Environmentally Friendly: | When making your own glue, you can use eco-friendly ingredients, reducing your carbon footprint and helping the environment. |
Making your own glue at home has many benefits. It is cost-effective, allows for control over the ingredients, can be a fun DIY activity, and is environmentally friendly. Additionally, homemade glue can be customized to fit specific needs, such as making it sticky again or using it for different materials like paper or clay. Consider making your own glue with one of the simple and easy-to-follow recipes listed below.
If you want to know how to make paper glue or what glue is best for wall stickers, follow the links.
Types of Glue and Their Uses
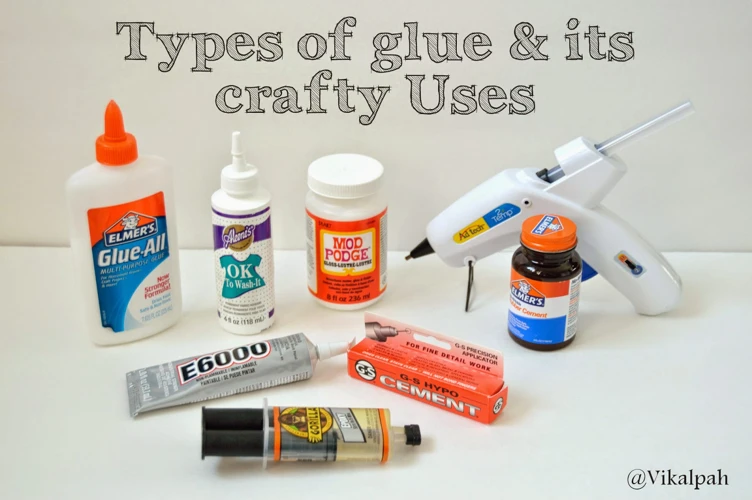
When it comes to DIY projects, choosing the right type of glue can make all the difference. There are various types of glue available in the market, each with its own unique characteristics and purposes. Before selecting a glue for your project, it is essential to understand the differences between them. Synthetic glues are usually water-resistant and perfect for bonding plastic, glass, and metals. Natural glues are great for paper-based products such as cards, envelopes, and crafts, while specialty glues are designed for specific purposes, such as binding book pages or fixing guitar binding. Depending on your project’s requirements, choosing the right type of glue can make all the difference in the final outcome. If you’re looking for tips on how to make glue at home, check out our other articles on how to make paper glue or how to make glue from styrofoam.
Synthetic Glues
Synthetic glues are made from chemicals and come in a variety of forms including white glue, super glue, and epoxy. They are commonly used for bonding plastics, metals, and ceramics. These glues are water-resistant and dry quickly, making them ideal for quick fixes and bonding small objects. One of the most popular types of synthetic glues is white glue, also known as polyvinyl acetate (PVA) glue. It is commonly used for school art projects, paper crafts, and even as a sealant.
Super glue is another popular synthetic glue that comes in small tubes and is used for bonding surfaces together. It is known for its quick-drying nature and strong bond, making it ideal for repairing small objects. However, it is important to be cautious when using super glue as it can stick to skin and cause irritation.
Epoxy glue is a strong synthetic adhesive that is commonly used for bonding metals and plastics. It is a two-part adhesive that requires mixing two components together before application. Epoxy creates a tough bond that is resistant to water and high temperatures.
While synthetic glues can be very useful, they can also be toxic and should be used in a well-ventilated area. It is important to follow the manufacturer’s instructions for use and be cautious when handling them. If you are looking for more natural alternatives, there are several options available.(source)
Synthetic glues can be very useful for a variety of projects and repairs. It is important to choose the right type of glue for the job and use it safely and properly.
Natural Glues
Natural Glues are made from natural substances such as vegetable starch, soy flour, casein, animal hides, and bones. The process of making natural glue involves boiling the ingredients until they form a thick adhesive substance. These types of glues are often more environmentally friendly and biodegradable than synthetic glues. They are also non-toxic, making them safe for children to use.
One common natural glue is made from casein, which is a protein found in milk. To make casein glue, milk is curdled with an acid such as vinegar or citric acid, and then it is heated and mixed with baking soda to neutralize the acid. This creates a thick, glue-like substance that can be used for a variety of crafts.
Another natural glue is hide glue, which is made from animal hides and bones. It has been used for centuries in woodworking because it is strong, durable, and dries quickly. Hide glue comes in a granular form that is mixed with water and heated to form the adhesive. It is commonly used for musical instruments because it can be easily reversed with heat and moisture, allowing for repairs without causing damage.
Natural glues can also be made from vegetable starch. This type of glue is commonly used for paper crafts and can be made with ingredients found in most kitchens. To make vegetable starch glue, cornstarch or potato starch is mixed with cold water and then boiled until it thickens. Once it has cooled, it can be used for paper projects and other lightweight crafts.
Internal link: If you want to learn more about gluing clay, check out our article on How to Glue Clay.
Specialty Glues
Specialty glues have specific uses and can be a savior in certain situations where regular glue won’t suffice. These glues are developed for specific materials and surfaces, and some even have unique properties.
Epoxy Glue: This glue is known for its strong bond and durability. It is ideal for use on hard materials such as metal, plastics, and ceramics. Epoxy glues come in two parts that must be mixed before use. The bond created by epoxy is water-resistant and can withstand heat, making it perfect for industrial use. If you need to glue clay together, epoxy is the best option. To read more about gluing clay, check out our article on how to glue clay.
Super Glue: Super glue or cyanoacrylate glue is a fast-drying, clear adhesive known for its incredible bonding strength. Super glue is perfect for bonding materials such as wood, plastic, metal, and ceramic. Its fast-drying properties make it a reliable option for small repairs and DIY projects. If you want to learn more about how to use adhesive glue, read our article on how to use adhesive glue.
PVA Glue: Polyvinyl acetate or PVA glue is a popular adhesive that dries clear. It is a preferred glue for paper products, felt, cardboard, and wood. PVA glue comes in both white and clear formulas and can be mixed with water to create a thinner consistency. Its versatility makes it an ideal choice for school projects and crafts.
Hot Glue: Hot glue is an adhesive that is applied using a hot glue gun, which melts the glue stick to create a bond. It is a popular choice for bonding materials such as fabric, paper, and plastic. Hot glue is available in both low and high-temperature formulas and can be used for both temporary and permanent bonds.
Wood Glue: As the name suggests, wood glue is designed for use on wood projects. It creates a strong bond that can withstand both pressure and heat. Wood glue dries clear and can be sanded or painted over once dry. If you want to learn how to stick wood together without glue, read our article on how to stick wood together without glue.
Acrylic Paint Glue: Acrylic paint glue is a specialty glue that is perfect for use in crafting projects. It is made by mixing equal parts of acrylic paint and PVA glue. The glue dries clear and is ideal for use on paper, rubber, and plastic surfaces.
It is important to note that some specialty glues may not work on every surface. Before using a specialty glue, check the manufacturer’s instructions and ensure it is safe to use on the desired surface. If you need to glue the binding on a guitar, for example, there are specific glues designed for this purpose. For more information on this, read our article on how to glue binding on a guitar. If you want to know what glue is best for wall stickers, check out our article on what glue is best for wall stickers.
How to Make Glue at Home
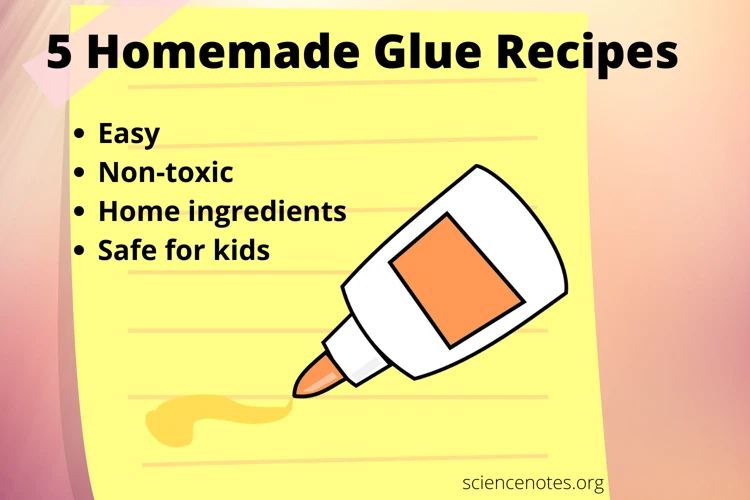
Making your own glue at home is not only a fun DIY project, but it’s also a great way to save money on buying commercial glue. With just a few ingredients that you probably already have in your kitchen, you can create effective adhesives for all your crafting needs. In this section, we will explore some simple methods for making different types of glue, including basic flour and water glue, borax and glue, milk glue, and cornstarch glue. So let’s dive in and get started creating our own homemade adhesives!
Recipe for Basic Flour and Water Glue
One of the easiest and most basic glue recipes is the flour and water glue. All you need is some flour, water, and a saucepan. This type of glue can be used for paper crafts, scrapbooking, and even as a non-toxic alternative for kids to use in their arts and crafts projects. Here’s how to make it:
What You’ll Need:
- 1/4 cup flour
- 1 cup of water
- Saucepan
- Whisk
Instructions:
- Mix the flour and water together in a saucepan.
- Whisk the ingredients over low heat.
- Keep stirring until the mixture thickens.
- Turn off the heat and let the paste cool.
- Your flour and water glue is now ready for use.
It’s important to note that this glue doesn’t have a long shelf-life, and it’s recommended to make only as much as you need for one project. Also, it’s best to use this glue right away as it may dry out if left for too long.
For those who prefer a stronger glue alternative, adding cornstarch to the recipe can help. Mixing equal parts of flour, cornstarch, and water together can create a stronger version of this glue. Additionally, adding a pinch of salt to the mixture can inhibit mold growth and extend shelf-life.
If you’re looking for non-toxic alternatives to chemical adhesives, this basic flour and water glue recipe is a great option. Not only is it easy to make, but it’s also affordable and safe to use.
Recipe for Borax and Glue
To make glue using borax, you’ll need the following materials:
- Borax powder
- Hot water
- White school glue
Here’s the step-by-step process for creating this type of glue:
- In a small mixing bowl, add 1 tablespoon of borax powder to 1/2 cup of hot water.
- Stir the mixture until the borax is dissolved.
- In another bowl, mix 1/2 cup of white school glue with 1/2 cup of hot water until combined.
- Add the borax mixture to the school glue mixture, stirring constantly.
- The glue will start to thicken quickly, becoming more opaque and jelly-like with each stir.
- Continue stirring until the glue reaches the desired consistency.
- Use the glue immediately, or store in an airtight container for later use.
It’s important to note that this type of glue should not be ingested and should be kept out of reach of children.
If you’re looking for fun and creative ways to use this borax glue, consider making yarn balls without glue or even a fake tongue ring without glue. The possibilities are endless with this simple and effective homemade adhesive.
Recipe for Milk Glue
Milk glue is an easy-to-make, non-toxic adhesive that can be made with ingredients found in most kitchens. Here’s what you need to make this glue:
- 1/4 cup of milk
- 1 tablespoon of white vinegar
- 2 tablespoons of baking soda
To make milk glue, follow these steps:
- In a small bowl, mix together 1/4 cup of milk and 1 tablespoon of white vinegar.
- Let the mixture sit for about 10 minutes until it thickens and curdles.
- Add 2 tablespoons of baking soda to the mixture and stir until it’s well combined.
- Your milk glue is now ready to use!
When using your milk glue, keep in mind that it works best on paper and lightweight materials. It’s not recommended for use on heavier materials like wood or metal. Milk glue also has a short shelf life, so it’s best to use it right away or store it in an airtight container in the refrigerator for no more than a week.
If you’re looking for an eco-friendly and affordable option for your DIY projects, milk glue is a great choice. Not only is it easy to make, but it’s also safe for both you and the environment. Give it a try and see how it works for your next project!
Recipe for Cornstarch Glue
If you want to make a strong, non-toxic and affordable glue at home, using cornstarch can be a great option. Here’s how to make it:
Materials:
- 1/4 cup of cornstarch
- 1/4 cup of cold water
- 4 cups of boiling water
- Food coloring (optional)
- 1 tablespoon of white vinegar (optional)
Instructions:
- In a small bowl, mix the cornstarch and cold water until it forms a smooth paste. Set it aside.
- In a saucepan, bring the 4 cups of water to a boil.
- Spoon the cornstarch paste into the boiling water while stirring constantly, until it thickens and becomes translucent.
- Remove the saucepan from heat and let the mixture cool down. Add food coloring, if desired, and stir well.
- If you want to extend the shelf life of the glue, add one tablespoon of white vinegar and stir well. This step is optional, but it can help prevent the glue from molding or spoiling too quickly.
- Pour the glue into a clean and dry container, and store it in the refrigerator. It will stay fresh for about a week.
Tips:
- If you want a stronger glue, you can add a tablespoon of white vinegar to the mixture before boiling it. Vinegar helps to increase the adhesive strength of the glue.
- If the glue is too thick, you can add more water, one tablespoon at a time, until you reach the desired consistency.
- Make sure to store the glue in a clean and dry container, and always use clean tools when handling it. This will prevent contamination and help extend its shelf life.
Cornstarch glue is perfect for paper crafts, as it dries clear and can be easily painted over. Just like with any other glue, make sure to test it on a small area before using it on a larger project. With this simple, yet effective recipe, you can have a reliable homemade glue that is safe and easy to make.
Tips for Making Glue
When it comes to making glue at home, there are certain tips that can make the process smoother and more successful. From storage to consistency to clean-up, there are simple steps you can take to ensure your DIY glue is high-quality and easy to use. Let’s take a closer look at some of these helpful tips.
Storage
Once you’ve made your very own DIY glue, proper storage will be essential to ensure its longevity and effectiveness. You can store your glue in an airtight container at room temperature, away from direct sunlight or heat sources. This will prevent it from drying out or becoming too thick.
Here are some tips you can follow for storing your homemade glue:
- Label your container: Be sure to label your container clearly with what type of glue it is, its date of creation, and any specific instructions for use. This will help you keep track of your glue and ensure you use it before its expiration date.
- Use a clean container: Use a clean container for your glue. Avoid reusing containers that previously held moisture, grease, or toxic substances as these could spoil your glue or contaminate it.
- Keep an eye on shelf life: Depending on the type of glue you make, its shelf life may range from a few days to several weeks. Be sure to check on your glue periodically to ensure it hasn’t spoiled.
- Reheat if necessary: If your glue has become too thick over time, you can try reheating it to its original consistency. Place the container in warm water and stir it gently until it reaches the desired consistency.
By following these steps, you can ensure that your glue will last and be ready to use when you need it. Proper storage will also help you save money by preventing the need to make new batches of glue frequently.
Consistency
When making glue at home, achieving the right consistency can be tricky but it is crucial for a good outcome. The consistency of the glue depends on the purpose you are using it for. Here are a few tips to help you achieve the perfect consistency:
- Thin Consistency: If you need the glue to be more liquid, add more water to the mixture, a little at a time. This is ideal if you are using the glue to coat paper or apply it to a porous surface.
- Medium Consistency: If you need a thicker glue for projects such as papier-mâché or bookbinding, use less water in the mixture. You can also add additional flour or cornstarch to thicken it up. Make sure to add these ingredients slowly and in small amounts to avoid clumping.
- Thick Consistency: If you need a very thick glue for projects that require a strong bond, such as woodworking, use less water and add additional flour or cornstarch to the mix. You can also add a small amount of white vinegar or lemon juice to the mixture to make the glue more durable.
It is important to note that the consistency of the glue may change over time. If the glue becomes too thick, you can add a little water to thin it out. However, if it becomes too thin, you may need to make a new batch. Also, keep in mind that the humidity and temperature of your environment may affect the consistency of your glue. If you are working in a humid environment, your glue may be more runny. On the other hand, if you are working in a dry environment, your glue may be thicker than expected.
In order to ensure you get the desired consistency, keep a close eye on the amount of water you are adding and use the ingredients in small increments. By doing this, you can achieve the perfect consistency for your specific project.
Clean-Up
Cleaning up any excess glue after a project can be a frustrating task, but it’s a necessary step to ensure that your workspace is tidy and prepped for the next project. Here are some tips to make clean-up a breeze:
- Act quickly: The sooner you clean up the glue, the easier it will be to remove. Don’t wait until the glue has dried.
- Use warm water: Warm water is the most effective way to dissolve and remove dried glue. Soak a cloth or paper towel in warm water, and gently rub the affected area to break up the glue.
- Scrape away excess: If the glue has not completely dried, use a plastic scraper to remove as much excess glue as possible before using a damp cloth.
- Avoid harsh chemicals: While you may be tempted to use harsh chemicals to remove stubborn glue residue, they can damage your surfaces or tools. Instead, opt for natural cleaning solutions like vinegar or baking soda mixed with warm water.
- Protect your surfaces: If you’re working on a surface that you don’t want to get glue on, use a protective covering like wax paper or plastic wrap. This will make clean-up much easier!
By following these tips, you can easily clean up any excess glue and keep your workspace neat and tidy. Remember, prevention is key – clean up as you go, and you’ll save yourself a lot of hassle in the long run.
Conclusion
After reading through this article, it is apparent that making your own glue at home is not only a cost-effective solution, but it can also be a fun and creative project. Whether you’re looking for an alternative to store-bought glues or you simply enjoy experimenting with different DIY projects, crafting your own glue can be a rewarding experience.
One of the main advantages of creating your own glue is that you have full control over the ingredients. This means that you can customize the glue to meet your specific needs, whether you require a stronger hold or a specific consistency.
Additionally, many of the recipes for homemade glue use natural, non-toxic ingredients, making them a safer option for children to use. By not relying on store-bought glues, you can also reduce your environmental footprint.
That being said, making your own glue can be a messy and time-consuming process. It may take some trial and error to find the right recipe and consistency for your specific needs. However, with a little patience and practice, homemade glue can be an effective and satisfying solution.
In conclusion, the benefits of making your own glue at home are clear. From cost-effectiveness to customization, homemade glue offers a range of advantages over store-bought options. While it may require some extra effort and experimentation, the end result is a satisfying and personalized product that you can feel proud to use in your DIY projects.
Frequently Asked Questions
What are some common uses for glue?
Glue is commonly used for arts and crafts, woodworking, paper projects, and DIY repairs.
Can I make natural glue without animal products?
Yes, natural glue can be made using plant-based ingredients like flour, starch, and milk.
What is the difference between synthetic and natural glue?
Synthetic glue is made from chemicals and is typically stronger and more durable, while natural glue is made from natural ingredients and is more environmentally friendly.
What is the recipe for flour and water glue?
Combine equal parts flour and water in a saucepan, heat the mixture over medium heat while whisking until it thickens, remove from heat and let cool before using.
Is borax glue safe to use?
Borax glue is safe to use as long as it is not ingested or inhaled. Keep it away from children and pets.
What is the recipe for milk glue?
Combine one part milk with one part vinegar, heat the mixture until it curdles, strain out the curds with a cheesecloth, and use the remaining liquid as glue.
What is the recipe for cornstarch glue?
Mix one cup of cornstarch with a half-cup of cold water, add four cups of boiling water while stirring, let the mixture cool, and it will form a gel-like consistency.
How should I store homemade glue?
Homemade glue should be stored in an airtight container in the refrigerator to prevent it from spoiling.
What should I do if my glue is too runny?
Add more of the thickening ingredient, such as flour or cornstarch, to the glue to thicken it up.
How can I clean up excess glue?
Wipe up excess glue with a damp cloth before it dries. Use warm water and soap to clean up any remaining residue.