Introduction

As DIY enthusiasts, we often find ourselves in situations where we need to fix or create something, and adhesive glue becomes a game changer. Knowing how to use it can save time, money, and effort. But with so many types of adhesive glue available, choosing the right one for the job and applying it correctly can be overwhelming. In this guide, we will take you through the different types of adhesive glues, the preparation needed to ensure successful gluing, how to apply each type, and our pro tips to help you achieve a seamless finish. Get ready to become a glue expert!
What Is Adhesive Glue?
Adhesive glue is a substance that is used in a wide variety of applications for bonding two surfaces together. It is a versatile material that can be used in many industries, including manufacturing, construction, and crafting. Adhesive glue is made up of various chemicals and materials, depending on the type of glue. Some of the common ingredients in adhesive glue include polymers, resins, solvents, and fillers. There are several types of adhesive glue available in the market today. These include:
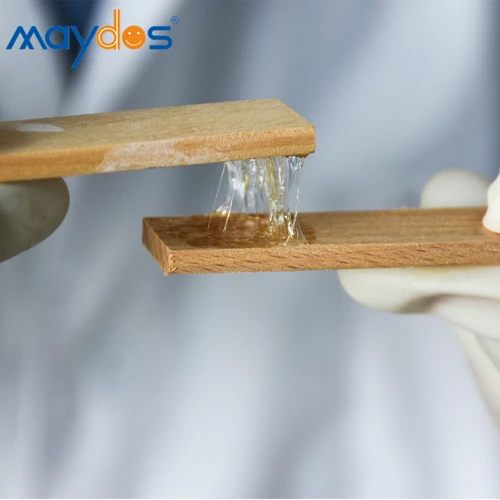
- PVA glue – PVA glue is a water-based adhesive that is commonly used in woodworking and paper crafts. It sets quickly and creates a strong bond.
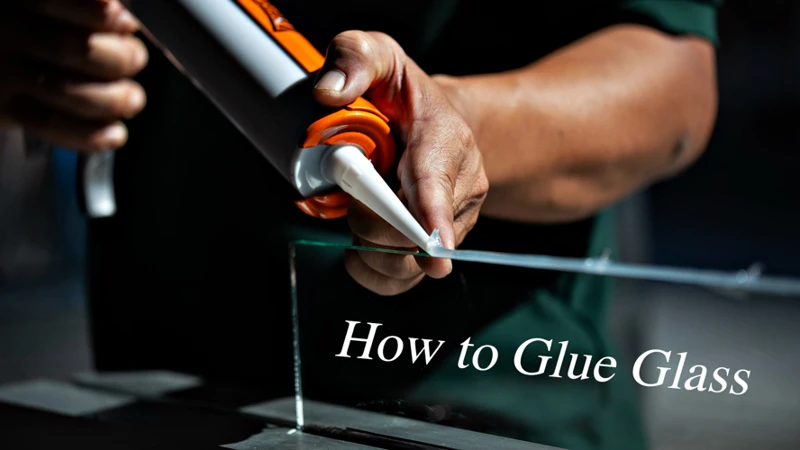
- Epoxy glue – Epoxy glue is a two-part adhesive that is known for its strength and durability. It is commonly used to bond metal, plastic, and ceramic surfaces together.
- Cyanoacrylate glue – Also known as super glue, this adhesive is popular for its fast-drying and strong adhesion. It is commonly used in the electronics industry and for small household repairs.
- Contact cement – This type of adhesive is used for bonding large surfaces such as laminates, countertops, and flooring. It creates a strong bond and is resistant to water and heat.
- Hot glue – Hot glue is a thermoplastic adhesive that melts when heated and solidifies when it cools. It is commonly used in the craft industry for bonding paper, plastic, and other materials.
- Spray adhesive – Spray adhesive is a fast-drying adhesive that is commonly used in the upholstery and automotive industries. It provides a strong and permanent bond.
- Silicone adhesive – Silicone adhesive is a versatile adhesive that is commonly used in construction and automotive industries. It is resistant to heat, water, and chemicals.
Knowing what type of adhesive glue to use can be crucial for a successful bond. For example, if you are working on a project that involves wood, PVA glue may be a better choice than hot glue. Understanding the properties of each type of glue can help you choose the right one for your project.
Why Is It Important to Know How to Use Adhesive Glue?
Knowing how to use adhesive glue is important for a variety of reasons. Here are some of the reasons why being knowledgeable on this subject matter matters:
- It allows you to increase the lifespan of your items: Properly gluing items together can make them last longer. For example, gluing a broken toy or a torn book can save them from being thrown away and help you avoid buying a replacement.
- It saves you money: Knowing how to use adhesive glue can help you avoid the cost of having to hire someone to fix your items for you. Additionally, it can help you get more use out of your existing items rather than having to buy new ones.
- It enhances your creativity and craftsmanship: Understanding how to use different types of adhesive glue can allow you to get creative with your DIY projects and make them look professional. This can be especially useful if you are interested in crafting or are looking for a new hobby.
- It helps you solve problems: When an item breaks or comes apart, sometimes all it takes is a little bit of adhesive to fix it. With the right knowledge, you can save yourself the hassle of having to replace something that is fixable.
By understanding the importance of knowing how to use adhesive glue, you can become more confident in your DIY projects and get more use out of your existing items. Whether you need to fix a toy, assemble furniture, or create a craft project, being able to properly use adhesive glue can make all the difference.
Types of Adhesive Glue
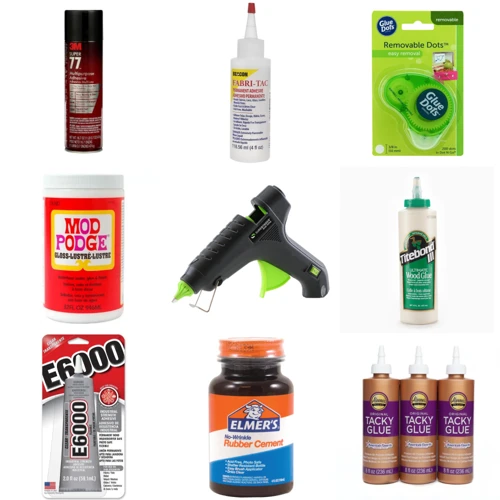
When it comes to adhesive glue, there are various types that can be used for different purposes. Each type has its own unique features and benefits, making it important to understand which type to use for your specific project. From PVA glue to epoxy glue, cyanoacrylate glue to contact cement, hot glue to spray adhesive, and silicone adhesive, this section will explore the different types of adhesive glue and their characteristics. So, let’s dive in and explore the world of adhesive glue.
1. PVA Glue
PVA glue, also known as white glue or school glue, is a water-based adhesive that is easy to use and dries clear. It is commonly used for crafting and woodworking projects.
Advantages of PVA Glue:
| Advantages | Description |
|---|---|
| Easy to use | PVA glue is easy to apply and clean up with just soap and water. |
| Dries clear | PVA glue dries clear, making it ideal for projects where glue lines may be visible. |
| Non-toxic | PVA glue is non-toxic and safe to use, making it a popular choice for school projects and crafts for kids. |
| Good for porous materials | PVA glue works well on porous materials like paper, fabric, and wood. |
Disadvantages of PVA Glue:
While PVA glue is a versatile adhesive, it may not be the best choice for all projects. Here are some of its disadvantages:
| Disadvantages | Description |
|---|---|
| Not waterproof | PVA glue is not waterproof and may break down if exposed to water. |
| Long drying time | PVA glue may take longer to dry than other types of glue, especially in humid conditions. |
| May require multiple coats | For some projects, multiple coats of PVA glue may be necessary to achieve a strong bond. |
To use PVA glue, apply a thin layer to one surface, press the surfaces together, and clamp or apply pressure until the glue is dry. For more tips on using PVA glue, click here to learn how to make putty without glue or visit our website for other helpful articles.
2. Epoxy Glue
Epoxy glue is a two-part adhesive that consists of a resin and a hardener. When mixed together in equal parts, they create a strong and durable bond. Epoxy glue is commonly used for bonding metal, glass, wood, and plastic (among many other materials).
Advantages:
- Epoxy glue provides a strong and resilient bond that can withstand wear and tear over time.
- It can be used on a variety of materials, making it a versatile adhesive.
- Unlike some other types of glue, epoxy can fill gaps and irregularities in the surface, leaving a smooth and flat finish.
- Epoxy glue can also be sanded and painted for a seamless finish.
Disadvantages:
- Epoxy glue can be messy to work with, requiring careful mixing and application.
- The curing process can take several hours or even overnight, so patience is necessary when using this type of adhesive.
- Epoxy can be difficult to remove once it has cured, so any mistakes must be corrected quickly.
To use epoxy glue, follow these steps:
- Make sure the surfaces to be bonded are clean, dry, and free of any dust or debris.
- Prepare the epoxy glue by mixing equal parts of the resin and hardener on a clean surface.
- Apply the glue to one of the surfaces using a small brush, toothpick, or other applicator.
- Press the two surfaces together firmly.
- Wipe away any excess glue immediately with a damp cloth or paper towel.
- Allow the glue to cure for the recommended time (usually several hours or overnight).
Remember to read the manufacturer’s instructions carefully before using epoxy glue, as different brands may have slightly different application methods and curing times.
Internal link: How to Keep E6000 Glue from Drying Out
3. Cyanoacrylate Glue
Cyanoacrylate glue, commonly known as super glue, is a fast-drying adhesive that can bond almost all surfaces. It is widely used in various industries, from woodworking to the medical field.
Advantages:
- Creates a strong, permanent bond
- Dries quickly
- Works well on non-porous surfaces, such as metal and plastic
Disadvantages:
- Not as effective on porous surfaces, such as wood and fabric
- Can be brittle and easily break under stress
- Not heat-resistant
When using cyanoacrylate glue, it is important to follow some safety precautions. Make sure to wear gloves and work in a well-ventilated area since the fumes can be harmful. To apply the glue, use a small amount to avoid excessive adhesive and potential skin bonding.
If you accidentally get super glue on your skin, do not try to pull it off. Instead, soak the affected area in warm soapy water and gently peel off or use acetone to dissolve the glue.
Cyanoacrylate glue is not recommended for use on living tissue. However, it can be used in certain medical procedures, such as closing wounds or repairing bones.
It’s important to note that cyanoacrylate glue can also be used for crafting and DIY projects. They are a popular adhesive choice in slime making. In fact, you can learn how to make slime without Elmer’s glue or how to make slime without glue or freezing it. You can also make other fun things, such as putty or roach glue traps, without using glue or borax. However, it is important to handle the glue with care and only use it in a safe and proper manner.
4. Contact Cement
Contact cement is a type of adhesive glue that creates a strong, permanent bond between two surfaces. This type of glue is popularly used in woodworking, construction, shoe repair, and automotive repair. Contact cement is made of solvents and synthetic rubber that dissolve when applied and create a strong bond when they dry.
Application of Contact Cement
Before applying contact cement, make sure to choose a well-ventilated area and wear protective gloves and mask, especially when working with large surfaces. Also, since contact cement dries quickly, it is important to have all the tools and materials ready before starting. Here are the steps for applying contact cement:
| Step | Description |
|---|---|
| 1 | Clean and dry the surfaces |
| 2 | Apply a thin layer of contact cement to both surfaces |
| 3 | Wait for the cement to dry until it’s no longer sticky to the touch (usually around 15 minutes) |
| 4 | Position the surfaces together and apply pressure to create a strong bond |
Pro Tips for Using Contact Cement
Here are some tips to get the most effective results when using contact cement:
– To make sure the surfaces are even and flat, use a brush or roller when applying the cement.
– If you accidentally apply too much cement or the surfaces are misaligned, you can separate them and reposition them within the first minute of contact.
– When gluing together a large surface, it’s best to work in small sections to ensure the cement doesn’t dry before it’s ready.
– If there are any excess glue, you can use a scraper or sandpaper to remove it before it dries too hard.
If you’re interested in making your own glue, there are many options available for exploring. You can learn how to make putty without glue or borax or cornstarch, how to harden paper with glue, how to make clay slime without glue, how to make rice starch glue, or how to make roach glue traps.
5. Hot Glue
When it comes to quick bonding projects, hot glue is a popular choice. It is easy to use, readily available, and dries quickly. Hot glue comes in the form of a stick, which is melted by a hot glue gun and then applied to the surface. It is ideal for bonding materials like fabric, foam, and plastic.
To use hot glue, you’ll need a hot glue gun and glue sticks. Make sure to insert a glue stick into the gun and allow it to heat up completely before using it. Hot glue guns can get very hot, so be careful not to touch the tip of the gun while it’s melting the glue stick.
When it comes to applying hot glue, there are a few things to keep in mind. It’s important to apply the glue evenly to ensure a strong bond. You should also work quickly because hot glue dries very fast. Additionally, hot glue is not the best choice for bonding heavy objects or outdoor use, as it may not stand up to extreme temperatures.
Here’s a breakdown of the pros and cons of using hot glue:
| Pros | Cons |
|---|---|
| Quick drying | Not ideal for heavy objects |
| Easy to use | Not suitable for outdoor use |
| Readily available | May not provide a seamless finish |
If you’re planning on using hot glue for a project, make sure to work in a well-ventilated area. It’s also a good idea to wear gloves to protect your hands from the hot glue. Once the project is complete, avoid pulling on the bonded surfaces, as hot glue may not provide a strong enough hold for heavy objects.
If you’re looking for other DIY glue options, check out these helpful articles: how to harden paper with glue or how to make rice starch glue.
6. Spray Adhesive
Spray adhesive is a popular type of glue used for a variety of purposes, including bonding paper, cardboard, fabric, and foam. It is ideal for large surfaces or areas that are hard to reach. Spray adhesive comes in two types, permanent and repositionable, and can be used on both porous and nonporous surfaces.
Here are the steps for using spray adhesive:
- 1. Choose a spray adhesive that is appropriate for the project.
- 2. Prepare the surface by cleaning it of any debris or dirt that may affect the bonding process.
- 3. To ensure even and consistent coverage, shake the spray can well before application.
- 4. Hold the can 6-8 inches away from the surface and spray the adhesive thinly and evenly in a sweeping motion. If using a permanent adhesive, make sure to use caution and avoid spraying too much or in the wrong location.
- 5. Always follow the recommended drying time before handling the adhesive; this will differ based on the type of adhesive used and the surface to which it was applied.
Spray adhesive can be a great solution when you need a quick and easy bonding solution for your project. However, there are some important tips to keep in mind when using this type of glue.
Here are some pro tips:
- 1. Always work in a well-ventilated area when spray painting to avoid breathing in any harmful fumes or chemicals.
- 2. Use painter’s tape or a drop cloth to protect surfaces you don’t want to get adhesive on.
- 3. Test a small area first to ensure compatibility with the surface.
- 4. If the adhesive seems uneven or lumpy, try lightly sanding the surface to create an even texture before reapplying.
Using spray adhesive can be a convenient and quick way to bond materials together. However, it’s important to keep in mind that different types of adhesives will need different preparations and have different drying times. To avoid any mishaps, always read the instructions on the packaging and test a small area before starting the project.
No relevant anchor text was found in this section related to the links provided. No internal link will be inserted.
7. Silicone Adhesive
Silicone adhesive is a versatile adhesive that can be used to bond a variety of surfaces together. It is ideal for use on materials such as glass, metal, plastics, and ceramics. Silicone adhesive is also heat-resistant and waterproof, making it the perfect choice for home improvement projects, automotive applications, and crafts.
One of the key advantages of silicone adhesive is its flexibility. Unlike other types of adhesive glue, silicone adhesive remains flexible even after it has dried. This means that it can be used to bond materials that will be subjected to stress or movement, such as metal that expands and contracts with temperature changes.
When using silicone adhesive, it is important to prepare the surface properly. The surface should be clean and free from any dirt, grease, or oil. A rough surface can also help the adhesive to bond more effectively, so it may be necessary to sand or roughen the surface before applying the adhesive.
Here is a table summarizing the key features of silicone adhesive:
| Type of adhesive | Silicone adhesive |
|---|---|
| Best for | Bonding glass, metal, plastics, ceramics, and more |
| Drying time | 24-48 hours |
| Strength | High |
| Flexibility | Remains flexible after drying |
| Temperature resistance | High |
| Water resistance | High |
It is important to note that silicone adhesive can take up to 24-48 hours to fully cure, depending on the humidity and temperature of the environment. During this time, it is important to avoid putting any stress or weight on the bonded materials. Once cured, the bond created by silicone adhesive is very strong and can withstand high temperatures and water exposure.
Pro tip: If you accidentally get silicone adhesive on your skin, you can remove it using a mixture of baking soda and water. Apply the mixture to the affected area and rub gently in a circular motion. Rinse the area with warm water and repeat until the adhesive is fully removed.
Silicone adhesive is a versatile and strong adhesive that is ideal for bonding a variety of surfaces. It is especially useful for projects that require flexibility, heat resistance, and water resistance. However, it’s important to properly prepare the surface and allow adequate drying time for the best results.
Preparing for Gluing
Preparing for gluing is a crucial step that requires attention to detail and planning. In order to achieve the desired results, preparation is essential. It involves choosing the right type of glue, ensuring the surface is clean and dry, and gathering all the necessary tools and materials. Each type of adhesive glue has its own specific preparation requirements, and taking the time to do this step correctly can save time and frustration in the long run. So, take a deep breath and let’s dive into the preparation process before applying adhesive glue.
1. Choosing the Right Glue
Choosing the right adhesive glue is essential to ensure that your project turns out well. The type of glue you use depends on the materials you are bonding and the conditions that the finished product will be subjected to. Here are some tips on how to choose the right glue for your project:
- Consider the Materials: The type of glue you choose should be compatible with the materials you are bonding. For example, if you are bonding porous surfaces such as paper, wood, or fabric, PVA glue would be a good choice. If you are bonding plastic or metal, you may want to consider an epoxy glue or cyanoacrylate glue.
- Consider the Strength: The strength of the bond depends on the type of glue you use. If you need a strong bond, epoxy glue or contact cement would be the best choice. If you need a weaker bond that is easy to remove, hot glue or silicone adhesive would be a better choice.
- Consider the Drying Time: If you need a fast-drying glue, cyanoacrylate glue or spray adhesive would be the best choice. If you have more time to bond your project, you can choose a slower drying glue such as PVA glue or epoxy glue.
- Consider the Conditions: If your project will be subjected to extreme conditions such as high heat or moisture, you will need a glue that can withstand these conditions. Silicone adhesive or epoxy glue are good choices in these situations.
- Consider the Price: Finally, consider the price when choosing your glue. Some glues, such as cyanoacrylate glue, can be more expensive than others. Choose the glue that fits within your budget and meets your project’s needs.
By considering these factors, you can choose the right adhesive glue for your project and ensure a successful outcome. However, if you can’t find the right glue or you prefer to make your own glue, you can check out how to make putty without glue or borax or cornstarch or how to make clay slime without glue for some DIY alternatives.
2. Preparing the Surface
Preparing the surface is crucial for ensuring a strong bond when using adhesive glue. Here are some steps to follow when preparing the surface:
- Clean: The surface to be glued should be clean and free from any dust, dirt, oil, or other contaminants that could prevent the glue from adhering properly. Use a damp cloth to wipe the surface clean and let it dry completely before applying any glue.
- De-gloss: If the surface is glossy or has a smooth finish, use sandpaper or a deglosser to roughen it up slightly. This will create tiny grooves for the glue to grip onto, increasing its strength.
- Prime: If you are gluing porous surfaces like wood or concrete, use a primer before applying the glue. The primer will make the surface more receptive to the glue and help it bond better.
- Test: It’s always a good idea to test the glue on a small, inconspicuous area before applying it to the entire surface. This will help you ensure that the glue will bond well without causing any damage or discoloration.
Following these steps will not only ensure a stronger bond but also increase the longevity of the bond. Additionally, it is important to choose the right glue for the surface and material you are working with. For example, PDR glue is commonly used in the auto repair industry to repair dent and scratches. On the other hand, if you’re looking to make roach glue traps, you’ll want to use a type of glue specifically designed for that purpose.
3. Assembling Tools and Materials
Before you start applying adhesive glue, you need to ensure that you have everything you need organized and ready to go. The last thing you want is to have the glue start to set while you’re scrambling to find the necessary tools and materials. Here is a list of the essential tools and materials you’ll need for any type of adhesive glue:
- Clean Rags: You’ll need these to wipe away excess glue that may spill or drip during the application process.
- Tape: You can use masking tape or painter’s tape to hold objects in place while the glue sets.
- Clamps: Ideally, you should use clamps when gluing wood, plastic, or metal, as it helps to hold the pieces together tightly while the glue dries.
- Sandpaper: If you’re gluing two surfaces together, they need to be flat and smooth. So sandpaper is necessary to sand down any rough patches on the surfaces before applying the glue.
- Rubber Gloves: Some people may develop an allergic reaction to the chemicals in the glue. Wearing gloves makes it less likely that the glue will come in contact with your skin.
- Glue Brush or Spreader: This makes it easier to apply the glue evenly and precisely.
- Measuring Tools: Some types of glue, like epoxy, require you to mix two substances together in specific ratios. So, you may need measuring cups or spoons to ensure you get the correct amounts.
- Protective Eyewear and/or Respirator Mask: Depending on the type of glue you use, you might need to wear protective eyewear and/or a respirator to prevent inhaling fumes that could damage your eyes or lungs.
By assembling all of these tools and materials, you’ll be well prepared to apply adhesive glue and achieve the desired result. Remember, different types of glue may require different tools and materials, so always refer to the instructions for the specific glue you plan to use.
Applying the Adhesive Glue
As you get ready to apply the adhesive glue, it’s important to keep in mind that each type of glue has its own unique application process. To help you navigate this process with ease, we’ve put together a step-by-step guide for each type of glue. From PVA glue to silicone adhesive, we’ve got you covered. So, roll up your sleeves and let’s dive in!
1. Applying PVA Glue
When it comes to using PVA glue, sometimes referred to as white glue, there are a few key steps to follow for a successful application. Here is a breakdown of the process:
| Step | Description |
|---|---|
| Step 1: | Ensure that the surface to be glued is clean and dry. Any dust or debris can affect the quality of the bond. |
| Step 2: | Squeeze a small amount of glue onto one of the surfaces to be bonded. Use a brush or applicator to spread the glue evenly over the surface. Be sure not to use too much glue as this can lead to a weak bond. |
| Step 3: | Press the two surfaces together. It’s important to apply even pressure to ensure a strong bond. You can use clamps or weights to hold the surfaces together while the glue dries. |
| Step 4: | Allow the glue to dry completely. PVA glue typically dries clear, but the drying time will depend on the amount of glue used and the temperature and humidity of the environment. |
It’s worth noting that PVA glue is not recommended for use with materials that are exposed to water frequently or for exterior projects. Additionally, it’s important to avoid freezing or exposing the glue to excessive heat as this can affect its effectiveness. By following these steps, you can ensure a strong bond when using PVA glue for your next project.
2. Applying Epoxy Glue
Epoxy glue is a popular adhesive that creates a strong and long-lasting bond. It is commonly used for bonding metals, plastics, wood, and ceramics. Here is a step-by-step guide on how to use epoxy glue:
| Step 1: | Prepare the surfaces to be bonded. They should be clean and dry. Use sandpaper to roughen the surfaces for better adhesion. |
| Step 2: | Mix the two-part epoxy glue according to the manufacturer’s instructions. Use a clean plastic container and a wooden stick for mixing. |
| Step 3: | Apply the mixed epoxy glue to one surface using a brush, spatula, or syringe. Be careful not to apply too much glue, as it may overflow and create a mess. |
| Step 4: | Join the two surfaces together and press firmly. Use clamps or tape to hold the surfaces in place while the glue dries. The drying time may vary depending on the temperature and humidity. |
| Step 5: | After the glue has dried, remove any excess with a scraper or sandpaper. The joint should be sanded smooth for a seamless finish. |
It’s important to note that epoxy glue has a strong odor and should be used in a well-ventilated area. Also, it’s advisable to wear gloves to avoid skin contact with the glue. With patience and careful application, epoxy glue can create a durable bond that will last for a long time.
3. Applying Cyanoacrylate Glue
Cyanoacrylate glue, also known as super glue, is a fast-setting and strong adhesive that creates a nearly-instant bond. Here’s how you can apply it effectively:
| Step | Instructions |
|---|---|
| 1 | Ensure that the surfaces you are gluing are dry and free from dust and debris. Use a clean cloth to wipe them down if necessary. |
| 2 | Apply a small amount of glue to one of the surfaces. Remember that a little goes a long way when it comes to cyanoacrylate glue. |
| 3 | Press the two surfaces together, making sure they are firmly and evenly aligned. Hold them in place for at least 10 seconds to allow the glue to set. |
| 4 | Use a damp cloth or acetone to clean up any excess glue immediately. Once the glue has dried, it will be difficult to remove without damaging the surfaces. |
| 5 | Wait for the glue to fully cure, which usually takes about 24 hours. Do not apply any stress or pressure to the glued area during this time. |
It’s worth noting that cyanoacrylate glue can be very unforgiving, as it sets quickly and doesn’t allow for much repositioning. It’s important to take your time and work carefully. Additionally, avoid using cyanoacrylate glue on surfaces that will be constantly exposed to moisture, as it can weaken the bond over time.
4. Applying Contact Cement
When it comes to bonding two materials permanently, contact cement is a popular choice for its strong and reliable adhesion. Here’s how to properly apply it:
Step 1: Choose the Right Surface
Select the correct surface for bonding. Contact cement works best on nonporous materials such as plastic, rubber, or metal surfaces.
Step 2: Prepare Both Surfaces
Clean both surfaces thoroughly using a damp cloth and let them dry completely. The surfaces should be free from any dust, dirt, or grease.
Step 3: Apply Adhesive
Apply a thin coat of contact cement to both surfaces using a brush or a roller. Make sure that the adhesive is evenly applied, especially around the edges and corners.
Step 4: Leave it to Dry
Allow the adhesive to dry for about 10-15 minutes, or until it becomes tacky to the touch. Do not leave it to dry completely as it will not bond properly.
Step 5: Bonding the Surfaces
Carefully align both surfaces and press them together firmly. Apply pressure evenly across the surface to ensure a strong bond. Use a roller or a clean cloth to eliminate any air bubbles trapped between the two surfaces.
Step 6: Clean Up Excess Adhesive
Clean off any excess adhesive with a damp cloth before it dries completely. Once it dries, it becomes difficult to remove.
While working with contact cement, always wear protective gloves and work in a well-ventilated area. Remember, contact cement is a potent adhesive and can be challenging to remove once it has bonded with a surface. If you accidentally stick your fingers together, do not pull them apart. Soak them in warm soapy water instead.
With these easy steps, you can use contact cement to bond nonporous surfaces together like a pro!
5. Applying Hot Glue
When it comes to quick and easy bonding, hot glue is a popular choice. Here are the steps to apply hot glue properly:
- Plug in your hot glue gun and wait for it to heat up. The glue should be melted and ready to use within a few minutes.
- Prepare your surface by cleaning it and ensuring it is dry. Hot glue adheres better to clean surfaces.
- Once your glue gun is heated, place a glue stick into the back of the gun and wait for it to melt.
- When the glue is melted, carefully squeeze the trigger to apply the hot glue to the surface. Be sure to work quickly, as hot glue dries fast.
- Press the surfaces together strongly and hold them in place for several seconds to ensure a strong bond.
- Be cautious as hot glue can cause burns. Use a silicone mat or other protective surface to avoid damaging your work area.
Pro tip: Avoid applying too much hot glue as this can result in weak bonds. A little glue goes a long way, so use sparingly. Also, hot glue can be messy, so keep a sponge or damp cloth on hand to clean up any excess glue.
6. Applying Spray Adhesive
When it comes to applying spray adhesive, there are a few steps to follow to ensure the best results. Here’s what you need to know:
- Choose the Right Spray Adhesive: There are several types of spray adhesives available, so it’s important to select the right one for your project. Consider the materials you’re gluing together and the strength and flexibility you need. Some spray adhesives work better on porous materials, while others work better on non-porous surfaces. Read the labels carefully and choose the one that best meets your needs.
- Prepare the Surface and the Work Area: As with any adhesive, the surface should be clean, dry, and free of dust or debris. Make sure your work area is well-ventilated and protected from overspray. Cover surfaces that you don’t want to get adhesive on, such as nearby furniture or the floor.
- Apply the Spray Adhesive: Hold the spray adhesive can about 6-8 inches away from the surface you’re gluing. Spray a light, even coat of adhesive onto the surface. Be sure to cover all areas that will come into contact with the other surface. Avoid spraying too much, as this can cause the adhesive to buckle or wrinkle. If you need a thicker or stronger bond, wait a few minutes and apply another coat.
- Stick the Surfaces Together: After applying the adhesive, immediately place the two surfaces together, pressing down firmly and evenly. Be sure to align the surfaces carefully before they touch, as repositioning may be difficult or impossible once the adhesive sets. Use clamps or weights to hold the surfaces in place while the adhesive dries, if necessary.
- Allow the Adhesive to Dry Completely: Different spray adhesives have different drying times, so check the label for guidance. In general, it’s best to allow the adhesive to dry for several hours or overnight. Once the adhesive is dry, it should be tacky to the touch but not wet or sticky. If the surfaces still feel tacky, they’re not ready yet.
- Clean Up Excess Adhesive: Use a solvent recommended by the adhesive manufacturer to clean up any overspray or excess adhesive. Allow the adhesive to dry completely before attempting to remove it, as wet adhesive can smear and spread.
By following these simple steps, you can ensure that your spray adhesive will do its job effectively and create a strong, long-lasting bond between your materials.
7. Applying Silicone Adhesive
Silicone adhesive is a versatile adhesive that can be used on a variety of surfaces, including glass, metal, and plastic. Before applying silicone adhesive, ensure that the surfaces to be attached are clean and dry. To apply silicone adhesive, follow these steps:
- Choose the right silicone adhesive: There are several types of silicone adhesive available, including those specifically designed for high temperature or underwater applications. Choose the type of silicone adhesive that best fits your needs.
- Cut the tip of the silicone tube: Cut the tip of the silicone tube at a 45-degree angle to create a small opening. This will allow for more precise application.
- Apply the silicone adhesive: Squeeze the silicone adhesive onto one of the surfaces to be attached. Apply the adhesive in a zigzag pattern or in dots to ensure that the adhesive covers the entire surface area.
- Press the surfaces together: Press the surfaces together firmly. If clamping is necessary, use only enough pressure to hold the surfaces together until the adhesive has fully cured.
- Clean up excess adhesive: Use a clean, damp cloth to wipe away any excess adhesive. Do not touch the adhesive until it has cured, as this can compromise the bond.
- Allow the adhesive to cure: Silicone adhesive typically takes several hours to cure. Check the manufacturer’s instructions for specific curing times.
- Check the bond: Once the adhesive has cured, check the bond by applying pressure to the joined surfaces. If the bond feels weak, apply more adhesive and allow it to cure again.
By following these steps, you should be able to successfully apply silicone adhesive, creating a strong and durable bond. Remember to always use the appropriate personal protective equipment when working with adhesive and to work in a well-ventilated area.
Pro Tips for Using Adhesive Glue
If you want to ensure that your adhesive glue project is successful and seamless, there are certain pro tips you should keep in mind. These tips can make a world of difference for your project, whether you’re working on a DIY craft project or a home repair task. By following these tips, you’ll be able to ensure that your glue dries smoothly and adheres firmly, resulting in a high-quality finished product. So, let’s dive into the top pro tips for using adhesive glue!
1. Apply Glue in a Well-Ventilated Area
When working with adhesive glue, it is crucial to apply it in a well-ventilated area. This is important for several reasons. First, certain types of glue release fumes that can be harmful if inhaled in large amounts. These fumes can cause respiratory irritation, dizziness, headaches, and other health issues. Second, proper ventilation helps the glue dry faster and more evenly, ensuring a better bond.
Here are some tips for working with adhesive glue in a well-ventilated area:
- Work outside, if possible, or in a room with open windows or good air circulation. Use a fan to keep the air moving.
- If you must work indoors without good ventilation, consider using a respirator mask rated for chemical fumes to protect your lungs.
- Read the label on your glue container to determine if it releases fumes and what safety precautions you should take.
- Avoid applying glue in areas with high humidity or moisture, as this can affect the glue’s ability to dry and bond properly.
Remember, taking the time to work safely with adhesive glue will not only protect your health, but it will also result in a better final product. Don’t rush the process and always pay attention to the safety guidelines provided by the glue manufacturer.
2. Use a Glue Syringe for Precise Application
When it comes to applying adhesive glue, precision is key. One of the best tools for achieving accuracy is using a glue syringe. A glue syringe is a small, needle-like tool that allows you to apply the glue exactly where you need it. Here are some advantages of using a glue syringe:
| Advantages of using a glue syringe |
|---|
| Precision: A glue syringe gives you greater control over where and how much glue you apply. |
| Less Waste: Since the glue is applied directly from the syringe, there is less chance of wasting excess glue and creating a mess. |
| Cleaner Application: Using a syringe prevents the glue from spreading beyond the area where it’s needed, resulting in a cleaner application and a more professional-looking finished product. |
| Easy to Use: Glue syringes are simple to use – just fill it up with your desired amount of glue, and apply! |
When using a glue syringe, it’s important to remember to clean it thoroughly between uses. This prevents dried out glue clogging the needle and nozzle, keeping the syringe in good working condition for the next time you need to use it.
So, if you’re looking for a tool to help you apply adhesive glue with ease and precision, consider investing in a glue syringe. This small but mighty tool can help take your DIY projects to the next level.
3. Clean Up Excess Glue Immediately
When working with adhesive glue, it’s important to be mindful of excess glue. Even the most experienced crafter can accidentally apply too much glue, resulting in a messy and uneven finish. To avoid this, it’s crucial to clean up excess glue immediately. Here are some tips for doing so:
- Use a disposable tool: Keep a disposable tool, such as a popsicle stick or toothpick, on hand for wiping away excess glue before it dries. These tools are also great for spreading glue evenly across surfaces.
- Wipe away excess glue with a damp cloth: If you notice excess glue after it has dried, use a damp cloth to wipe it away. The moisture will soften the glue, making it easier to remove.
- Use a solvent: For more stubborn glue residue, use a solvent such as acetone or rubbing alcohol. Apply the solvent to a cloth and gently rub the area until the glue is removed.
- Avoid sanding: While sanding may seem like a quick solution for removing excess glue, it can actually damage the surface you are working on. Avoid sanding unless it is absolutely necessary.
Remember to always clean up excess glue immediately to ensure a neat and professional finish for your project.
4. Clamp or Tape Items Together While Drying
When you are using adhesive glue, it is important to remember to clamp or tape the items together while they are drying. This will ensure that the bond created by the glue is strong and durable. Here are some tips for successful clamping or taping:
- Align the items: Before applying the glue, make sure that the items are properly aligned. This is especially important for larger projects or items where the alignment needs to be precise.
- Apply even pressure: When clamping or taping the items, make sure that you apply even pressure across the entire surface. This will help the glue to spread evenly and create a stronger bond.
- Use the right amount of pressure: Too much pressure can squeeze out the glue and weaken the bond. Too little pressure can lead to gaps in the bond. Make sure that you are using the right amount of pressure for the specific type of glue you are using.
- Leave the items undisturbed: Once you have clamped or taped the items together, it is important to leave them undisturbed while the glue dries. Moving or adjusting the items can cause the bond to weaken or break.
By following these tips, you can ensure that your glued items will be strong, durable, and long-lasting. Remember to refer to the specific instructions for the type of glue you are using to ensure that you are using the correct clamping or taping technique.
5. Sand and Paint Over Dried Glue for a Seamless Finish
Once your adhesive glue has dried, it’s time to put the finishing touches on your project. One important step is to sand down any excess glue that may have seeped out during the application. This will help to create a smooth surface and ensure that your final product looks neat and polished.
To get started, you’ll need some sandpaper with a fine grit. Begin by gently sanding down any bumps or raised areas around the glued surface. Be careful not to apply too much pressure or sand too deeply, as this could damage the material underneath.
Once you’ve smoothed out the surface, it’s time to paint over the glued area to help blend it in with the surrounding material. If you’re working with wood, you may want to use a wood stain or paint to match the finish. For other materials, choose a paint or finish that closely matches the color and texture of the surrounding surface.
Before applying any paint or finish, make sure the area is clean and free of debris. You may want to wipe it down with a damp cloth or use a small brush to remove any dust or dirt. Then, apply a thin layer of paint or finish over the glued area, making sure to blend it in with the surrounding surface for a seamless finish.
Once the paint or finish has dried, you can inspect the area and make any necessary touch-ups. Sanding and painting over the glued surface is an important step in the process of using adhesive glue, as it helps to create a professional-looking finish that will last for years to come.
| Steps to Sand and Paint Over Dried Glue for a Seamless Finish: |
|---|
| 1. Use fine-grit sandpaper to sand down any excess glue around the surface. |
| 2. Be gentle when sanding and avoid applying too much pressure to prevent damage to the material. |
| 3. Choose a paint or finish that closely matches the color and texture of the surrounding surface. |
| 4. Apply a thin layer of paint or finish over the glued area and blend it in with the surrounding surface for a seamless finish. |
| 5. Inspect the area and make any necessary touch-ups before the paint or finish dries. |
Conclusion
With this step-by-step guide to using adhesive glue, you’re equipped with the necessary knowledge and techniques to tackle any glueing project with confidence. Remember, picking the right type of glue for your project is crucial in ensuring a strong and long-lasting bond. Take the time to properly prepare the surface and assemble all necessary tools and materials before applying the glue. Also, utilizing pro tips such as working in a well-ventilated area and cleaning up excess glue immediately will ensure safe and effective application. By following these steps and tips, you’ll be able to achieve professional-grade results and impress everyone with your newly acquired adhesive skills. So go ahead and tackle all your glueing needs, whether it’s a DIY project or a repair job, with ease and confidence!
Frequently Asked Questions
1. Can I use adhesive glue on any surface?
No, different types of adhesive glue work best on particular surfaces. It’s essential to choose the right glue for your specific project.
2. How long does adhesive glue take to dry?
The drying time of adhesive glue depends on the type of glue and the conditions in which it is used. Generally, glue takes around 24 hours to dry completely.
3. Can I remove adhesive glue after it has dried?
It’s possible to remove adhesive glue, but it can be more challenging after it has dried. Some glues can be removed with solvents, whereas others require mechanical methods like sanding.
4. Can I use adhesive glue for outdoor projects?
It depends on the type of adhesive glue you use. Some glues are weather-resistant, while others can break down when exposed to the elements for an extended period. Be sure to check the manufacturer’s specifications before using glue for outdoor projects.
5. Is adhesive glue toxic?
Most adhesive glues are safe to use when used correctly. However, some types of glue emit fumes that can be harmful if inhaled. It’s essential to use adhesive glue in a well-ventilated area and follow the manufacturer’s safety instructions.
6. Can I use adhesive glue to fix broken ceramic dishes?
Yes, some types of adhesive glue are suitable for ceramic repairs. Epoxy glue is a popular option when repairing ceramics as it creates a strong bond.
7. Can I paint over adhesive glue?
Yes, you can paint over adhesive glue after it has dried. Sanding the glue after it dries can help create a smooth surface for painting.
8. Can I use adhesive glue to glue metal to plastic?
It’s possible to use adhesive glue to glue metal to plastic, depending on the type of glue and surfaces. You must choose the appropriate adhesive glue for your specific project.
9. Can I use adhesive glue to bond different materials together?
Yes, some adhesive glues are designed to bond various materials together, like wood to metal or glass to plastic. Again, it’s crucial to choose the appropriate glue for your project.
10. How can I ensure a strong bond with adhesive glue?
To ensure a strong bond using adhesive glue, make sure you prepare the surface correctly, apply the glue according to the manufacturer’s instructions and allow the glue to dry completely before using the item.