As you embark on your journey to create your own putty, you might be surprised to learn that glue is not always necessary. Yes, you read that right – you can make putty without using any glue! If you’re feeling adventurous and want to try out a simple and fun DIY project, look no further! In this article, we’ll go through the step-by-step instructions on how to make putty without glue. So, roll up your sleeves and get ready to dive into this exciting experiment.
Ingredients
When it comes to making putty without glue, you might be surprised to learn that you only need a few common household ingredients. With just some flour, dish soap, and food coloring (optional), you can easily create your own fun and moldable putty. But before we dive into the details, let’s take a closer look at each of these ingredients and why they are important for this DIY project. We’ll also provide some helpful tips and tricks along the way to make your putty-making experience a success. And if you’re interested in learning more about different types of glue and how to use them, be sure to check out our article on what to do with glue.
Flour
Flour is a key ingredient in making putty without glue. Flour is a versatile kitchen ingredient that can also be used in various craft projects. For this DIY project, you will need all-purpose flour or any kind of flour that you have in your pantry. Flour acts as the base ingredient for the putty, forming the dough-like consistency that we all know and love. It also has a neutral color, making it a perfect blank canvas for adding food coloring.
When choosing the flour to use, make sure it’s fresh and has not been sitting in your pantry for too long. Old flour loses its elasticity, making it harder to mold and work with when creating putty. If you want a gluten-free option, you can use cornstarch as a substitute for flour. However, keep in mind that cornstarch yields a different consistency compared to all-purpose flour.
It is best to sift the flour before using it, as this makes it easier to mix with the other ingredients. Sifting also ensures that there are no lumps or clumps in the flour, resulting in a smoother and more consistent putty. If you have a large clump of flour, you can break it apart using your hands or the back of a spoon.
Fun Fact: Did you know that flour can also be used as a DIY glue? Mix flour and water in equal parts to create a paste that can be used for papier-mâché and other craft projects.
Now that you know all about flour, let’s move on to the other ingredients needed to create putty without glue.
Dish Soap
Dish soap is the second ingredient you will need to make putty without glue. Dish soap helps to bind the flour together and create the desired consistency. When choosing a dish soap for this project, it is important to use a clear and mild dish soap as colored or heavily scented dish soaps can affect the color and smell of the putty.
Table: Types of Dish Soap
| Type of Dish Soap | Description |
|---|---|
| Clear dish soap | A mild and clear dish soap is the best option for making putty without affecting the color or scent. Some examples of clear dish soap brands include Dawn Pure Essentials and Palmolive Ultra Pure + Clear. |
| Colored dish soap | Colored dish soaps can work but may alter the color of the putty. If you decide to use colored dish soap, use a light color such as yellow or green to ensure the color changes are minimal. Some examples of colored dish soap brands include Ajax Red Pear & Vanilla and Gain Botanicals Hawaiian Aloha. |
| Antibacterial dish soap | Antibacterial dish soaps are not recommended for making putty as they contain additional chemicals that could affect the consistency of the putty. Additionally, the putty is not meant for consumption and the antibacterial properties are unnecessary. |
It is worth noting that different types of dish soap may create slightly different consistencies of putty. If you are not satisfied with the consistency of your putty, try using a different type of dish soap or adjusting the ratio of flour and dish soap. For more information on how to adjust glue consistency, check out our article on how to make glue thicker.
Food Coloring (Optional)
Adding food coloring is an optional step, but it can make your putty look more vibrant and fun. To add color to your putty mixture, simply add a few drops of food coloring to the mixture after Step 1. You can use any color you like; just make sure that you add the food coloring gradually to avoid over-saturating your putty.
Pro tip: Start with just a few drops of food coloring, and add more as needed until you get the desired color.
Food coloring can be found in most grocery stores and is available in a variety of colors and shades. There are even neon and glitter varieties that can give your putty a unique and dazzling look. However, be aware that some food coloring can stain clothing, so it is important to protect your clothes and work surface.
Remember: Food coloring is optional, so if you prefer not to use it, your putty will still form and function great!
If you are interested in other DIY glue projects, such as learning how to glue arrow inserts or how to glue a puzzle with mod podge, be sure to check out our site for more ideas and tutorials.
Instructions
Now that you have gathered all the necessary ingredients, it’s time to start making your very own putty without glue. Follow these simple step-by-step instructions to create a fun, gooey substance that will provide hours of entertainment. Whether you’re looking for a fun DIY project to do with the kids or simply looking for a creative way to pass the time, making putty without glue is the perfect activity. So, put on your apron and let’s get started!
Step 1: Mix Flour and Dish Soap
When making putty without glue, the first step is to mix flour and dish soap. This is the foundation of the putty, so it’s important to get the consistency just right. Begin by pouring 1 cup of flour into a bowl. You can use all-purpose flour or try using cornstarch as a substitute for a lighter texture (Tip: learn more about substituting flour with cornstarch here).
Add 1/2 cup of dish soap to the bowl with the flour. The dish soap acts as a binding agent for the flour and creates a moldable texture for the putty. You can experiment with different types of dish soap to achieve different consistencies (Tip: find out more about different types of dish soap here). Mix the flour and dish soap together until it forms a sticky, yet pliable dough.
If the mixture is too dry, slowly add more dish soap until you reach the desired consistency. Alternatively, if the mixture is too sticky, add a little bit more flour until it becomes more manageable. It’s important to find the right balance between the flour and dish soap to get the perfect texture for your putty.
Mixing flour and dish soap is a simple and easy way to create homemade putty without glue. It’s a fun and engaging DIY project for kids or adults, and you can even add food coloring to the putty to make it more visually appealing (Tip: learn how to dye the putty in the next section).
Step 2: Add Food Coloring (Optional)
Adding food coloring to your homemade putty is entirely optional, but it can make the final product much more visually appealing and exciting to play with. Whether you want to go with a classic red or blue, or mix it up with some fun neon colors, the possibilities are endless. To add some color to your putty, simply follow these steps:
| Step | Instructions |
|---|---|
| 1 | Add a few drops of your desired food coloring to the mixture. Use a toothpick to help distribute the food coloring evenly throughout the putty. Be careful not to use too much at once; a little goes a long way. |
| 2 | Knead the mixture again. As you knead the putty, the color will become more evenly distributed. If you want a more intense color, add a few more drops of food coloring and continue kneading until you get the desired shade. |
And that’s it – adding food coloring to your putty is that simple! Just make sure to wash your hands thoroughly after kneading the mixture to prevent any staining. If you’re looking for more creative DIY projects, check out our article on how to make a bow out of ribbon without glue for some fun and easy ideas!
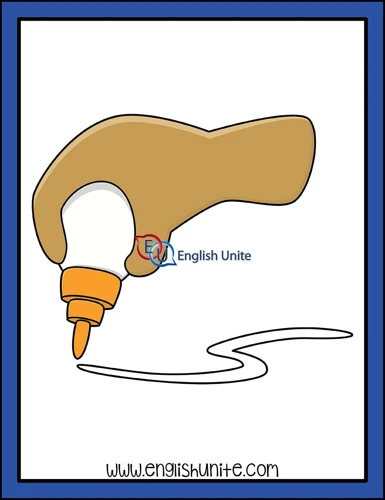
Step 3: Knead the Mixture
After mixing the flour and dish soap together, you should now have a crumbly and sticky mixture. This is where the fun begins – kneading the mixture into putty! Take the mixture and transfer it onto a clean surface. You can use a cutting board, a countertop, or a table. Sprinkle some flour onto the surface to prevent the mixture from sticking.
Kneading is an important step in making putty without glue, and it’s easy to do. Start by using your hands to press down on the mixture, pushing it flat. Fold the mixture in half, and press down again. Repeat this process for about 5-10 minutes, until the mixture starts to take on a putty-like consistency.
Don’t worry if the mixture seems too sticky or too dry at first. Keep kneading and adding small amounts of flour or moisture as needed until you get the desired consistency. The putty should be pliable, stretchy, and moldable.
Pro tip: If you’re having trouble getting the right consistency, try adding a little cornstarch. Alternatively, try using different types of dish soap, as they can affect the texture and feel of the putty.
Once you’ve achieved the desired putty consistency, it’s time to play! Mold it into different shapes or roll it into balls. You can even use cookie cutters to make fun shapes. This putty recipe is perfect for kids and adults to enjoy alike.
And there you have it – a simple and fun DIY putty recipe that doesn’t require any glue. So go ahead, make your own putty and have fun with it!
Pro tip: If you happen to get any putty on your clothes or other fabric surfaces, don’t worry. You can easily remove it by using soap and warm water. If the putty has dried, try using a mixture of vinegar and water to loosen it up.
Glue can come in many forms and be used for a variety of projects, but putty is a great alternative for those who want a glue-free project.
Tips and Tricks
After creating your own putty, there are some tips and tricks that can help you achieve different consistencies and textures. These simple hacks allow you to get creative with your putty-making and tailor your mixture to your preference. So, let’s take a look at some easy ways to elevate your putty-making game. Whether you want firmer putty or more stretchy putty, these tips will help you achieve the desired results.
Use Cornstarch as a Substitute for Flour if you want a firmer putty and control the stickiness. Experiment with different types of dish soap for different consistencies, as described below or perhaps try some other DIY projects like gluing a puzzle with Mod Podge or even dive into cloud computing and learn about AWS Glue’s dynamic frame. Finally, adjust your glue application techniques. For instance, if you’re working with Gorilla wood glue, you might want to know how long to clamp it for the best result. These tips and tricks will take your putty-making adventures to the next level!
Use Cornstarch as a Substitute for Flour
Cornstarch can be used as a flour substitute in making putty without glue. It is a great alternative for those who are allergic to flour or simply don’t have flour on hand. Cornstarch has similar properties to flour in terms of texture and consistency.
To use cornstarch as a substitute for flour, simply follow the same recipe as before but use cornstarch instead. Mix equal parts cornstarch and dish soap until you reach the desired consistency. Add food coloring if desired.
It is important to note that cornstarch may produce a slightly stickier putty than flour. If this is the case, simply add a little more cornstarch until the mixture reaches the desired consistency.
Using cornstarch can be a fun and easy way to make putty without glue. Give it a try the next time you’re feeling crafty!
Note: For more information on glue-related DIY projects, check out our article on This Is How We Glue It.
Use Different Types of Dish Soap for Different Consistencies
Did you know that different types of dish soap can affect the consistency of your homemade putty? Using a dish soap with a high concentration of sulfates or surfactants can lead to a firmer, more elastic putty. On the other hand, using a dish soap with a lower concentration of sulfates or surfactants can result in a softer and more malleable putty. Here are some examples of dish soaps that can be used to achieve different consistencies:
- High Sulfate Dish Soap: Examples include Dawn Ultra and Ajax. These dish soaps are great for producing a firmer and stretchier putty.
- Low Sulfate Dish Soap: Examples include Seventh Generation and Method. These dish soaps are ideal for creating a softer and smoother putty.
- Creamy Dish Soap: Examples include Palmolive and Ivory. These dish soaps can produce a slightly fluffier putty, with a texture reminiscent of whipped cream.
- Clear Dish Soap: Examples include Joy and Sunlight. These dish soaps are perfect for creating a translucent putty, which is ideal for adding glitter or other sparkly embellishments.
Remember to experiment with different types of dish soap to see which one works best for you and for the particular texture you want to achieve. It’s also a good idea to always read the label and take note of the ingredients listed.
Conclusion
In conclusion, making putty without glue is an easy and fun DIY project that can provide hours of entertainment for children and adults alike. With just three simple ingredients – flour, dish soap, and food coloring – you can create a soft and moldable putty that is great for stress relief, sensory play, and even educational activities.
By mixing the right amounts of flour and dish soap and kneading the mixture, you can achieve a smooth and pliable consistency that is perfect for shaping and sculpting. And if you want to add a pop of color to your putty, food coloring can help you achieve your desired hue.
When making putty without glue, it’s important to experiment with different types of dish soap to achieve different consistencies and textures. And if you don’t have flour on hand, you can substitute it with cornstarch to achieve a similar result.
Whether you’re looking for a fun family activity or a stress-relieving hobby, making putty without glue is a great option. So gather your ingredients and get ready to unleash your creativity!
Frequently Asked Questions
Can I make putty without using glue?
Yes, you can make putty without using glue. You can use just flour and dish soap to make a simple and fun DIY project that is easy to follow.
What kind of flour should I use?
You can use any type of flour for this recipe. However, we recommend using all-purpose flour for best results.
Do I need to use food coloring?
No, food coloring is optional. You can choose to leave the putty white or add your favorite color of food coloring to make it more fun and colorful.
How much dish soap should I use?
The amount of dish soap you use will depend on the amount of flour you use. A good rule of thumb is to use one part dish soap to two parts flour. You can adjust accordingly if needed.
Can I use cornstarch instead of flour?
Yes, you can use cornstarch as a substitute for flour if you prefer. However, keep in mind that the texture may be slightly different.
What can I use to knead the mixture?
You can use your hands to knead the mixture or a spatula or spoon to mix the ingredients together until well combined.
Can I add essential oils to my putty?
Yes, you can add a few drops of essential oils to your putty if you want a scented version. However, keep in mind that some oils may stain your hands or clothes.
Can I store my putty?
Yes, you can store your putty in an airtight container or plastic bag to keep it fresh. Keep it away from heat and direct sunlight to prevent it from drying out too quickly.
What other things can I make with this putty?
You can use this putty to make various shapes and designs, or even use it to clean small crevices in hard-to-reach areas.
Is this putty safe for kids to play with?
Yes, this putty is safe for kids to play with. However, make sure they don’t ingest it and supervise them while they play with it to prevent any accidents.