Have you ever wondered how long you should clamp Gorilla wood glue for optimal results? If you’re a woodworker or DIY enthusiast, you know that the answer to this question can make or break the success of your project. With so many factors affecting the drying time of the glue, it can be confusing to determine the exact clamping time required for proper bonding. But fear not – in this article, we’ll delve into the science behind glue drying time, the importance of clamping time, and tips and tricks for achieving optimal clamping results. Whether you’re a beginner or a seasoned woodworker, this guide will provide you with all the information you need to make your glue-ups a success. So, let’s dive in!
Why Clamping Time Matters

Clamping may seem like a small part of the woodworking process, but it can make a significant impact on the final outcome of your project. Proper clamping time is crucial for ensuring the strength and durability of your gluing bond. It can be perplexing to determine the exact amount of clamping time needed for your project, especially with the abundance of diverse information available online. Understanding the science behind glue drying time is essential for optimal clamping. Knowing how to select the proper clamps and managing your time can also impact the effectiveness of your clamping. In this guide, we’ll examine why clamping time matters and provide tips and tricks for a successful woodworking project.
The Science Behind Glue Drying Time
When glue is applied to a surface, it begins to dry almost instantly due to the evaporation of water or solvents in the glue. However, the drying process is not complete until the glue has reached its maximum strength, which can take a considerable amount of time. Gorilla Wood Glue is a type of polyvinyl acetate (PVA) glue, which means it consists of a polymer that emulsifies in water. As the water evaporates, the polymer particles move closer together, forming a strong bond.
The drying time for PVA glue is affected by a number of factors, including temperature, humidity, and the porosity of the surfaces being bonded. As a general rule, glue will dry faster in warm, dry environments than in cool, humid ones. Similarly, the glue will dry faster when applied to non-porous surfaces than to porous ones.
It is also important to note that different types of glue have different drying times. For example, glue used to mount air plants may dry more quickly than wood glue, while glue used on decals may take longer to dry. It is important to select the right glue for the job and to follow the manufacturer’s instructions for drying time.
In addition to the type of glue used, the amount of glue applied also affects drying time. Applying too much glue can slow down the drying process, while applying too little glue can result in a weak bond. As a general rule, about one drop of glue per square inch of surface area should be used.
It is also important to note that if the surface is not properly prepared, the glue may not dry properly. This may happen if the surface is dirty or oily, or if it is too smooth or too rough. It is important to properly clean and prepare the surface before applying glue.
Understanding the science behind glue drying time is important for achieving a strong and lasting bond. By selecting the right glue, applying the right amount, and preparing the surface properly, you can ensure that your project is a success.
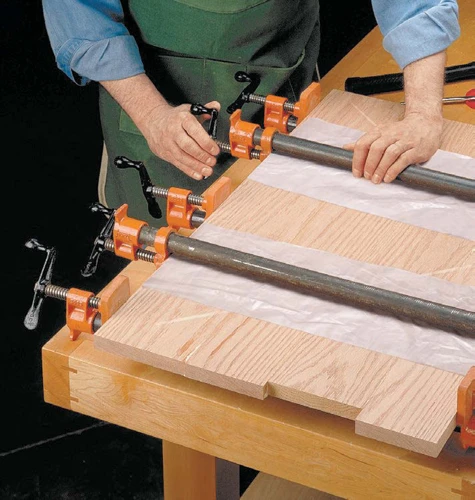
The Importance of Clamping Time
The clamping time is a crucial factor in ensuring that the wood glue bond is strong and durable. The clamping time refers to the time period during which the glued surfaces are held together with pressure, using clamps or any other tools until the glue dries completely.
The importance of clamping time can be understood by the following points:
- Clamping ensures that the glue spreads evenly across the surfaces and that air pockets are eliminated to create a tight bond.
- It prevents the wood from warping, twisting, or bending, which can happen if the glue dries unevenly.
- Proper clamping ensures that the pressure is maintained between the glued surfaces, making it less likely for the bond to fail under stress.
- It ensures that the bond is strong enough to withstand any physical and environmental changes that might occur in the future.
Without proper clamping, the glue bond may fail, and the joint may become weak, especially if it’s being used for load-bearing applications. Taking adequate time to clamp the surfaces properly is essential in achieving the ideal bond strength and durability.
It’s worth noting that different glues and materials require varying clamping times. Gorilla wood glue, for example, has a recommended clamping time, and it should be followed for the best results. However, other factors such as temperature, humidity, and the size of the surfaces to be bonded, may also affect the clamping time.
To ensure that the clamping time is optimally utilized, it’s necessary to follow the manufacturer’s instructions closely. It’s also essential to prepare the surfaces properly before applying the glue. Preparing the surfaces often entails cleaning, sanding, and drying them.
If you’re unsure of the clamping time, it’s always better to give the glue more time to dry than to rush the process. Rushing the process may compromise the strength of the bond and could lead to the joint failing later.
Now that we understand the importance of clamping time, let’s dive into how to clamp Gorilla wood glue properly.
Gorilla Wood Glue Clamping Time
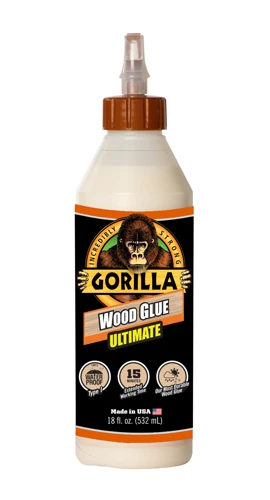
For those who are using Gorilla Wood Glue, it is essential to know the appropriate clamping time to ensure strong, durable bonds. Gorilla Wood Glue is known for its strong adhesive properties and is ideal for woodworking projects. Using the proper clamping time can make all the difference in the strength and durability of your project. In this section, we will discuss the recommended clamping time according to Gorilla, the different factors that may affect the clamping time, and how to test if the glue is dry. Make sure to read till the end for some valuable tips and tricks.
Recommended Clamping Time According to Gorilla
Gorilla Wood Glue is a popular brand in the market and they provide clear instructions for the recommended clamping time. According to Gorilla, the recommended clamping time is 20 to 30 minutes. However, this time can vary based on certain factors such as the type and moisture of the materials being glued together, temperature, humidity and the amount of glue applied.
It is important to note that Gorilla’s recommended clamping time is not the same as the total drying time of the glue. The glue may take longer to dry completely after the clamps have been removed. It is best to wait for at least 24 hours before sanding or painting the glued surface.
If you are using Gorilla Wood Glue for the first time, it is recommended to test the clamping time on a scrap piece of the same material to get an idea of the drying time based on the factors mentioned above. This will ensure that you have a good idea of how long you need to clamp your project.
It is important to follow the recommended clamping time provided by the manufacturer to ensure that the glue sets properly and provides a strong bond. And, if you ever face any problem with the usage of Gorilla Wood Glue, you can take the help of troubleshooting tips provided by Gorilla to help you resolve any issues.
Factors That Affect Clamping Time
Various factors affect the clamping time for Gorilla Wood Glue. These factors include:
| Factor | Description |
|---|---|
| Temperature | The temperature of the room and the surface being glued can affect the glue’s drying time. Lower temperatures will slow down the drying process, while higher temperatures will speed up the process. |
| Humidity | The level of humidity can also affect the drying time of Gorilla Wood Glue. Higher humidity levels can slow down the drying process, while lower levels can speed it up. |
| Type of wood | The type of wood being glued together can affect the drying time of the glue. Some types of wood are more porous than others and may absorb more glue, which can lengthen the drying time. |
| Amount of glue applied | The amount of glue applied can also affect the drying time. Applying too much glue can extend the drying time, while using too little may result in weaker bond strength. |
| Pressure applied | The pressure applied during clamping can affect the bond strength and the drying time of the glue. Too much pressure can force the glue out of the joint, while too little pressure can result in weak bonds. |
It’s important to understand these factors because they can impact the final results of your project. If the room temperature is too low or the wood is too dense and absorbs too much glue, it may take longer for the glue to dry. On the other hand, if the temperature is too high or too much pressure is applied during clamping, the glue may dry too quickly, potentially weakening the bond.
To ensure a successful glue-up process, it’s best to follow Gorilla’s recommended clamping time and take these factors into consideration beforehand. In addition to clamping time, proper surface preparation, glue application, and clamp selection can greatly affect the final outcome of the project.
How to Test If the Glue is Dry
To ensure that your Gorilla Wood Glue is fully dry before removing the clamps, it’s important to know how to test its dryness. Here are some methods you can use to check if the glue is dry:
| Method | Procedure |
|---|---|
| Visual Inspection | Inspect the glue to see if it has changed in appearance. Wet glue will be a milky color, while dry glue will be clear. You can also check for any visible wet spots in the glue. |
| Touch Test | Lightly touch the glue with your finger and see if it feels tacky or wet. If it feels hard and dry, the glue has fully dried. |
| Sound Test | Gently tap the glued surfaces with a hard object, like a metal tool or a fingernail. If the glue is dry, it should produce a hard, crisp sound. Wet glue, on the other hand, will produce a dull thudding sound. |
| Joint Flexibility Test | If the joint you glued is accessible, you can gently flex it to see if the glue has fully cured. If the joint moves or the glue cracks, it needs more time to cure. |
| Drying Time | You can also check the recommended drying time according to Gorilla Wood Glue packaging. Gorilla Wood Glue dries clear and natural in 10-45 minutes depending on the amount of glue applied and the humidity of the environment. |
It’s important to make sure the glue is fully dry before applying any pressure or removing the clamps. Testing the glue’s dryness can help you avoid any errors that could compromise the quality of your project. If you encounter any issues with the glue drying, check out our article on making putty without glue or consult a Gorilla Wood Glue expert for advice.
Tips and Tricks for Optimal Clamping
As important as clamping time is, there are various tips and tricks you could use to optimize your overall gluing process. These simple yet highly effective techniques will help ensure that your Gorilla Wood Glue provides a strong and durable bond. By mastering the following methods, you can have the peace of mind knowing that your clamping time will be maximized for a long-lasting result. And for those interested in more DIY projects, check out our article on How to Glue Bind a Book for a step-by-step guide!
Choosing the Right Clamps
Choosing the Right Clamps:
When it comes to clamping gorilla wood glue, choosing the right clamps is crucial. Here are some tips to consider when selecting your clamps:
- Size: The size of the clamp you need will depend on the size of the project you are working on. If you are working with a large piece of wood, you will need larger clamps to hold it securely.
- Strength: Make sure the clamps you use are strong enough to hold the pieces of wood together during the drying process. Weak clamps can cause the wood to separate, which will ruin your project.
- Type: There are various types of clamps available such as bar clamps, C-clamps, spring clamps, and pipe clamps. Different clamps work better for specific projects, so be sure to choose the appropriate type of clamp.
- Number: You will need to use enough clamps to hold your project securely in place. The number of clamps you need will depend on the size of the project and the size of the clamps you are using.
It’s important to remember that using too few clamps can cause the wood to shift during the drying process, which will affect the overall quality of your project. Additionally, using too many clamps can cause your project to warp. So, finding the right balance is key.
If you need more information on how to choose the right clamps and how to properly glue pieces of wood together, check out our article on how to glue up a cutting board.
Applying the Right Amount of Glue
One important factor in achieving optimal clamping time is applying the right amount of glue. Too little glue won’t create a strong bond, while too much glue can cause the joint to weaken and even lead to glue failure. Here are some tips on how to apply the right amount of glue for your project:
- Use a brush: A brush helps spread the glue evenly and ensures that you don’t apply too much.
- Work in small sections: Start by applying glue in a small section of the joint, then move on to the next section. This will help you see how much glue you need to apply.
- Don’t overdo it: It’s better to apply too little glue than too much. A good rule of thumb is to apply a thin layer of glue to each surface you’re joining.
- Consider the type of wood: Hardwoods require more glue than softwoods, so keep this in mind when applying glue.
By following these tips, you’ll be able to apply just the right amount of glue for your project, helping to ensure a strong and lasting bond. Remember that different types of glue may have different recommendations for how much to use, so be sure to check the manufacturer’s instructions.
If you’re still unsure about how much glue to use, you can always do a test joint on scrap wood before applying glue to your actual project. Lastly, if you want to get more information about other types of glue, you can read more about the best glue for plastic toys or how to make roach glue traps.
Preparing the Surface
One of the most important steps in ensuring a successful glue-up is preparing the surface. If the surface isn’t clean or smooth, the bond may not be strong enough to hold the joint together.
The following table outlines some tips for preparing the surface:
| Step | Description |
|---|---|
| Clean the surface | Remove any dust, dirt, grease, or other contaminants that could interfere with the bond. Use a clean, dry cloth or a mineral spirit on a cloth to clean surfaces. |
| Sand the surface | If necessary, sand the surfaces to remove any rough spots or high spots to ensure a tight, snug fit. Use a fine-grit sandpaper (about 120 grit) and sand until the surfaces are smooth. Take care to sand carefully near edges, as oversanding may impact negatively on the final glue-up. |
| Apply glue sparingly | Use only enough glue to cover the surface completely. Equally, don’t use too much glue, as this may cause the joint to fail. Refer to our related article on how much wood glue to use in various situations. |
| Spread the glue | Spread the glue evenly over the surface with a brush or covered knife. This will give the joint more surface area to bond and prevent any dry spots that may cause the joint to break. |
Remember, the success of any glue-up starts with surface preparation. Take the time to clean and sand surfaces and apply glue evenly and in moderate amounts for maximum strength and durability. It is essential for determining the optimal clamping time for your project. If you would like more information on Elmer’s Wood Glue, be sure to check out our related article on how long should Elmer’s Wood Glue dry.
Removing Excess Glue
Once the glue has been applied and the clamps are in place, it’s important to take care of any excess glue that may have squeezed out from the joint. Not only can this excess be unsightly, but it can also negatively affect the strength of the bond. Here are some tips for removing excess glue:
- Wait for the glue to dry: Attempting to remove excess glue before it has dried can lead to a mess, and it can also weaken the bond. Wait until the glue has dried before attempting to remove it.
- Scrape off excess glue: Once the glue has dried, use a paint scraper or putty knife to carefully scrape off any excess glue that may be on the surface. Be sure to angle the scraper or knife to avoid damaging the wood surface.
- Sand the surface: After any excess glue has been scraped off, the surface can be sanded to smooth out any rough patches or uneven spots. Use a fine-grit sandpaper and be sure to move in the direction of the wood grain to avoid damage.
- Use a damp cloth: For smaller amounts of excess glue, a damp cloth can be used to wipe away any residue. Be sure to use a clean, damp cloth and avoid saturating the wood with water.
- Avoid chiseling: While some may be tempted to use a chisel to remove excess glue, this can actually damage the wood surface and weaken the bond. Stick to scraping, sanding, and wiping away excess glue for best results.
By taking care to remove excess glue after clamping, you can ensure a clean and strong bond for your woodworking project.
Caring for Your Clamps and Tools
To make sure your clamps and tools last long, it’s important to take care of them after each use. Here are some tips to help you keep them in good condition:
- Clean and dry: After using your clamps and tools, clean them with a damp cloth and let them air dry completely. Don’t store them until they are completely dry to prevent rust and bacteria growth.
- Protect from moisture: Store your clamps and tools in a dry place to prevent moisture from causing them to rust or corrode. If you live in a humid area, consider using a dehumidifier or silica gel packets to keep your tools dry.
- Oil and lubricate: Regularly oil your clamps and tools to prevent rust and keep the mechanisms functioning well. Lubricate moving parts with silicone spray or oil to keep them sliding smoothly.
- Inspect: Regularly inspect your clamps and tools for any damage or wear and tear. Repair or replace any damaged components to ensure optimal performance and safety.
- Store properly: Store your clamps and tools in an organized manner to prevent them from becoming damaged or misplaced. Keep them in a well-ventilated area to prevent moisture buildup.
By following these steps, you will be able to prolong the lifespan of your clamps and tools, ensuring that they are always ready for your next woodworking project.
Managing Your Time
When it comes to using Gorilla Wood Glue, managing your time is crucial. Here are some tips to help you stay on track:
- Create a Plan: Before you start gluing anything, make sure you have a plan in place. This will help you work more efficiently and prevent any mistakes.
- Organize Your Materials: Having all the necessary materials within reach will save you time and prevent frustration. Make sure you have your clamps, glue, and other tools ready to go.
- Apply Glue in Sections: Depending on the size of the project, you may need to apply the glue in sections. This will prevent the glue from drying before you have a chance to clamp it.
- Use a Timer: Set a timer for the recommended clamping time so that you don’t have to keep checking the clock. This will allow you to focus on other tasks in the meantime.
- Double-Check: Before you walk away, double-check that all clamps are tight and secure. This will ensure that the glue dries properly and that your project is a success.
By properly managing your time, you can ensure that your project is completed efficiently and effectively. With a little planning and preparation, you can enjoy the satisfaction of a job well done.
Troubleshooting
Even with the best of intentions and following all the recommended steps, there can still be some unexpected hiccups in the clamping process when using Gorilla Wood Glue. It can be frustrating when things aren’t going as planned, but don’t worry – there are solutions to these common issues. In this section, we will explore some troubleshooting tips and tricks to help you navigate through any challenges that may arise during the clamping process. Let’s dive in and solve some problems!
What to Do If the Glue Doesn’t Dry
What to Do If the Glue Doesn’t Dry
If you’ve already clamped your objects and the glue doesn’t seem to be drying, don’t panic. There could be a few reasons why this is happening, but there are also some easy solutions.
One common reason for glue not drying is applying too much moisture to the surface before applying the glue. If you wipe down the surface with a damp cloth before applying the glue, make sure it has enough time to completely dry before adding the glue. Another reason could be the temperature and humidity in the room. If it’s too cold or damp, the glue will take longer to dry. In this case, you can try moving the objects to a warmer, dryer location.
If you’ve ruled out those possibilities, the issue could be with the glue itself. Check the expiration date to make sure it’s still good. If it’s expired, you’ll need to use a fresh bottle. If the glue is still in date but isn’t drying, it’s possible it was improperly stored and has been contaminated. In this case, you’ll need to purchase a new bottle of glue and make sure to store it correctly.
Table: Possible Solutions for Glue That Won’t Dry
| Possible Cause | Solution |
|---|---|
| Too much moisture on surface | Wait for surface to completely dry before applying glue |
| Temperature and humidity | Move objects to warmer and drier location |
| Expired glue | Use fresh bottle |
| Contaminated glue | Purchase new bottle and store correctly |
By identifying the cause of the issue and using these remedies, you can make sure the glue dries as intended and your project is a success.
What to Do If the Glue Dries Too Quickly
It can be frustrating when the glue dries more quickly than expected. However, there are steps you can take to salvage your project. Here are a few tips to try:
- Use a smaller amount of glue: If the glue is drying too quickly, it could be because you applied too much. Try using less glue next time.
- Use a slower-drying glue: Different types of glue have different drying times. If you need more time to work with the glue, consider switching to a slower-drying option.
- Rehearse your steps: Before applying the glue, practice clamping the pieces together without any glue. This will help you get into the rhythm of the process and reduce the amount of time it takes to apply the glue and clamp the pieces together.
- Work in smaller sections: If you’re gluing together a large surface area, it can be difficult to apply the glue and clamp everything before it dries. Instead, work in smaller sections and apply the glue one section at a time.
- Use a cooler environment: The warmer the temperature, the faster the glue will dry. If possible, try working in a cooler area to slow down the drying process.
Remember, it’s better to take your time and do things correctly than to rush and potentially make mistakes. If the glue still dries too quickly despite these efforts, it may be time to start over with fresh materials.
What to Do If the Clamps Won’t Hold
Clamping objects together while the glue dries is an essential step in woodworking, but sometimes the clamps just won’t hold. This can be frustrating and may result in unsatisfactory outcomes. Here are some causes and solutions for when the clamps won’t hold.
| Cause | Solution |
|---|---|
| Wrong type of clamp | Make sure you are using the right type of clamp for your project. Different clamps have different holding capacities and may be better suited for a specific job. Consider using a C-clamp or a pipe clamp for larger projects. |
| Not enough pressure | Check that you have applied enough pressure to hold the objects together. Tighten the clamps a little further to create more pressure. Avoid over-tightening the clamps as this may result in the glue being squeezed out of the joint. |
| Uneven surfaces | If the surfaces you are clamping are not flat or even, the clamps may not be able to hold them together properly. Check that both surfaces are clean and even. If one of the surfaces is curved, consider using a curved caul to even out the pressure. |
| Not allowing enough drying time | If the glue has not had enough time to dry, the clamps may not be able to hold the objects together properly. Check the recommended drying time for the type of glue you are using and ensure you have allowed enough time for it to dry before removing the clamps. |
| Using too much glue | Applying too much glue can result in excess glue being squeezed out of the joint and preventing the clamps from holding the objects together. Use the recommended amount of glue and spread it evenly across the surface. |
| Using old or expired glue | Glue that has passed its expiration date or has been stored improperly may not work effectively. Make sure you are using fresh glue that has been stored in a cool, dry place and is within its expiration date. |
If none of these solutions work, it may be necessary to re-glue the joint and start over again. Remember to thoroughly clean the surfaces before applying a fresh layer of glue and allowing enough drying time before clamping. With a little troubleshooting, you can ensure your clamps hold tight, resulting in a successful woodworking project.
Conclusion
In conclusion, ensuring proper clamping time for Gorilla Wood Glue is crucial for achieving strong and durable bonds in your woodworking projects. Investing the time and effort into understanding the science behind glue drying time, as well as the factors that influence it, can make a significant difference in the success of your projects.
To optimize your clamping time, it is important to choose the right clamps, apply the appropriate amount of glue, and properly prepare the surface. Removing excess glue and caring for your tools can also contribute to achieving optimal bonding results. Managing your time effectively is also a key factor in ensuring your glue dries properly, while troubleshooting strategies can help you overcome any problems you may encounter.
By following these tips and tricks, and investing in the proper tools and materials, you can confidently work with Gorilla Wood Glue and achieve strong, long-lasting bonds in your woodworking projects. Remember that patience and attention to detail are important for woodworking success, and taking the time to properly clamp your glue will pay off in the end.
Frequently Asked Questions
1. What is the recommended clamping time for Gorilla Wood Glue?
Gorilla recommends clamping for at least 20-30 minutes for the glue to fully cure.
2. What factors affect clamping time?
Humidity, temperature, and the type of wood being glued can affect the clamping time. Humid or cold weather can increase the drying time, while dry or hot weather can speed up the drying time.
3. How do I know if the glue is dry?
You can test the glue by lightly tapping the joint with your finger. If it feels hard and solid, then the glue is dry and the clamps can be removed.
4. How do I choose the right clamps?
Choose clamps that have enough pressure to squeeze out excess glue but not so much that it starves the joint. The size and type of clamp will depend on the size and shape of the wood being glued.
5. How much glue should I apply?
Apply a liberal amount of glue, enough to fully cover the surface of the wood and fill any gaps in the joint. Too little glue can result in a weak joint.
6. How do I prepare the surface before gluing?
The surfaces should be clean, dry, and free of any dirt, oil, or debris. Sand the surfaces to remove any rough spots or bumps that could prevent the glue from bonding properly.
7. How do I remove excess glue?
Wipe away excess glue with a damp cloth before it dries. Once the glue is dry, it can be scraped away with a chisel or trimmed with a sharp blade.
8. How do I care for my clamps and tools?
Clean your clamps and tools after use to prevent rust or corrosion. Store them in a dry place where they won’t be exposed to moisture or extreme temperatures.
9. What should I do if the glue doesn’t dry?
If the glue doesn’t dry, there may be too much moisture in the wood or the glue may be expired. Remove the glue and start over with fresh glue and dry wood.
10. What should I do if the clamps won’t hold?
If the clamps won’t hold, check to make sure the joint is properly aligned and that the wood is not too thick for the clamp to reach. You may need to use more clamps or adjust their placement to distribute pressure evenly.